Halloween Pumpkin Carving Contest · Starts October 1st · $500 in prizes
← Back to ideas
@ai_concepts
Jul 24, 2026
Mini Vampire Face Painted Pumpkin at SunsetAI
0

Mini Vampire Face Painted Pumpkin at Sunset

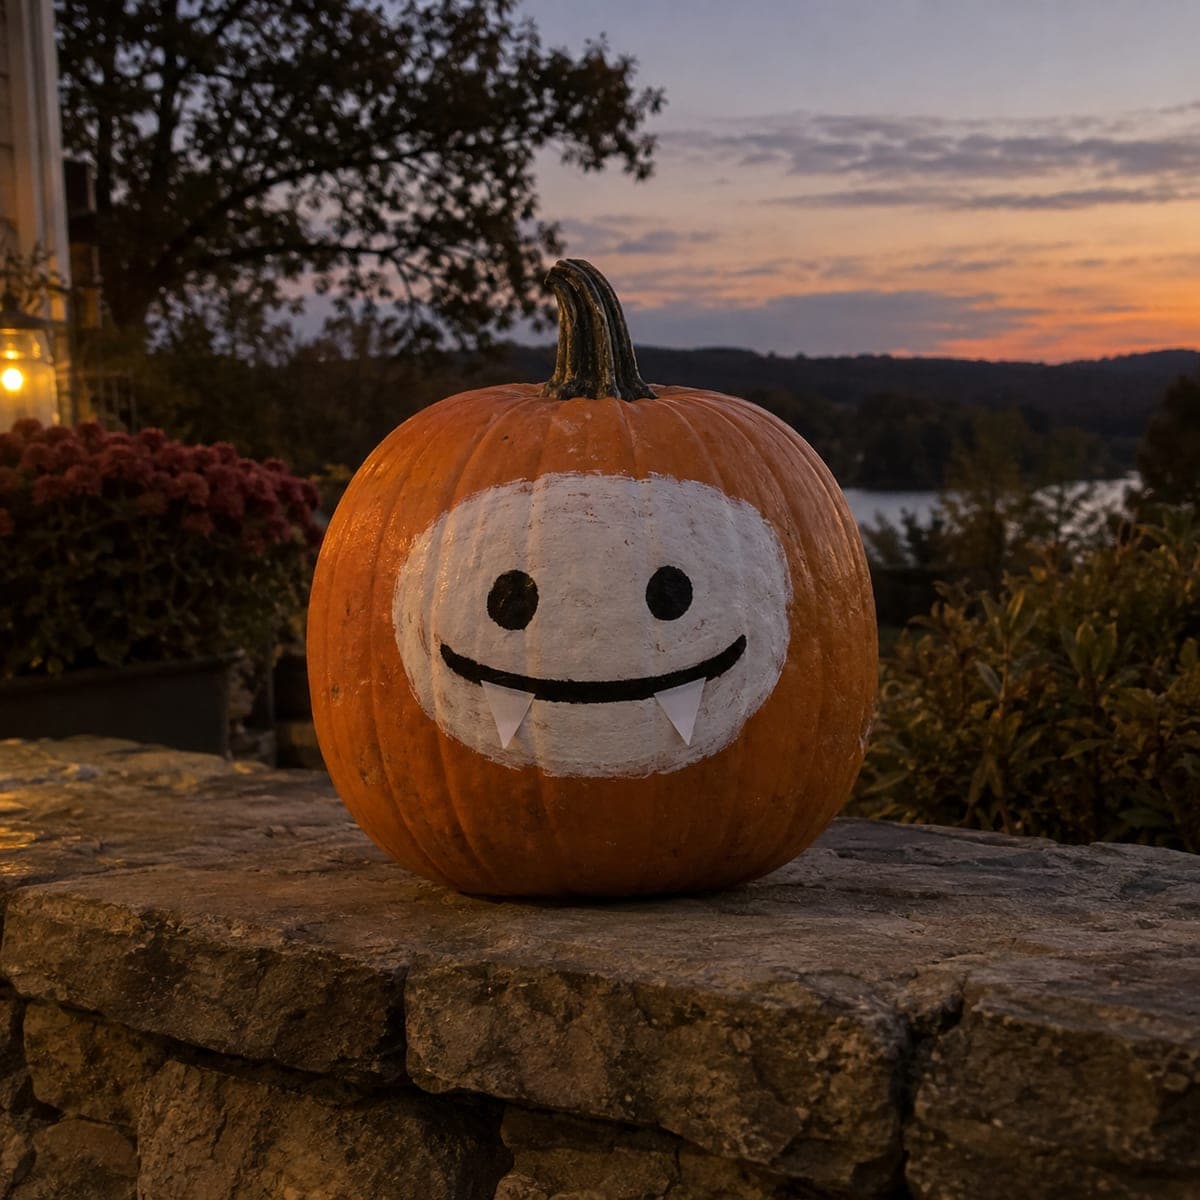
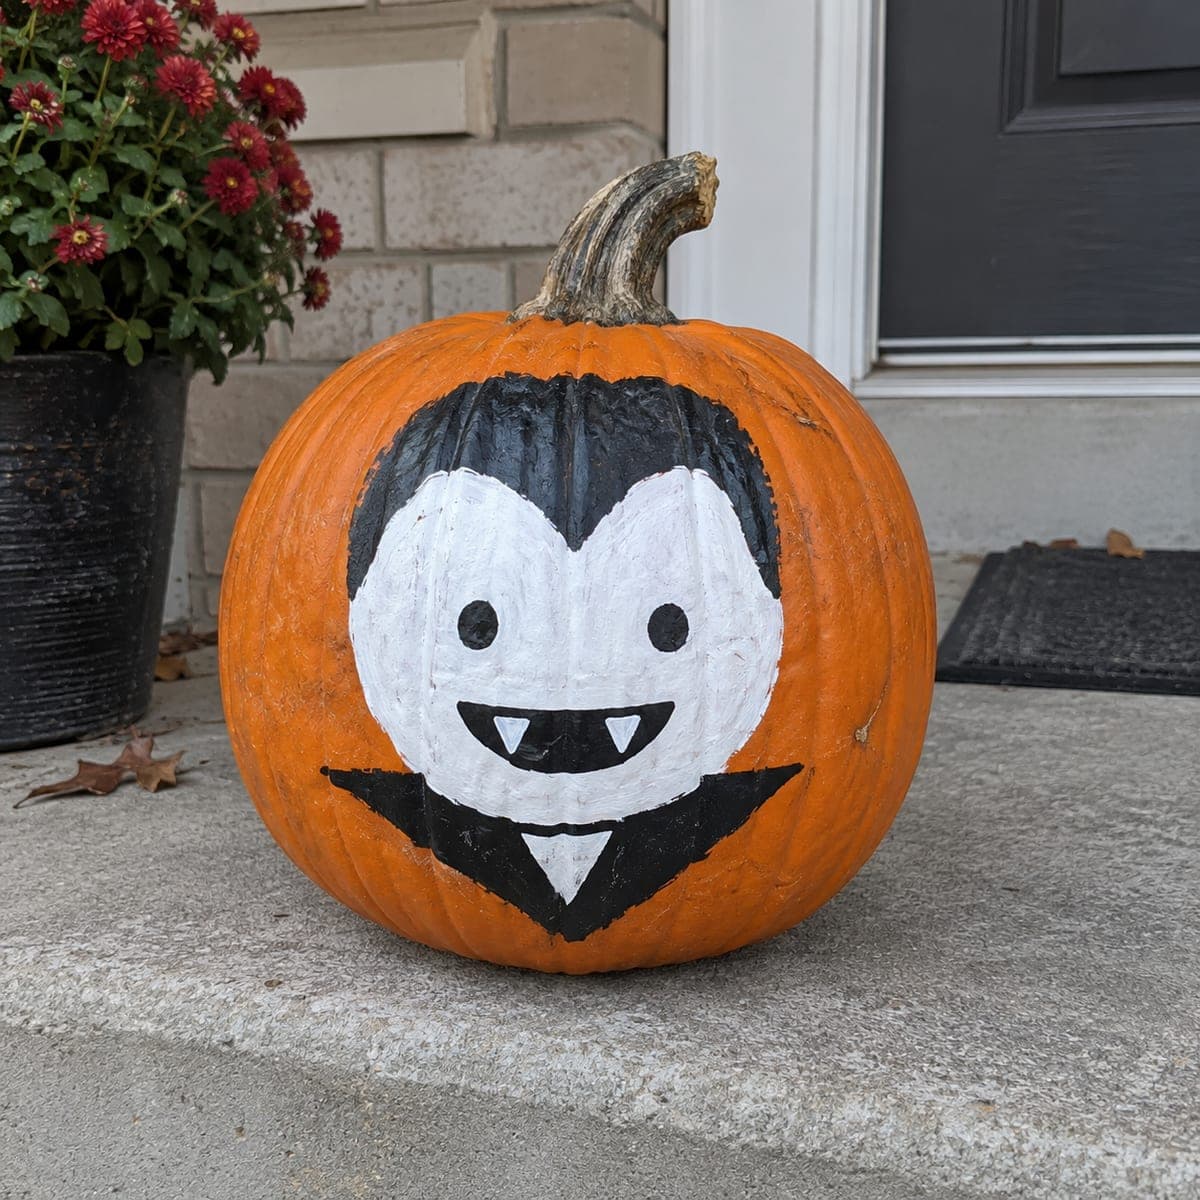
A small white oval vampire face with dot eyes, a curved smile, and two painted fangs sits on an outdoor stone ledge at dusk, the painted design glowing softly in the warm golden-hour light behind it. The cartoonish simplicity makes this one of the friendliest-looking no-carve vampire pumpkin ideas you can finish in under thirty minutes. Block in the white oval with foam sponge daubers, then add the face details once dry using a thin brush and black acrylic. Its compact size works well as part of a grouped front-porch vignette.

This is an AI-generated concept image: a realistic, carvable design idea rather than a photo of a finished carve. AI concepts are always labeled and sit out the leaderboard and the contest.

No ratings yet · Sign in to rate
Comments (0)

  • No comments yet — be the first.

Save without an account. Sign in to like or comment.

Our tips for carving a similar design

The whole charm here is a small white oval that frames a cartoon vampire face with dot eyes, a curved smile, and two little fangs. Since this is an AI concept and no real pumpkin exists, you can recreate the look as a quick no-carve paint job or translate it into a shallow carve where the white oval glows and the eyes and mouth shine through. Either way, keep the design compact and centered so it reads clearly from a few feet away.

Written by PumpkinCarvingIdeas.com, inspired by the image above. These are our suggestions, not instructions from the uploader. This approach to the AI concept has not been tested on a real pumpkin.

From pumpkin to porch

  1. Pick and prep a small pumpkin

    Choose a rounder, smaller pumpkin with a smooth front face so your oval sits flat and even. Wipe the skin clean and let it dry fully before you mark anything. A dry surface helps paint grip and keeps carved edges from smearing. Set it on a stable table at a comfortable working height.

  2. Sketch the oval and face

    Lightly draw a horizontal white oval in the center of the front with a washable marker or pencil. Inside it, place two round dot eyes near the top, a wide curved smile below, and two small triangle fangs hanging from the smile line. Step back and check that everything is level and centered before you commit. Keep the fangs short and rooted to the mouth so they stay strong.

  3. Block in the white oval

    If you are painting, load a foam sponge dauber with white acrylic and daub the oval in thin, even coats, letting each layer dry. If you would rather carve, use a peeling or shaving tool to remove just the outer skin inside the oval so it lightens instead of cutting through. Build the shape gradually and keep the outer edge clean and rounded. Let paint dry completely before adding details.

  4. Add the eyes, smile, and fangs

    For the painted version, use a thin brush and black acrylic to fill the dot eyes and the curved smile, keeping strokes steady and even. For a carved version, cut the two round eyes and the smile line all the way through for bright light, and leave the fangs as raised white shapes so they stay attached. Work slowly and keep fingers behind the blade at all times. Adults should handle any cutting tools.

  5. Clean up and let it set

    Erase any leftover guide marks and touch up the oval edge or carved lines so they look crisp. If you painted, give it a final dry time so nothing lifts when handled. If you carved, wipe away pulp bits from the openings so light passes cleanly. A light coat of clear sealant helps a painted pumpkin last longer outdoors.

  6. Light it and photograph at dusk

    Drop a battery LED tea light inside a carved version, or simply set the painted one out as is. Place it on a stone ledge or porch step where warm sunset light catches the white face. Shoot at golden hour so the design glows softly against the sky. Group it with a couple of other small pumpkins for a friendly porch vignette.

Gather your supplies

Check things off as you get ready.

Work on a stable surface, keep your free hand out of the cutting path, and have an adult handle sharp tools.

Three levels of light

  • Leave intact

    The orange skin all around the oval stays untouched and dark, framing the face.

  • Peel & shade

    The white oval face can be skin-peeled so it glows a soft dim orange, or simply painted white for the no-carve look.

  • Cut through

    The dot eyes and curved smile are cut fully through for the brightest points of light, with the fangs left raised.

Learn the carving basics

Before you start cutting

Should I paint this or carve it?

Both work, so pick based on your comfort level. Painting with a sponge dauber and thin brush is the fastest route and stays true to the cute cartoon look. If you want it to glow at night, do a shallow peel for the oval and cut only the eyes and mouth through.

How do I keep the fangs from breaking off?

Keep the fangs short and connect them directly to the smile line rather than leaving them as free-standing points. If you are carving, treat them as raised white shapes instead of cutting all the way around them. Painted fangs have no structural risk at all, which is why they suit this small design.

Will the white oval last outdoors?

Acrylic holds up reasonably well, but a light clear sealant spray helps it resist dew and light rain. Bring the pumpkin inside during heavy weather to protect the paint. On a carved version, a peeled oval will slowly darken over a few days, so carve close to the day you want it on display.

Your take belongs here, too.

Changed a detail? Made it simpler? Share a photo of your version and tell the community what worked.

Share your pumpkin

More pumpkins like this

You've reached the end · 8 pumpkins
The Patch Report

Fresh pumpkins, in your inbox.

The best new carvings, ideas worth stealing, and how-tos for carving season. Short, seasonal, and gone by November.

A short email during carving season. Unsubscribe anytime. See our privacy policy.