Halloween Pumpkin Carving Contest · Starts October 1st · $500 in prizes
← Back to ideas
@ai_concepts
Sep 25, 2026
Nine Triangle Grid Geometric Pumpkin Carving PatternAI
0

Report this carving

Tell us what is wrong. Reports are private.

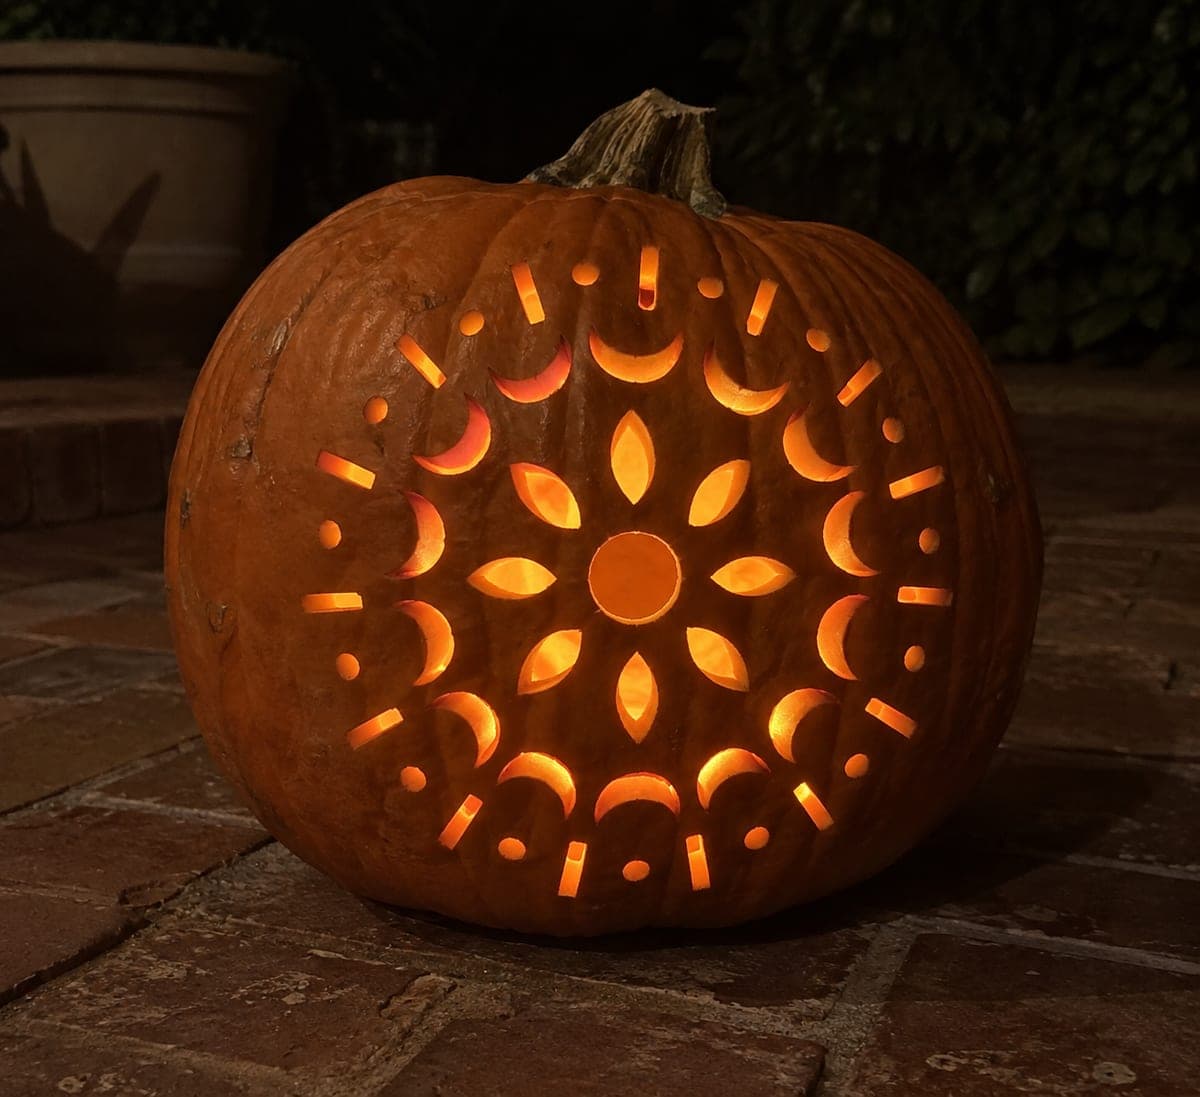
Nine Triangle Grid Geometric Pumpkin Carving Pattern

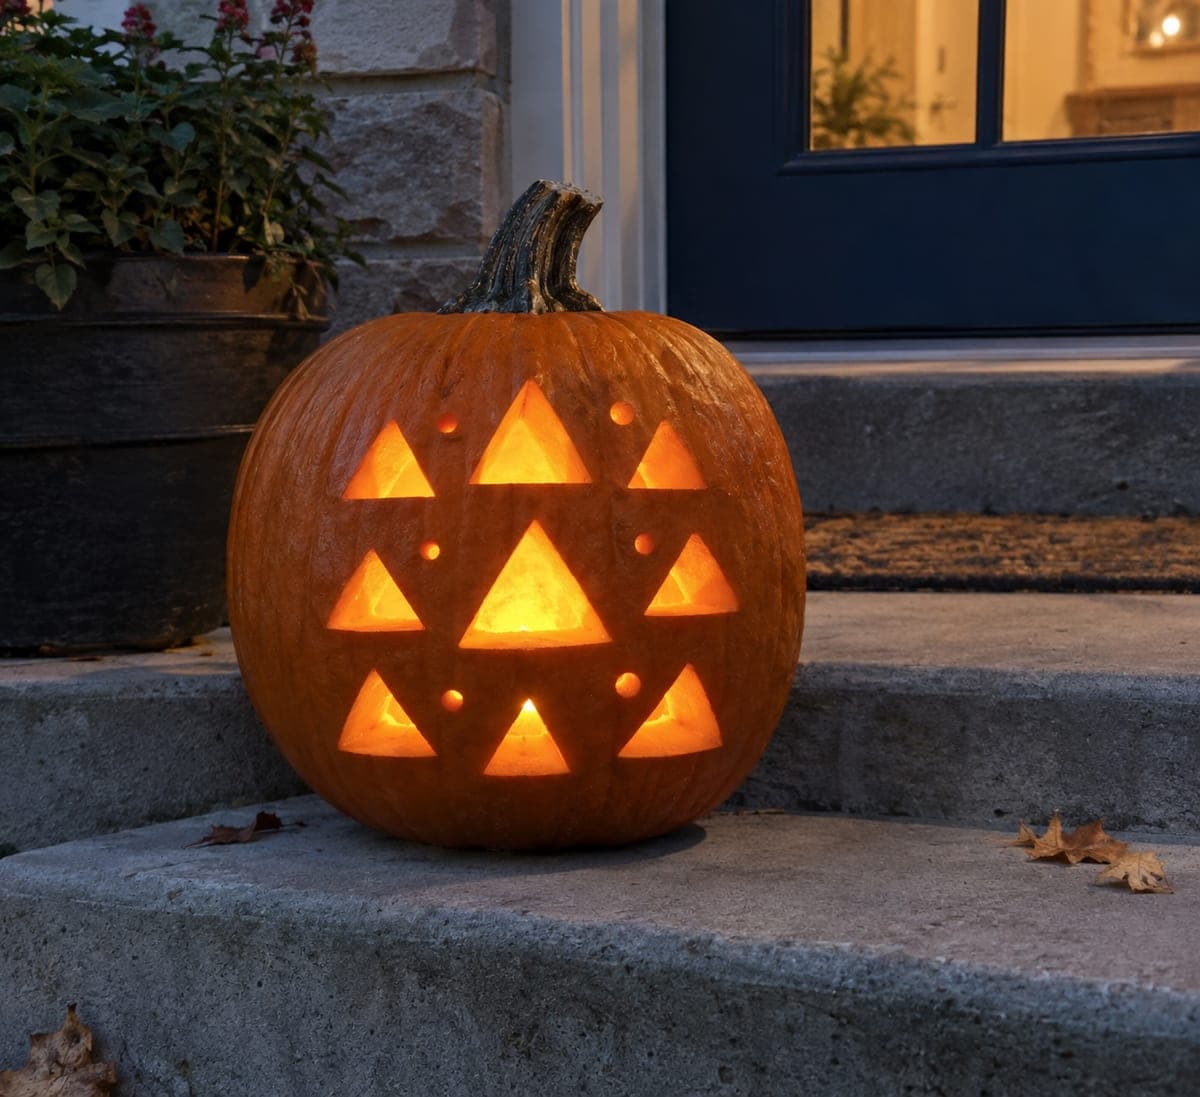
Nine separate triangles of alternating sizes arranged in a loose three-by-three grid turn this geometric pumpkin carving idea into a bold modern lantern with no continuous grid lines to cut through. Keeping all the surrounding rind connected means every triangle is structurally independent, so there are no fragile webbing sections to worry about. Stagger the sizes deliberately: three large, three medium, three small, arranged so no two matching sizes sit next to each other. Indoors on a shelf, the scattered triangle light creates a patchwork glow across the ceiling.

No ratings yet · Sign in to rate
Comments (0)

  • No comments yet — be the first.

Save without an account. Sign in to like or comment.

Our tips for carving a similar design

The design works because all nine triangles are structurally independent: no two share a cut edge, so there is no fragile webbing between them. Staggering the sizes deliberately (three large, three medium, three small, arranged so no two matching sizes sit adjacent) means the eye reads the grid as dynamic rather than mechanical. Indoors at close range, the scattered triangle beams cover the ceiling in a patchwork of light.

From pumpkin to porch

  1. Hollow and mark a grid

    Scoop to a 25 mm wall. Draw a loose three-by-three grid on the pumpkin face, not as rigid lines but as nine approximate zone centers. The grid should sit within the flattest, widest section of the face.

  2. Size and place the triangles

    Assign triangle sizes to grid positions: large in the top-left, top-right, and bottom-center; medium in the top-center, middle-left, and bottom-right; small in the middle-center, middle-right, and bottom-left (or any arrangement where no two same-size triangles are adjacent). Sketch all nine in chalk before cutting any.

  3. Adjust for connectivity

    Check that at least 15 mm of uncut rind separates every triangle from every neighboring triangle and from the outer edge of the face. This gap is both structural and aesthetic: it is what makes each triangle read as an island of light rather than part of a continuous opening.

  4. Cut the large triangles first

    Cut the three large triangles with clean three-stroke cuts, one side per stroke. Large openings are easier to cut cleanly before smaller cuts nearby have reduced the wall rigidity. Clear each triangle piece before moving to the next.

  5. Cut the medium then small triangles

    Complete the three medium triangles, then the three small ones. For the smallest triangles, a craft knife gives more control than a pumpkin saw in tight spaces. Pre-score all three sides before pushing through.

  6. Display indoors for the ceiling effect

    Place a bright LED inside and set the pumpkin on a shelf in a dark room. The nine scattered beams paint distinct triangular patches of light across the ceiling. Varying the LED position slightly shifts the light patches and gives the display a subtle, dynamic quality.

Written with AI to match this design

Gather your supplies

Check things off as you get ready.

Work on a stable surface, keep your free hand out of the cutting path, and have an adult handle sharp tools.

Three levels of light

  • Leave intact

    All rind between and surrounding the nine triangles, the outer border of the face, and the back of the pumpkin

  • Peel & shade

    None needed

  • Cut through

    Nine separate triangles of alternating sizes in a loose three-by-three grid arrangement

Learn the carving basics

Before you start cutting

Should the triangles all point the same direction or can I rotate them?

Rotating individual triangles at different angles adds energy to the composition and reinforces the non-mechanical, scattered quality. Keeping the three large triangles with apex pointing up and the medium and small ones rotated at various angles is one approach that works well.

The three small triangles are very tight to cut. Can I make them the same size as the medium ones?

Yes. Reducing the design to two size categories (large and medium, roughly equal counts) still gives a dynamic grid. The key is still placing the sizes so no two identical triangles sit adjacent to each other.

Can I do this as a painted design on a no-carve pumpkin?

Yes. Paint the nine triangle shapes in deep metallic gold or black on a natural orange pumpkin. The flat painted version loses the light-scatter ceiling effect but gains a bold graphic quality that works outdoors in daylight.

Your take belongs here, too.

Changed a detail? Made it simpler? Share a photo of your version and tell the community what worked.

Share your pumpkin

More pumpkins like this

You've reached the end · 8 pumpkins
The Patch Report

Fresh pumpkins, in your inbox.

The best new carvings, ideas worth stealing, and how-tos for carving season. Short, seasonal, and gone by November.

A short email during carving season. Unsubscribe anytime. See our privacy policy.