Halloween Pumpkin Carving Contest · Starts October 1st · $500 in prizes
← Back to ideas
@ai_concepts
Aug 3, 2026
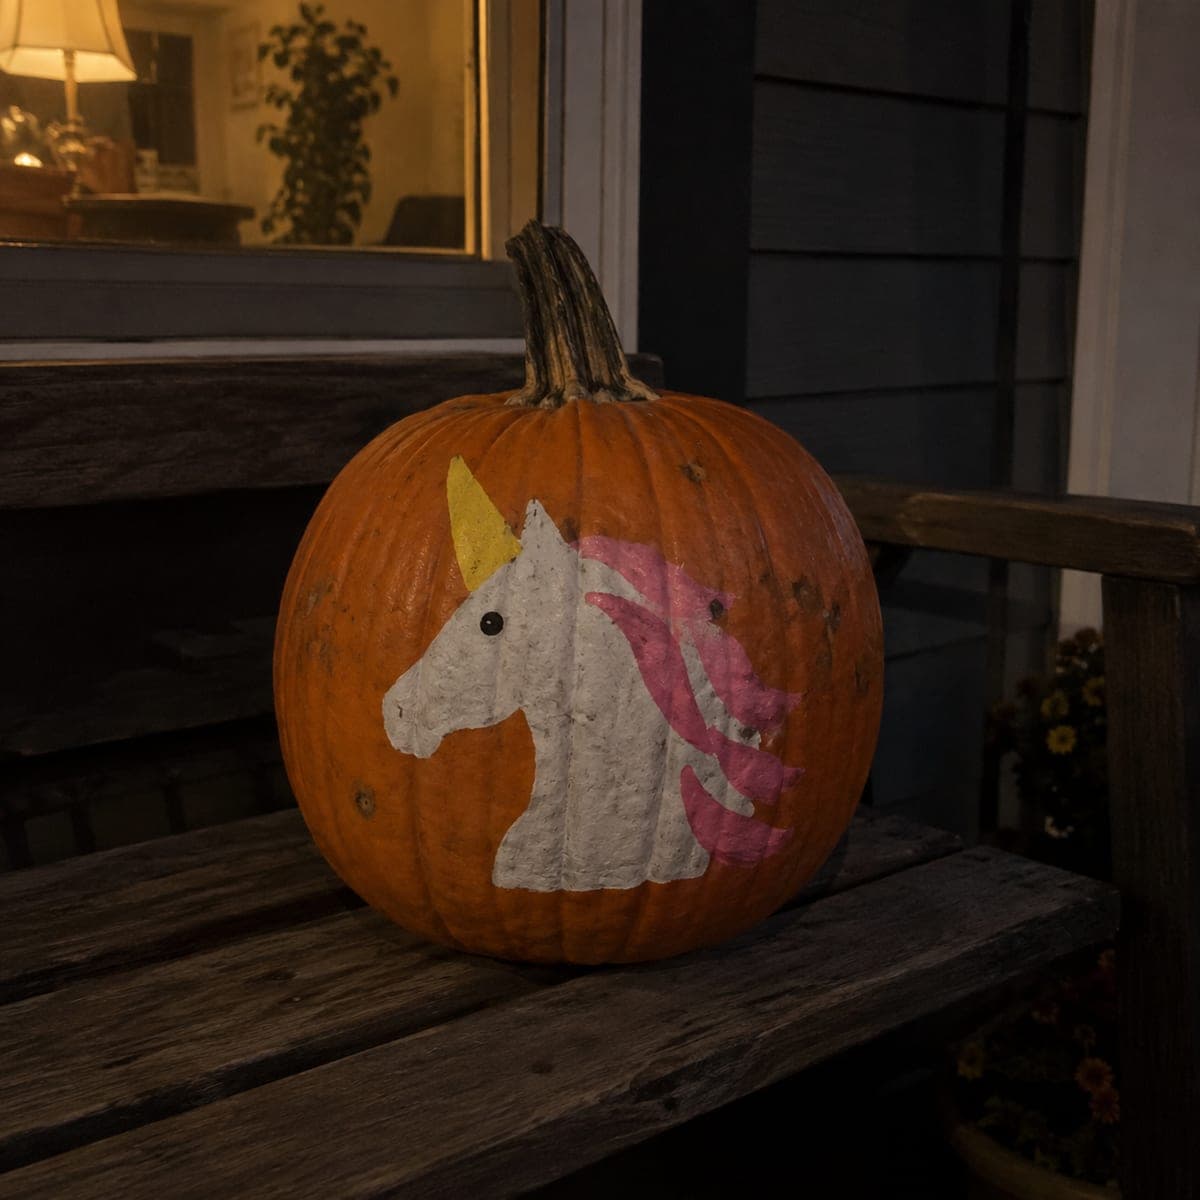
Painted Unicorn Head No-Carve Pumpkin for KidsAI
0

Painted Unicorn Head No-Carve Pumpkin for Kids

A cheerful unicorn head with a yellow horn and flowing pink-and-white mane is painted directly onto an uncut pumpkin, making this a no-carve pumpkin idea the whole family can tackle. Acrylic craft paint adheres well to a clean, dry pumpkin surface with no priming needed. Paint the white face shape first and let it dry fully before adding the mane colors and facial details, finishing with a thin black outline for definition. The finished pumpkin is safe for young children to help decorate and looks great on a bench or tabletop.

This is an AI-generated concept image: a realistic, carvable design idea rather than a photo of a finished carve. AI concepts are always labeled and sit out the leaderboard and the contest.

No ratings yet · Sign in to rate

Comments (0)

  • No comments yet — be the first.

Save without an account. Sign in to like or comment.

Our tips for carving a similar design

This design skips the knife entirely and builds a unicorn head from flat blocks of acrylic paint on a clean, dry pumpkin. The core trick is layering: lay down the solid white face and neck first, let it dry, then add the yellow horn and the pink mane behind it, and finish with a thin black outline and a dot eye for definition. Keep your shapes simple and let each color dry fully so nothing smears.

Written by PumpkinCarvingIdeas.com, inspired by the image above. These are our suggestions, not instructions from the uploader. This approach to the AI concept has not been tested on a real pumpkin.

From pumpkin to porch

  1. Wipe down and plan the face

    Wash the pumpkin with plain water and dry it completely so the paint grips. Pick the flattest, cleanest panel facing out and lightly sketch the unicorn head in pencil, keeping the muzzle, neck, and horn as simple shapes. Aim the face toward one side so the mane has room to flow behind it. Pencil lines wipe off easily, so do not press hard.

  2. Paint the white head and neck

    Load a medium flat brush with white acrylic and fill the whole head and neck shape in smooth strokes. Two thin coats look better than one thick one, so let the first dry and add a second for solid coverage. Keep the outer edge clean and slightly rounded at the muzzle. Let this base dry fully before touching it again, about 20 to 30 minutes.

  3. Add the horn and mane

    Paint the horn in yellow as a tall triangle rising from the forehead. Once the white is dry, brush the mane in pink behind and below the head using loose, curved strokes so it looks like it is flowing. Leave a few gaps of orange or white between the pink locks so the mane reads as separate strands. Let everything dry before the next step.

  4. Outline and add the eye

    With a thin liner brush and a little black paint, trace a clean outline around the head, muzzle, and horn to make the shapes pop against the orange skin. Add a single round black dot for the eye and a small curved nostril. Keep the black lines thin and steady; rest your hand on the pumpkin to stay controlled. Touch up any wobbles with a dab of white.

  5. Seal and stage it

    Once fully dry, brush on a thin coat of clear matte sealer if you have it, which helps the paint survive dew and handling. Set the pumpkin on a bench or tabletop where the flat painted panel faces your walkway. Because nothing is cut, it holds up for days and needs no light inside. Snap your photo in soft daylight or under a warm porch bulb.

  6. Optional glow variation

    If you want a lit version later, carve a small access hole in the back and drop in a battery LED puck, leaving the painted front completely intact. Never use a candle near acrylic paint or sealer. A single warm LED behind the pumpkin or beside it also gives a nice evening glow without any cutting at all.

Gather your supplies

Check things off as you get ready.

Work on a stable surface, keep your free hand out of the cutting path, and have an adult handle sharp tools.

Three levels of light

  • Leave intact

    The natural orange skin all around the unicorn stays untouched and dark, framing the painted head.

  • Peel & shade

    Since this is a painted design, there is no peeled skin; the white and pink paint itself does the soft glowing-color work.

  • Cut through

    Nothing is cut on the front; only an optional hidden hole in the back for an LED if you want an evening glow.

Learn the carving basics

Before you start cutting

Do I need to prime or sand the pumpkin before painting?

No priming is needed. Just wash the pumpkin with water and dry it completely so the acrylic grips the waxy skin. A quick wipe with a dry cloth right before painting helps the first coat go on evenly.

How do I keep the pink mane from bleeding into the white face?

Let the white base dry fully, about 20 to 30 minutes, before you add any pink. Painting onto dry paint keeps the edges crisp instead of muddy. If colors do touch while wet, wipe gently and let it dry before fixing.

Will a painted no-carve pumpkin last longer than a carved one?

Yes. Because the skin is never opened, it does not dry out or mold nearly as fast as a carved pumpkin. A thin coat of clear matte sealer adds extra protection from dew and handling, so it can look good for a week or more.

Your take belongs here, too.

Changed a detail? Made it simpler? Share a photo of your version and tell the community what worked.

Share your pumpkin

More pumpkins like this

You've reached the end · 8 pumpkins
The Patch Report

Fresh pumpkins, in your inbox.

The best new carvings, ideas worth stealing, and how-tos for carving season. Short, seasonal, and gone by November.

A short email during carving season. Unsubscribe anytime. See our privacy policy.