Halloween Pumpkin Carving Contest · Starts October 1st · $500 in prizes
← Back to ideas
@ai_concepts
Sep 25, 2026
Painted Zero Ghost Dog Pumpkin with Orange NoseAI
0

Report this carving

Tell us what is wrong. Reports are private.

Painted Zero Ghost Dog Pumpkin with Orange Nose

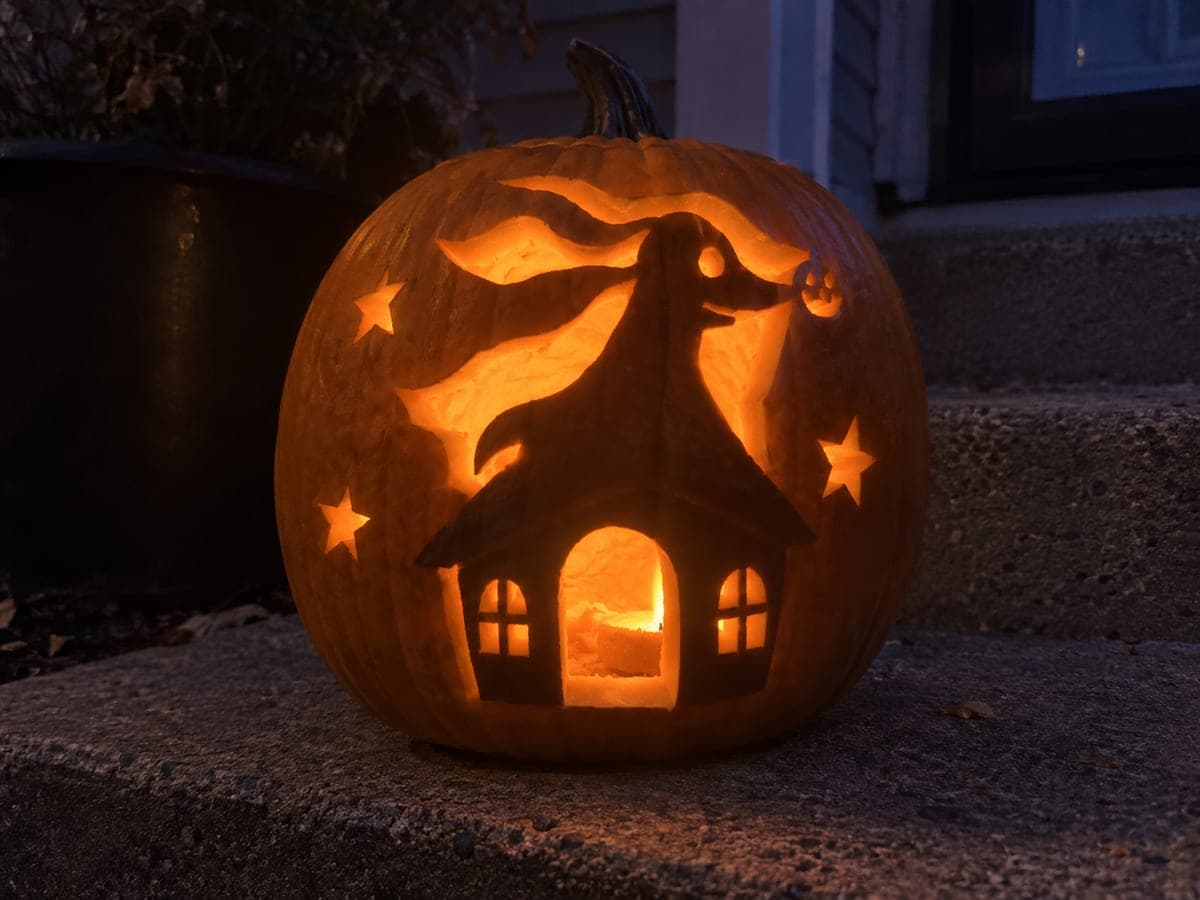
A cream ghost-dog silhouette with a bright orange nose, a dot eye, and three stars is painted on an intact pumpkin for this no-carve Zero pumpkin carving idea, capturing the character's warm, gentle look without any cutting required. The high contrast of cream paint over orange rind makes the design pop even in daylight. Paint the cream body shape first and let it dry fully before adding the orange nose so the colors stay crisp.

No ratings yet · Sign in to rate

Comments (0)

  • No comments yet — be the first.

Save without an account. Sign in to like or comment.

Our tips for carving a similar design

The design reads through color contrast: cream white over orange rind for the ghost body, a bright orange nose dot on top of the cream, a small dot eye, and three star shapes scattered around. Because no cutting is involved, the entire surface of the pumpkin stays intact and the design holds its shape for the full season. Painting the cream body base first and letting it dry completely before adding the orange nose prevents the colors from bleeding into each other.

From pumpkin to porch

  1. Clean and dry the pumpkin

    Wipe the pumpkin surface with a damp cloth to remove dirt and any waxy coating, then dry it thoroughly with a paper towel. A clean, dry rind takes acrylic paint much better than a dusty or damp one. Let the pumpkin air dry for at least 30 minutes before starting.

  2. Sketch the design

    Use a white chalk pencil or a soft graphite pencil to lightly sketch the ghost-dog silhouette, the nose position, the eye dot, and the star locations. Keep the sketch light so it disappears under the first coat of paint. A printed Zero reference image helps maintain the correct ear-to-body proportions.

  3. Paint the cream ghost body

    Thin white acrylic paint slightly with a few drops of water and apply a first coat over the ghost-dog silhouette with a flat brush. This thinner first coat bonds well to the rind. Let it dry fully, then apply a second, full-opacity coat for bright, crisp edges. Use the brush tip to define the ear point and tail curl.

  4. Add the orange nose and eye dot

    Once the white body is completely dry, load a small round brush with orange acrylic and paint the round nose dot at the end of the snout. Follow with a small black or dark dot for the eye. Both marks should be done in single, confident strokes rather than built up in multiple passes, which can cause bleeding at the edges.

  5. Paint the stars

    Use a fine liner brush and white acrylic to paint the three stars scattered around the ghost body. Simple four-point or five-point stars done with single crossed strokes look clean and graphic. Let everything dry for at least an hour before handling.

  6. Seal and display

    Apply a thin coat of clear acrylic sealant spray over the finished design to protect the paint from moisture and light handling. Display in a spot with some ambient light so the cream body pops against the orange rind. No candle or LED is needed, though a small spotlight behind the pumpkin enhances the design after dark.

Written with AI to match this design

Gather your supplies

Check things off as you get ready.

Work on a stable surface, keep your free hand out of the cutting path, and have an adult handle sharp tools.

Three levels of light

  • Leave intact

    The bare orange rind outside the painted ghost shape provides the background color contrast for the whole design

  • Peel & shade

    None, this design leaves the shell fully intact

  • Cut through

    None. Display with an outdoor spotlight or porch light rather than an internal candle or LED

Learn the carving basics

Before you start cutting

My white paint is not covering the orange rind in one coat. What should I do?

Most white acrylics need two or three coats to fully cover orange. Let each coat dry completely before the next, and switch to a higher-pigment craft acrylic if coverage is still weak after three coats. Artist-grade titanium white has excellent opacity and covers in one to two coats on most surfaces.

Can I use regular house paint instead of acrylic craft paint?

Interior latex wall paint in white works reasonably well and usually has higher coverage than cheap craft acrylic. The finish is slightly flatter, which actually looks good on the organic curve of a pumpkin. Avoid oil-based paint as it takes much longer to dry and the fumes are unpleasant for an indoor or semi-indoor project.

How long will the painted design last compared to a carved pumpkin?

A no-carve painted pumpkin typically lasts two to three times longer than a carved one since the rind is never breached. With a sealant coat, a painted design can hold for the full month of October if the pumpkin is stored out of direct rain and not in very hot sun. Check the stem area weekly and move it inside if it begins to soften.

Your take belongs here, too.

Changed a detail? Made it simpler? Share a photo of your version and tell the community what worked.

Share your pumpkin

More pumpkins like this

You've reached the end · 8 pumpkins
The Patch Report

Fresh pumpkins, in your inbox.

The best new carvings, ideas worth stealing, and how-tos for carving season. Short, seasonal, and gone by November.

A short email during carving season. Unsubscribe anytime. See our privacy policy.