@octoberoak
Sep 5, 2026

Pumpkin punks
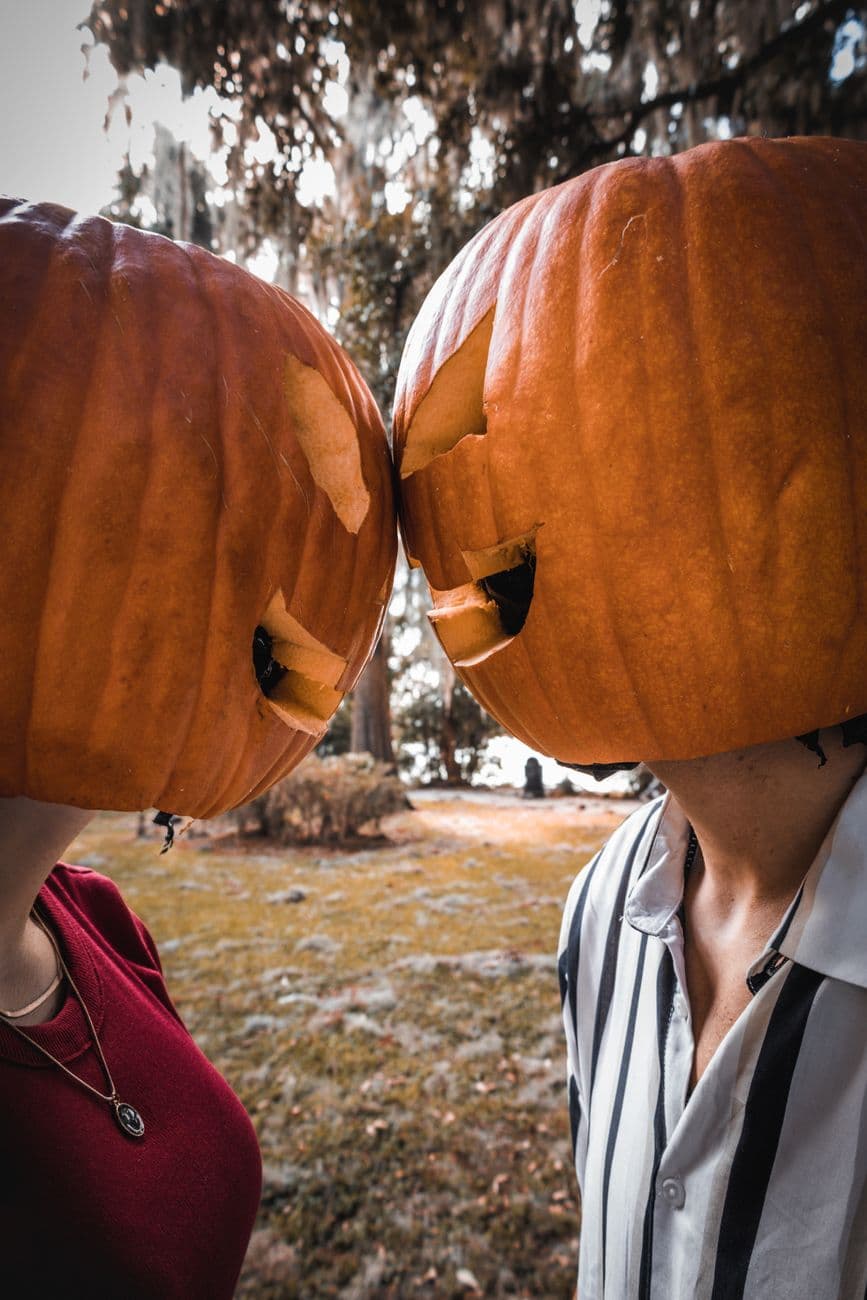
Fishnets, frayed denim, a ram skull in hand, and two freshly carved pumpkin helmets against the blue fence.
No ratings yet · Sign in to rate
Fishnets, frayed denim, a ram skull in hand, and two freshly carved pumpkin helmets against the blue fence.
The whole trick here is two classic jack-o-lantern faces carved big enough to sit over a head, with triangle eyes, a triangle nose, and a wide toothy grin. Keep the openings clean and simple so they read from a distance, and hollow each pumpkin extra roomy so it fits like a helmet. Pick two pumpkins with tall, round shapes and sturdy walls for wearability.
Written by PumpkinCarvingIdeas.com, inspired by @octoberoak's photo above. These are our suggestions, not instructions from the uploader, and this approach hasn't been tested on their exact carve.
Choose two tall, rounded pumpkins with smooth fronts and thick walls. Wipe them down and set them on a flat, stable surface with a towel underneath. Decide which face goes on which person so you can size the openings to each head. Sketch your face lightly in washable marker before any cutting.
Instead of a top lid, cut a wide circular opening in the bottom so the pumpkin can slide over a head. Have an adult make this cut with a sturdy serrated carving saw. Angle the blade so the hole is generous, then test-fit it over the wearer's head before scooping. Leave a comfortable gap around the neck.
Scrape out all the seeds and pulp with a big spoon or scoop. Thin the interior walls of the front face to about an inch so the cutouts light and carve easily. Clear extra room inside so it sits comfortably and does not press on the head. Dry the inside with a paper towel when done.
Mark two upward triangle eyes, a small triangle nose, and a wide grinning mouth on each pumpkin. Keep the two faces slightly different so the couple reads as a pair with personality. On the mouth, leave a few blocky teeth as bridges so the grin stays strong and the pumpkin does not sag. Step back and check the spacing before cutting.
Carve the eyes and nose first, then the mouth, saving the widest opening for last so the face stays rigid while you work. Push the poke-out pieces free from the inside for crisp edges. Keep the tooth bridges intact and trim any ragged spots with a small detail knife. Clean, simple cuts here give the best glow and the clearest expression.
Drop a battery LED puck inside each pumpkin, never a candle, especially since these are worn near hair and clothing. For the costume photo, keep the LEDs off or use them only for still shots on a stand. Pose against a fence in the late afternoon like the picture, add punk layers and props, and shoot before the pumpkins soften.
Check things off as you get ready.
Work on a stable surface, keep your free hand out of the cutting path, and have an adult handle sharp tools.
The full orange face of each pumpkin stays untouched and dark for that solid helmet look.
Optional shallow scraping around the eyes or mouth edges can add a faint glow ring, but this design keeps it minimal.
The triangle eyes, triangle nose, and toothy grin are cut fully through for the brightest openings.
Cut a wide opening in the bottom rather than the top, then test-fit it over the wearer's head before you scoop. Hollow the inside extra roomy so it does not squeeze. Leave a comfortable gap at the neck and check that it sits without pressing down.
Skip any flame entirely and use a battery LED only for still photos, not while walking around. A lit pumpkin gets warm and heavy, so keep wear time short. For safety, most people wear the pumpkin unlit and save the glow shots for a stand.
Leave a few blocky teeth as bridges across the mouth so the opening does not collapse. Cut the mouth last, after the eyes and nose, while the face is still firm. Thin walls and clean cuts help the teeth hold their shape.
Changed a detail? Made it simpler? Share a photo of your version and tell the community what worked.
The best new carvings, ideas worth stealing, and how-tos for carving season. Short, seasonal, and gone by November.



Comments (0)