Halloween Pumpkin Carving Contest · Starts October 1st · $500 in prizes
← Back to ideas
@ai_concepts
Sep 5, 2026
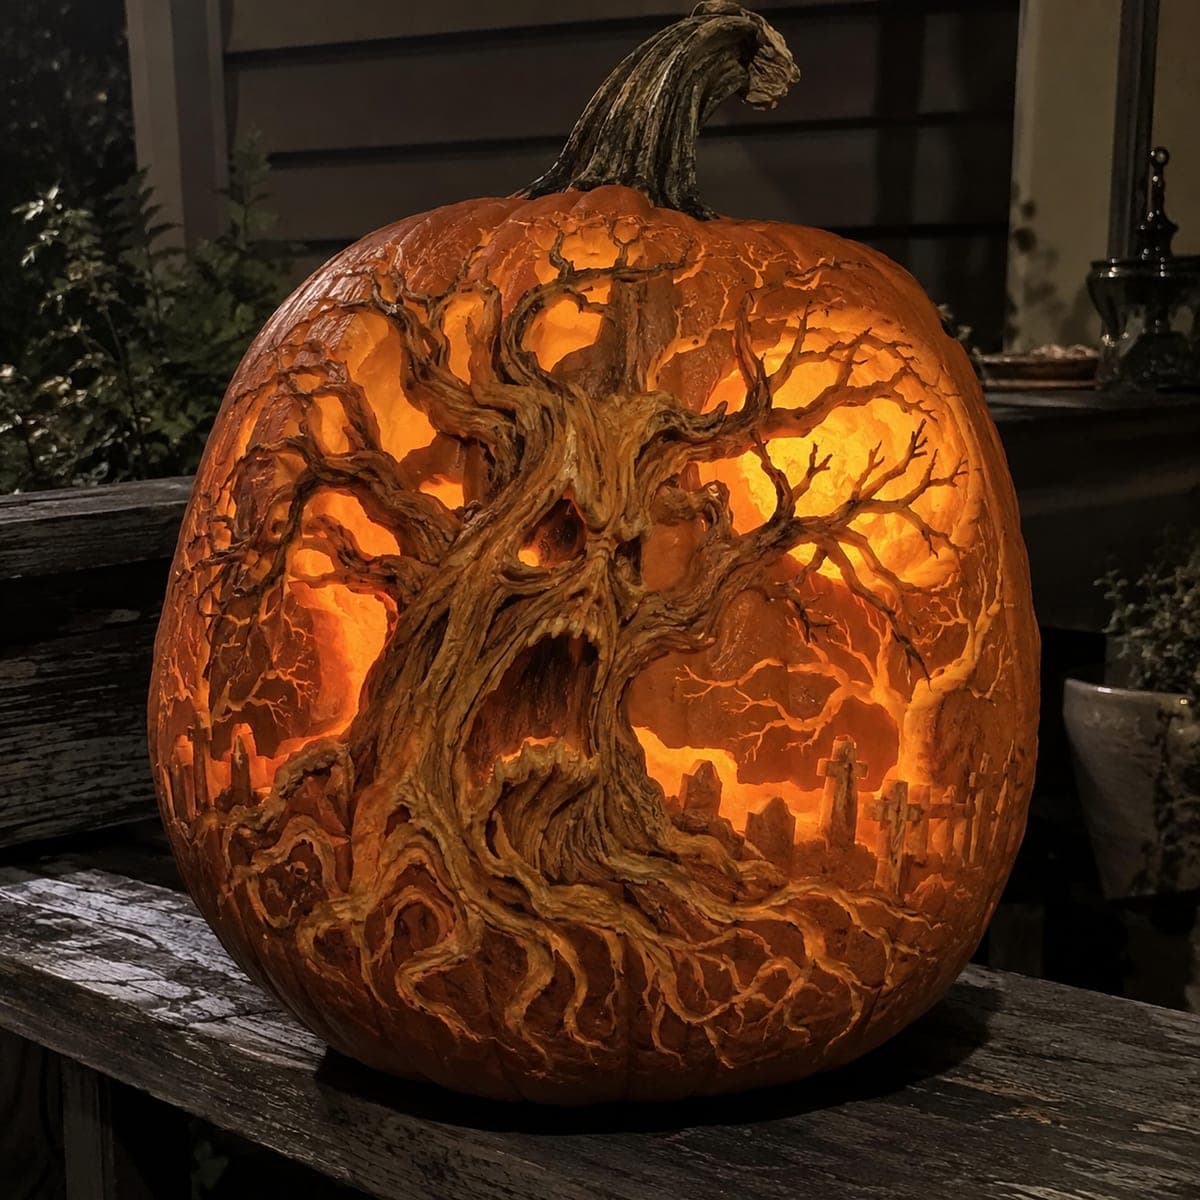
Screaming Haunted Tree and Graveyard Pumpkin CarvingAI
0

Screaming Haunted Tree and Graveyard Pumpkin Carving

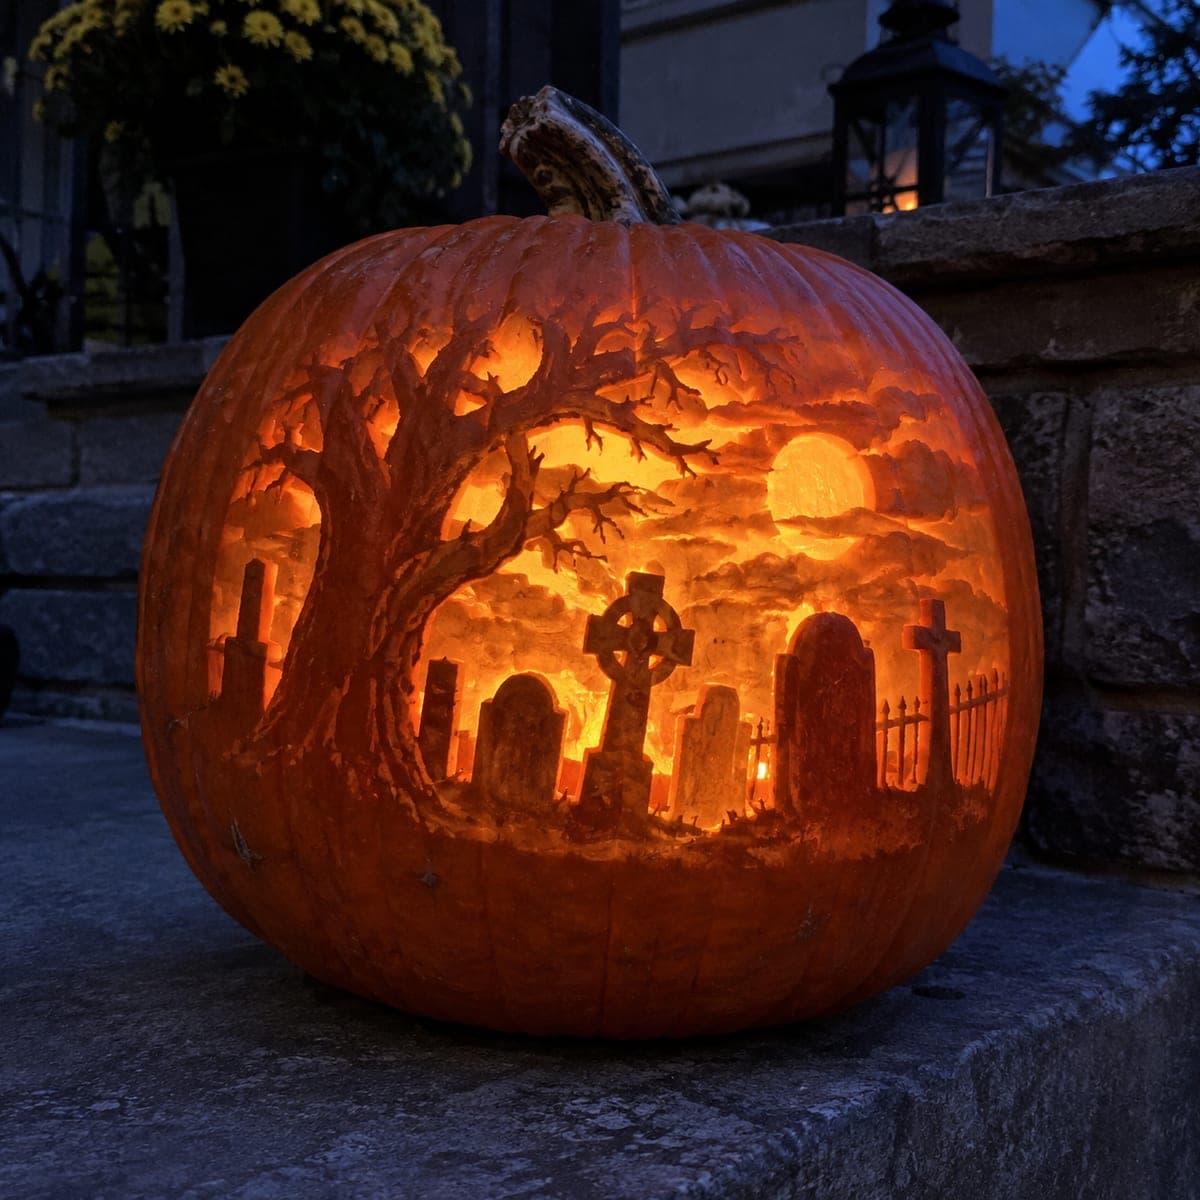
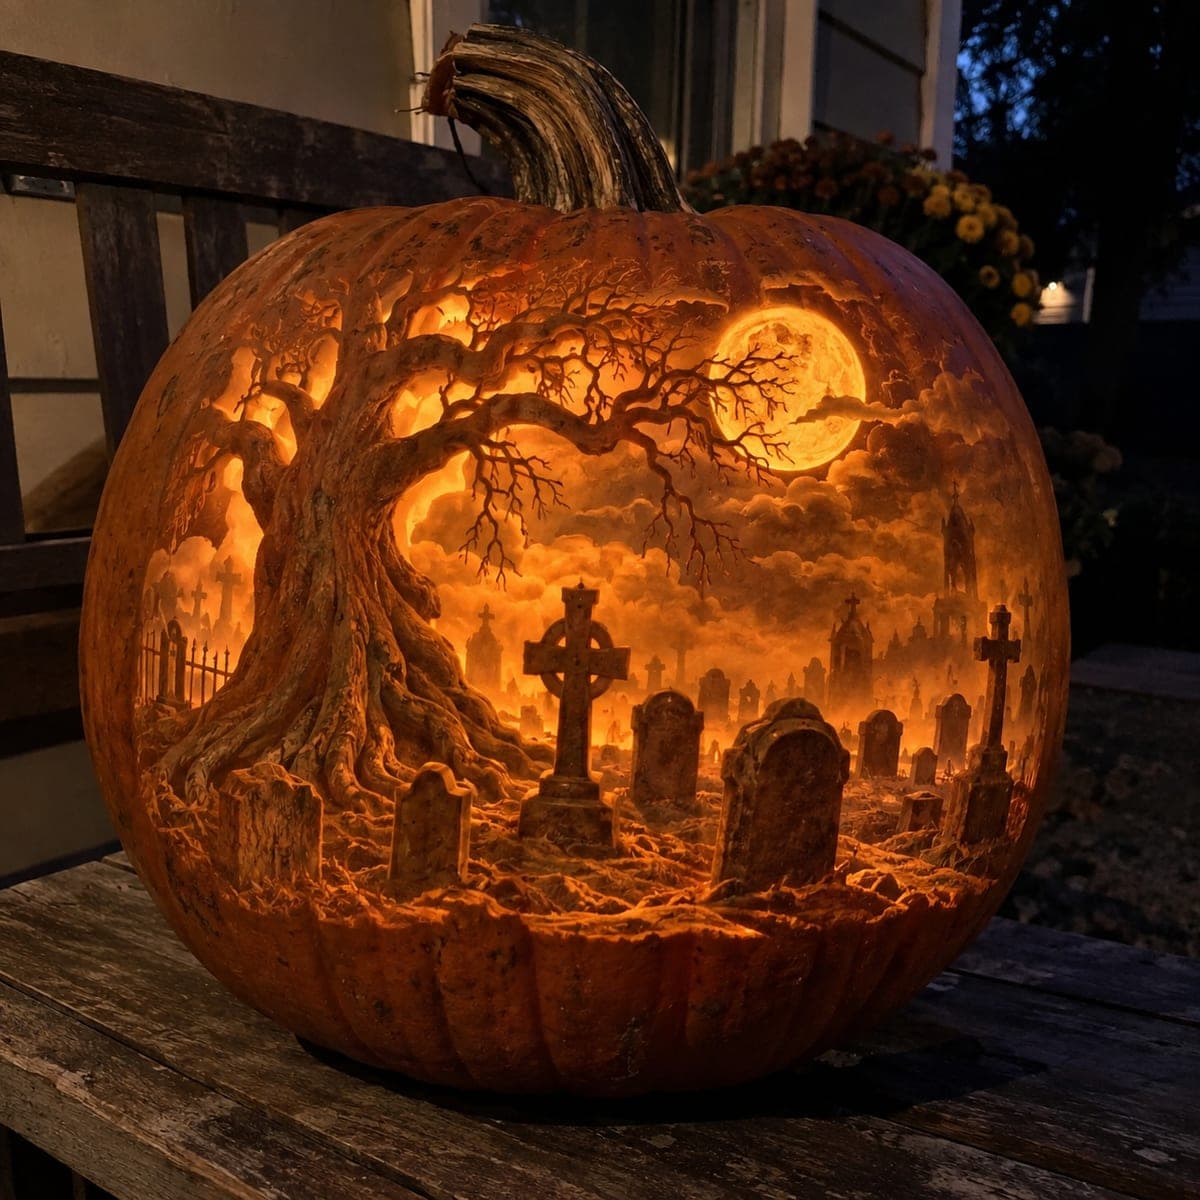
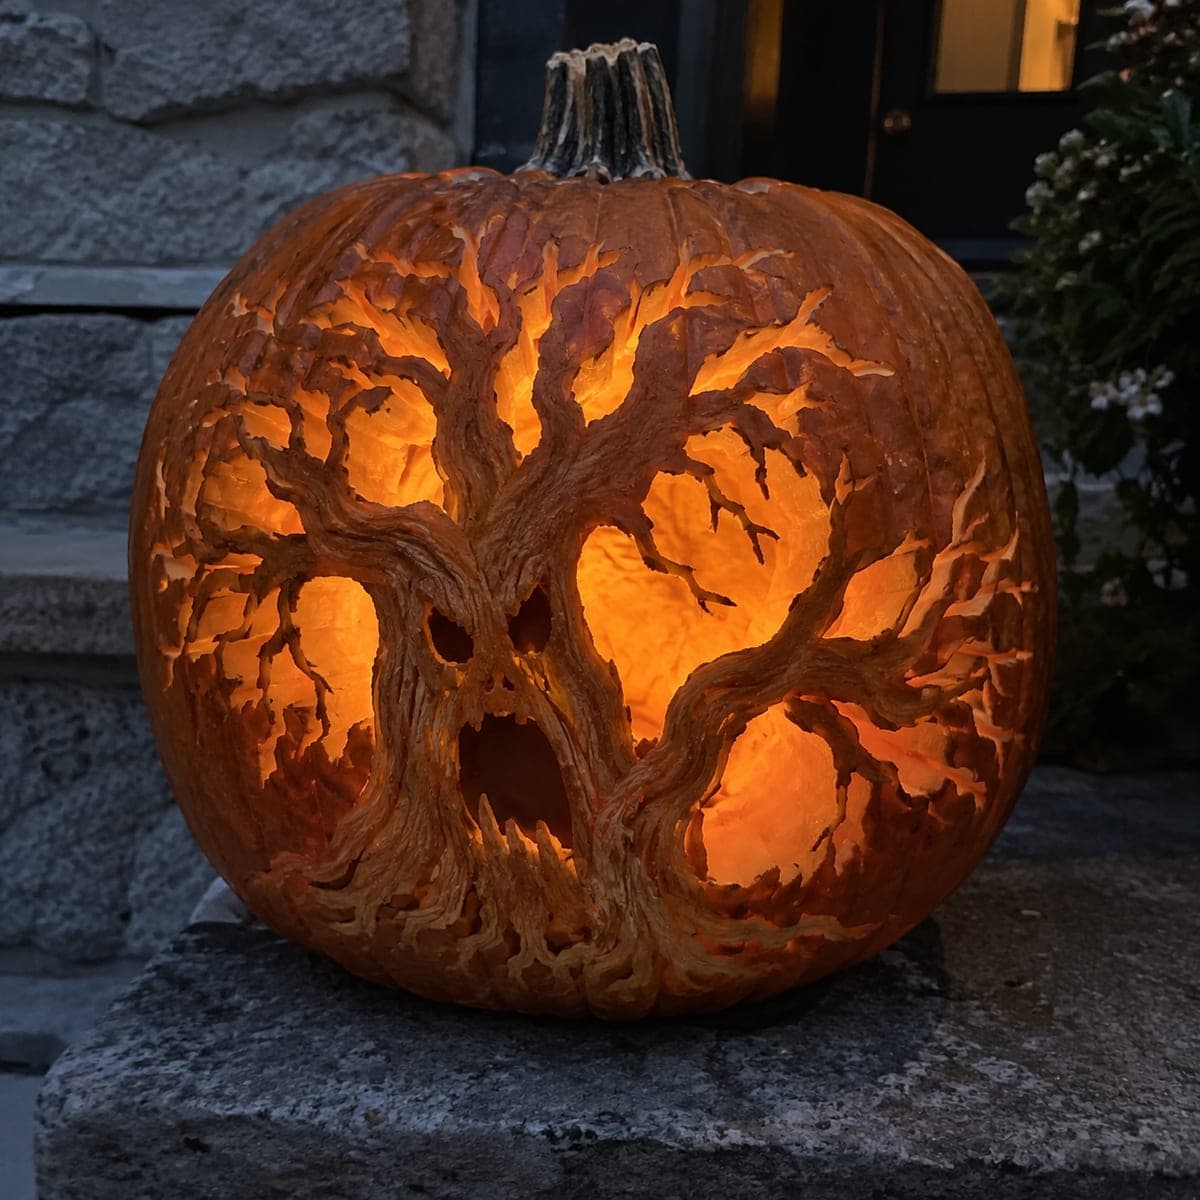
A gnarled tree with a howling face twists out of this pumpkin in full sculpted relief, its roots gripping a glowing graveyard of etched headstones. The scene layers three techniques, raised relief for the trunk, shallow etching for the background branches, and thin-walled glow for the sky, so plan your depths before the first cut. Backlight it with a strong LED so the amber sky burns behind the black branches at night.

This is an AI-generated concept image: a realistic, carvable design idea rather than a photo of a finished carve. AI concepts are always labeled and sit out the leaderboard and the contest.

No ratings yet · Sign in to rate
Comments (0)

  • No comments yet — be the first.

Save without an account. Sign in to like or comment.

Our tips for carving a similar design

The core trick here is layering three carving depths on one pumpkin so a raised tree trunk pops forward while the sky glows behind it. Sculpt the screaming trunk and its roots in raised relief, etch the bare branches and headstones shallow into the skin, and thin the walls where the amber sky needs to burn through. Plan every depth before you cut, because you cannot un-remove flesh.

Written by PumpkinCarvingIdeas.com, inspired by the image above. These are our suggestions, not instructions from the uploader. This approach to the AI concept has not been tested on a real pumpkin.

From pumpkin to porch

  1. Transfer the scene and map your depths

    Choose a tall, wide pumpkin with a smooth face and clean out the inside, scraping the carving wall down to about one inch. Tape your stencil on and poke through the outlines, or draw the tree, branches, and headstone row directly with a washable marker. Mark which zones are relief (the trunk and roots), which are shallow etch (background branches and stones), and which are thin glow (the sky gaps). Use three marker colors or a simple key so you never confuse a keep zone with a cut zone.

  2. Sculpt the screaming trunk in relief

    Start with the raised trunk and face because it stays proudest and everything else works around it. With a fine loop tool, shave the skin and a little flesh away from around the trunk so the tree stands forward while the bark, brow, and gaping mouth stay high. Round the edges of the ridges so the light rakes across them and reads as gnarled wood. Work slowly and keep the mouth cavity as a real recess for the deepest shadow.

  3. Etch the background branches and headstones

    Switch to shallow etching for the bare branches spreading across the sky and the row of tombstones near the roots. Scrape only the top skin so these lines glow a dim amber without cutting through the wall. Keep the twig tips connected to thicker branches so nothing crumbles as the pumpkin softens. Vary your pressure to fade branches into the distance for depth.

  4. Thin the sky for the amber glow

    In the open sky areas between the branches, shave the inner wall thinner from inside the pumpkin, or skin the outside down until the flesh turns translucent. Test with your light often, since a wall that is too thin tears and one too thick stays dark. Aim for a warm even glow that silhouettes the black branches. Leave small skin bridges wherever a branch crosses a bright gap so the branch stays supported.

  5. Cut the deepest openings last

    Save the true cut-throughs, like the eye hollows and the darkest part of the screaming mouth, for the very end when the surrounding relief is finished. Cutting these big openings early weakens the wall and makes the fine work flex and crack. Use a small saw or detail blade and clear the plug from inside. Adults should handle all sharp tools, and keep your bracing hand behind the blade.

  6. Light it and photograph at night

    Set a strong warm LED inside, ideally two lights aimed at the thinned sky so the amber burns bright behind the branches. Avoid open flame, since the raised relief and thin walls are fragile and heat dries them fast. Mist the cut surfaces and refrigerate between showings to slow shrinking. Shoot it after dark against a dark background so the glowing graveyard pops.

Gather your supplies

Check things off as you get ready.

Work on a stable surface, keep your free hand out of the cutting path, and have an adult handle sharp tools.

Three levels of light

  • Leave intact

    The proud trunk face, bark ridges, and the tips of the black branches stay as untouched skin for deep shadow.

  • Peel & shade

    The background branches, the headstone row, and the twisting roots are shallow etched to glow a soft amber.

  • Cut through

    The eye hollows and the deepest throat of the screaming mouth are cut through for the brightest points of light.

Learn the carving basics

Before you start cutting

How do I keep the raised trunk from looking flat?

Round every ridge instead of leaving square edges so light rakes across the bark and casts small shadows. Vary the depth of your scraping, leaving the face and knots highest and sinking the grooves between them. Test under the light as you go and deepen any area that reads flat.

Will the thin sky and skinny branches survive the night?

They can if you keep skin bridges wherever a thin branch crosses a bright gap, so each twig stays anchored to thicker wood. Do not thin the sky wall so far that it tears, and cut the big eye and mouth openings only at the very end. Mist and refrigerate the pumpkin between displays to slow softening.

This looks like a lot. Where should a first-timer start?

This is an expert level scene that stacks three techniques, so build up to it. Practice raised relief on a simpler single tree first, then add etched branches once the sculpting feels natural. You can also drop the graveyard and just carve the screaming tree to cut the workload.

Your take belongs here, too.

Changed a detail? Made it simpler? Share a photo of your version and tell the community what worked.

Share your pumpkin

More pumpkins like this

You've reached the end · 8 pumpkins
The Patch Report

Fresh pumpkins, in your inbox.

The best new carvings, ideas worth stealing, and how-tos for carving season. Short, seasonal, and gone by November.

A short email during carving season. Unsubscribe anytime. See our privacy policy.