@boo_radley
Sep 5, 2026
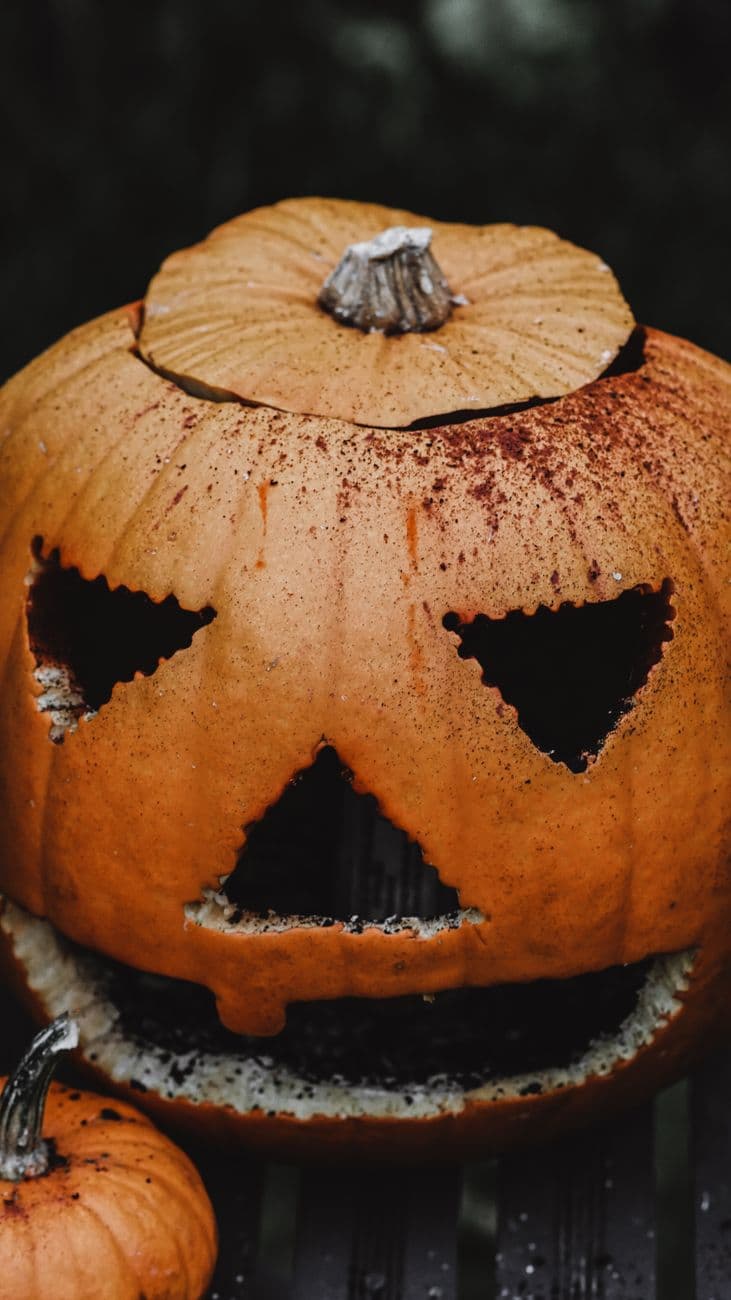
Serrated stare
Serrated triangle eyes and a spattered crown with the lid still on. The pinking-shear edges make it feel bitten, not cut.
No ratings yet · Sign in to rate
Serrated triangle eyes and a spattered crown with the lid still on. The pinking-shear edges make it feel bitten, not cut.
The core trick here is the pinking-shear edge on every opening, a run of tiny zigzag notches that makes the holes look bitten rather than cleanly cut. The plan is simple: carve the standard triangle eyes, nose, and wide mouth, then go back and nick each edge so the light spills through a ragged outline. A dusting of spatter across the top adds a grubby, aged feel.
Written by PumpkinCarvingIdeas.com, inspired by @boo_radley's photo above. These are our suggestions, not instructions from the uploader, and this approach hasn't been tested on their exact carve.
Cut a wide lid around the stem at a slight inward angle so it rests back on without falling in. Scoop the seeds and scrape the front wall down to about an inch thick where the face will go. A thinner wall is far easier to notch cleanly later. Keep the lid nearby since this design shows it sitting back in place.
Mark two triangle eyes angled inward, a smaller triangle nose below and between them, and a broad triangle mouth near the bottom. Keep the base of the mouth well above the pumpkin's seam so the front wall stays strong. Draw the outlines with a washable marker first and step back to check the spacing before any blade touches the skin.
An adult should make all the cuts with a small serrated carving saw. Cut the eyes and nose first with steady, straight strokes, pushing the pieces out from inside. Save the large mouth for last so the face keeps its rigidity while you work. Angle the saw slightly outward so light passes through freely.
This is the signature step. Go around each opening making tiny angled nicks, alternating direction to form a continuous zigzag like pinking shears. Work slowly and keep the notches shallow and even so no single tooth snaps off. Uneven, hand-cut jaggedness is exactly what sells the bitten look, so do not aim for perfection.
For the grimy speckling over the top, dab a stiff brush in a little dark, food-safe paint or coffee and flick it lightly across the upper face and lid. Keep the spray sparse so it reads as texture, not a smear. Let it dry before you light the pumpkin. This step is optional but it ties the whole aged mood together.
Set a battery LED puck or string inside and rest the lid back on at its natural angle. Shoot in near darkness so the jagged edges glow orange against the shadow. A small second pumpkin at the base, as pictured, makes a nice companion in the frame. Skip real candles since the thin notched edges can scorch.
Check things off as you get ready.
Work on a stable surface, keep your free hand out of the cutting path, and have an adult handle sharp tools.
The untouched orange skin across most of the face and lid stays dark and solid.
Lightly scrape the spattered crown area if you want a faint glow to bleed up toward the stem.
The two serrated triangle eyes, the triangle nose, and the wide jagged mouth blaze brightest.
Thin the wall behind the face to about an inch first, which lets the saw bite cleanly without forcing. Keep each notch shallow and leave a little skin between teeth so none stands alone. If a tooth does snap, just even out the neighbors so the gap blends in.
Yes, the resting lid is part of this look and it frames the spattered crown nicely. Cut the lid with an inward bevel so it seats without dropping through. Just leave a small notch or gap at the back for heat from the LED to escape.
Brewed coffee, watered down cocoa, or even a little balsamic flicked from a brush all read as grime and are food safe. Test on the back of the pumpkin first to check the color. Let it dry fully before adding the light so it does not run over the edges.
Changed a detail? Made it simpler? Share a photo of your version and tell the community what worked.
The best new carvings, ideas worth stealing, and how-tos for carving season. Short, seasonal, and gone by November.








Comments (0)