Halloween Pumpkin Carving Contest Β· Starts October 1st Β· $500 in prizes
← Back to ideas
@ai_concepts
Sep 25, 2026
Shrunken Head Bob Jack-O-Lantern With Collar SlotsAI
0

Report this carving

Tell us what is wrong. Reports are private.

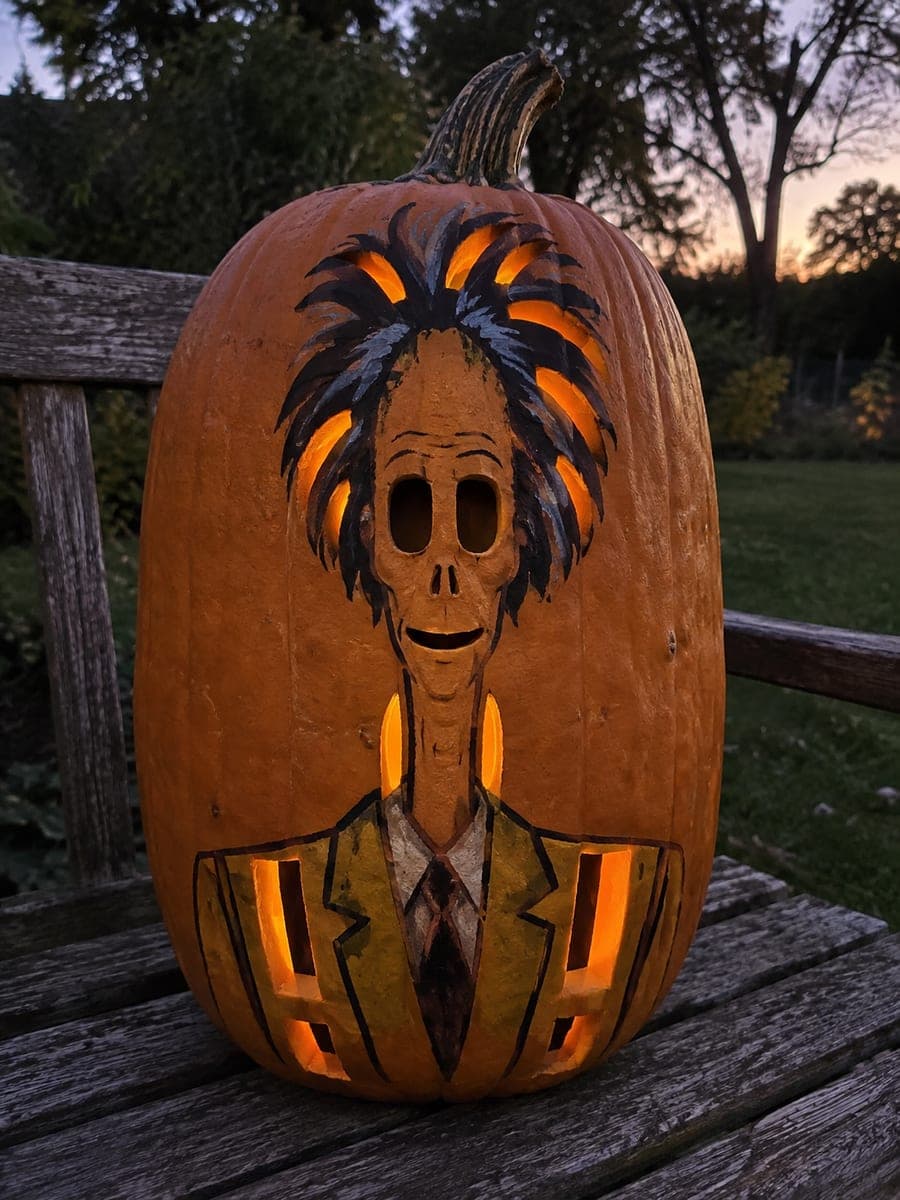
Shrunken Head Bob Jack-O-Lantern With Collar Slots

This intermediate shrunken head Bob pumpkin carving idea uses a flat face stencil with separated eyes, nose, and mouth plus five to eight short hair and collar slots, keeping pupils as broad bars joined to the upper eye rim and teeth rooted to the lip. The outer face contour gets a shallow backing rather than a full cutout. Carve the collar slots with a narrow detail blade to keep the lines sharp against the glowing interior.

No ratings yet Β· Sign in to rate

Comments (0)

  • No comments yet β€” be the first.

Save without an account. Sign in to like or comment.

Our tips for carving a similar design

A flat face stencil separates the eyes, nose, and mouth into distinct openings while five to eight short hair and collar slots surround the face, creating the shrunken, puckered texture of the character without any risky free-floating cuts. The outer face contour is shallow-backed rather than fully cut, adding a subtle raised edge that gives the face depth without weakening the rind. Wide pupil bars connected to the upper eye rim and teeth rooted to the lip keep the most expressive elements structurally sound.

From pumpkin to porch

  1. Prep and transfer

    Clean, gut, and scrape the pumpkin interior in the face area to 2 cm. Transfer the full stencil with a pin tool, marking the face contour shallow-back zone, pupil bar roots, tooth roots, and the slot positions around the face. Use a bold marker to indicate which lines are full cuts versus shallow-back.

  2. Shallow-back the outer face contour

    Use a gouge to shallow-back the outer face contour first, while all surrounding rind is still intact. Remove about half the rind thickness along this boundary line. The resulting shallow ridge separates the face from the surrounding rind visually without creating a fragile free edge.

  3. Cut the eye openings with pupil bars

    Cut each eye opening around its broad pupil bar, which connects at the upper rim of the eye. The bar is the main retained element of each eye so cut toward it carefully from both sides. Each pupil bar should be at least 8 mm wide so it does not droop under its own weight over time.

  4. Cut the nose and mouth with teeth

    Cut the nose opening as a small separate hole, then cut the mouth area around the retained teeth. Each tooth roots to the lip so cut between them from the top down, keeping each tooth base at least 1 cm wide. A blunt tooth tip is more durable than a sharp one over a multi-week display.

  5. Add the hair and collar slots

    Cut the short hair slots above the face and the collar slots below it using a narrow detail saw. Each slot is a small separate opening isolated by solid rind. Keep at least 5 mm of rind between each slot and between any slot and the nearest face opening. Cut all slots in a single pass each.

  6. Light and assess

    Insert an LED and check the design from the front. The shallow-backed face contour should glow dimly as a border around the brighter interior openings. If any slot appears too close to a face opening, stop and leave it rather than risking a structural crack to add one more slot.

Written with AI to match this design

Gather your supplies

Check things off as you get ready.

Work on a stable surface, keep your free hand out of the cutting path, and have an adult handle sharp tools.

Three levels of light

  • Leave intact

    Broad pupil bars in each eye, retained teeth on the lip, and all rind between face elements and surrounding slots

  • Peel & shade

    Outer face contour shallow-backed for a subtle raised-edge mid-glow effect

  • Cut through

    Eye openings around the pupil bars, nose hole, mouth area around the teeth, and all hair and collar slots

Learn the carving basics

Before you start cutting

How wide should the outer face contour shallow-back be?

A shallow-backed band of 5 to 8 mm follows the outer face outline. Wider than that and it becomes a dominant design element rather than a subtle border. Narrower than 5 mm and the effect is barely visible in the final lit design. Mark the width with two parallel lines before gouging so you stay consistent.

My pupil bars look too thick and blocky. Can I thin them after the fact?

You can remove a small amount of material from the open sides of the eye to make the surrounding opening slightly larger, which makes the pupil bar look proportionally thinner. Do this in tiny increments and from both sides equally so the bar stays centered in the eye opening.

How many hair and collar slots is the right number for this design?

Five to eight slots total is the range given in the construction notes, and staying in the lower part of that range is safer on a standard-sized pumpkin. Six slots arranged as three hair and three collar gives a balanced read without crowding the face. More slots do not significantly improve the design and increase cracking risk.

Your take belongs here, too.

Changed a detail? Made it simpler? Share a photo of your version and tell the community what worked.

Share your pumpkin

More pumpkins like this

You've reached the end Β· 8 pumpkins
The Patch Report

Fresh pumpkins, in your inbox.

The best new carvings, ideas worth stealing, and how-tos for carving season. Short, seasonal, and gone by November.

A short email during carving season. Unsubscribe anytime. See our privacy policy.