Halloween Pumpkin Carving Contest Β· Starts October 1st Β· $500 in prizes
← Back to ideas
@ai_concepts
Sep 25, 2026
Expert Shrunken Head Bob Pumpkin With Star CutoutsAI
0

Report this carving

Tell us what is wrong. Reports are private.

Expert Shrunken Head Bob Pumpkin With Star Cutouts

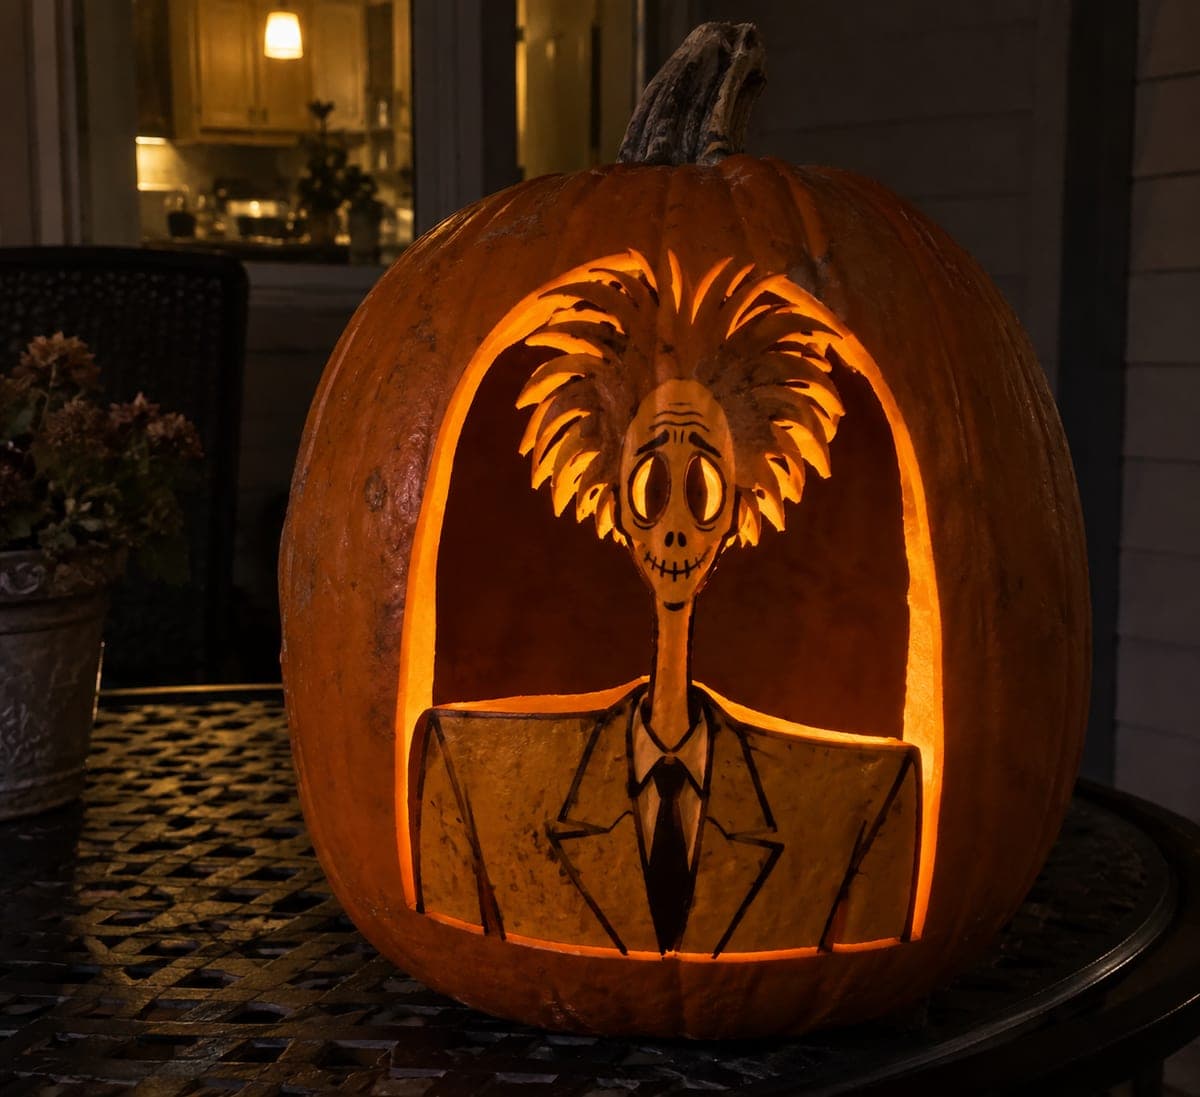
This expert shrunken head Bob pumpkin carving idea keeps the small head connected via upper hair bridges, the long neck, and a jacket anchored at the base and shoulder sides, with an open arch, jacket slots, eye holes, and separate floating star accents all cut through. Tiny facial grooves get a rind backing to preserve the shrunken texture. Add the separate stars around the arch last, spacing them so the pumpkin carving idea reads clearly from a distance.

No ratings yet Β· Sign in to rate

Comments (0)

  • No comments yet β€” be the first.

Save without an account. Sign in to like or comment.

Our tips for carving a similar design

The small head is kept connected via upper hair bridges and the long neck, with the jacket anchored at the base and shoulder sides, creating multiple redundant root points for the most complex version of this design. Separate star accents around the arch are the last cuts made, spaced so the overall composition reads clearly from a distance. Tiny facial groove details receive a rind backing to preserve the shrunken texture effect that defines the character.

From pumpkin to porch

  1. Plan for the full composition

    Map the arch, portrait, and approximate star positions on the pumpkin before cutting anything. Star accents placed too close to the arch edge will thin the frame unacceptably. Mark out star positions in pencil first, then adjust their spacing to maintain at least 2 cm of rind between each star and the arch edge.

  2. Transfer all elements

    Pin-transfer the arch, portrait silhouette, upper hair bridge positions, jacket base and shoulder side anchors, eye holes, facial groove zones, jacket slots, and all star positions. Use three marker colors for cut-through, shallow-back, and root contact areas. Do not begin cutting until all marks are complete.

  3. Shallow-back the facial grooves

    Before cutting the arch, use a fine gouge to shallow-back the tiny facial texture groove areas within the retained head. These grooves simulate the puckered shrunken texture. Work while the portrait is still fully enclosed for maximum stability, removing just the outer skin and a thin rind layer.

  4. Cut the arch and confirm roots

    Cut the open arch background, stopping at each root contact point. After the arch is complete, press each connection point gently to confirm the portrait is secure: upper hair bridges, long neck, jacket base, and shoulder sides should all feel firm. Any looseness needs attention before proceeding.

  5. Cut the eye holes and jacket slots

    Add the eye openings through the retained head and the jacket slot openings within the jacket body. These are medium-difficulty cuts at this stage because the portrait is already suspended. Use a narrow blade and cut each element in a single pass without back-and-forth pressure that could flex the suspended portrait.

  6. Cut the star accents last

    Cut each star shape around the arch as the final step. Use a narrow detail saw and work from the center of each star outward toward each point, keeping all five points roughly equal in length. Space the stars so they frame the arch without crowding each other. Insert the LED immediately after the last star is cut.

Written with AI to match this design

Gather your supplies

Check things off as you get ready.

Work on a stable surface, keep your free hand out of the cutting path, and have an adult handle sharp tools.

Three levels of light

  • Leave intact

    Retained small head, long neck, and jacket as a connected dark-rind portrait; arch frame rind between stars

  • Peel & shade

    Tiny facial groove areas shallow-backed for a subtle shrunken texture under glow

  • Cut through

    Open arch background, eye holes, jacket slots, and separate star accents all cut fully through

Learn the carving basics

Before you start cutting

How do I cut a five-pointed star cleanly on a curved pumpkin surface?

Draw the star in pencil first, making all five points equal length. Cut each side of each point as a straight line from tip to inner corner, making ten short cuts total rather than trying to cut a continuous outline. This segmented approach gives you better control on the curved surface and produces cleaner points than trying to follow the whole perimeter in sequence.

With so many root contact points, how do I keep track of which ones to avoid while cutting?

The color-coded marker system from the transfer step is your main guide. Before each cut, look at the endpoint of the line you are about to cut and confirm whether it terminates at rind or at a marked root point. Stopping just short of a root and then shaving the remaining material gradually is safer than cutting past it accidentally.

The facial grooves are very tiny. Is there a simpler way to achieve the shrunken texture?

Three to four short, closely spaced horizontal lines gouged across the cheeks and forehead suggest wrinkle texture without requiring precise fine work. A V-gouge dragged across the surface in a gentle arc creates readable wrinkle lines quickly. The effect reads from display distance even with modest detail precision.

Your take belongs here, too.

Changed a detail? Made it simpler? Share a photo of your version and tell the community what worked.

Share your pumpkin

More pumpkins like this

You've reached the end Β· 8 pumpkins
The Patch Report

Fresh pumpkins, in your inbox.

The best new carvings, ideas worth stealing, and how-tos for carving season. Short, seasonal, and gone by November.

A short email during carving season. Unsubscribe anytime. See our privacy policy.