Halloween Pumpkin Carving Contest · Starts October 1st · $500 in prizes
← Back to ideas
@ai_concepts
Sep 25, 2026
Beetlejuice Jack-O-Lantern With Glowing Jacket StripesAI
0

Report this carving

Tell us what is wrong. Reports are private.

Beetlejuice Jack-O-Lantern With Glowing Jacket Stripes

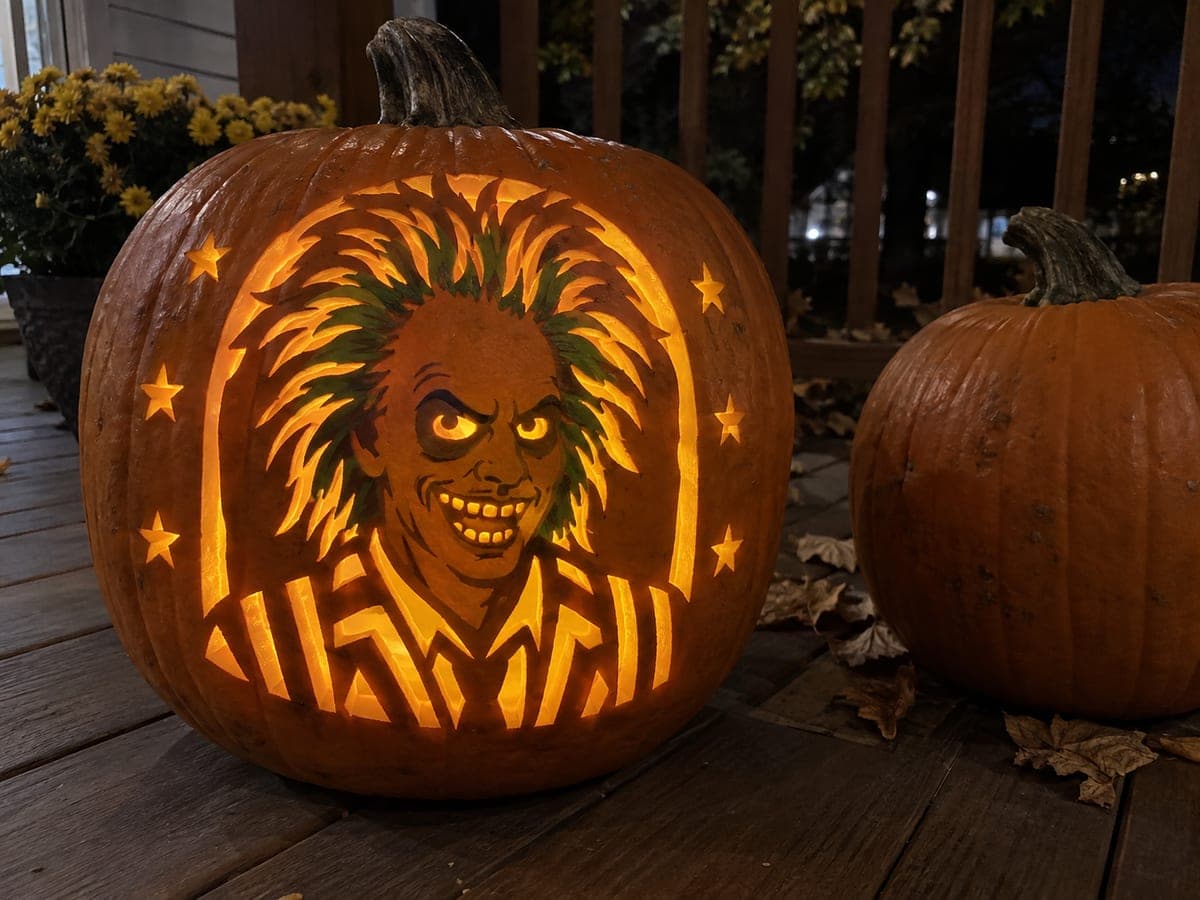
This intermediate Beetlejuice pumpkin carving idea separates the face, hair, and jacket apertures with solid rind dividers while keeping the teeth joined to the lip for stability. Painted character accents fill in the hair and collar details you do not cut. Start with the larger face openings before adding the narrow jacket stripe slots, and use a thin blade for the stripe cuts to keep them crisp.

No ratings yet · Sign in to rate
Comments (0)

  • No comments yet — be the first.

Save without an account. Sign in to like or comment.

Our tips for carving a similar design

Solid rind dividers separate the face, hair, and jacket apertures into distinct zones, while painted character accents fill the details that would be too fragile to cut. The teeth are kept joined to the lip so they do not become free-floating pieces. Starting with the larger face openings before the narrow jacket stripe slots is the right order because wide openings are more forgiving and establish proportional anchors for the narrower cuts that follow.

From pumpkin to porch

  1. Paint hair and character accents

    As with the easy version, apply the green hair paint and any collar color to the intact rind before making any cuts. Painted accents are harder to apply neatly after cutting since the open holes interrupt your painting surface. Let the paint dry fully before taping the stencil over it.

  2. Transfer the full stencil

    Tape the stencil and pin-transfer the eye openings, nose shape, mouth with attached teeth, hair slot positions, and jacket stripe locations. Mark dividing rind strips clearly so you do not accidentally cut them. These dividers are what keeps the zones separate and the design structurally sound.

  3. Cut the eye and nose openings

    Cut the two eye holes first, keeping the solid rind divider between them and between each eye and the adjacent hair slots. Then cut the nose opening if present. Cutting from top to bottom keeps your grip on the most intact part of the pumpkin for the longest possible time.

  4. Cut the mouth with retained teeth

    Cut the open areas of the mouth around the teeth, which remain joined to the upper or lower lip. Use a thin saw for the curves and a narrow blade for the inter-tooth gaps. The teeth do not need to be sharp points; blunt-tipped teeth are more stable and suit the character's exaggerated look.

  5. Cut the hair slots

    Add the short hair slots above the face area using a narrow detail saw. Each slot is separated from its neighbor by an intact rind strip. Keep each slot at least 5 mm wide and cut them with single smooth passes rather than repeated sawing strokes.

  6. Cut the jacket stripe slots

    Add the narrow jacket stripe openings last. These are the most delicate cuts because they are long and narrow. Use a thin, sharp blade and cut from top to bottom in a single pass. Solid rind dividers between each stripe ensure the jacket zone stays together as a unit.

Written with AI to match this design

Gather your supplies

Check things off as you get ready.

Work on a stable surface, keep your free hand out of the cutting path, and have an adult handle sharp tools.

Three levels of light

  • Leave intact

    Solid rind dividers between zones, retained teeth joined to the lip, and painted hair and collar areas

  • Peel & shade

    None specified for this intermediate version

  • Cut through

    Eye holes, nose opening, open mouth areas around the teeth, hair slots, and jacket stripe slots

Learn the carving basics

Before you start cutting

How thin can the jacket stripe slots be before they risk cracking?

Keep each slot at least 4 mm wide. Narrower than that and the saw blade tends to bind, which puts sideways pressure on the rind and can cause cracking. The rind strips between stripes should be at least as wide as the stripes themselves to provide adequate support.

The teeth are attached to the lip but one of them cracked at the base. Can I save it?

Press the cracked tooth back into position and apply a small piece of clear tape to the back surface from inside the pumpkin to hold it. Use a battery LED rather than a candle to keep heat away from the repair. Handled gently, a taped tooth can last several days.

Do I need all the zones to line up perfectly, or is some variation okay?

The zones read correctly even with modest variation in slot width or position. The most important alignment is between the face openings and the hair slots, which should flow naturally from the head shape. Jacket stripes that are slightly uneven actually suit the character's disheveled, otherworldly look.

Your take belongs here, too.

Changed a detail? Made it simpler? Share a photo of your version and tell the community what worked.

Share your pumpkin

More pumpkins like this

You've reached the end · 8 pumpkins
The Patch Report

Fresh pumpkins, in your inbox.

The best new carvings, ideas worth stealing, and how-tos for carving season. Short, seasonal, and gone by November.

A short email during carving season. Unsubscribe anytime. See our privacy policy.