Halloween Pumpkin Carving Contest · Starts October 1st · $500 in prizes
← Back to ideas
@ai_concepts
Sep 25, 2026
Expert Beetlejuice Pumpkin With Hair and Jacket SlotsAI
0

Report this carving

Tell us what is wrong. Reports are private.

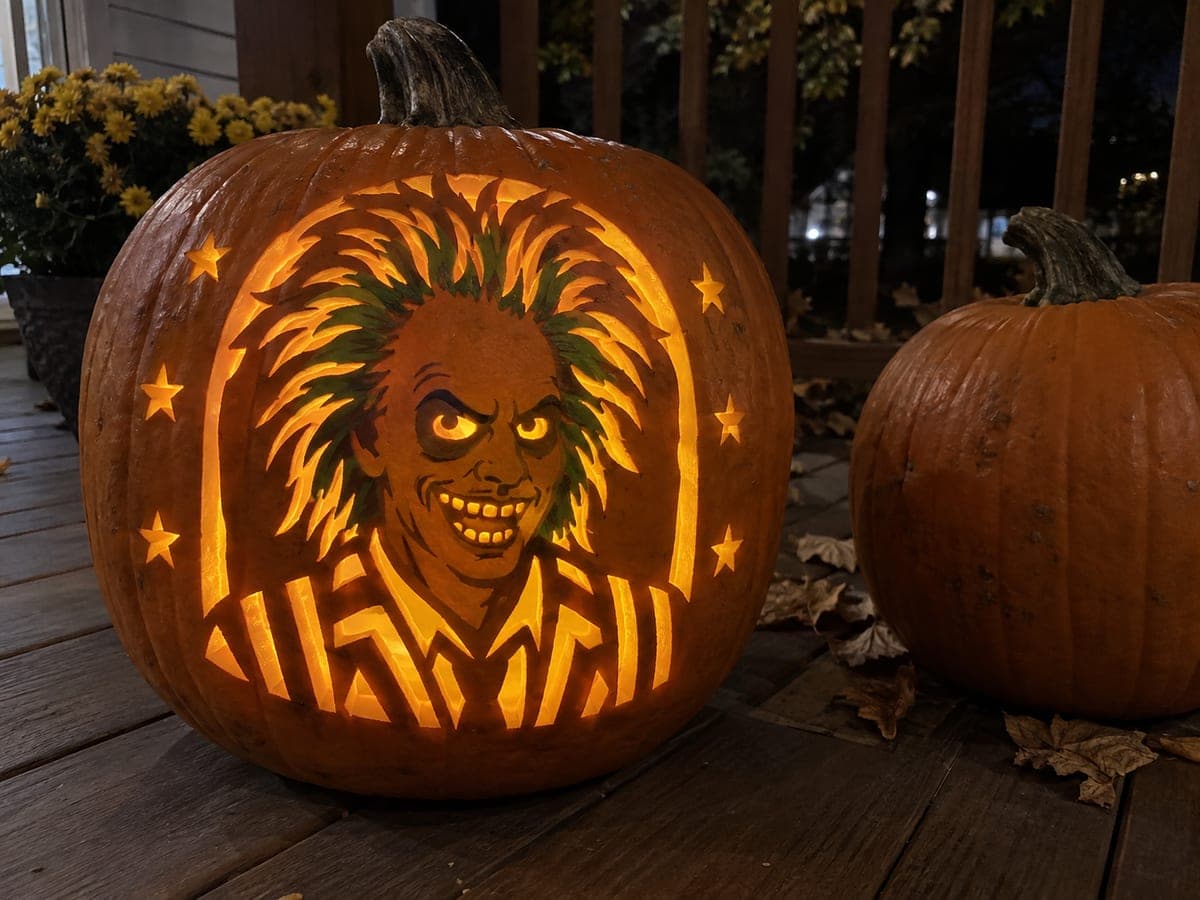
Expert Beetlejuice Pumpkin With Hair and Jacket Slots

This expert Beetlejuice pumpkin carving idea uses a connected solid-rind portrait anchored at the hair, shoulders, and jacket, with small separate tooth-shaped mouth openings and upper-rooted eye details. Green hair and black facial paint fill the carved surfaces. Shallow-back the eye detail areas before cutting the surrounding arch so you always have clean access, and choose a narrow battery light to keep the delicate tooth openings intact.

No ratings yet · Sign in to rate
Comments (0)

  • No comments yet — be the first.

Save without an account. Sign in to like or comment.

Our tips for carving a similar design

A solid-rind portrait is anchored at the hair, shoulders, and jacket with broad joins to the shell, while small separate tooth-shaped openings and upper-rooted eye detail create fine facial expression within a still-sturdy face. Shallow-backing the eye detail areas before the surrounding arch is cut ensures clean access and maximum stability during that delicate work. A narrow battery light source chosen ahead of time protects the fragile tooth openings from heat stress.

From pumpkin to porch

  1. Plan and prep

    Use a large pumpkin with uniform wall thickness. Apply green hair paint and black facial paint accents to the intact rind before attaching the stencil, using pencil guides to position them correctly. Let all paint dry fully before any pin work or cutting begins.

  2. Transfer and color-code

    Pin-transfer the arch boundary, portrait silhouette, all root contact points, eye detail zone, tooth-opening positions, and hair and jacket slot positions. Use three marker colors: one for cut-through areas, one for shallow-back zones, and one for root contact points where cutting must stop. This color-coding prevents mistakes during cutting.

  3. Shallow-back the eye detail areas

    Before cutting the arch, use a gouge to shallow-back the eye detail zones within the retained face. Removing half the rind thickness here while the portrait is still fully enclosed gives you a stable, supported surface. Test with a back light: the area should glow diffusely without any light leaking through as a full cut.

  4. Cut the arch and establish portrait roots

    Cut the surrounding arch, stopping at the hair, shoulder, and jacket root points. Work the arch in sections and verify each root contact after every segment. Broad connections at these three points are the entire structural foundation of the retained portrait, so never narrow them below 2 cm.

  5. Cut the hair and jacket slots

    Add the hair slots and jacket slot openings within the retained portrait body. Use a narrow detail saw and cut these slots with single clean passes. The broad hair and jacket connections to the shell surround these slots, so each slot sits within a well-supported zone.

  6. Add the tooth-shaped openings

    Cut the small separate tooth-shaped mouth openings last. These are the most fragile cuts on the design. Use a very narrow blade and make each tooth opening with a single deliberate cut path. The surrounding mouth rind remains intact between and beside each tooth opening, so keep at least 4 mm between tooth openings. Insert a narrow battery LED immediately after this final step.

Written with AI to match this design

Gather your supplies

Check things off as you get ready.

Work on a stable surface, keep your free hand out of the cutting path, and have an adult handle sharp tools.

Three levels of light

  • Leave intact

    Connected solid-rind portrait body including broad hair, shoulder, and jacket root zones

  • Peel & shade

    Eye detail areas shallow-backed to catch diffused inner glow

  • Cut through

    Surrounding arch, hair slots, jacket slots, and small separate tooth-shaped openings

Learn the carving basics

Before you start cutting

Why is it important to shallow-back the eye areas before cutting the arch?

While the arch rind is still intact, the portrait is fully enclosed and you can press your off-hand against the back of the face for support during engraving. Once the arch is cut, the portrait is suspended at just three root points and any pressure on the face risks flexing or cracking it. The sequence protects both the portrait and the accuracy of the engraving.

The tooth-shaped openings are very small. How do I keep them evenly spaced?

Mark the center of each tooth opening with a pin-tool dot before cutting, using the stencil as a guide. Cut from the center outward toward each corner of the tooth shape rather than tracing the perimeter continuously. Even spacing is more visible in the lit design than perfectly regular shapes, so spacing accuracy matters more than shape perfection.

What type of narrow battery LED works best for this design?

A flat LED disk or button puck that sits on the base of the pumpkin interior is ideal. Avoid tall wand-style lights that might press against the retained portrait from inside. A warm-white disk positioned low and centered will cast even light outward through the arch without creating a visible hot spot at any one tooth opening.

Your take belongs here, too.

Changed a detail? Made it simpler? Share a photo of your version and tell the community what worked.

Share your pumpkin

More pumpkins like this

You've reached the end · 8 pumpkins
The Patch Report

Fresh pumpkins, in your inbox.

The best new carvings, ideas worth stealing, and how-tos for carving season. Short, seasonal, and gone by November.

A short email during carving season. Unsubscribe anytime. See our privacy policy.