@toothpick_tessa
Sep 5, 2026

Side-eye on the steps
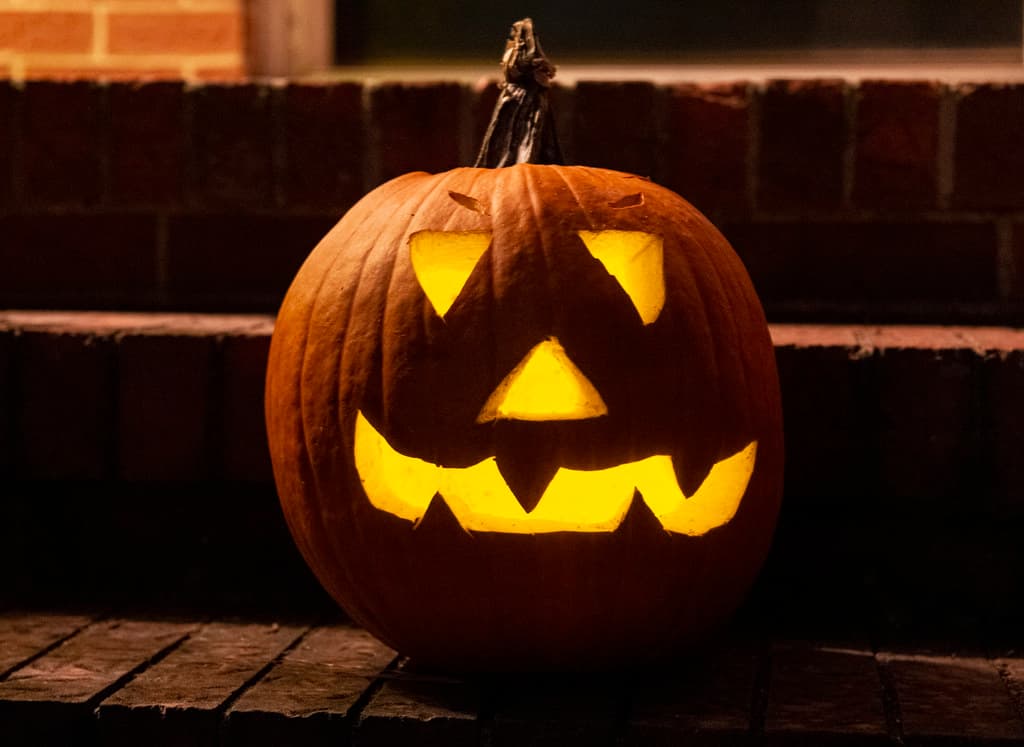
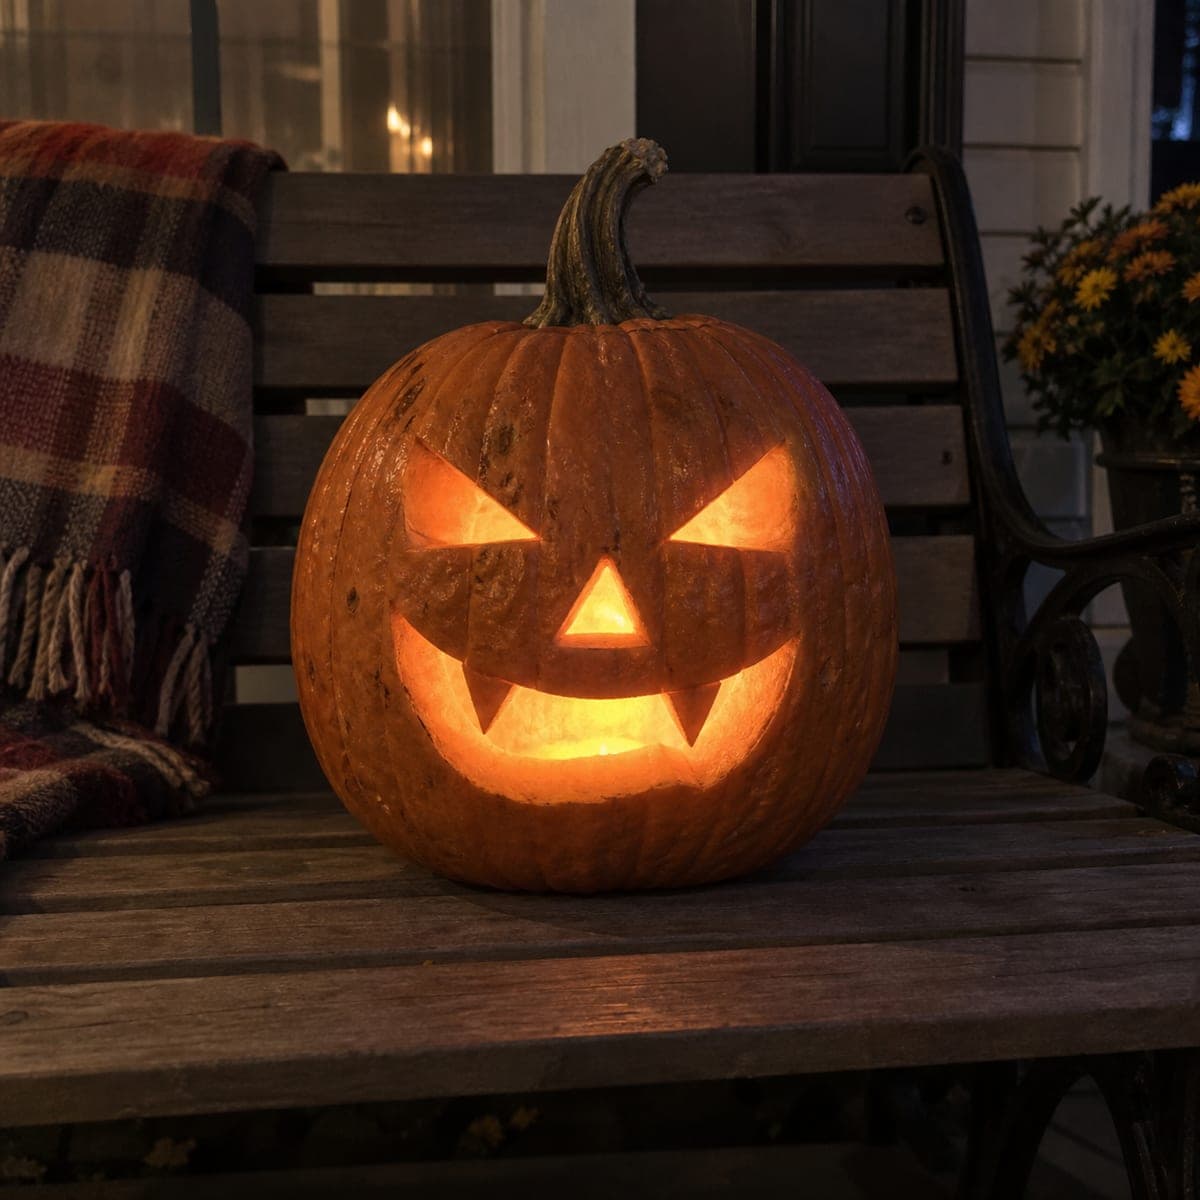
Slanted brows, dot pupils, and a jagged sneer glowing on the brick steps. Same porch, new attitude.
No ratings yet · Sign in to rate
Slanted brows, dot pupils, and a jagged sneer glowing on the brick steps. Same porch, new attitude.
The whole personality here comes from the slant. Angled brows and narrow, tilted eyes give the face a sideways glare, while tiny dot pupils and a jagged toothy mouth finish the mean grin. Plan every cut as a full cutout so the light pours through cleanly, and save the big mouth for last so the face holds its shape while you work.
Written by PumpkinCarvingIdeas.com, inspired by @toothpick_tessa's photo above. These are our suggestions, not instructions from the uploader, and this approach hasn't been tested on their exact carve.
Choose a round pumpkin with a flat front and no soft spots so the face reads clearly. Cut the lid at an angle around the stem so it drops back in without falling through, then scoop out the seeds and pulp. Thin the inside of the front wall to about one inch so your blade glides through. A thinner wall makes the fine mouth teeth much easier to carve.
Tape your stencil flat against the front, smoothing out wrinkles as you go. Poke closely spaced dots along every line with a pin or a poker tool, paying extra attention to the sharp brow points and the zigzag teeth. Peel the paper away and connect the dots lightly with a pencil so you can see the full slanted layout. Double check that both eyes tilt the same direction before you cut.
Start with the smaller shapes so the pumpkin stays sturdy. Cut the two angled eyes and the sharp downward brows with a small serrated saw, easing the tip in and letting the blade do the work. Keep the pointed corners crisp since those points carry the mean expression. Gently push each piece out toward you rather than pulling it back inside.
For the small dot pupils, use a narrow drill bit or the tip of your poker to make two clean round holes inside the eyes. These little dots are what give the face its focused side-eye stare, so keep them small and even. Carve the triangular nose next, cutting slowly so the narrow tip does not snap. Clear any pulp from the back of each opening so light passes through.
Save the wide mouth for the end since it removes the most material. Work from one corner across, cutting each tooth point carefully and leaving the connecting zigzag intact so the grin stays sharp. Avoid making the teeth too thin or they may sag under warm light. Take your time on the pointed ends that give the sneer its bite.
Drop in a battery LED tea light or a small puck light for a steady, safe glow, and skip real candles. Set the pumpkin on a brick step or porch ledge and check the face from a few feet back. If any opening looks dim, scrape a little more pulp from the inside edge to brighten it. Snap your photo in low light so the yellow glow really pops against the dark background.
Check things off as you get ready.
Work on a stable surface, keep your free hand out of the cutting path, and have an adult handle sharp tools.
The outer skin across the face and cheeks stays untouched and dark, framing the glow.
You could shave a thin halo around the brows or eye corners to add a soft dim orange edge.
The eyes, dot pupils, nose, and jagged mouth are cut all the way through for the brightest yellow light.
The angle is everything, so make sure both eyes tilt in the same direction and the inner corners point down toward the nose. Keep the brows as sharp wedges above them. Carving the pupils as small offset dots aims the stare and locks in the attitude.
They can if you cut them too skinny, so keep each tooth point a bit wider at the base than at the tip. Thinning the front wall to about an inch first helps the saw move cleanly without forcing it. Cut the mouth last so the surrounding pumpkin stays strong while you carve.
A battery LED tea light or small puck light gives the steady, even yellow glow you see here and is safe to leave on brick steps. Warm white LEDs read closest to a candle color. Never use a real flame, especially near a wood or brick porch where the pumpkin sits close to other surfaces.
Changed a detail? Made it simpler? Share a photo of your version and tell the community what worked.
The best new carvings, ideas worth stealing, and how-tos for carving season. Short, seasonal, and gone by November.



Comments (0)