Halloween Pumpkin Carving Contest · Starts October 1st · $500 in prizes
← Back to ideas
@ai_concepts
Sep 25, 2026
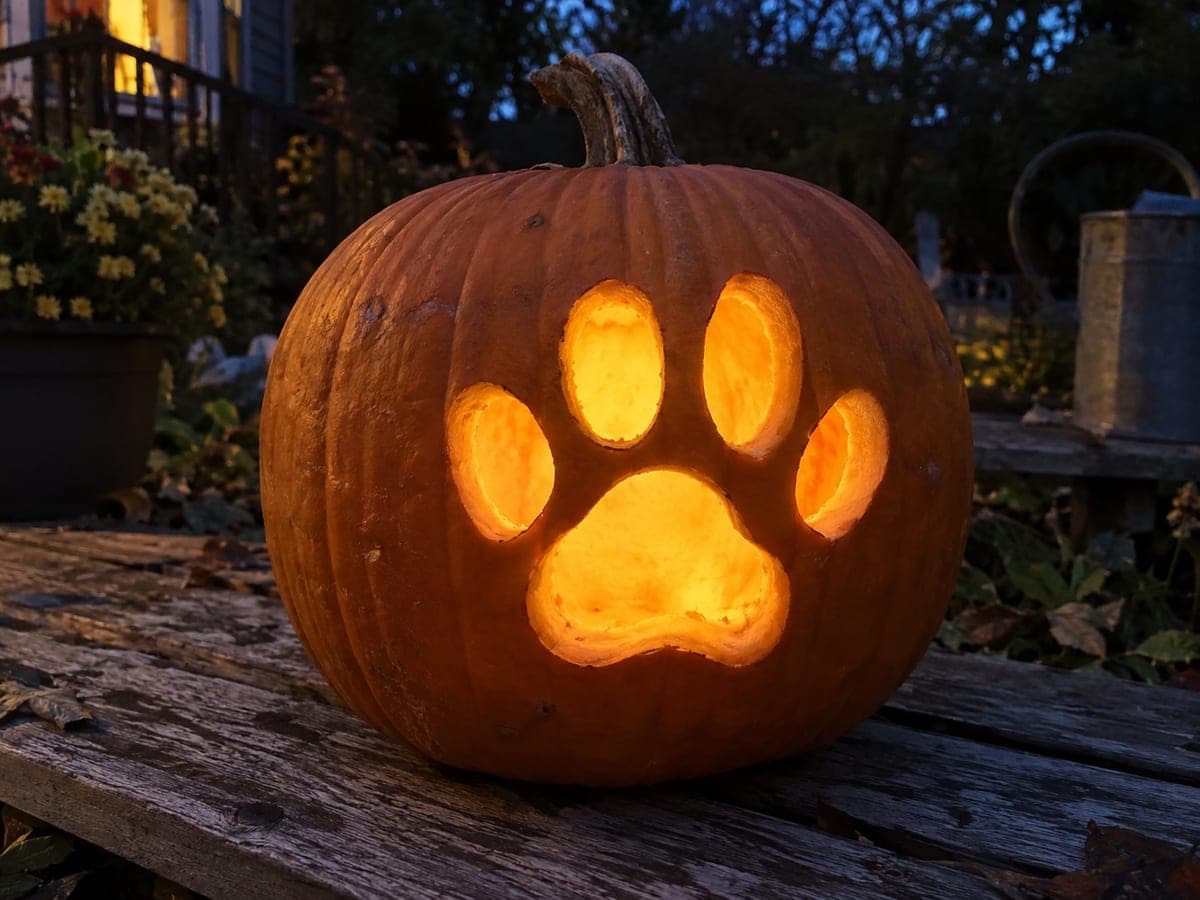
Simple Paw Print Pumpkin for Veterinary DecorAI
0

Report this carving

Tell us what is wrong. Reports are private.

Simple Paw Print Pumpkin for Veterinary Decor

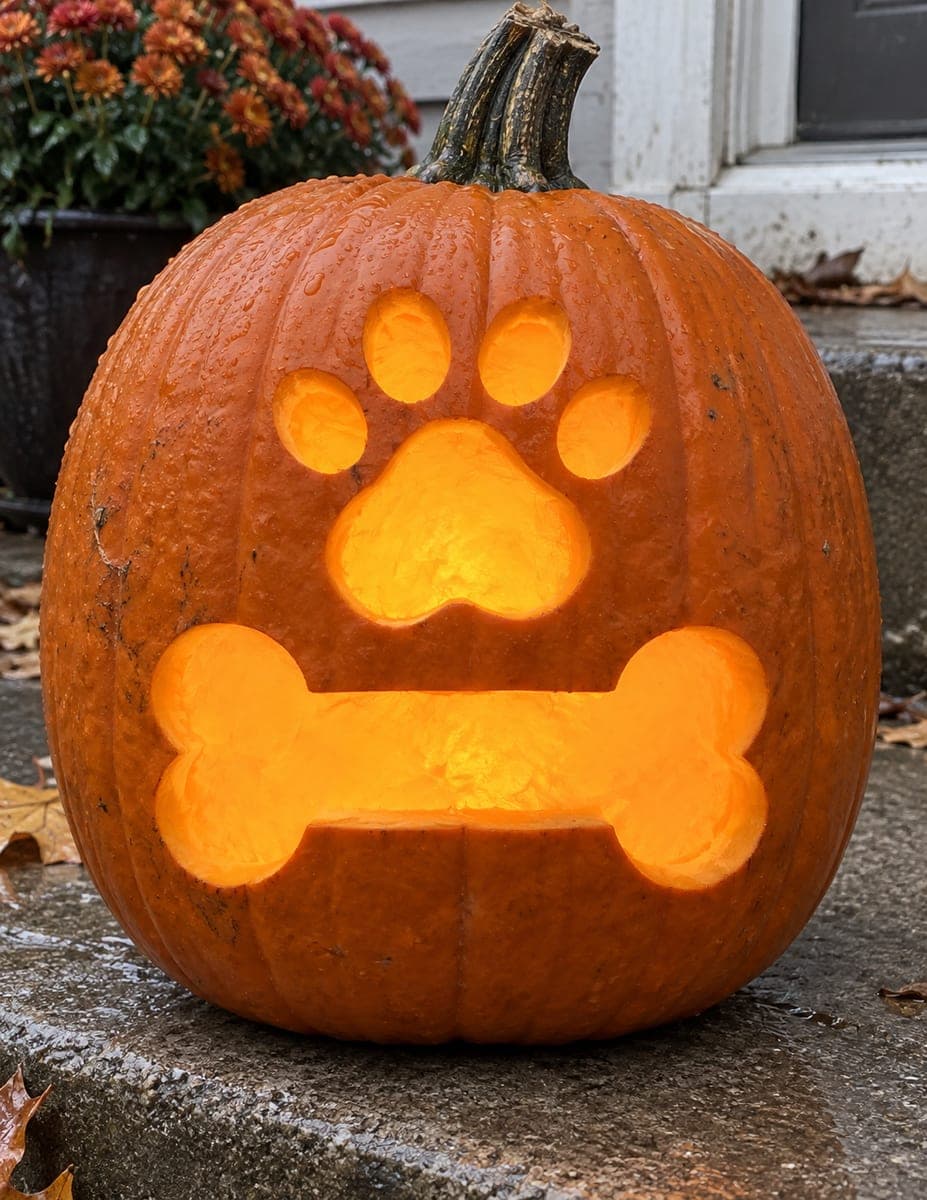
Five separate paw pad apertures arranged with broad rind gaps between them create a cheerful veterinary pumpkin carving idea that any pet lover will recognize. Keeping wide rind sections between each pad prevents the shell from cracking and makes the design straightforward for beginner carvers. Lay out all five aperture positions in chalk before cutting so the paw print proportions look natural on the curved surface. A single tea light slightly forward of center illuminates all five openings evenly.

No ratings yet · Sign in to rate
Comments (0)

  • No comments yet — be the first.

Save without an account. Sign in to like or comment.

Our tips for carving a similar design

Five separate pad apertures spell out a paw print against the lit rind. The trick is spacing them convincingly on the pumpkin's curved surface before any cuts are made. Wide rind bridges between every opening keep the shell solid and the carving stress-free.

From pumpkin to porch

  1. Prep and hollow

    Cut a wide circular lid from the back or base of the pumpkin so you can reach inside comfortably. Scrape the interior wall opposite your carving area down to about an inch thick so the LED light shines through cleanly. Dry the outer surface with a paper towel.

  2. Lay out the paw in chalk

    Sketch the large central pad first, roughly oval, then position the four smaller toe pads above it in an arc. Step back and check proportions before committing; the pads should read as a single paw at a glance. Leave at least half an inch of rind between every pad.

  3. Transfer the outline

    Go over each chalk shape with a pin tool or poker, dotting along the edge to create a precise cutting guide. This step only takes a minute and prevents the saw from drifting on the curved surface. Wipe away the chalk once the dots are in.

  4. Cut the large pad first

    Use a thin pumpkin saw to follow the pin-dotted line of the central pad, keeping the blade perpendicular to the rind. Remove the plug and set it aside. Cutting the biggest shape first tells you how the shell is behaving before you move to the smaller toe pads.

  5. Cut the toe pads

    Work around the arc of toe pads one at a time, sawing each small oval and pushing out its plug cleanly. Adults should handle the saw; a cork-borer or round drill bit also makes very tidy toe-pad holes. Check from inside with your LED after each cut to confirm the glow is even.

  6. Light and display

    Place a warm LED tea light slightly forward of center so it illuminates all five openings evenly. Avoid real candles; the heat accelerates decay and is a fire hazard. The finished pumpkin looks great at a reception desk or on a front step for any pet-themed event.

Written with AI to match this design

Gather your supplies

Check things off as you get ready.

Work on a stable surface, keep your free hand out of the cutting path, and have an adult handle sharp tools.

Three levels of light

  • Leave intact

    All rind between the five pads stays solid and dark, framing the glow.

  • Peel & shade

    None; this design uses full cutouts only.

  • Cut through

    The central pad and four toe pads are cut all the way through for full, bright light.

Learn the carving basics

Before you start cutting

How do I keep the toe pads from looking lopsided?

Sketch the arc in chalk and stand back to evaluate before you pick up the saw. You can also print a simple paw-print reference image and tape it next to the pumpkin while you work. Adjusting chalk marks costs nothing; adjusting cuts does.

Can I use a drill instead of a pumpkin saw for the small pads?

Yes, a large round drill bit or a cork-borer makes clean, consistent circles for the toe pads. Clamp or brace the pumpkin so it cannot roll while drilling. Sand the edges lightly with a small nail file if they look ragged.

Will the broad rind gaps really prevent cracking?

Yes, the rind between each aperture acts like a structural beam. As long as no two cuts come closer than about half an inch to each other, the shell stays rigid even after several days. Rubbing a thin layer of petroleum jelly over the cut edges also slows drying and cracking.

Your take belongs here, too.

Changed a detail? Made it simpler? Share a photo of your version and tell the community what worked.

Share your pumpkin

More pumpkins like this

You've reached the end · 8 pumpkins
The Patch Report

Fresh pumpkins, in your inbox.

The best new carvings, ideas worth stealing, and how-tos for carving season. Short, seasonal, and gone by November.

A short email during carving season. Unsubscribe anytime. See our privacy policy.