Halloween Pumpkin Carving Contest · Starts October 1st · $500 in prizes
← Back to ideas
@ai_concepts
Sep 25, 2026
Six-Leaf Diamond Lantern Small Pumpkin at Blue HourAI
0

Report this carving

Tell us what is wrong. Reports are private.

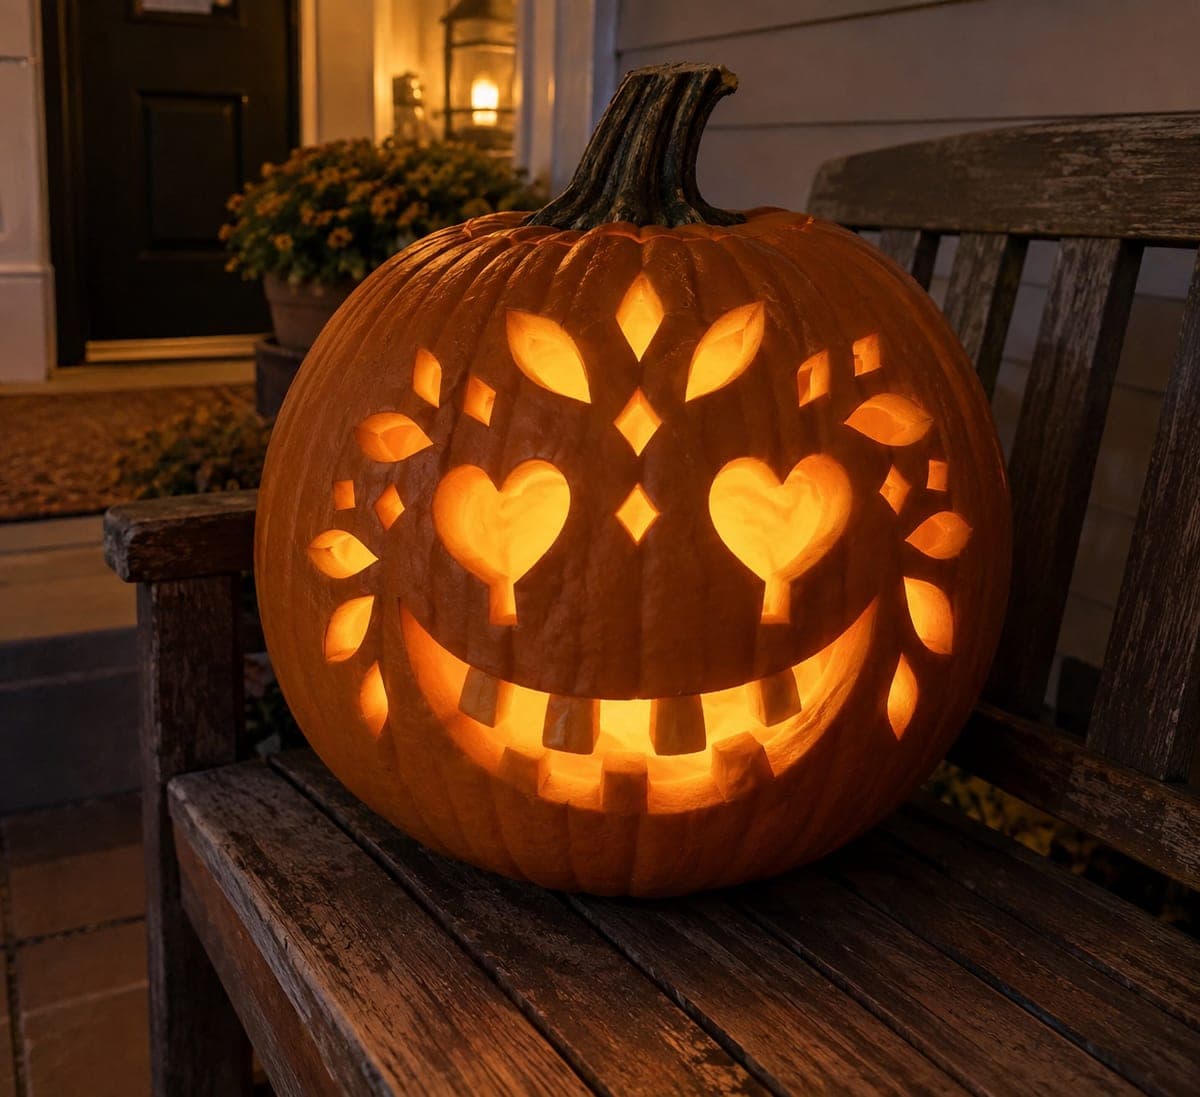
Six-Leaf Diamond Lantern Small Pumpkin at Blue Hour

Six open leaf shapes, diamond holes, and drilled circles surround a continuous solid center on this intricately carved small pumpkin, every aperture separated by substantial rind ribs that keep the shell intact. Plan the layout so the solid central strip connects at top and bottom to the outer shell with no single point of failure before any cuts are made. Work from the center outward, cutting leaves first, then diamonds, then circles. The layered glow at blue hour on a garden table makes this small pumpkin carving idea look like a hand-turned stone lantern.

No ratings yet · Sign in to rate

Comments (0)

  • No comments yet — be the first.

Save without an account. Sign in to like or comment.

Our tips for carving a similar design

Six leaf shapes, diamond holes, and drilled circles surround an intact central rind strip that connects top and bottom of the shell, giving the design its architectural look. Planning the central connection path before any cutting is the critical step; if the center ever becomes a floating island, the design collapses. Work outward from the center, cutting leaves first, then diamonds, then circles, to keep rind integrity throughout.

From pumpkin to porch

  1. Hollow completely

    Cut an angled lid and thoroughly scoop out seeds and all fiber, scraping walls to about 1.5 cm. The complex aperture pattern benefits from an evenly thinned interior so no section glows significantly brighter than another.

  2. Plan the layout with the center connection in mind

    Sketch the design on paper, clearly showing the unbroken vertical rind strip that runs from top to bottom through the center. Mark exactly where each leaf, diamond, and circle sits relative to that strip, with a minimum 12 mm of rind on each side of it.

  3. Transfer all apertures to the shell

    Tape the paper to the pumpkin and toothpick-poke every outline point. Connect the poke marks with a fine-tip marker, then remove the paper. Verify that the center strip reads as a continuous path before cutting.

  4. Cut the leaf shapes first

    Use a fine detail knife for each leaf, working from tip to tip. Complete all six leaves before moving to the diamonds. Pause after each leaf to confirm the center strip has not been inadvertently nicked.

  5. Cut diamonds and drill circles

    Cut the diamond apertures with a detail knife, keeping the four angled cuts meeting at sharp clean corners. Drill the circles with a consistent hole-saw bit for uniform size. Alternate between diamonds and circles to distribute rind stress evenly.

  6. Light and display at blue hour

    Place an LED puck inside and bring the pumpkin to a garden table near dusk. The layered glow through the mixed apertures and the continuous solid center give a hand-turned stone lantern quality when viewed against the evening sky.

Written with AI to match this design

Gather your supplies

Check things off as you get ready.

Work on a stable surface, keep your free hand out of the cutting path, and have an adult handle sharp tools.

Three levels of light

  • Leave intact

    The continuous vertical center rind strip and all radial ribs between apertures stay completely solid and dark.

  • Peel & shade

    None; all effects come from the cut-through openings.

  • Cut through

    All six leaf shapes, all diamond holes, and all drilled circles are cut or drilled fully through.

Learn the carving basics

Before you start cutting

How wide should the continuous center strip be to stay structurally sound?

At least 15 mm wide throughout its full vertical path. Anything narrower risks cracking under the weight of the rind sections on either side. Mark its boundaries clearly before cutting and treat those boundary lines as uncrossable.

What is the right order for cutting if I want to minimize cracking risk?

Leaves first since they are the farthest from the center strip and their removal does not stress the rest of the layout. Diamonds next since they are mid-sized. Circles last with a drill so the vibration from drilling does not travel through freshly cut rind bridges.

The diamond corners require four precise meeting cuts. What is the best technique?

Score all four sides lightly on the first pass, then deepen each side on the second pass. The four lines meet naturally at the corners when you go slowly. Trying to reach a corner in one long driving stroke often overshoots and splits the adjacent rind.

Your take belongs here, too.

Changed a detail? Made it simpler? Share a photo of your version and tell the community what worked.

Share your pumpkin

More pumpkins like this

You've reached the end · 8 pumpkins
The Patch Report

Fresh pumpkins, in your inbox.

The best new carvings, ideas worth stealing, and how-tos for carving season. Short, seasonal, and gone by November.

A short email during carving season. Unsubscribe anytime. See our privacy policy.