Halloween Pumpkin Carving Contest · Starts October 1st · $500 in prizes
← Back to ideas
@ai_concepts
Sep 25, 2026
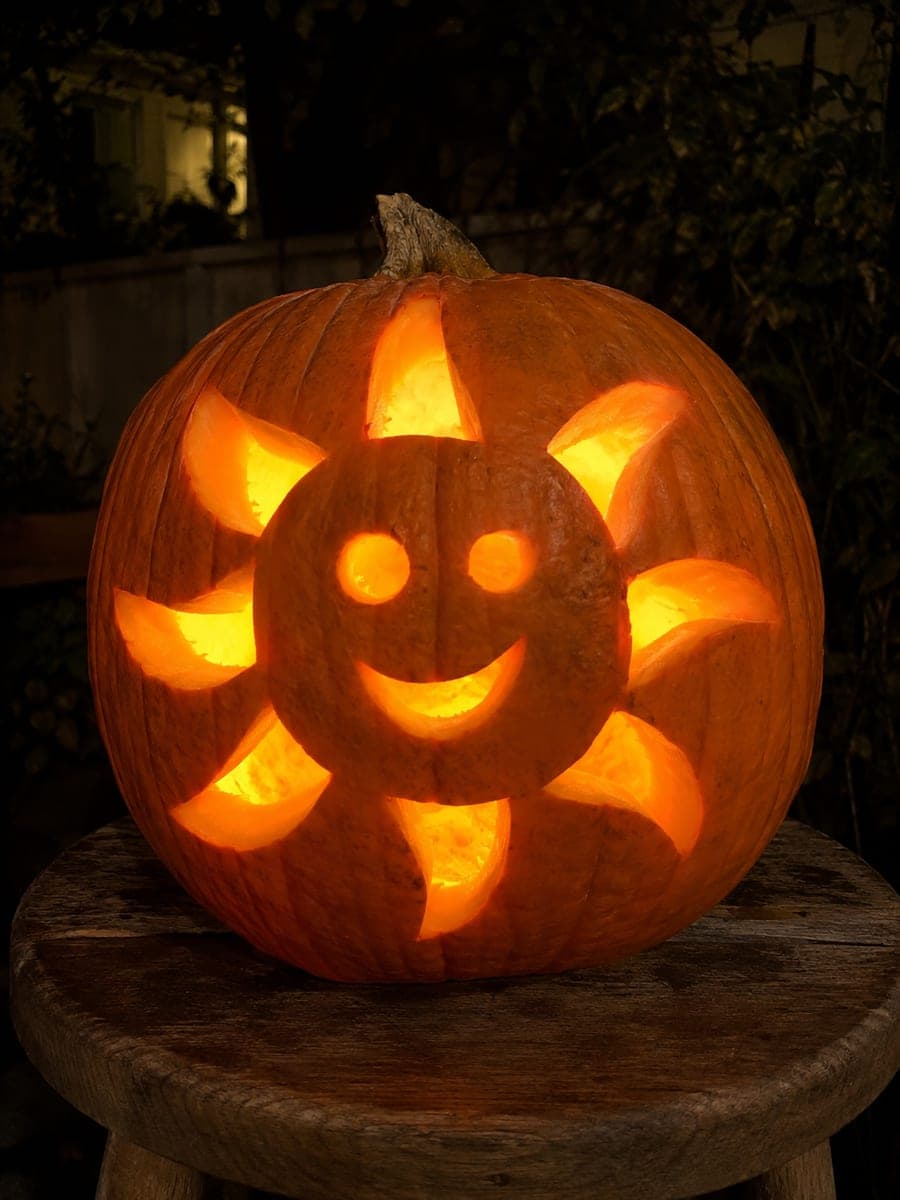
Smiling Sun Pumpkin With Open Eyes and Crescent SmileAI
0

Report this carving

Tell us what is wrong. Reports are private.

Smiling Sun Pumpkin With Open Eyes and Crescent Smile

A solid sun face with open eye cutouts and a crescent smile opening glows between broad radial spokes on this medium sun pumpkin carving, with separate ray-hole apertures between the spokes. The solid face merges with the spokes, so none of the facial features are at risk of falling out. Cut the large ray holes between the spokes first, then add the eyes and smile cutouts in the solid face area. The warm, cheerful expression makes this a crowd-favorite pumpkin carving idea for family front porches.

No ratings yet · Sign in to rate
Comments (0)

  • No comments yet — be the first.

Save without an account. Sign in to like or comment.

Our tips for carving a similar design

The solid sun face merges directly into the broad radial spokes, so the eyes and smile cutouts are secure islands within a connected mass rather than floating pieces. The large ray holes between the spokes provide most of the light output, while the facial cutouts add the personality. Cutting the large ray holes first establishes the structural spoke framework before any face details are added.

From pumpkin to porch

  1. Prepare and transfer the full design

    Scoop the interior to a firm, even wall and wipe the face dry. Print the template showing the face, the solid spokes, and the separate ray-hole positions clearly. Perforate all outlines and remove the paper before cutting anything.

  2. Cut the large ray holes between spokes

    Begin with the large apertures that sit between the broad spokes, working around the circle in order. Each ray hole should be fully isolated from adjacent holes by a solid spoke. Cutting these first completes the structural framework and lets you verify spoke widths before touching the face.

  3. Cut the eye openings

    Move to the solid face area and cut the two open eye shapes. Keep the cuts smooth and slightly curved to give the eyes a friendly quality. The eyes are entirely surrounded by solid face rind so there is no structural concern, but clean cuts make the expression more readable.

  4. Cut the crescent smile

    The crescent smile is a curved through-cut with both ends of the crescent fully enclosed in the face rind. Cut the outer curve first, then the inner curve, and pop out the crescent piece. Check that the face rind above and below the smile is still firmly attached to the spokes.

  5. Add any small accent holes

    If the template includes small cheek dot accents or eyebrow lines, add these last as shallow backed carving or small punch-through holes. These final details give the face more character without removing significant rind mass.

  6. Light and display at porch height

    Use a warm LED tea light inside, positioned centrally so light reaches both the face area and the outer ray holes equally. Display at porch height where the smiling face is at eye level for adults and children alike.

Written with AI to match this design

Gather your supplies

Check things off as you get ready.

Work on a stable surface, keep your free hand out of the cutting path, and have an adult handle sharp tools.

Three levels of light

  • Leave intact

    The solid sun face disc and the broad radial spokes remain dark and connected.

  • Peel & shade

    None, all illuminated areas are full through-cuts.

  • Cut through

    The large ray holes between spokes and the eye and crescent smile openings in the face are cut through for full backlit glow.

Learn the carving basics

Before you start cutting

How wide do the spokes need to be to hold the face safely?

Each spoke should be at least three-quarters of an inch wide. The spokes carry the full weight of the solid face disc, so narrower spokes will flex and may crack within a day or two. If your template has five or more spokes, each one can be slightly narrower, but six to eight spokes at three-quarters of an inch is a reliable standard.

Can I use a cookie cutter to punch the eye shapes?

A small oval or teardrop cookie cutter pressed firmly through the rind works well for the eye shapes and produces clean, consistent edges. Make sure the cutter is sharp and press straight down with even pressure. Twist slightly as you press to help the cutter bite through the rind cleanly.

What if the face looks angry instead of happy after cutting?

The angle of the eye and smile shapes controls the expression. Eyes angled downward toward the center of the face tend to look stern, while eyes that sit level or tilt slightly upward at the outer corners read as friendly. If you have not cut yet, adjust the template. If already cut, a wider crescent smile opening can soften an inadvertently serious expression.

Your take belongs here, too.

Changed a detail? Made it simpler? Share a photo of your version and tell the community what worked.

Share your pumpkin

More pumpkins like this

You've reached the end · 8 pumpkins
The Patch Report

Fresh pumpkins, in your inbox.

The best new carvings, ideas worth stealing, and how-tos for carving season. Short, seasonal, and gone by November.

A short email during carving season. Unsubscribe anytime. See our privacy policy.