Halloween Pumpkin Carving Contest · Starts October 1st · $500 in prizes
← Back to ideas
@ai_concepts
Sep 25, 2026
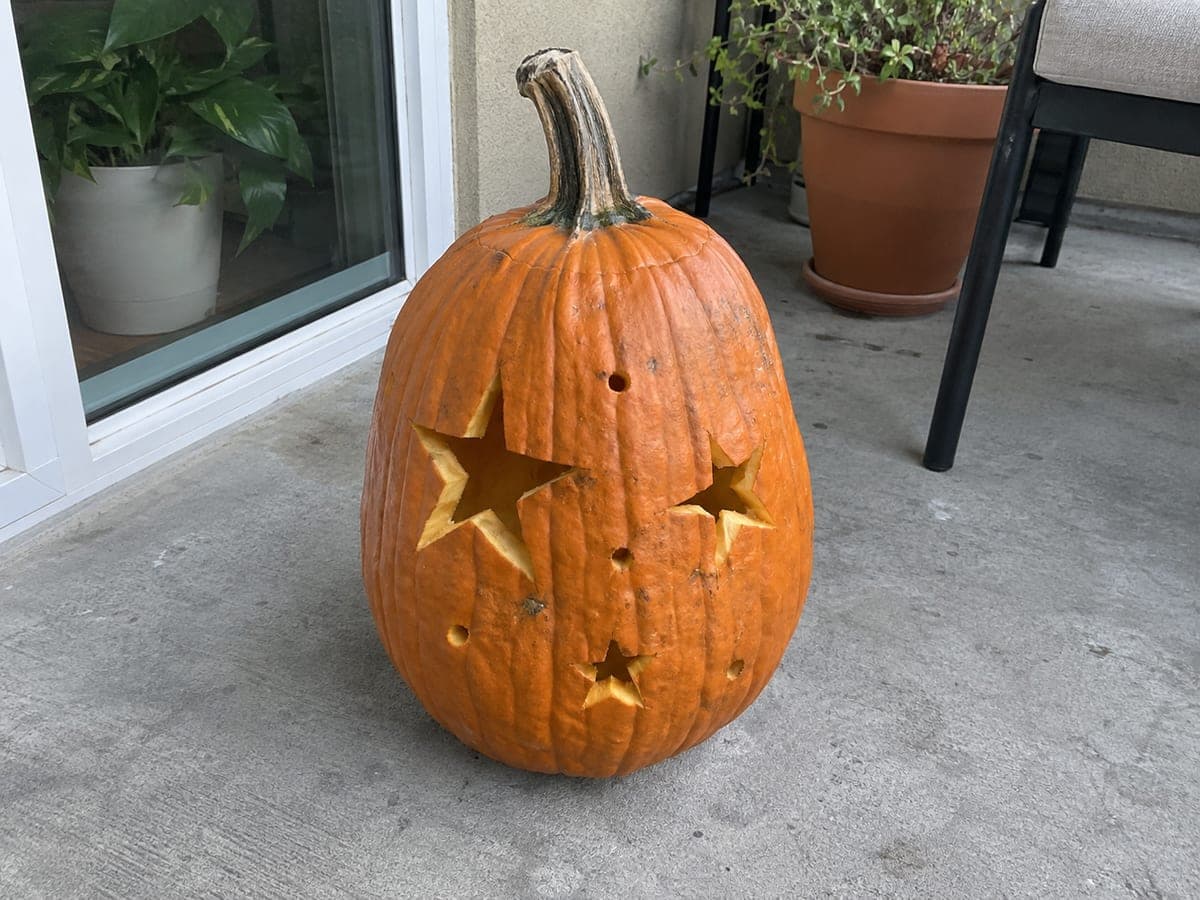
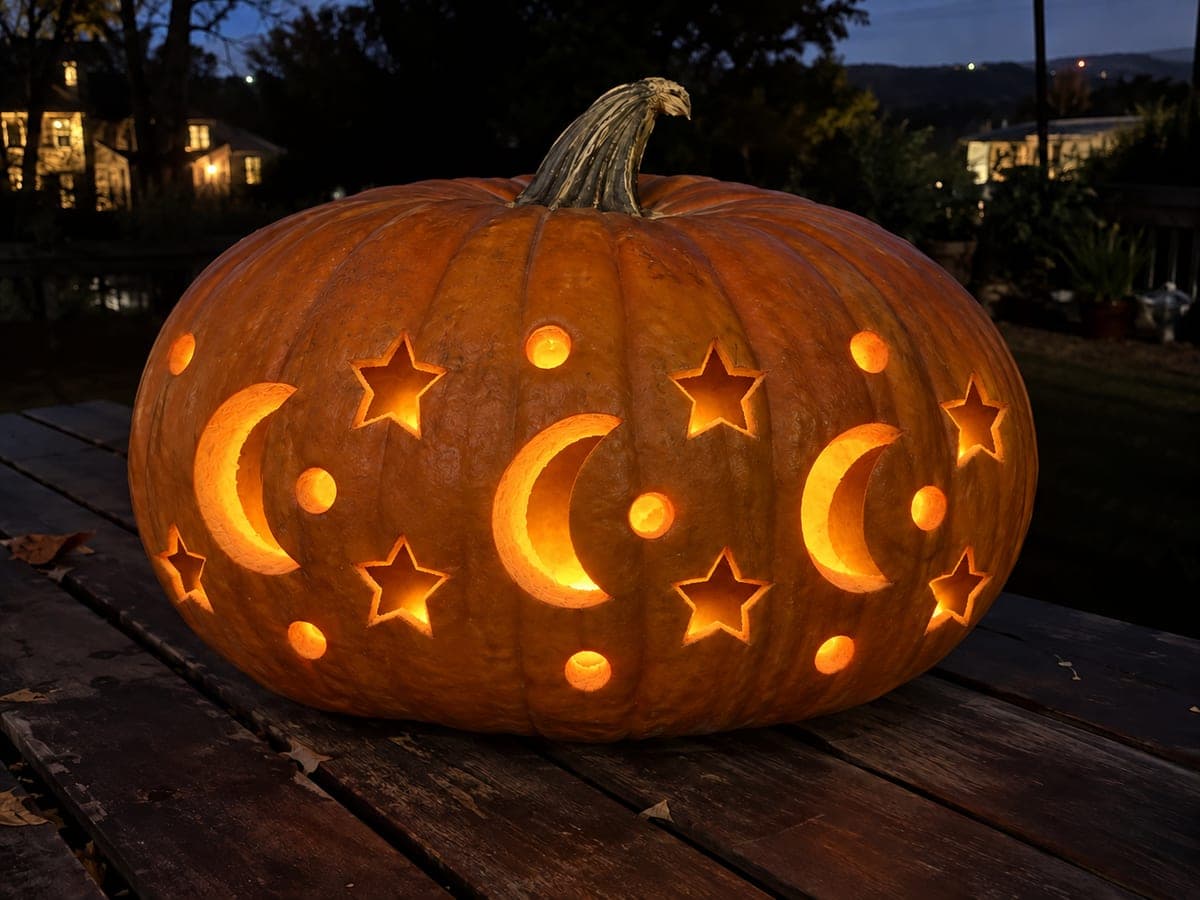
Star Cutout Pumpkin on a Concrete Balcony at NightAI
0

Report this carving

Tell us what is wrong. Reports are private.

Star Cutout Pumpkin on a Concrete Balcony at Night

Three bold star openings and a scattering of small drilled dots create a night-sky easy pumpkin carving idea perfect for a concrete balcony. Print or trace each star outline onto the surface with a poker tool before cutting so the points stay sharp and symmetrical. Cut the largest star first while the wall is still at full strength, then drill the accent holes with a spade bit for clean circular edges. A flickering LED candle inside makes the star points dance.

No ratings yet · Sign in to rate
Comments (0)

  • No comments yet — be the first.

Save without an account. Sign in to like or comment.

Our tips for carving a similar design

Three bold star openings carry the main design, while a scattering of small drilled holes adds depth and a starfield texture. Cutting the largest star first while the wall is at full strength prevents the smaller subsequent holes from cracking through to an already-weakened section. A flickering LED inside animates the points and dots for added drama.

From pumpkin to porch

  1. Hollow the pumpkin

    Cut an angled lid, remove seeds, and scrape the interior wall to a consistent inch. A tall pumpkin often has thicker walls at the base, so spend extra time thinning the lower half where the bottom star will sit.

  2. Place and transfer the stars

    Print three five-pointed stars of varying sizes and tape them to the pumpkin face. Use a stylus to poke the outline of each star into the surface so the marks remain after the paper is removed. Space the stars so each one has at least an inch of solid rind separating it from the others and from the outer border.

  3. Mark the accent dots

    Mark 8 to 12 small dot positions around and between the stars using a marker. These will become drilled holes. Keep dots at least three-quarters of an inch from any star opening to avoid cracking the wall between a star point and a nearby hole.

  4. Cut the largest star first

    Use a fine-toothed pumpkin saw to cut the largest star while the wall is still fully intact. Approach each point from two directions, meeting at the tip rather than cutting around it in one curved motion. Push the freed piece inward after the final cut completes the star.

  5. Cut the remaining stars

    Cut the medium and small stars in order of size, pausing after each to press gently on the pumpkin face and confirm no cracking has occurred. Take shorter, slower strokes near the points of the smaller stars since the narrower tips are easy to over-cut.

  6. Drill the accent holes and light

    Use a spade bit or large drill bit to drill each marked dot, pressing straight through the wall in one controlled motion. Clean any splintered rind from the holes with a small gouge. Insert a flickering LED candle inside, replace the lid, and display on the balcony.

Written with AI to match this design

Gather your supplies

Check things off as you get ready.

Work on a stable surface, keep your free hand out of the cutting path, and have an adult handle sharp tools.

Three levels of light

  • Leave intact

    All surrounding rind between and around the stars and dots stays solid orange

  • Peel & shade

    None, this is a full cutout design

  • Cut through

    All three star openings and all small drilled accent holes

Learn the carving basics

Before you start cutting

How do I get clean sharp star points when cutting?

Make two straight cuts that meet at each point rather than attempting one continuous curved cut. Insert the saw at one side of the point, cut to the tip, withdraw, then approach from the other side and cut to meet the first line. The point pops free cleanly.

What size spade bit should I use for the accent dots?

A three-quarter inch spade bit creates dots large enough to glow visibly from a few feet away. Smaller bits produce subtle pinhole dots that read well as distant stars. Use both sizes for variety, placing the larger dots near the stars and smaller ones farther out.

Can I drill the holes before cutting the stars?

Yes, and it is actually slightly safer for the wall because the drill holes are small and the wall is still at full strength. However, drilling into the rind can cause slight vibration that dislodges your star template marks, so confirm star positions firmly before drilling.

Your take belongs here, too.

Changed a detail? Made it simpler? Share a photo of your version and tell the community what worked.

Share your pumpkin

More pumpkins like this

You've reached the end · 8 pumpkins
The Patch Report

Fresh pumpkins, in your inbox.

The best new carvings, ideas worth stealing, and how-tos for carving season. Short, seasonal, and gone by November.

A short email during carving season. Unsubscribe anytime. See our privacy policy.