Halloween Pumpkin Carving Contest · Starts October 1st · $500 in prizes
← Back to ideas
@ai_concepts
Sep 25, 2026
Sun-Face Shading Pumpkin on a Wooden Garden BenchAI
0

Report this carving

Tell us what is wrong. Reports are private.

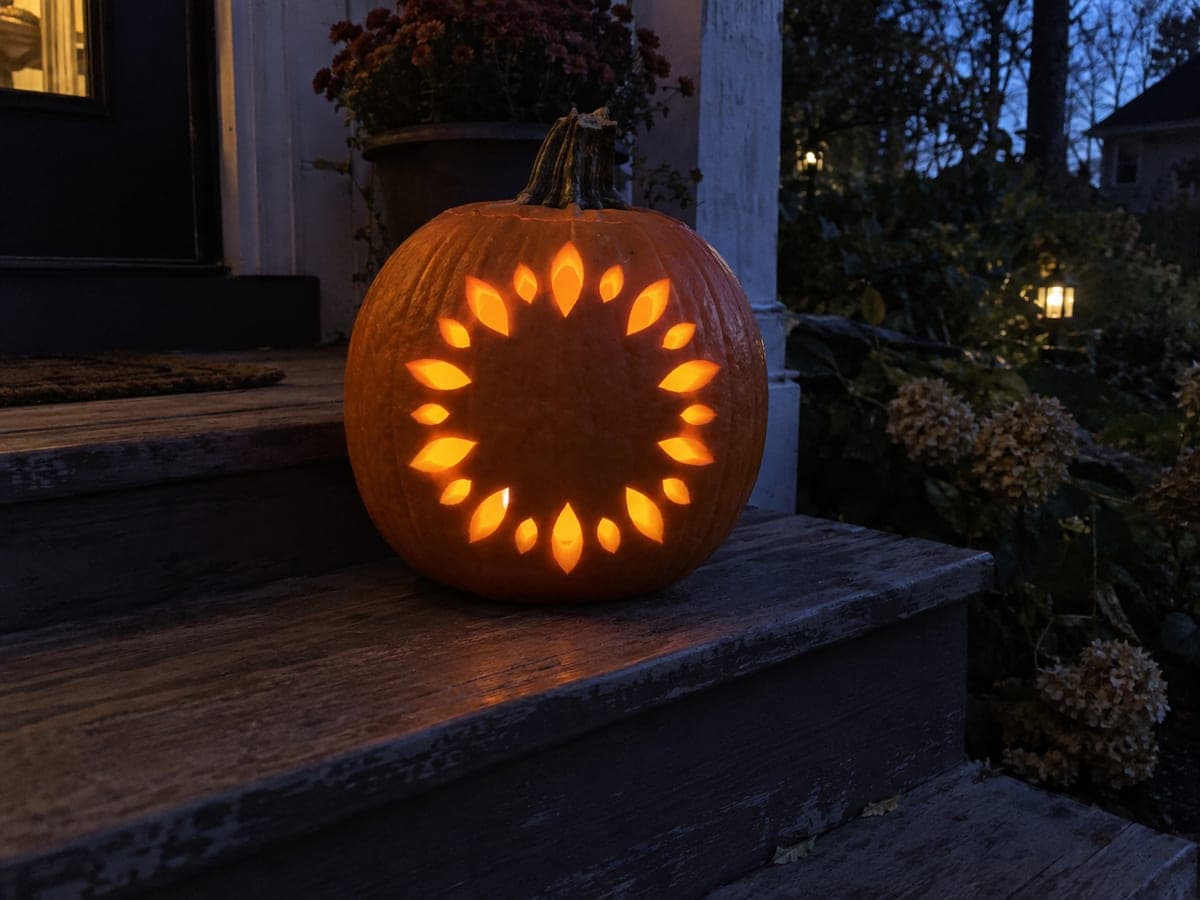
Sun-Face Shading Pumpkin on a Wooden Garden Bench

Scraped ray shapes radiating around a carved face give this pumpkin carving idea a dimensional sun character that sits beautifully on a wooden garden bench. Use a linoleum cutter or V-gouge to shallowly scrape the ray outlines, removing only the orange skin layer while leaving the pale flesh beneath intact. Cut the eyes, nose, and mouth completely through as the final step, and keep all skin bridges connecting the rays to avoid weakening the design. Daytime display lets the translucent scraped areas glow naturally in sunlight.

No ratings yet · Sign in to rate

Comments (0)

  • No comments yet — be the first.

Save without an account. Sign in to like or comment.

Our tips for carving a similar design

The design pairs two techniques: shallow skin scraping for the sun rays and full cutout for the eyes, nose, and mouth. The rays are scraped first so the face openings can be cut last without disturbing the fragile scraped areas. Keeping all ray bases connected to surrounding rind via intact skin bridges is essential for the design to hold together.

From pumpkin to porch

  1. Hollow and prep the surface

    Cut the lid, scoop seeds, and scrape the interior to about an inch thick. Dry the outside surface with a paper towel before drawing so that lines stay crisp on the rind.

  2. Map the ray positions

    Draw a circle in the center of the face that will contain the facial features, then mark 8 to 12 evenly spaced ray shapes radiating outward from that circle. Each ray should taper to a rounded tip and have a defined base where it meets the center circle. Leave at least a centimeter of orange skin between adjacent rays.

  3. Scrape the ray shapes

    Use a linoleum V-gouge or paring knife tip to shallowly scrape within each ray outline, removing only the orange skin layer and revealing the pale cream flesh beneath. Work from the tip toward the base of each ray and keep the scrape depth consistent. Never undercut or go deep enough to see the interior pulp.

  4. Check the skin bridges

    After scraping all rays, press gently along the rind between adjacent rays to confirm the connecting strips are firm and not accidentally scraped thin. Any bridge that feels soft should be left alone and not scraped further. Light bridges are the only weak point in this design.

  5. Cut the facial features last

    Draw the eyes, nose, and mouth in the center circle area, then cut them through completely using a serrated saw. Cutting these openings last prevents vibration from the saw from cracking the already-scraped ray areas. Keep the facial features inside the center circle boundary so they do not approach the ray bases.

  6. Display in natural light

    During the day, the pale scraped rays catch sunlight and glow against the orange rind with no interior light needed. At night, an LED inside illuminates the cut eyes, nose, and mouth brightly while the scraped rays glow more subtly. Position the pumpkin on the garden bench where it catches afternoon sun.

Written with AI to match this design

Gather your supplies

Check things off as you get ready.

Work on a stable surface, keep your free hand out of the cutting path, and have an adult handle sharp tools.

Three levels of light

  • Leave intact

    All orange skin between the rays and around the face border stays fully intact and dark

  • Peel & shade

    Each ray shape: orange skin is scraped away to reveal the pale cream flesh beneath

  • Cut through

    The eyes, nose, and mouth in the center face area

Learn the carving basics

Before you start cutting

How deep should I scrape the rays?

Aim to remove only the orange outer skin, which is typically about one to two millimeters thick. The exposed flesh should look pale cream or off-white. If you see a darker yellow or orange layer beneath, you have scraped too deep. Consistent shallow passes are better than one deep stroke.

What if a ray tip tears when I scrape it?

A small tear at a ray tip is mostly cosmetic and does not affect structural integrity. Smooth the torn edge with a dry fingertip to flatten any lifted skin. If the tear extends back toward the base of the ray, stop scraping that ray and leave the tip slightly unfinished rather than risk widening the damage.

Can I skip the face cutouts and make it a pure scraped sun design?

Absolutely. Scraping only the rays with no cutouts produces a subtle daytime design where the pale rays stand out against orange rind. Without interior light the scraped version is a calm outdoor decoration that lasts longer than any carved version since the wall stays fully intact.

Your take belongs here, too.

Changed a detail? Made it simpler? Share a photo of your version and tell the community what worked.

Share your pumpkin

More pumpkins like this

You've reached the end · 8 pumpkins
The Patch Report

Fresh pumpkins, in your inbox.

The best new carvings, ideas worth stealing, and how-tos for carving season. Short, seasonal, and gone by November.

A short email during carving season. Unsubscribe anytime. See our privacy policy.