Halloween Pumpkin Carving Contest · Starts October 1st · $500 in prizes
← Back to ideas
@ai_concepts
Sep 25, 2026
Supported Oogie Boogie Portrait Pumpkin with Glowing GrinAI
0

Report this carving

Tell us what is wrong. Reports are private.

Supported Oogie Boogie Portrait Pumpkin with Glowing Grin

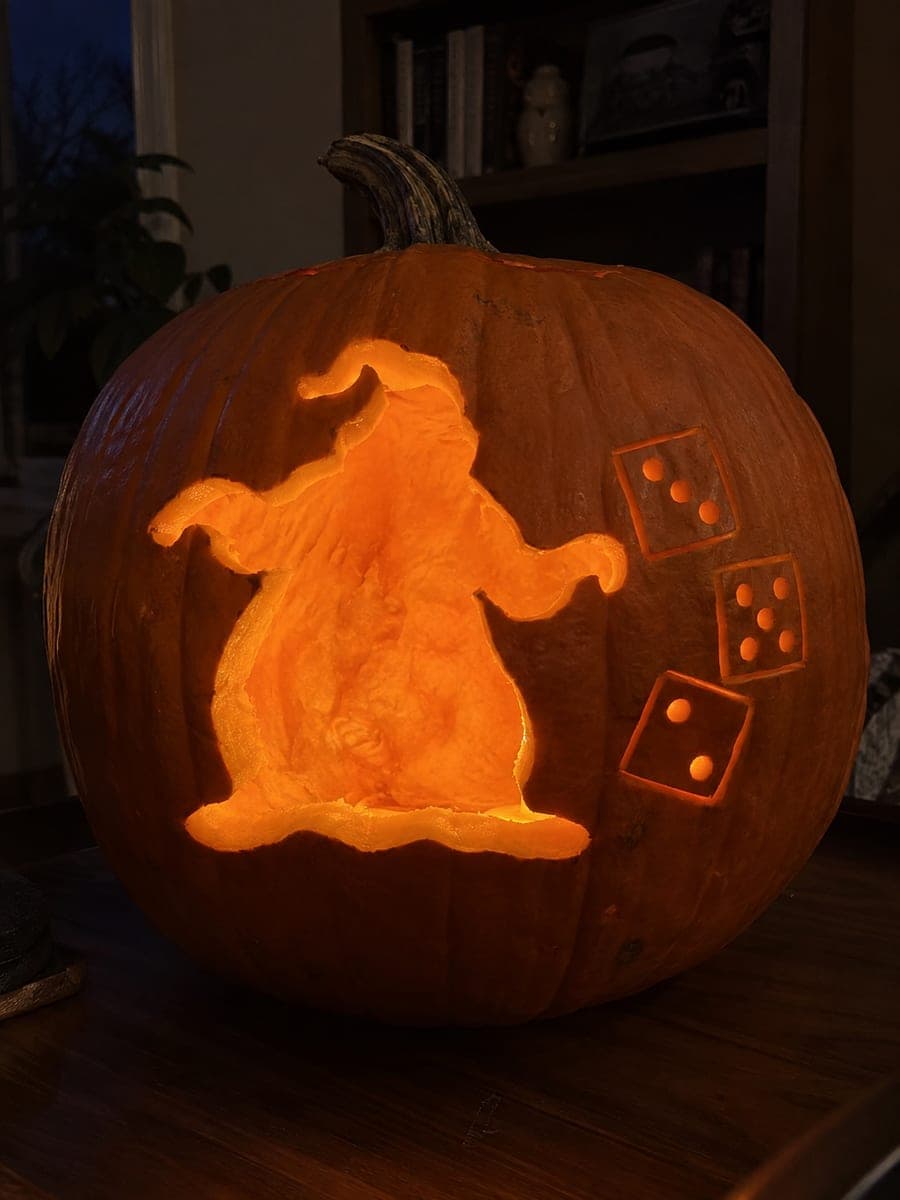
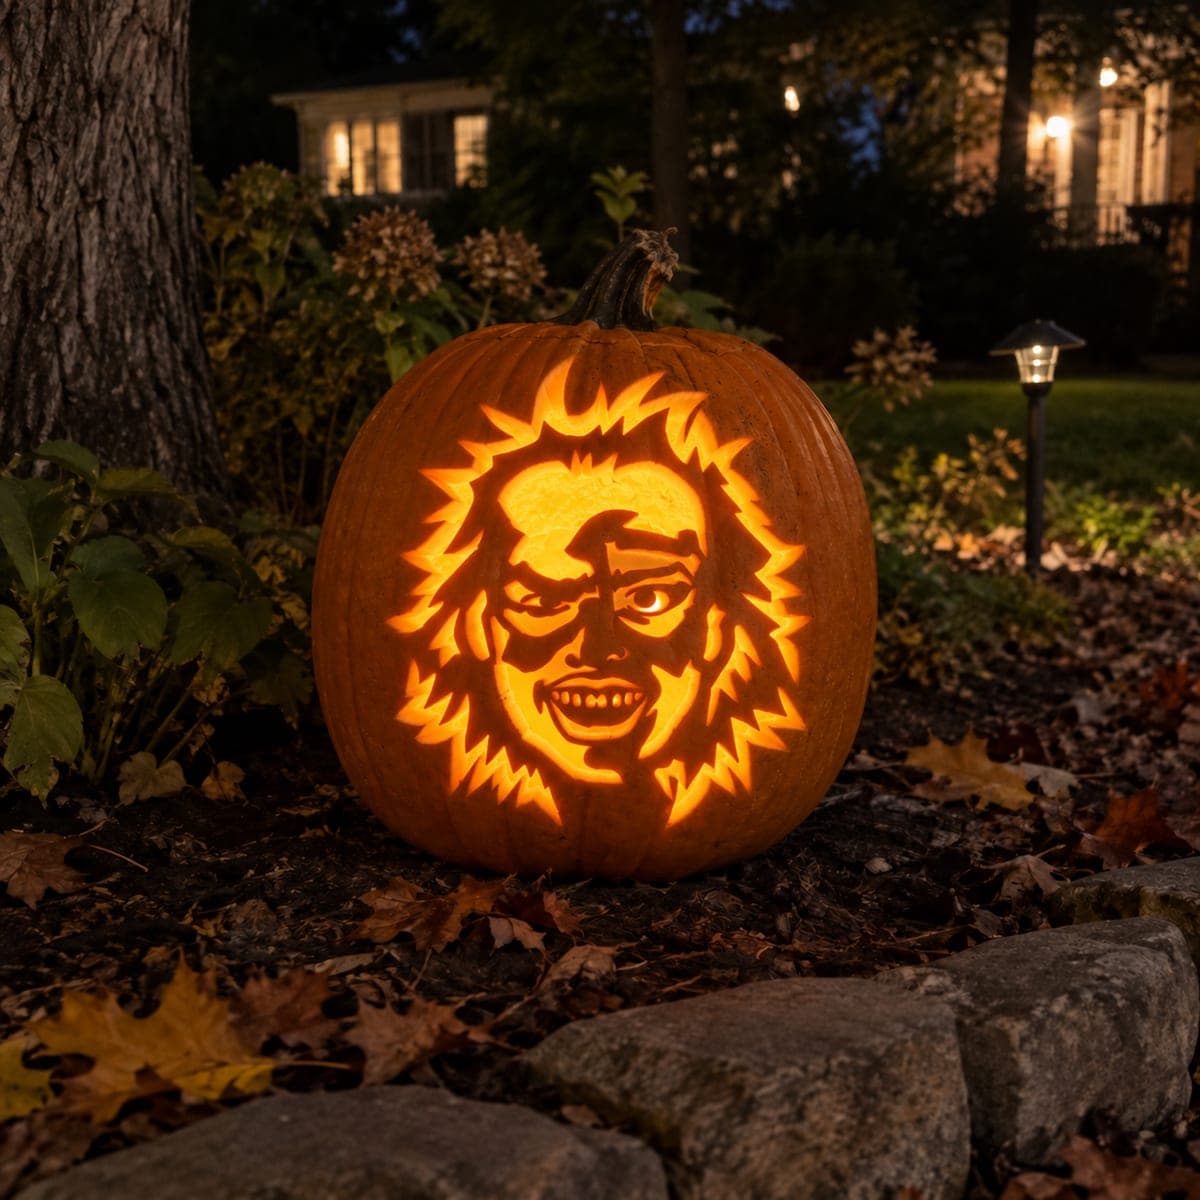
Oogie Boogie's full portrait, broad lower body and outstretched arms connecting to the frame and teeth rooted to both lips, glows through this hard Nightmare Before Christmas pumpkin carving idea. Seam lines and body texture are achieved with shallow backing rather than full cuts, keeping the rind solid beneath the surface. Carve the large body apertures first so you can gauge remaining rind thickness before committing to the shallower texture work.

No ratings yet · Sign in to rate

Comments (0)

  • No comments yet — be the first.

Save without an account. Sign in to like or comment.

Our tips for carving a similar design

The portrait holds together because the broad lower body connects to the bottom of the pumpkin frame and both outstretched arms bridge to the sides, creating a three-point anchor that supports the head weight above. Teeth rooted to both lips mean the wide grin is structurally sound even as the surrounding apertures open up. Shallow backing for seams and body texture preserves rind mass while adding the layered, sack-like surface quality the character requires.

From pumpkin to porch

  1. Prep and transfer

    Scoop the pumpkin from the back and thin the interior walls to a consistent inch, spending extra time thinning the upper section where the head detail sits. Transfer the full stencil with a pounce wheel, pressing firmly over the seam and texture lines since those will guide the shallow backing work later.

  2. Open the large body apertures

    Cut the two largest body apertures first, the open areas flanking the broad lower body, using a medium carving saw. Work from the outer boundary inward so you always cut toward solid rind. These large cuts define the composition and let you gauge how much rind remains before moving to detail work.

  3. Establish arm and side connections

    Cut along the arm outlines, leaving each arm connected to the side frame at its outer tip. The arm connections are wide and deliberate, so use a medium saw at a steady pace rather than a fine detail saw. Check each connection by pressing gently: it should feel absolutely rigid.

  4. Cut the grin and face details

    Work the grin by cutting along the outer mouth boundary first, then removing material between each tooth while keeping every tooth rooted to both the top and bottom lips. Use a fine detail saw for the narrow gaps between teeth. Cut the eye openings last among the face features.

  5. Shallow-back the seams and body texture

    Switch to a V-gouge and trace all seam lines with a consistent, shallow pass that removes orange skin and reveals cream flesh. Add the body texture marks as loose parallel grooves within the retained body panels. Keep all backing under half the rind thickness to maintain structural integrity.

  6. Light and display

    Place an LED tea light inside and evaluate the design from three feet away in low light. The silhouetted body with seam texture should read against the glowing background apertures, while the grin illuminates the face. Petroleum jelly on all cut and grooved surfaces extends the display life of the design.

Written with AI to match this design

Gather your supplies

Check things off as you get ready.

Work on a stable surface, keep your free hand out of the cutting path, and have an adult handle sharp tools.

Three levels of light

  • Leave intact

    The retained Oogie Boogie body, arms, and face surfaces remain dark, silhouetted against the glowing background

  • Peel & shade

    Seam lines and sack texture grooves reveal cream flesh for a mid-tone surface detail on the retained body

  • Cut through

    Body apertures flanking the figure, arm connection cutouts, eye openings, and grin gaps between teeth are fully cut through

Learn the carving basics

Before you start cutting

How thick should the arm connections to the frame be?

Each arm should connect to the side frame by at least three-quarters of an inch of uncut rind to support the head weight and resist the pumpkin drying and contracting. Thicker connections look slightly less detailed but are far more reliable over a week of display. You can always refine the connection outline later; you cannot repair a snapped arm.

The teeth in the grin are very small. How do I avoid snapping them?

Keep the root connection at both the top and bottom lip at least a quarter-inch wide per tooth. Use a fine detail saw and let the blade do the work rather than forcing it, which causes vibration that cracks narrow pieces. If a tooth does snap, attach it from the inside with a wooden toothpick and a drop of wood glue before it dries out.

Can I do the seam work before any apertures are open?

Yes, and some carvers prefer it. Gouging the seam lines on a fully intact pumpkin is actually easier because the surface is rigid and there is no flex. Transfer and complete all the groove work first, then cut the large apertures in the established order. This is a valid alternative approach for this design.

Your take belongs here, too.

Changed a detail? Made it simpler? Share a photo of your version and tell the community what worked.

Share your pumpkin

More pumpkins like this

You've reached the end · 8 pumpkins
The Patch Report

Fresh pumpkins, in your inbox.

The best new carvings, ideas worth stealing, and how-tos for carving season. Short, seasonal, and gone by November.

A short email during carving season. Unsubscribe anytime. See our privacy policy.