Halloween Pumpkin Carving Contest Β· Starts October 1st Β· $500 in prizes
← Back to ideas
@ai_concepts
Sep 25, 2026
Oogie Boogie Jagged Grin Jack-O-Lantern CarvingAI
0

Report this carving

Tell us what is wrong. Reports are private.

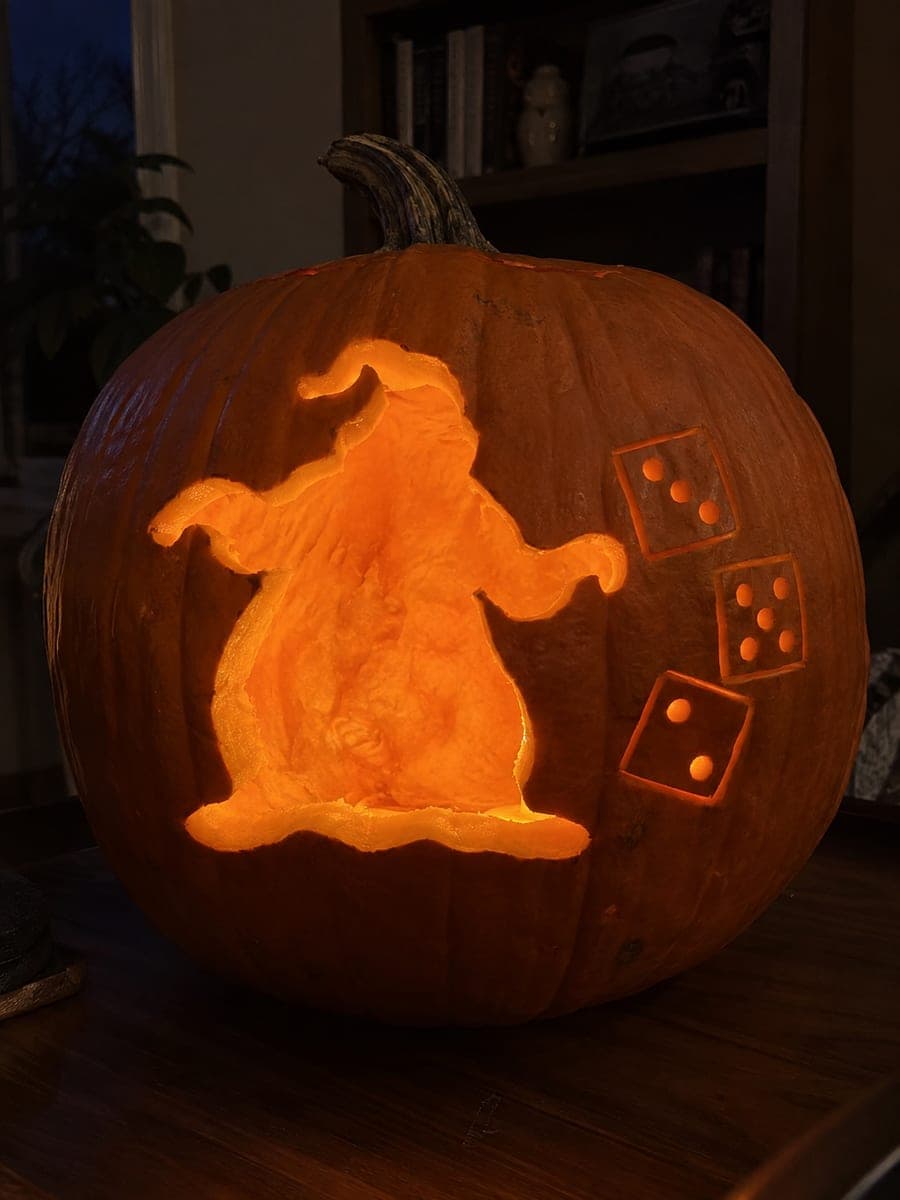
Oogie Boogie Jagged Grin Jack-O-Lantern Carving

Oogie Boogie's wide eyes and jagged grin glow through this easy Oogie Boogie pumpkin carving, every tooth broadly rooted to a lip so the mouth stays intact, plus separate cheek stitch holes that add texture. The simple face layout makes it a strong choice for first-time carvers who want a Nightmare Before Christmas pumpkin carving idea without complex bridgework. Start with the eyes to confirm vertical placement before committing to the wide mouth below.

No ratings yet Β· Sign in to rate

Comments (0)

  • No comments yet β€” be the first.

Save without an account. Sign in to like or comment.

Our tips for carving a similar design

The design keeps things simple: two open eye holes and a wide mouth where every tooth is broadly rooted to the lip rind so nothing can fall out. A handful of small cheek stitch holes scatter extra dots of light without requiring any bridgework. Getting the eyes placed correctly in the upper half before you cut the mouth below is the single most important step for making the face look like Oogie Boogie.

From pumpkin to porch

  1. Prep and transfer

    Cut a back lid, scoop thoroughly, and thin the interior walls to about an inch. Press the stencil onto the front and trace all features with a pounce wheel. The cheek stitch dots are easy to miss, so press firmly around them to make sure every hole is marked.

  2. Cut the eyes

    Use a detail saw to cut both eye openings first, confirming the vertical position looks right before moving to the mouth below. Oogie Boogie's eyes are wide and round, so follow the stencil outline carefully and remove the rind slug in one piece if possible for the cleanest edge.

  3. Cut the mouth

    Move to the mouth and cut along the outer boundary first, then cut between each tooth from inside the mouth opening. Every tooth must remain connected to either the top or bottom lip rind, so never cut a tooth free on more than three sides. Work slowly near each root connection.

  4. Punch the cheek stitch holes

    Use a small drill bit or narrow detail saw to open each cheek stitch hole. These are the smallest cuts on the design, so a steady hand and slow pressure matter more than speed. Work in a well-lit area so you can see each dot mark clearly.

  5. Clean and smooth

    Run a narrow gouge or the back edge of the saw blade around the interior of the eye and mouth openings to remove any ragged rind fibers. Dry the cut surfaces with a paper towel before checking the design with an LED light inside.

  6. Light and display

    Insert a warm LED tea light and check the front view in a dark room. Oogie Boogie's face should read immediately with glowing eyes, a jagged grin, and scattered cheek-stitch dots. Apply petroleum jelly around all cut edges and display on a covered porch out of direct weather.

Written with AI to match this design

Gather your supplies

Check things off as you get ready.

Work on a stable surface, keep your free hand out of the cutting path, and have an adult handle sharp tools.

Three levels of light

  • Leave intact

    The rind between the eyes, the lip rind connecting each tooth, and the solid cheek panels remain dark

  • Peel & shade

    None on this design; all contrast comes from cut-through openings

  • Cut through

    Both eye openings, the wide mouth including gaps between teeth, and each cheek stitch hole are fully cut through

Learn the carving basics

Before you start cutting

How wide should the tooth root connections be to prevent breakage?

Each tooth should stay connected to the lip rind by at least a half-inch of uncut rind at its base. Wider roots mean a sturdier mouth that will survive the pumpkin drying over several days. If any tooth feels loose after cutting, a dab of wood glue on the root from the inside can reinforce it overnight.

My eye openings are not perfectly round. Does that matter?

Slight irregularities actually fit Oogie Boogie's sack-creature look, since the character is made of rough burlap. As long as both eyes are roughly the same size and positioned symmetrically, the face will read correctly. You can smooth any jagged edges with a narrow gouge after the initial cut.

Can a child carve this design with supervision?

Adults should handle all saw and gouge work. Older children can help trace the stencil, scoop the interior pulp with a spoon, and paint the final pumpkin, but cutting requires adult-only handling of sharp tools. A foam pumpkin version of this simple three-feature design is a safe alternative for younger carvers.

Your take belongs here, too.

Changed a detail? Made it simpler? Share a photo of your version and tell the community what worked.

Share your pumpkin

More pumpkins like this

You've reached the end Β· 8 pumpkins
The Patch Report

Fresh pumpkins, in your inbox.

The best new carvings, ideas worth stealing, and how-tos for carving season. Short, seasonal, and gone by November.

A short email during carving season. Unsubscribe anytime. See our privacy policy.