Halloween Pumpkin Carving Contest · Starts October 1st · $500 in prizes
← Back to ideas
@ai_concepts
Jul 7, 2026
Thanksgiving Turkey Full Fan Sculpted PumpkinAI
0

Thanksgiving Turkey Full Fan Sculpted Pumpkin

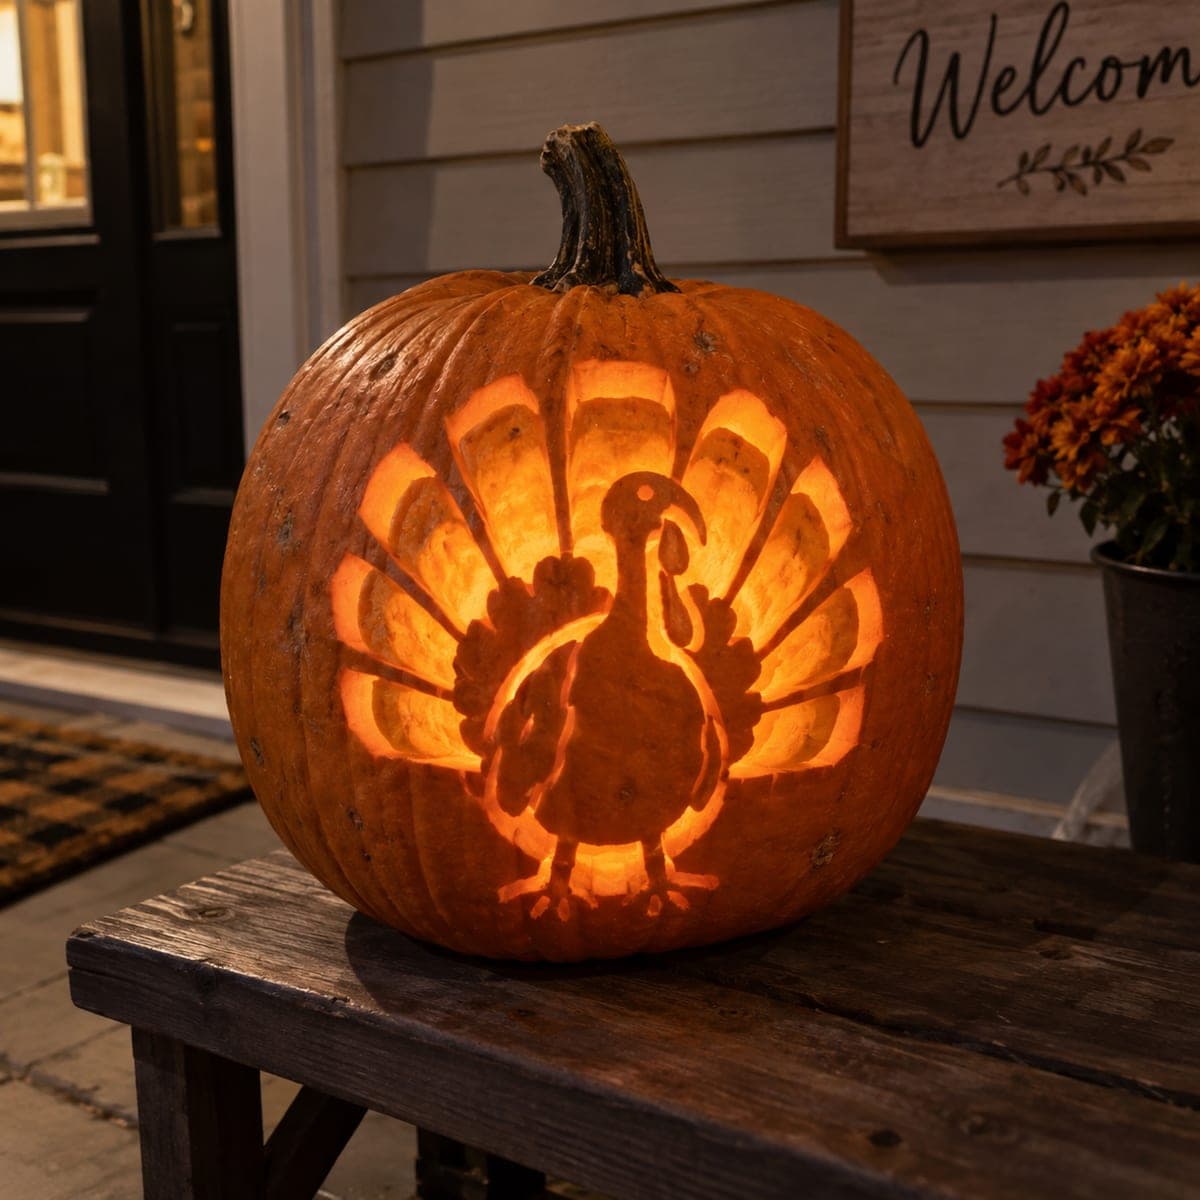
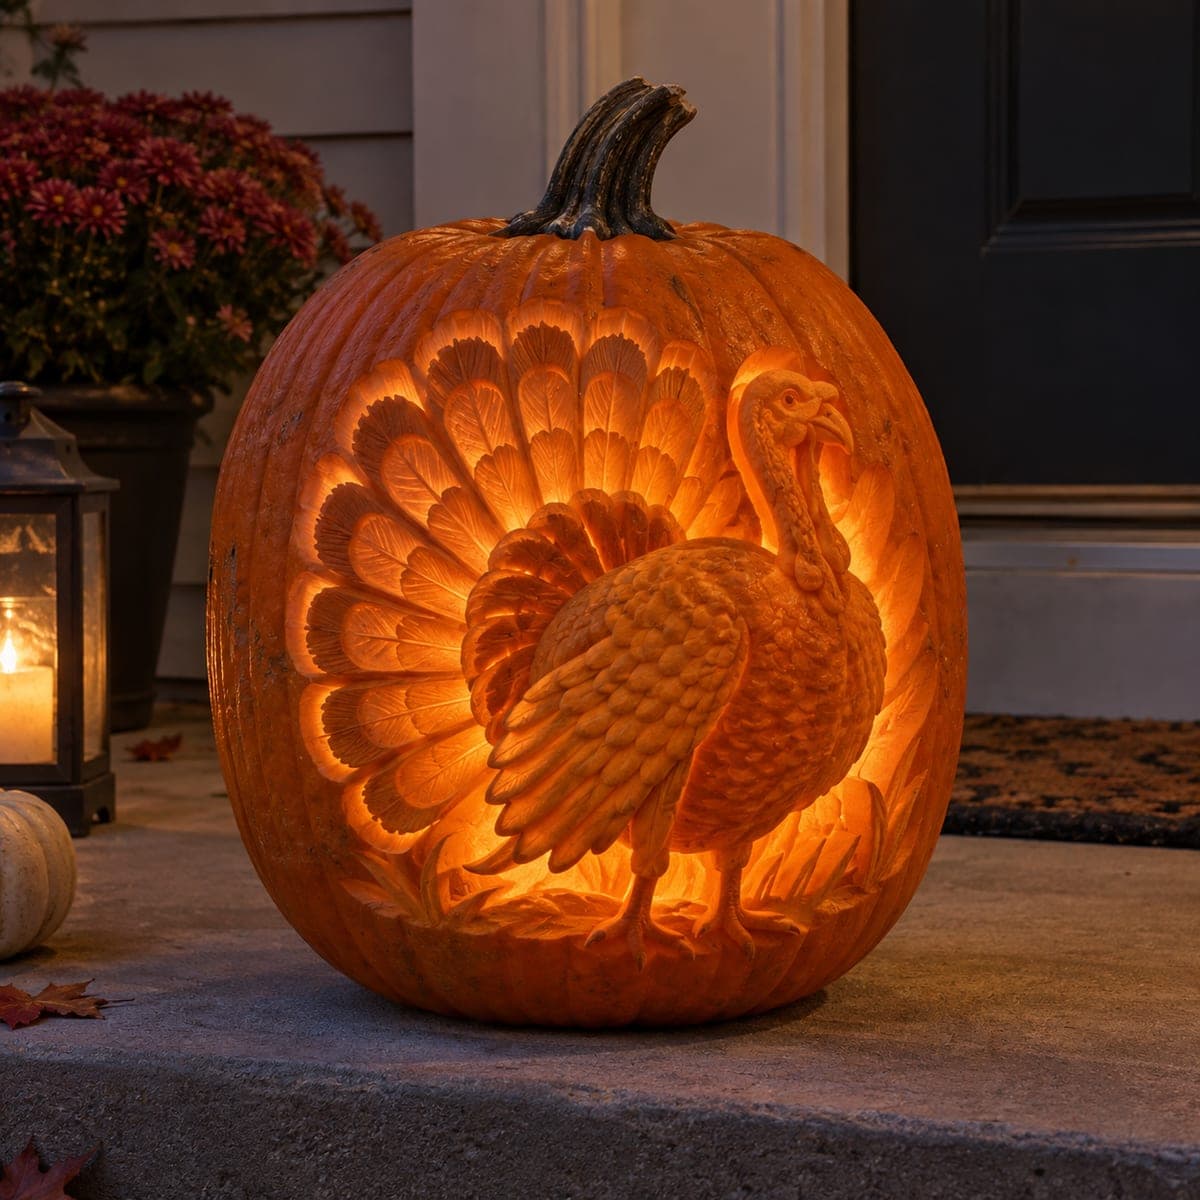
A tom turkey in full display struts across this pumpkin, its fanned tail feathers, wattle, and layered wing all sculpted in glowing dimensional relief. Every feather in the fan is individually carved with a ribbed center vein, lit from within so the whole bird radiates like stained glass. This is a marathon expert carve, so save it for the week of Thanksgiving and it will anchor your harvest porch display.

This is an AI-generated concept image: a realistic, carvable design idea rather than a photo of a finished carve. AI concepts are always labeled and sit out the leaderboard and the contest.

No ratings yet · Sign in to rate
Comments (0)

  • No comments yet — be the first.

Save without an account. Sign in to like or comment.

Our tips for carving a similar design

The whole effect here rides on relief carving, where you shave the pumpkin wall down to different depths instead of cutting all the way through. The turkey's body stays thick and dark while the fanned tail is peeled thin to glow, so the light comes from behind the details rather than through open holes. Plan it as a layered map of depths, working the raised bird forward and the feather fan back into light.

Written by PumpkinCarvingIdeas.com, inspired by the image above. These are our suggestions, not instructions from the uploader. This approach to the AI concept has not been tested on a real pumpkin.

From pumpkin to porch

  1. Pick a big wall and transfer the design

    Choose a tall, wide pumpkin with one broad, smooth face and a thick wall, since relief work needs material to sculpt into. Clean the guts out fully and scrape the inside of the carving face down to about an inch so light passes through the thin areas. Tape your turkey and feather-fan stencil flat and poke the main outlines through with a transfer tool. Mark which zones are body, which are fan feathers, and which are background so you never lose track of your depth plan.

  2. Outline the turkey body and fan

    With a fine detail knife, score along the edge of the turkey's body, wing, neck, and each fan feather to lock in the shapes. Keep these cuts shallow at first, just enough to define the borders. These score lines act as stop cuts so that when you shave the background it does not tear into the bird. Do not cut all the way through anywhere yet.

  3. Lower the background around the bird

    Using a loop or ribbon tool, shave away the background between the feathers and around the turkey so those areas sit deeper and read brighter. Leave the turkey's body proud and mostly untouched so it stays dark and dimensional. Work slowly and check the wall thickness often by holding a light behind it. The goal is a stepped landscape where the bird is high and the spaces around it are low and thin.

  4. Sculpt the feather fan

    Carve each tail feather as its own rounded shape, then run a shallow center groove down each one for the rib vein. Peel the skin off the outer part of every feather so those zones glow, while keeping the ribs and feather edges as slightly higher dark lines. Repeat the layered scale texture on the wing, shaving gentle overlapping crescents. Take breaks, since this is the long marathon section and steady hands matter.

  5. Shade the head, wattle, and grass

    Round the neck and head with soft, smooth scraping so highlights and shadows form naturally under the light. Keep the wattle and beak as raised skin details for structure rather than carving them thin and fragile. Peel a few blades of grass at the base to a mid glow so the turkey looks grounded. Blend all your depth transitions so nothing looks like a hard edge.

  6. Light it and photograph

    Set a battery LED puck or string inside, never a candle, so the thin relief areas glow evenly without heat scorching them. View it in a dark spot and touch up any feather that reads too flat by shaving it a hair thinner. Mist the cut surfaces and store it cool between showings, since a detailed relief pumpkin like this dries out faster than a simple face. Stage it on your porch the week of Thanksgiving so it peaks fresh.

Gather your supplies

Check things off as you get ready.

Work on a stable surface, keep your free hand out of the cutting path, and have an adult handle sharp tools.

Three levels of light

  • Leave intact

    The turkey's body, wing edges, wattle, beak, and each feather rib stay as untouched skin so they read dark and solid.

  • Peel & shade

    The inner surface of each fan feather, the wing scales, and a few grass blades get skin-peeled for a warm mid glow.

  • Cut through

    Keep true cutouts minimal on this relief design, reserving any full cuts for tiny gaps deep in the background if extra brightness is needed.

Learn the carving basics

Before you start cutting

Do I need to cut all the way through anywhere?

Not really, and that is the point of this design. The glow comes from peeling and thinning the wall so light passes through, not from open holes. If one background pocket looks too dim, you can carefully cut a small gap deep behind the feathers, but do that last.

How thick should the carving wall be for the fan to glow?

Scrape the inside of the carving face down to roughly one inch first, then thin the feather zones to about a quarter inch. Check often by holding a light behind the wall as you work. Stop as soon as you see an even orange glow so you do not punch through.

This looks like a huge project. How do I keep it from drying out?

It is a long carve, so work in sessions and wrap the pumpkin in a damp towel or bag in the fridge between them. Rub cut surfaces with a little petroleum jelly to slow drying. Save the final display for the actual week of Thanksgiving since detailed relief fades fast.

Your take belongs here, too.

Changed a detail? Made it simpler? Share a photo of your version and tell the community what worked.

Share your pumpkin

More pumpkins like this

You've reached the end · 8 pumpkins
The Patch Report

Fresh pumpkins, in your inbox.

The best new carvings, ideas worth stealing, and how-tos for carving season. Short, seasonal, and gone by November.

A short email during carving season. Unsubscribe anytime. See our privacy policy.