Halloween Pumpkin Carving Contest · Starts October 1st · $500 in prizes
← Back to ideas
@ai_concepts
Aug 31, 2026
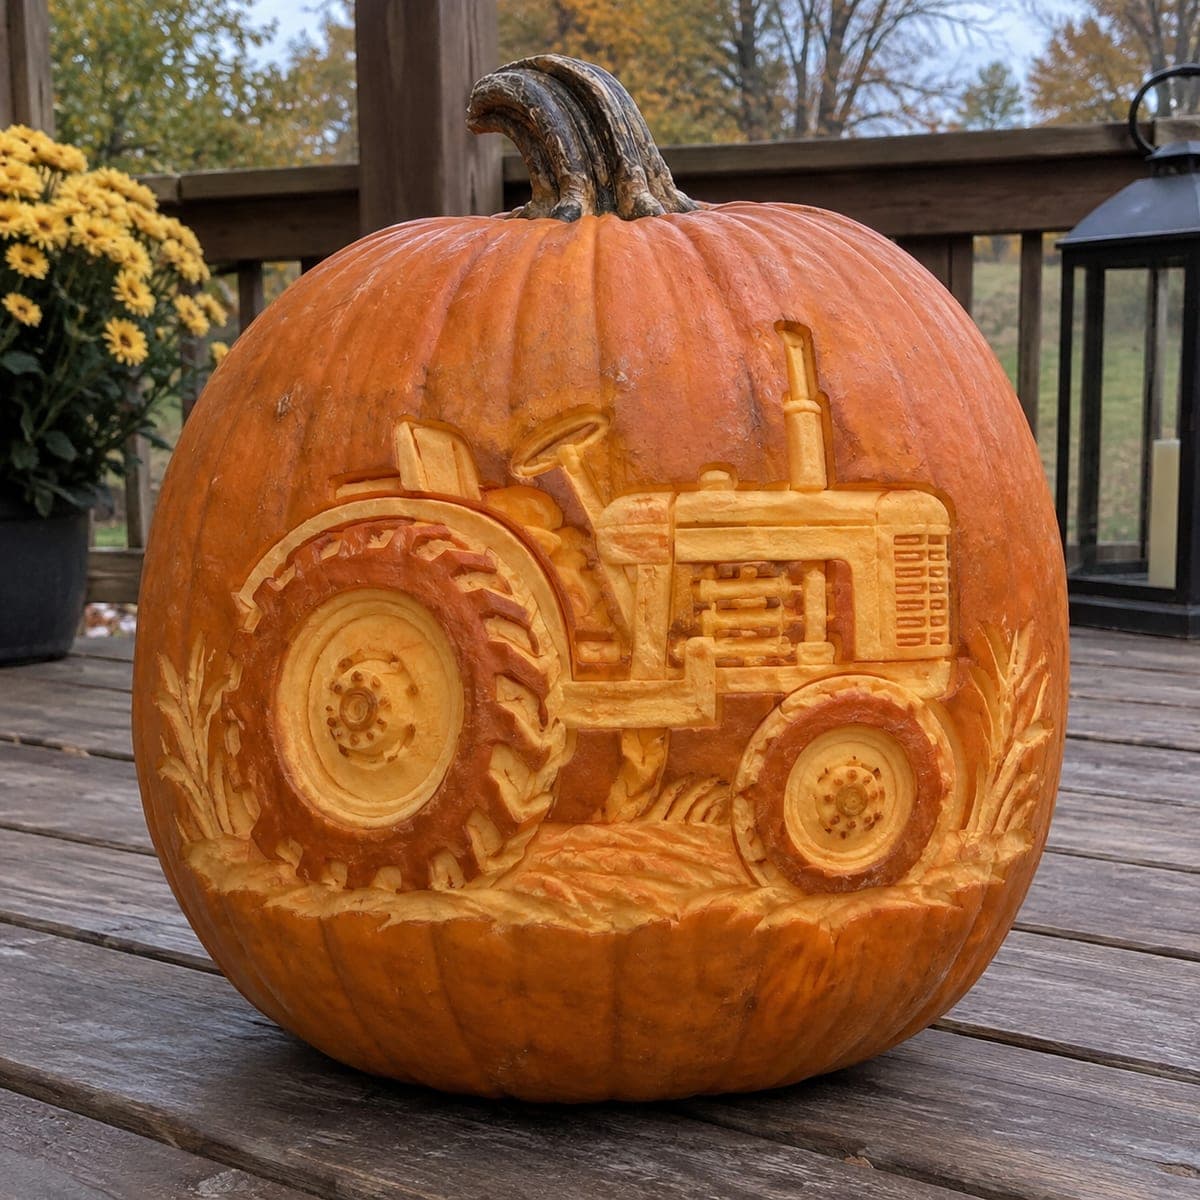
Vintage Farm Tractor Shading PumpkinAI
0

Vintage Farm Tractor Shading Pumpkin

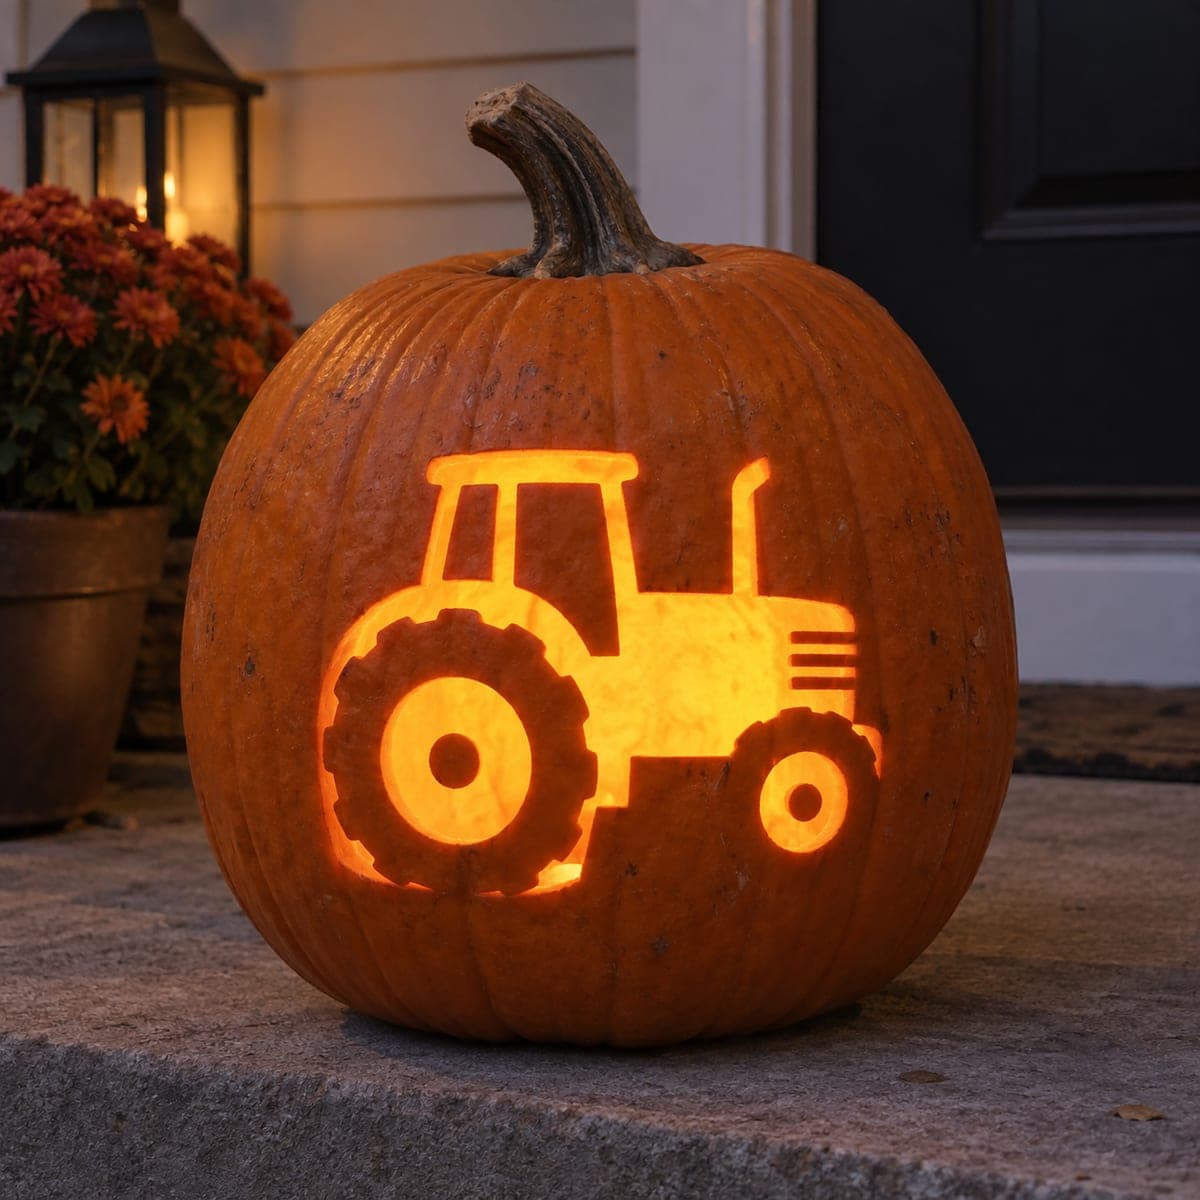
A detailed relief carving of a classic farm tractor fills the front of this pumpkin, with wheat stalks framing either side and the tractor's treaded tires and grille rendered in precise surface etching. The design uses shading technique, peeling away the outer skin at varying depths to create light and shadow without piercing through. Transfer the tractor outline with a stylus and carbon paper before etching, and work from the lightest tones outward. Display unlit in daylight for the richest contrast on the orange rind.

This is an AI-generated concept image: a realistic, carvable design idea rather than a photo of a finished carve. AI concepts are always labeled and sit out the leaderboard and the contest.

No ratings yet · Sign in to rate
Comments (0)

  • No comments yet — be the first.

Save without an account. Sign in to like or comment.

Our tips for carving a similar design

The core trick here is shading, peeling the skin at different depths so the tractor, tires, and wheat glow in soft orange tones without cutting all the way through. Plan the whole scene as a relief carving, mapping the lightest areas first and leaving the darkest skin untouched for contrast. Keep the grille bars and tire treads as raised ridges so they read as detail rather than open holes.

Written by PumpkinCarvingIdeas.com, inspired by the image above. These are our suggestions, not instructions from the uploader. This approach to the AI concept has not been tested on a real pumpkin.

From pumpkin to porch

  1. Pick a firm pumpkin and clean the face

    Choose a large pumpkin with a broad, smooth front and even orange color. Wipe the carving area clean and dry so your transfer will stick. Do not gut it if you plan to display unlit, since an intact wall holds detail and lasts longer. If you want a faint interior glow later, you can hollow it lightly and add an LED, but shading looks richest in daylight.

  2. Transfer the tractor outline

    Tape your tractor and wheat stencil in place, keeping it centered on the flattest part of the face. Slip carbon paper underneath and trace every line with a stylus, including the tire treads, grille slats, and steering wheel. Press firmly but evenly so the lines stay crisp. Peel the paper back partway to check nothing was missed before removing it fully.

  3. Map your three tones

    Before cutting, decide which areas stay dark, which get lightly peeled, and which get shaved deepest. The tractor body and front-lit wheel hubs will be your brightest, the wheat and background dim, and the shadowed edges left as untouched skin. Lightly mark these zones with a washable pen. Working out this plan first keeps the shading readable instead of muddy.

  4. Shave the lightest areas first

    Use a small loop or ribbon tool to peel the outer skin from the tractor body, hood, and wheel centers, going deepest where you want the most glow. Keep the surface smooth and even so light reflects cleanly. Work from the lightest tones outward, easing up as you reach the mid-tone areas. Go slow and take off thin layers, since you can remove more but cannot add skin back.

  5. Etch the fine detail and treads

    Switch to a fine detail tool for the grille slats, tire treads, and wheat stalks. Leave narrow raised ridges between each groove so the pattern holds together and does not tear. Vary depth slightly to suggest curve on the round tires. These raised bridges are what keep delicate detail structurally sound instead of crumbling.

  6. Refine contrast and photograph in daylight

    Step back and check the balance of light and dark from a few feet away. Deepen any area that should read brighter and clean up ragged edges with the tip of your tool. Rub a little vegetable oil into the peeled surface to slow drying and deepen the tones. Display it unlit on a porch in soft daylight for the richest contrast against the orange rind.

Gather your supplies

Check things off as you get ready.

Work on a stable surface, keep your free hand out of the cutting path, and have an adult handle sharp tools.

Three levels of light

  • Leave intact

    The shadowed edges around the tractor and the darkest background skin stay untouched and dark.

  • Peel & shade

    The wheat stalks, tire treads, and mid-tone body panels get a shallow peel for a soft dim glow.

  • Cut through

    Nothing is cut all the way through; the brightest look comes from the deepest shaved areas on the tractor body and wheel hubs.

Learn the carving basics

Before you start cutting

Do I need to cut all the way through the pumpkin?

No, this is a relief and shading design, so you only remove the outer skin at varying depths. Piercing through would break the soft, glowing look and weaken the detailed treads and grille. Save deep cuts for a separate design if you want backlight.

How do I keep the tire treads and grille slats from crumbling?

Leave a narrow raised ridge of pumpkin between each groove instead of cutting them as open channels. These little bridges hold the fine pattern together and give the surface its texture. Work with a sharp fine tool and take shallow passes so the ridges stay intact.

Since shading dries out, how do I keep it looking good?

Shaved pumpkin skin dries and shrinks faster than an intact rind, so plan to carve close to when you want to display it. Rub vegetable oil into the peeled areas to slow moisture loss and deepen the color. Keep it cool and out of direct sun between showings, and mist it lightly if it starts to look dull.

Your take belongs here, too.

Changed a detail? Made it simpler? Share a photo of your version and tell the community what worked.

Share your pumpkin

More pumpkins like this

You've reached the end · 8 pumpkins
The Patch Report

Fresh pumpkins, in your inbox.

The best new carvings, ideas worth stealing, and how-tos for carving season. Short, seasonal, and gone by November.

A short email during carving season. Unsubscribe anytime. See our privacy policy.