@gourdon_ramsay
Sep 7, 2026
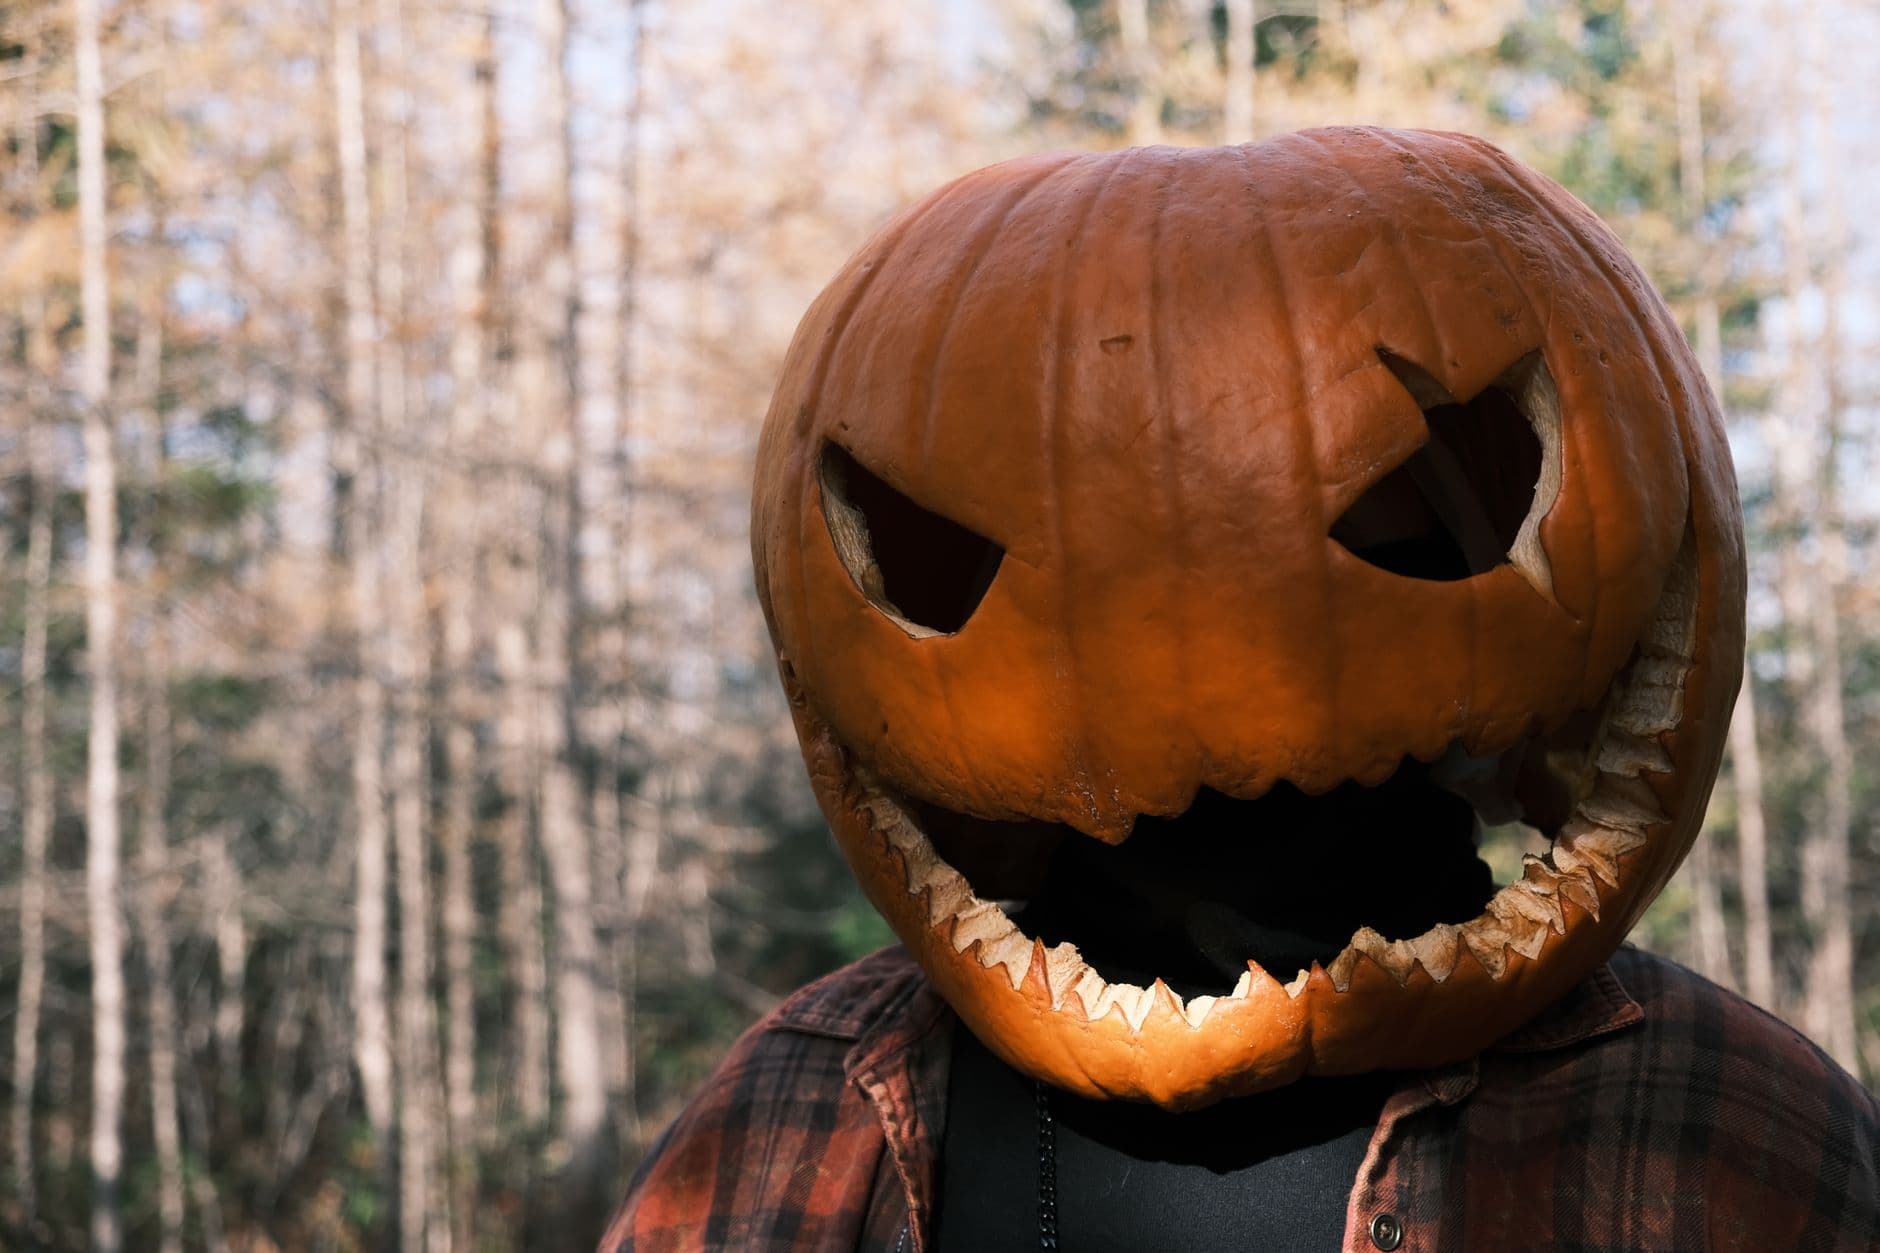
The core trick here is a giant hollowed pumpkin worn as a mask, with a mouth cut so wide it stretches nearly ear to ear. Sharp angular eyes and a row of jagged, uneven teeth give it that wicked stare. The plan is to fully gut the pumpkin, cut a neck opening in the base, then carve the face features with the huge mouth done last so the shell stays strong while you work.
Written by PumpkinCarvingIdeas.com, inspired by @gourdon_ramsay's photo above. These are our suggestions, not instructions from the uploader, and this approach hasn't been tested on their exact carve.
Choose a big, round pumpkin with a fairly even wall so it fits over your head and sits on your shoulders. Cut the neck opening in the bottom rather than the top, making it wide enough to slide over your head comfortably. Scoop out all the seeds and pulp, then thin the front wall to about one inch so it carves cleanly. Test the fit before you draw anything.
With a washable marker, sketch two angular eyes tilted inward for a mean look. Draw the mouth as a huge grin curving from cheek to cheek, then mark the zigzag teeth along both the top and bottom edges. Keep the teeth uneven in size so they look jagged rather than tidy. Leave a solid band of skin between the eyes and mouth so the shell does not weaken.
Start with the eyes since they are smaller and let you practice your angle. Use a small serrated carving saw and push straight through the wall with slow, steady strokes. Cut on the inside of your marker line so any stray marks fall away. Poke the waste pieces out from behind so you do not stress the surrounding shell.
For the small nose, peel just the skin instead of cutting a hole. Score the outline, then use a loop tool or the tip of a spoon to scrape away the orange skin down to the pale flesh. This gives a soft dim glow that contrasts with the bright eyes. Go slow so you keep an even depth.
Save the big mouth for last so the pumpkin holds its shape while you carve everything else. Cut along the top and bottom grin lines, then carefully follow each zigzag to leave the pointed teeth attached to the rim. Work from the center outward and support the shell with your free hand. Because the teeth are part of the solid rim rather than thin bridges, they stay strong and jagged.
Set a battery LED puck inside or clip a small light to the neck rim, never a candle, since this may be worn or handled. Shoot outdoors in soft afternoon light against bare trees for that eerie fall mood. Try a low angle so the wide grin dominates the frame. Mist the cut edges with water to freshen them before the shot.
Check things off as you get ready.
Work on a stable surface, keep your free hand out of the cutting path, and have an adult handle sharp tools.
The outer orange skin across the cheeks and forehead stays dark for the pumpkin's natural surface.
The small scraped nose glows a soft dim orange.
The angular eyes and the wide toothy mouth are cut clean through for the brightest openings.
For a wearable head like this, cut the neck opening in the bottom so it slides over your head and the stem stays intact on top. Make it wide enough to fit comfortably and to reach in for gutting. A bottom opening also lets you set the pumpkin down over a light easily.
Carve the teeth as part of the thick solid rim of the mouth rather than as thin dangling points. Follow the zigzag line so each tooth stays anchored to the surrounding shell. Cut slowly and support the area with your other hand to avoid snapping a point.
You can if you pick a big pumpkin and thin the walls so it is lighter, but a full pumpkin is heavy and the flesh is slippery. Wear it only for short photos and never with a candle inside. Have someone help you lift it on and off, and stop if it feels unstable.
Changed a detail? Made it simpler? Share a photo of your version and tell the community what worked.
The best new carvings, ideas worth stealing, and how-tos for carving season. Short, seasonal, and gone by November.





Comments (0)