@lanternlane
Sep 7, 2026

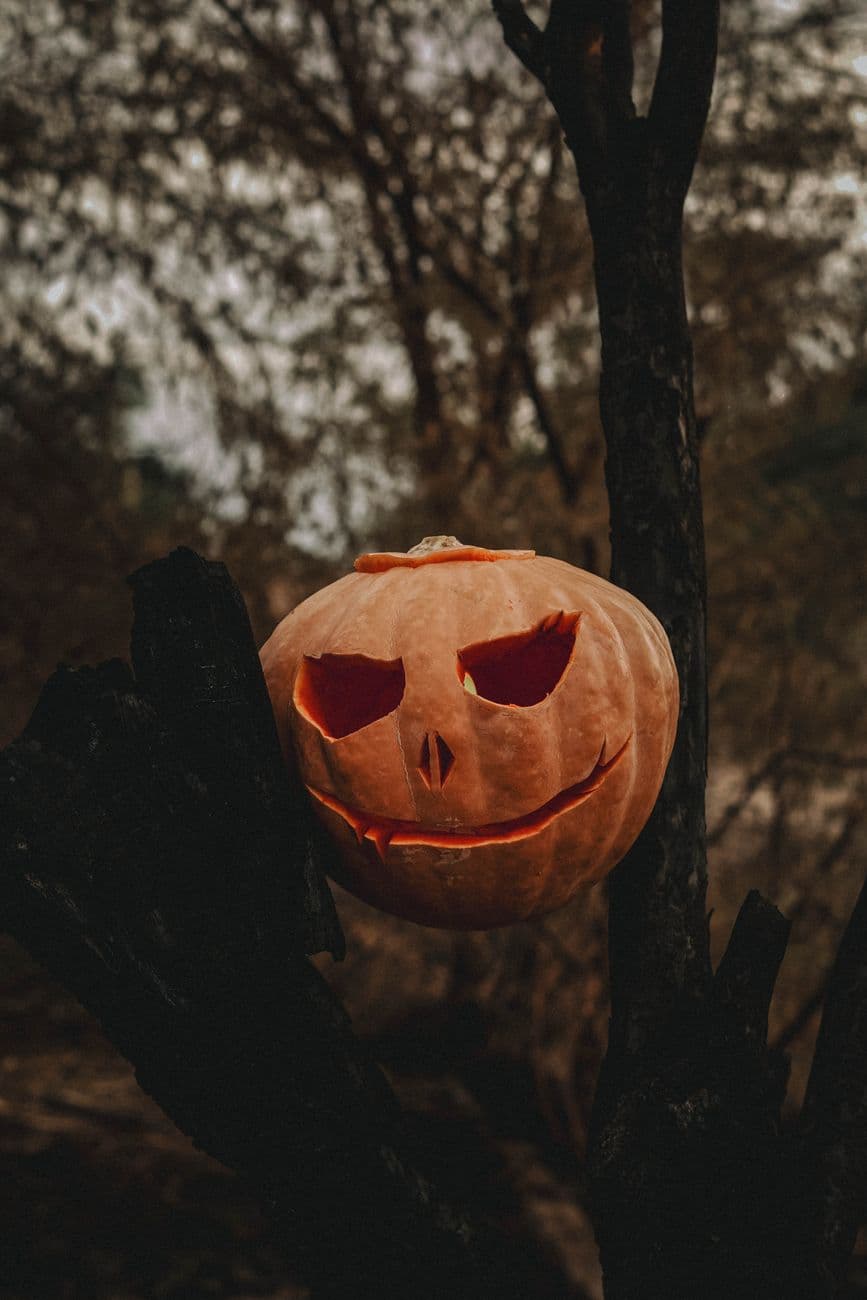
The core trick here is keeping every cut angular and clean, with two sharp triangle eyes and a wide zigzag mouth that reads as scary from a distance. The whole face lives on one side of the pumpkin, so plan your layout on the flattest, most forward-facing panel. Because the shapes are simple, your success depends on crisp straight edges rather than fine detail.
Written by PumpkinCarvingIdeas.com, inspired by @lanternlane's photo above. These are our suggestions, not instructions from the uploader, and this approach hasn't been tested on their exact carve.
Choose a rounder pumpkin with a smooth, flat front panel so the face sits square to the viewer. Wipe it down and find the side that faces you most naturally when set on a table. Lightly sketch two angled triangle eyes and a wide zigzag mouth with a washable marker. Keep the shapes big and spaced apart so the wall between them stays strong.
Have an adult cut a lid around the stem at an angle so it rests back in place without falling through. Angle the blade toward the center so the lid has a shelf to sit on. Lift it off and scoop out the seeds and stringy pulp with a sturdy spoon. Thin the inside of the front wall to about one inch so your cutouts are easier and the light glows through.
Before cutting all the way through, trace each marker line with a shallow score using a poke tool or a light pass of the saw. This gives you a guide groove and lets you fix any wobble before it is permanent. Double check that the eyes are level and the mouth is centered. Reworking a score is easy, but a full cut is forever.
Use a small carving saw to cut each triangle, starting from an inside corner and pushing gently along your scored line. Let the saw do the work and keep your free hand away from the blade path. Push the cut pieces out from the inside with your thumb to keep the edges clean. Sharp inside corners make the eyes look crisp and menacing.
Work the mouth as a series of short straight strokes, turning the pumpkin as you follow each peak and valley. Save this large opening for last since it removes the most material and weakens the wall. Cut the top edge and bottom edge as two connected zigzags, then push the whole piece out gently. Trim any ragged bits from the back so the teeth read sharp.
Drop in a battery LED tea light or a small puck light rather than a flame, which is safer and easier to photograph. Set the pumpkin at eye level against a dark backdrop like a brick step or wall. Shoot in low light so the orange glow pops through the eyes and mouth. Snap a few angles and share your carve with the community.
Check things off as you get ready.
Work on a stable surface, keep your free hand out of the cutting path, and have an adult handle sharp tools.
The whole outer skin stays dark, keeping the scary face isolated in the center.
Optional: lightly scrape a thin halo around the eyes and mouth for a soft glow that frames the face.
The two triangle eyes and the zigzag mouth are cut all the way through for the brightest glow.
Keep each tooth fairly wide at its base rather than long and thin, and avoid over-thinning the front wall. Cut the mouth last so the surrounding wall stays strong while you work the eyes. If a point feels fragile, trim it slightly shorter instead of forcing it.
Angling the top of each triangle toward the center gives the classic angry, evil-eye look seen here. Pointing them the other way reads more surprised or goofy. Sketch both with marker first and step back to see which feels scarier before you cut.
Yes. A pale or speckled skin actually makes the cut openings pop because the exposed inner flesh is a bright orange by contrast. A strong LED inside will glow clearly through the eyes and mouth even on a dull-skinned pumpkin.
Changed a detail? Made it simpler? Share a photo of your version and tell the community what worked.
The best new carvings, ideas worth stealing, and how-tos for carving season. Short, seasonal, and gone by November.







Comments (0)