Halloween Pumpkin Carving Contest · Starts October 1st · $500 in prizes
← Back to ideas
@ai_concepts
Sep 14, 2026
Winged Gargoyle Face PumpkinAI
0

Winged Gargoyle Face Pumpkin

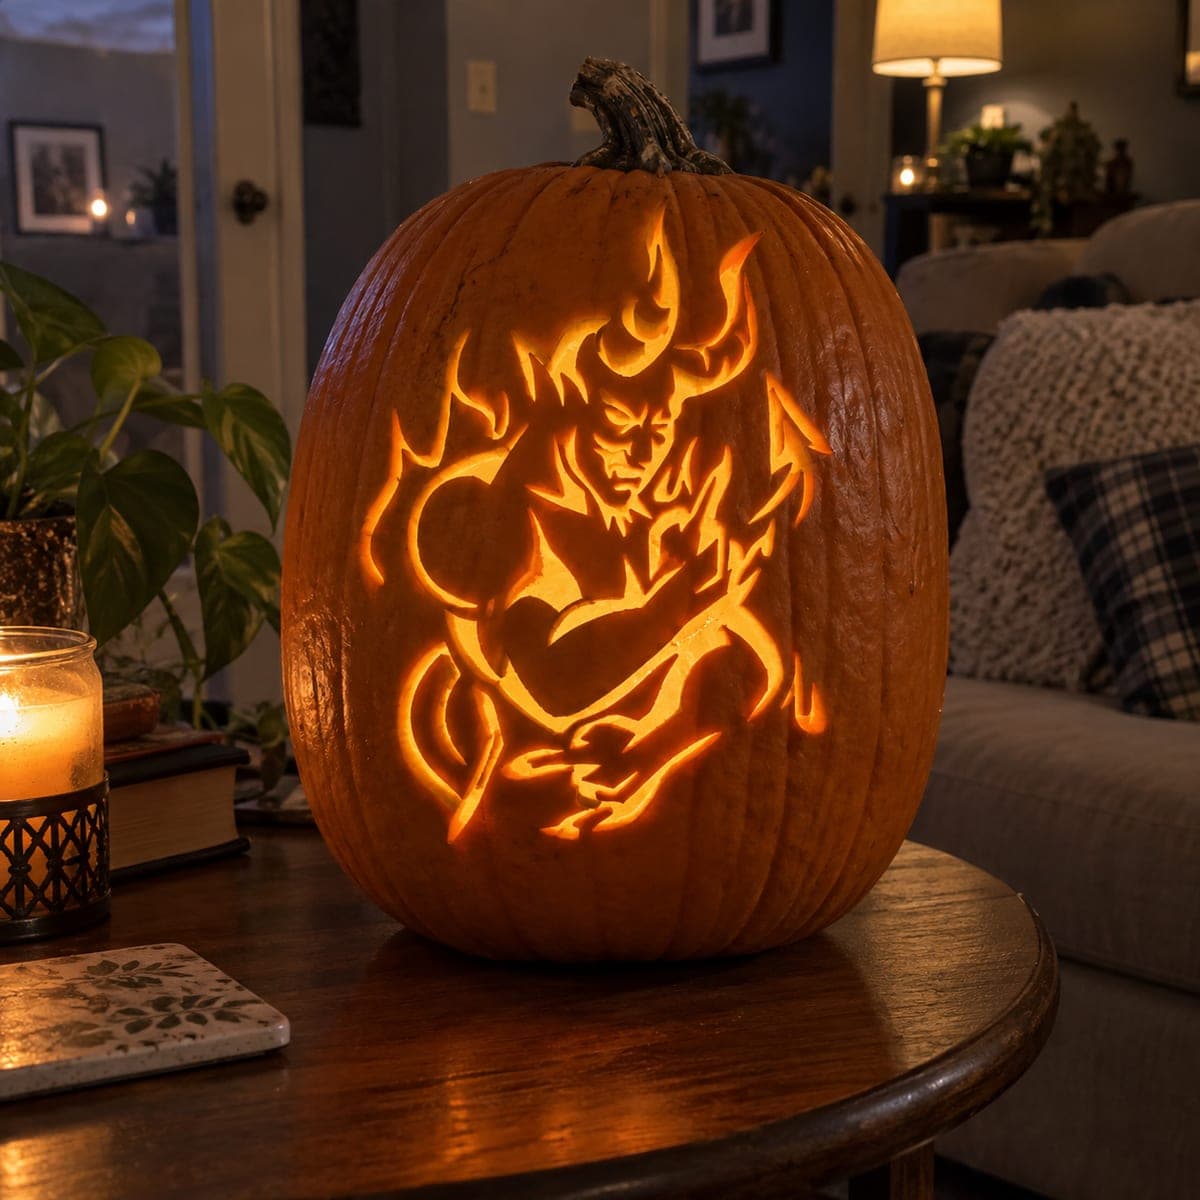
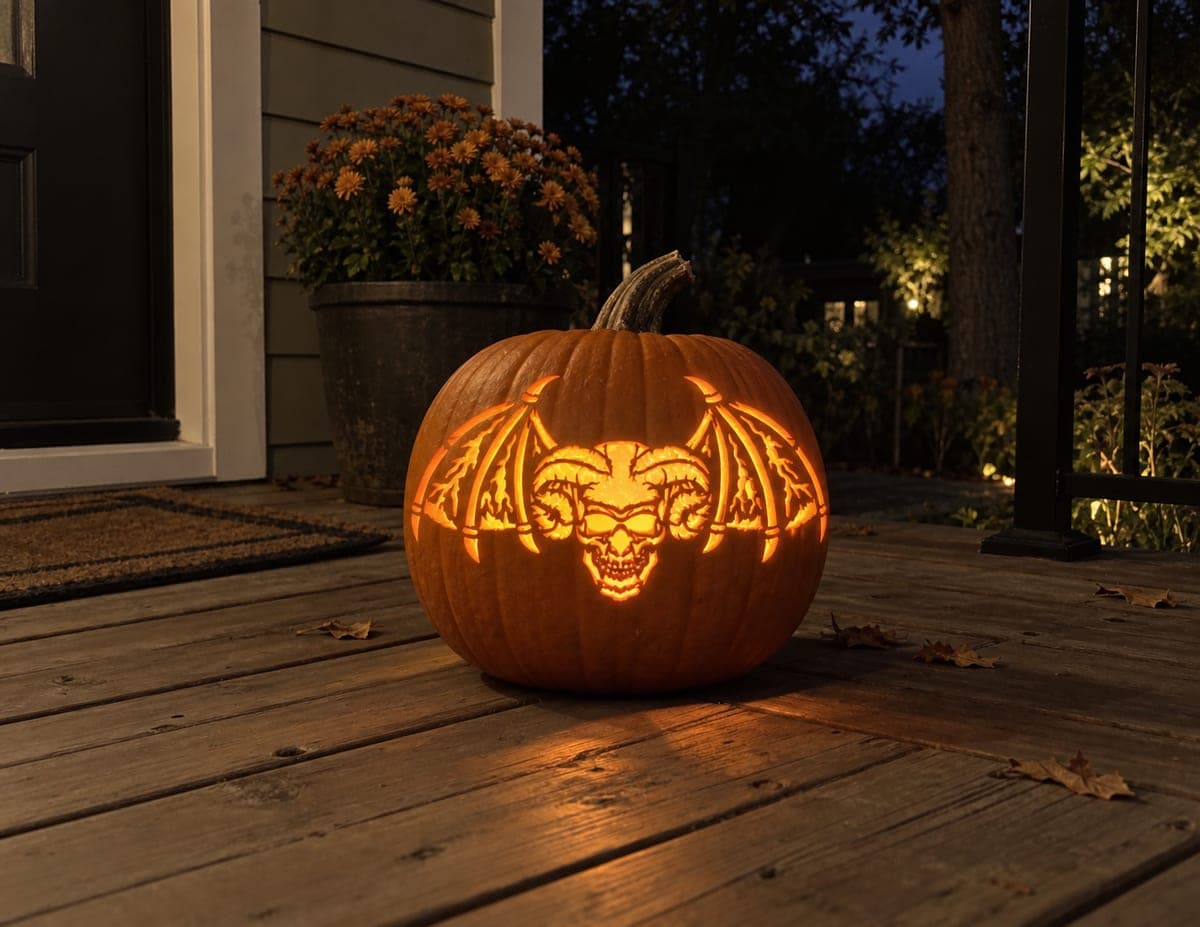
A snarling skull with ram horns sits centered between two large leathery bat wings detailed with web veins and claw tips, filling the entire pumpkin face in a symmetrical design. Each wing membrane panel is pierced through, flooding the jack-o-lantern with a dramatic orange glow in this hard pumpkin carving idea. Start by cutting the central skull, which anchors both wings, and leave the thin vein lines between wing panels as raised skin bridges rather than removing them entirely so the fragile outer wing edges stay intact.

This is an AI-generated concept image: a realistic, carvable design idea rather than a photo of a finished carve. AI concepts are always labeled and sit out the leaderboard and the contest.

No ratings yet · Sign in to rate
Comments (0)

  • No comments yet — be the first.

Save without an account. Sign in to like or comment.

Our tips for carving a similar design

The core trick here is the symmetrical layout: a ram-horned skull anchors the middle while two leathery wings fan out to fill the whole face. The wing membranes are cut all the way through for a bright glow, but the thin vein lines are left as raised skin bridges so the fragile outer edges stay connected. Carve the skull first since it holds everything together, then work the wings outward one panel at a time.

Written by PumpkinCarvingIdeas.com, inspired by the image above. These are our suggestions, not instructions from the uploader. This approach to the AI concept has not been tested on a real pumpkin.

From pumpkin to porch

  1. Prep the pumpkin and transfer the design

    Pick a large, round pumpkin with a broad flat face so the wide wingspan fits. Cut a lid from the bottom or the back rather than the top, which keeps the tall stem intact and gives you a stable base. Scrape the inside wall down to about one inch thick on the face side so light passes through easily. Tape your stencil on and poke the outlines with a pin or a pounce wheel, marking the skull, horns, and each wing vein clearly.

  2. Carve the central skull first

    Start with the skull since it anchors both wings. Cut the eye sockets and nose fully through for the brightest points, then peel a thin layer of skin off the cheekbones and brow to give the face a dim orange contour. Work slowly around the curled ram horns and keep a little uncut skin between the horns and the wings so nothing snaps loose. Take breaks and let an adult handle the fine detail cuts.

  3. Map the wing panels and their bridges

    Before removing anything, look at how the vein lines divide each wing into membrane panels. Those veins should stay as raised skin bridges, not cutouts, so the outer wing edge keeps its support. Lightly score the vein lines first so you have a visible boundary to cut up to. This planning step is what keeps a fragile-looking wing from falling apart.

  4. Cut the wing membranes through

    Now cut each membrane panel all the way through, working from the panels nearest the skull outward toward the wing tips. Leave the pointed claw tips and the top wing spurs attached to solid skin so they do not break. Cut the largest openings last so the wall stays rigid while you carve. Use gentle sawing strokes and clear the plug of pumpkin as you finish each panel.

  5. Shade and clean up the edges

    Peel skin off any spots you want to glow softly, like the inner wing ridges or the shadowed jaw, to add depth without full openings. Trim the inside edges of your cutouts at a slight outward bevel so more light escapes. Run your finger along each bridge to check it feels solid. Wipe away loose bits and dry the cut edges.

  6. Light it and take the photo

    Set a battery LED puck or string light inside, never a candle, since the thin walls and many openings can dry and scorch. Position the light low and slightly forward so it floods the wing cutouts and backlights the skull sockets. Test in a dark room and shift the light until both wings glow evenly. Photograph it at dusk on a porch step for that warm orange effect.

Gather your supplies

Check things off as you get ready.

Work on a stable surface, keep your free hand out of the cutting path, and have an adult handle sharp tools.

Three levels of light

  • Leave intact

    The vein bridges between wing panels and the outer wing edges stay as dark uncut skin.

  • Peel & shade

    The skull cheekbones, brow, and inner wing ridges are skin-peeled for a dim orange glow.

  • Cut through

    The wing membrane panels, eye sockets, and nose are cut through for the brightest light.

Learn the carving basics

Before you start cutting

How do I keep the thin wing veins from breaking?

Leave the vein lines as raised bands of skin rather than cutting them out. They act as bridges that connect the outer wing edge to the body of the pumpkin. Score them lightly first so you know exactly where to stop cutting each membrane panel.

Should I cut the skull or the wings first?

Carve the central skull first because it anchors the whole layout and gives you a reference for keeping the wings symmetrical. Once the face is set, work the wing panels outward from the skull toward the tips. Save the largest wing openings for last so the wall stays firm.

This is a concept image, so can a real pumpkin hold this many cutouts?

Yes, if you keep the vein bridges intact and thin the wall to about one inch for good light flow. The many openings do weaken the face, so avoid a top lid and instead cut your access hole from the back or bottom. A real carve will look a touch chunkier than the smooth digital version, which is normal.

Your take belongs here, too.

Changed a detail? Made it simpler? Share a photo of your version and tell the community what worked.

Share your pumpkin

More pumpkins like this

You've reached the end · 8 pumpkins
The Patch Report

Fresh pumpkins, in your inbox.

The best new carvings, ideas worth stealing, and how-tos for carving season. Short, seasonal, and gone by November.

A short email during carving season. Unsubscribe anytime. See our privacy policy.