Halloween Pumpkin Carving Contest · Starts October 1st · $500 in prizes
← Back to ideas
@ai_concepts
Jul 11, 2026
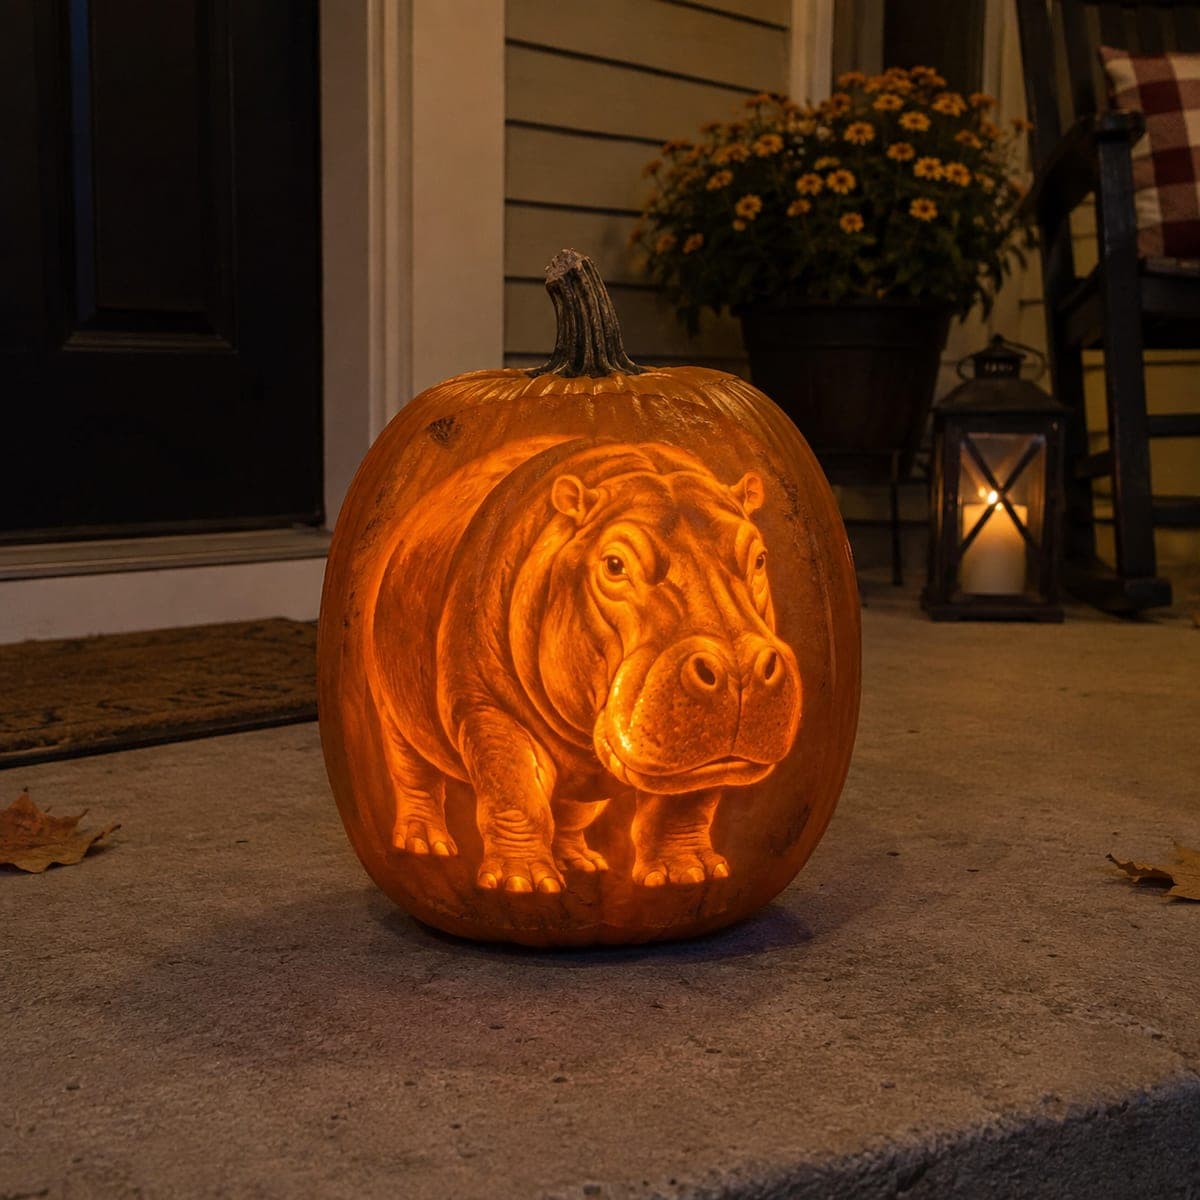
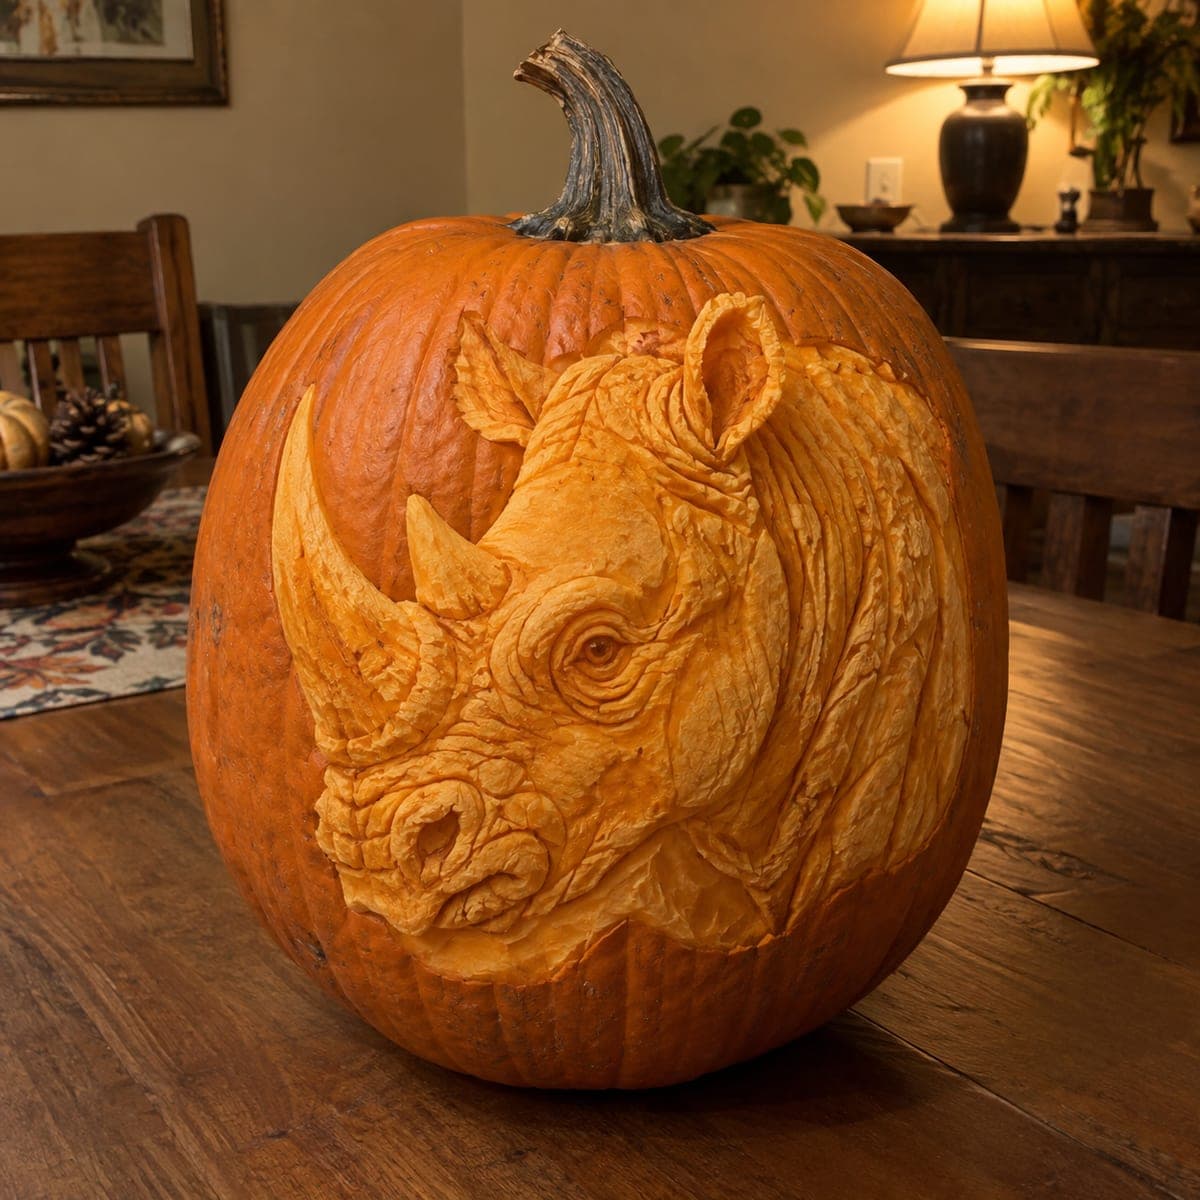
Baby Hippo Glowing Relief Carved PumpkinAI
0

Baby Hippo Glowing Relief Carved Pumpkin

A chunky hippo stands in full-body relief on this pumpkin, backlit so its rounded snout, wrinkles, and stubby legs glow from within. The effect comes from carving the entire background thin while modeling the hippo at varying depths, letting light grade smoothly across its body. Save this one for a large, thick-walled pumpkin, and use a bright cool LED inside so the fine wrinkle lines show against the warm flesh.

This is an AI-generated concept image: a realistic, carvable design idea rather than a photo of a finished carve. AI concepts are always labeled and sit out the leaderboard and the contest.

No ratings yet · Sign in to rate
Comments (0)

  • No comments yet — be the first.

Save without an account. Sign in to like or comment.

Our tips for carving a similar design

The core trick here is relief carving: instead of cutting shapes all the way through, you shave the pumpkin wall to different thicknesses so light grades smoothly across the hippo's body. The whole background gets scooped thin and bright while the hippo stays thicker and darker, then you model its rounded snout, wrinkles, and stubby legs at varying depths. Plan on a large, thick-walled pumpkin and a cool white LED so the fine lines read clearly.

Written by PumpkinCarvingIdeas.com, inspired by the image above. These are our suggestions, not instructions from the uploader. This approach to the AI concept has not been tested on a real pumpkin.

From pumpkin to porch

  1. Prep the pumpkin and open the back

    Pick the largest, heaviest, thickest-walled pumpkin you can find, since relief work needs plenty of material to shave into. Cut a wide access hole in the back rather than the top so the lid does not steal light from your scene. Scrape the inside wall behind the hippo down to about one inch thick and even it out with a loop tool. A consistent starting thickness makes your later shading predictable.

  2. Transfer the hippo outline

    Tape a hippo relief stencil to the front and poke the main outlines with a pin or transfer tool. Mark the body edge, the head, ears, the rounded snout, and the four stubby legs as separate zones. Keep the pattern low and centered on the fattest part of the pumpkin so the belly sits at the roundest spot. Step back and check the whole animal fits before you cut anything.

  3. Carve the background thin for the glow

    Using a loop or ribbon tool, shave away the entire area around the hippo, taking the wall down until it glows brightly when lit. Work slowly and check often against a light so you keep the background even. This bright halo is what makes the darker hippo pop forward. Do not cut clean through unless you want a few small full-bright accents.

  4. Model the body from thick to thin

    Now sculpt the hippo itself, leaving the darkest areas thickest and thinning toward highlights. Round the snout and cheeks so they catch the most inner light, and leave the back and shadowed leg sides thicker and darker. Blend gradually so there are no hard steps, letting the glow fade from bright belly to dim back. Test with your LED frequently to judge the gradient.

  5. Etch the fine wrinkles and details

    Switch to a small detail tool or veined lino gouge for the wrinkle lines, nostrils, eye ridges, and toe splits. Scratch these shallow so they read as dark hairlines against the lit flesh. Keep the ear edges and leg outlines attached to the surrounding surface rather than cutting them free. Little bridges of uncut skin keep delicate features from tearing.

  6. Light it and photograph

    Drop in a bright cool white LED, ideally two, to spread even light behind the thin background. Set the pumpkin on a porch step at dusk and check that the wrinkles show against the warm flesh tones. Mist the cut surfaces with water and refrigerate between showings to slow shrinking. Snap your photo while the gradient still looks crisp.

Gather your supplies

Check things off as you get ready.

Work on a stable surface, keep your free hand out of the cutting path, and have an adult handle sharp tools.

Three levels of light

  • Leave intact

    The hippo's back, upper body, and shadowed leg sides stay thick and dark to keep its mass.

  • Peel & shade

    The rounded snout, cheeks, belly, and background all get shaved thin for a graded orange glow.

  • Cut through

    Only tiny optional accents, like a nostril highlight, go all the way through for full brightness.

Learn the carving basics

Before you start cutting

This is an AI concept, so can a real pumpkin actually glow like this?

Yes, the effect is achievable with true relief carving, though it takes patience. The smooth gradient comes from carefully varying wall thickness rather than any single cut. Expect to spend real time testing against your light as you shave.

Why does the pumpkin need to be so thick?

Relief shading only works if you have material to remove at different depths. A thin-walled pumpkin gives you no room to grade from dark to bright, and it can collapse as you scoop. A large, heavy, firm pumpkin holds the modeling much better.

Should I use one light or two?

Two cool white LEDs usually give the most even glow across a wide relief scene like this. A single light can leave the edges of the background darker than the center. Cool white also makes the fine wrinkle lines read more crisply than warm yellow bulbs.

Your take belongs here, too.

Changed a detail? Made it simpler? Share a photo of your version and tell the community what worked.

Share your pumpkin

More pumpkins like this

You've reached the end · 8 pumpkins
The Patch Report

Fresh pumpkins, in your inbox.

The best new carvings, ideas worth stealing, and how-tos for carving season. Short, seasonal, and gone by November.

A short email during carving season. Unsubscribe anytime. See our privacy policy.