Halloween Pumpkin Carving Contest · Starts October 1st · $500 in prizes
← Back to ideas
@ai_concepts
Jul 26, 2026
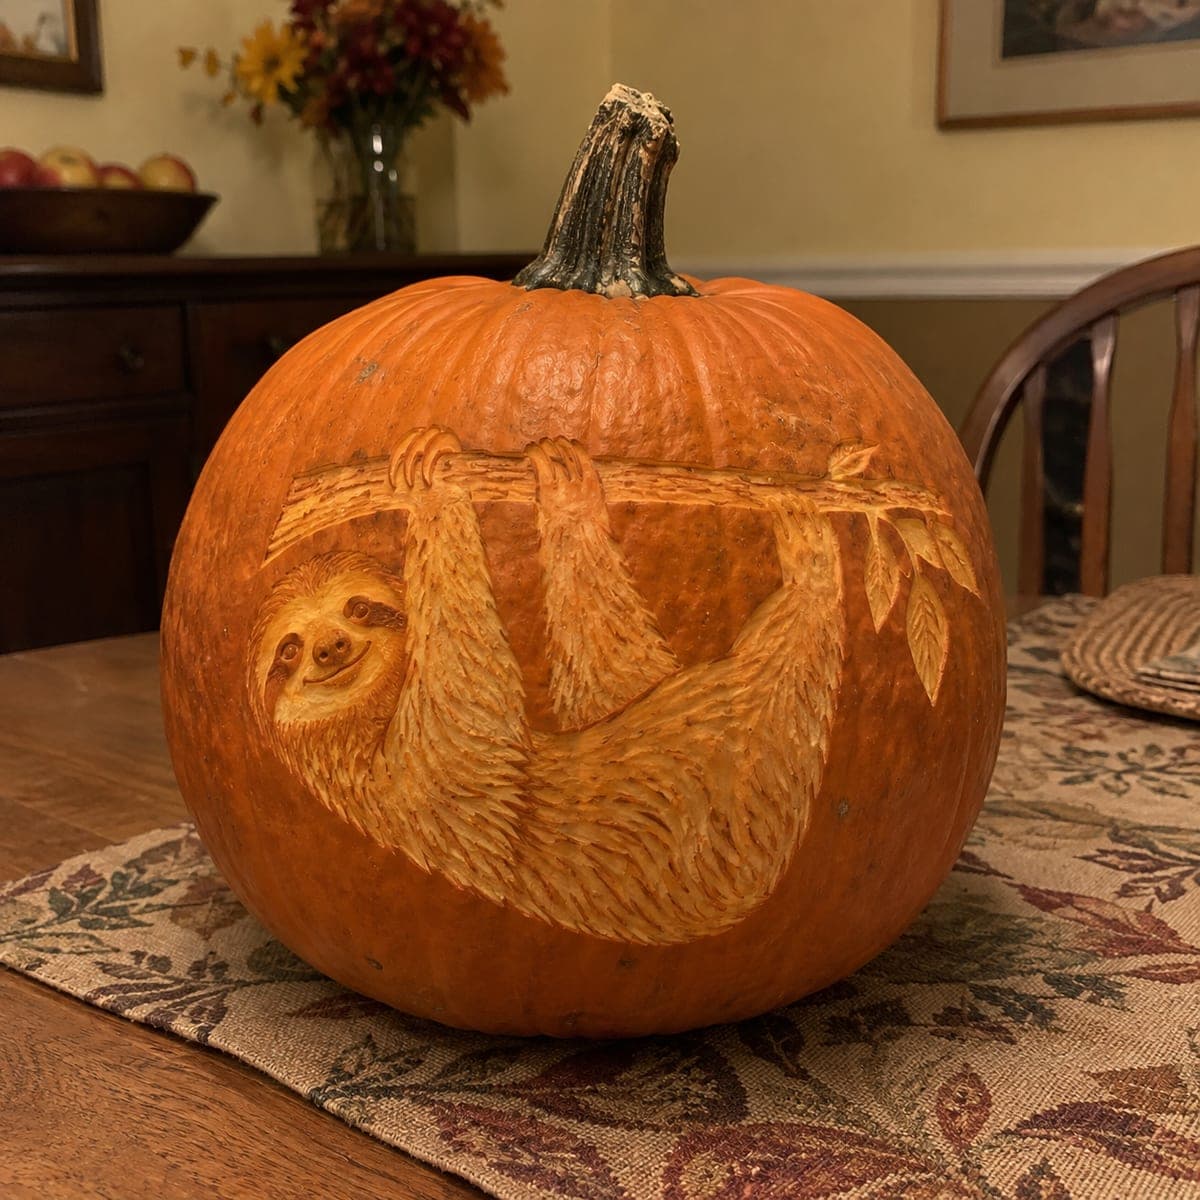
Hanging Sloth Relief Carved PumpkinAI
0

Hanging Sloth Relief Carved Pumpkin

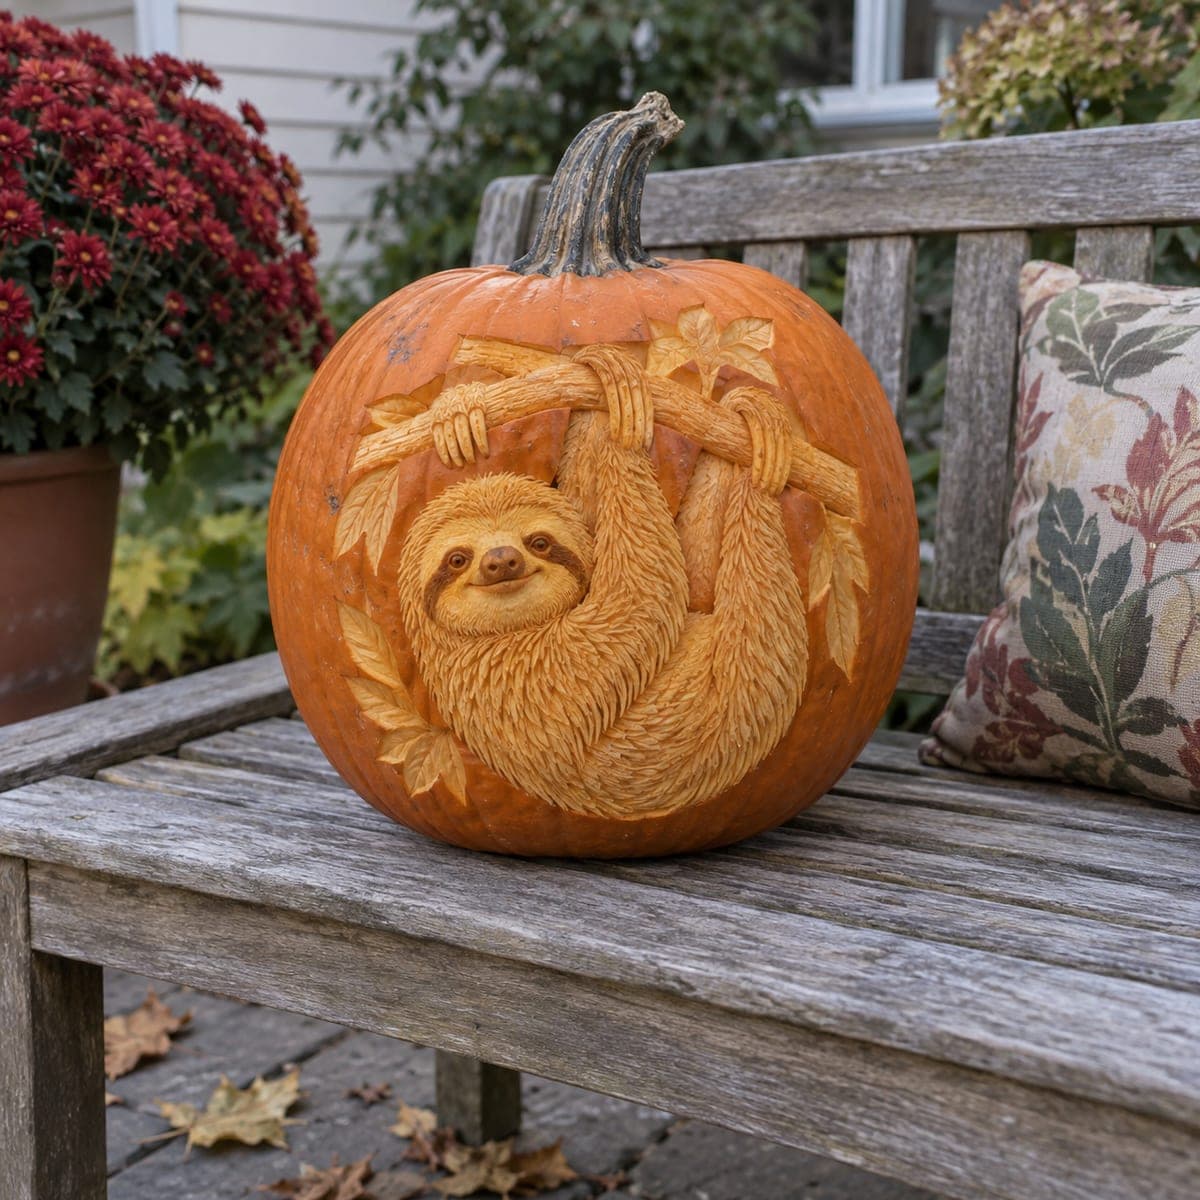
A shaggy sloth dangles from a sculpted branch on this pumpkin, smiling out from a wreath of carved leaves in deep dimensional relief. The branch and body are raised by clearing the background first, then the long fur is combed in with fine parallel gouge strokes that follow the hang of the arms. Rough out all the big forms before any fur texture, or the thin strokes will crumble. An instant conversation piece for a covered porch.

This is an AI-generated concept image: a realistic, carvable design idea rather than a photo of a finished carve. AI concepts are always labeled and sit out the leaderboard and the contest.

No ratings yet · Sign in to rate
Comments (0)

  • No comments yet — be the first.

Save without an account. Sign in to like or comment.

Our tips for carving a similar design

The core trick here is relief sculpting: instead of cutting holes, you carve away the background so the sloth and branch stand up in three dimensions. Rough out every big form first, then comb in fine parallel fur strokes that follow the hang of the arms. Because this is an AI concept and no real pumpkin exists, treat it as a plan for what you could carve with patience and a thick-walled pumpkin.

Written by PumpkinCarvingIdeas.com, inspired by the image above. These are our suggestions, not instructions from the uploader. This approach to the AI concept has not been tested on a real pumpkin.

From pumpkin to porch

  1. Pick a thick pumpkin and transfer the outline

    Choose a large pumpkin with a deep, firm wall, since relief work needs material to carve into. Cut a lid from the bottom rather than the top so the stem stays intact for the branch. Scrape the inside wall on the carving side to a workable thickness but leave it thick, at least an inch and a half. Tape your stencil on and poke through the main outlines of the sloth, branch, and leaf wreath.

  2. Clear the background

    Using a wide loop or ribbon tool, remove the skin and shave down the pumpkin flesh everywhere outside the sloth, branch, and leaves. Work slowly and keep the depth even so the raised shapes read clearly. This is the step that makes the figure pop, so take your time and step back often. Adults should handle all sharp tools here.

  3. Rough out the big forms

    Before any texture, sculpt the broad shapes: round the sloth's body and head, taper the arms up to the branch, and give the branch a rounded bark surface. Keep the arms attached to the branch as built-in bridges so nothing snaps. Do not carve fur or fine lines yet. If the large forms are wrong now, the delicate strokes later will crumble.

  4. Shape the face and shade the depths

    Carve the gentle smile, the eye patches, and the snout with a small detail gouge, keeping the muzzle raised and the eye areas slightly recessed. Use a fine tool to peel the darker fur mask around the eyes so it reads as shadow. Round the leaves and press a center vein into each one. Work shallow here since the face is small.

  5. Comb in the fur

    With a fine V-gouge or lino tool, draw long parallel strokes that follow the hang of the arms and the curve of the belly. Let the strokes flow downward like real sloth fur, curving around the face in a shaggy ring. Keep the pressure light and consistent so the texture stays crisp. This slow shading is what gives the whole piece its softness.

  6. Light it and photograph

    Drop a battery LED puck inside, never a candle, since the thin fur strokes and warm relief look best with steady cool light from below. Mist the carved surface and wrap it in plastic in the fridge between showings to slow drying. Set it on a covered porch out of direct rain. Shoot at dusk so the low light rakes across the fur and shows off the dimension.

Gather your supplies

Check things off as you get ready.

Work on a stable surface, keep your free hand out of the cutting path, and have an adult handle sharp tools.

Three levels of light

  • Leave intact

    The untouched orange skin around the wreath stays darkest, framing the scene.

  • Peel & shade

    The sloth's body, face, and branch glow soft mid-orange where the skin is peeled and shaded.

  • Cut through

    Skip full cutouts on this design; if you want a bright accent, cut only a couple of small gaps between the branch leaves.

Learn the carving basics

Before you start cutting

How thick does my pumpkin wall need to be for this?

Aim for a wall at least an inch and a half thick on the carving face, thicker if you can find it. Relief work carves down into the flesh rather than through it, so you need material to sculpt the raised body and branch. A thin-walled pumpkin will break through before you get any depth.

How do I keep the sloth's arms and the branch from breaking?

Carve the arms as raised shapes that stay physically connected to the branch, which turns them into natural bridges. Never fully undercut a thin limb until the surrounding forms support it. Rough out all the big masses first and save the finest fur strokes for last.

This looks hard. Is it realistic for one evening?

This is an expert relief carving and it will take several hours of patient work, not a quick evening project. Break it into sessions: clear the background one day, rough the forms, then texture the fur. If that feels like too much, start with a simpler cute animal stencil and build up your shading skills first.

Your take belongs here, too.

Changed a detail? Made it simpler? Share a photo of your version and tell the community what worked.

Share your pumpkin

More pumpkins like this

You've reached the end · 8 pumpkins
The Patch Report

Fresh pumpkins, in your inbox.

The best new carvings, ideas worth stealing, and how-tos for carving season. Short, seasonal, and gone by November.

A short email during carving season. Unsubscribe anytime. See our privacy policy.