Halloween Pumpkin Carving Contest · Starts October 1st · $500 in prizes
← Back to ideas
@ai_concepts
Sep 25, 2026
Crescent and Sixteen Stars Glowing PumpkinAI
0

Report this carving

Tell us what is wrong. Reports are private.

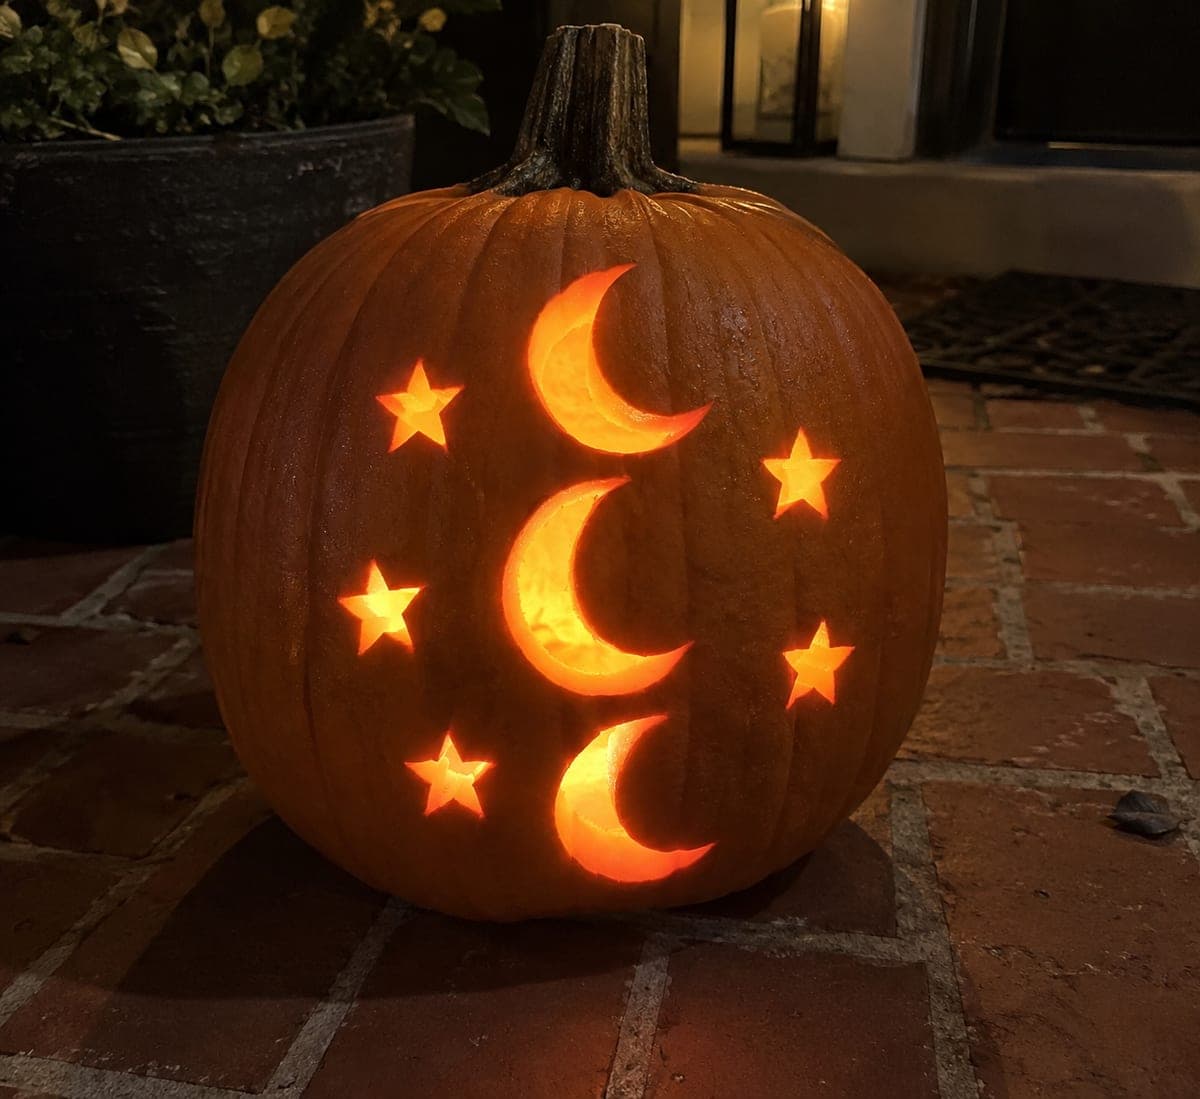
Crescent and Sixteen Stars Glowing Pumpkin

One bold crescent moon opening and sixteen individually cut five-pointed stars create a celestial unique pumpkin carving idea that glows brilliantly when lit from within. Transfer the crescent and each star onto the surface before cutting, maintaining at least 10mm of solid rind between every opening to prevent the wall from cracking. Cut the crescent first as the largest opening, then work through the stars from largest to smallest. A high-output LED lantern inside maximizes the distinct glow of each star point.

No ratings yet · Sign in to rate

Save this design for carving night, then share a photo of your own jack-o'-lantern once it's glowing.

Comments (0)

  • No comments yet — be the first.

Save without an account. Sign in to like or comment.

Our tips for carving a similar design

One large crescent opening and sixteen five-pointed stars are cut completely through the wall. The crescent goes first because it is the largest and most structurally impactful opening. Maintaining at least 10mm of solid rind between every opening prevents the wall from cracking as the star count accumulates. A high-output LED maximizes the distinct glow of every star point.

From pumpkin to porch

  1. Hollow and check wall thickness

    Cut the lid, scoop, and scrape the interior front wall to a consistent inch or slightly less. With seventeen openings planned, the wall needs to start thick enough to sustain all the cuts. Mark any thin spots and scrape them to match the rest before transferring the design.

  2. Transfer the crescent and stars

    Tape the template to the face and trace the crescent and all sixteen star positions with a stylus. Remove the template and confirm each opening has at least 10mm of planned rind between it and any neighbor. Adjust any star that looks too close to another before cutting.

  3. Cut the crescent first

    Use a fine-toothed saw to cut the crescent as one continuous opening. The crescent outer arc is the longest single cut on this design. Keep the saw moving steadily around the curve rather than stopping and restarting, which can leave visible notches.

  4. Cut stars largest to smallest

    Work through the sixteen stars from the largest down to the smallest. Use two-cut technique for each point: approach from one side, stop at the tip, then cut from the other side to meet it. Push each star piece inward once it is free.

  5. Inspect and reinforce

    After all seventeen openings are cut, press gently on the pumpkin face and confirm no cracking has occurred between openings. If any rind strip between two stars looks very thin, a thin bead of super glue pressed along the back of that strip from inside can reinforce it.

  6. Light and display

    Insert a high-output LED lantern rather than a tea light for enough brightness to make all sixteen star points glow distinctly. A dim LED will make the stars look like blurry ovals rather than crisp stars. Display outdoors on a dark surface for maximum contrast.

Written with AI to match this design

Gather your supplies

Check things off as you get ready.

Work on a stable surface, keep your free hand out of the cutting path, and have an adult handle sharp tools.

Three levels of light

  • Leave intact

    All surrounding orange rind, including the space between the crescent arms and all rind between stars, stays solid dark

  • Peel & shade

    None, this is a pure cutout design

  • Cut through

    The crescent moon opening and all sixteen five-pointed star openings

Learn the carving basics

Before you start cutting

How do I space sixteen stars evenly around the crescent?

Divide the available face area outside the crescent into a rough grid before placing star marks. Aim for roughly equal spacing and alternate star sizes for variety. Actual even spacing matters less than maintaining the 10mm rind minimum between all openings.

What if two stars are too close together and cracking occurs?

Stop cutting immediately. Apply thin super glue along the crack from inside the pumpkin and hold the area steady for 60 seconds. Once set, continue cutting but work around the repaired area last and use lighter pressure near it.

Will the crescent opening weaken the wall enough to affect the star cuts?

A crescent cut well inside the border leaves most of the wall intact. Keep the crescent tips pointing away from the star cluster area if possible so the largest cuts and the star field are on different parts of the face rather than directly adjacent.

Your take belongs here, too.

Changed a detail? Made it simpler? Share a photo of your version and tell the community what worked.

Share your pumpkin

More pumpkins like this

You've reached the end · 8 pumpkins
The Patch Report

Fresh pumpkins, in your inbox.

The best new carvings, ideas worth stealing, and how-tos for carving season. Short, seasonal, and gone by November.

A short email during carving season. Unsubscribe anytime. See our privacy policy.