Halloween Pumpkin Carving Contest · Starts October 1st · $500 in prizes
← Back to ideas
@ai_concepts
Sep 25, 2026
Detailed Football Helmet Hard Pumpkin CarvingAI
0

Report this carving

Tell us what is wrong. Reports are private.

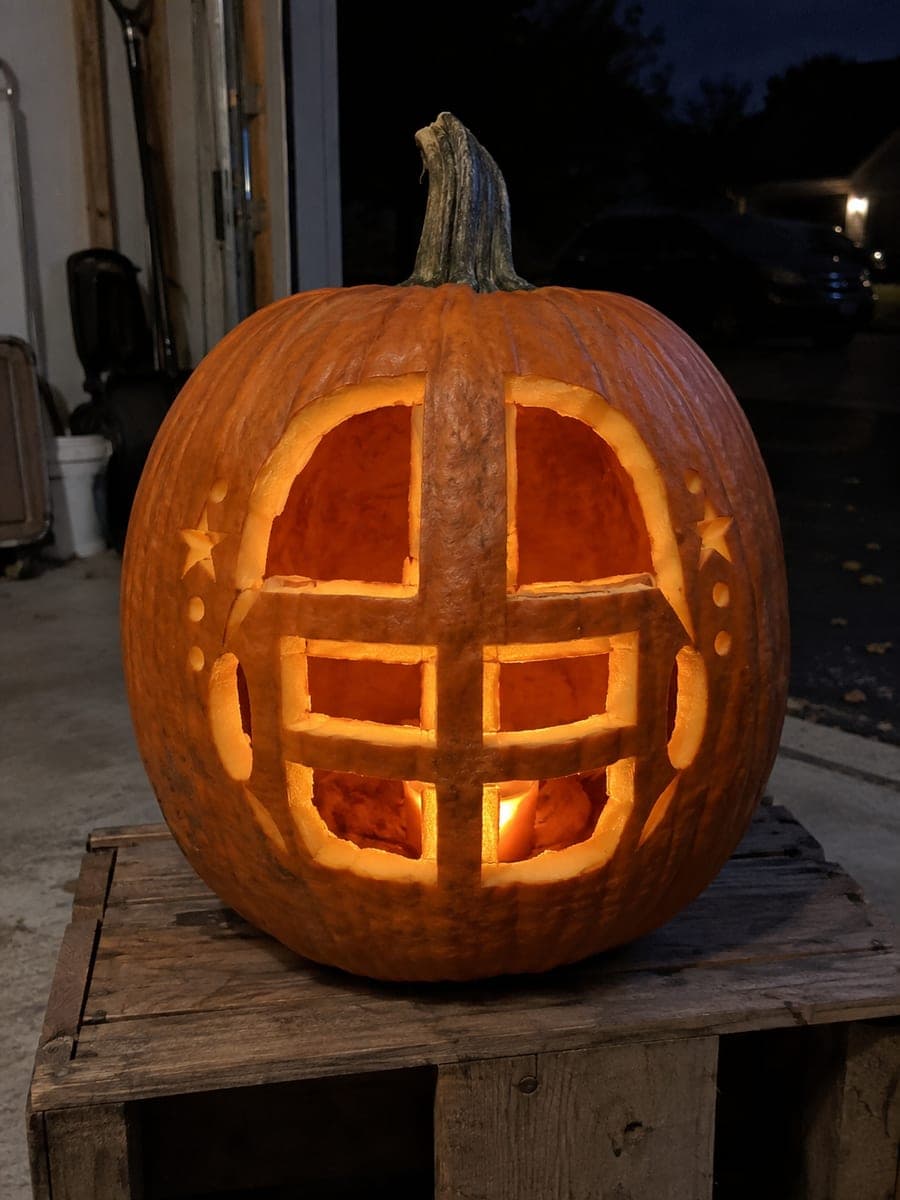
Detailed Football Helmet Hard Pumpkin Carving

A precisely detailed football helmet with open face-mask slots and surface-scored stripes makes this a rewarding hard football helmet pumpkin carving idea. Cut through-shapes are supported by connected rind bands while fine stripe detail stays backed by flesh. Start with the helmet dome, then add the face-mask bars from the widest slot to the narrowest. A bright white LED inside emphasizes the clean geometry of the design.

No ratings yet · Sign in to rate

Comments (0)

  • No comments yet — be the first.

Save without an account. Sign in to like or comment.

Our tips for carving a similar design

The hard version adds surface-scored stripe detail to the through-cut dome and face-mask grid. Cut-through shapes connect via broad rind bands, while stripe lines stay backed by flesh for structural integrity. Starting with the dome, then the widest mask slot, and moving to the narrowest keeps the shell balanced as material is removed. Bright white LED lighting rewards the extra detail work.

From pumpkin to porch

  1. Chill and prep

    Refrigerate the pumpkin for an hour to firm the flesh for cleaner scoring later. Cut a bottom entry, scoop completely, and scrape the interior wall to an even three-quarter-inch thickness. Lay out your medium saw, detail blade, and scoring tool before starting.

  2. Transfer dome, mask slots, and stripes

    Use two pin spacings: dense for through-cuts, sparse for score lines. Pin-transfer the full stencil in one session so all elements stay registered relative to each other. Mark stripe positions explicitly so you do not accidentally cut through them.

  3. Cut the dome aperture

    Saw the main dome opening with a medium blade, maintaining the rounded shoulder arcs. Remove the dome piece and confirm that the surrounding rind is at least one inch wide on all sides before proceeding.

  4. Cut face-mask slots widest to narrowest

    Begin with the widest slot and work toward the narrower ones. This order keeps maximum support around each new cut. Use a narrow blade and cut each slot's two long sides first, then the short ends to release the piece.

  5. Score the stripe lines

    Switch to a linoleum gouge or paring knife tip for the helmet stripes. Work in a single steady stroke per stripe, removing only the outer green skin without entering the orange flesh. Scored stripes glow softly against the dark unscored rind.

  6. Light and finish

    Insert a bright white LED and view in a dim room. The clean geometry of the dome, slots, and scored stripes should all read distinctly. Coat exposed edges and scored grooves with petroleum jelly to slow drying.

Written with AI to match this design

Gather your supplies

Check things off as you get ready.

Work on a stable surface, keep your free hand out of the cutting path, and have an adult handle sharp tools.

Three levels of light

  • Leave intact

    Outer shell border, rind bands between mask slots, and unscored background stay fully dark.

  • Peel & shade

    Surface-scored stripe lines glow faintly where outer skin is removed.

  • Cut through

    Dome aperture and all face-mask slots cut completely through for maximum brightness.

Learn the carving basics

Before you start cutting

How deep should the stripe scores be?

Score just deep enough to remove the outer green skin and reveal the white underlayer of the rind. Entering the orange flesh is too deep; the scored line will be noticeably brighter than intended and may weaken the rind. Make two shallow passes if needed rather than one deep one.

The dome is a big opening. Will the pumpkin stay rigid?

Yes, as long as the surrounding rind is at least one inch wide and the interior wall is not scraped thinner than three-quarters of an inch. The dome cut removes rind from one face but the shell curves around the back to maintain overall rigidity.

Can I paint the scored stripe areas for extra color?

Yes. Once scoring is complete and the pumpkin has dried slightly, apply a thin coat of acrylic paint in a contrasting color along the scored grooves using a fine brush. The scored channel guides the brush naturally and keeps the paint from spreading onto unscored rind.

Your take belongs here, too.

Changed a detail? Made it simpler? Share a photo of your version and tell the community what worked.

Share your pumpkin

More pumpkins like this

You've reached the end · 8 pumpkins
The Patch Report

Fresh pumpkins, in your inbox.

The best new carvings, ideas worth stealing, and how-tos for carving season. Short, seasonal, and gone by November.

A short email during carving season. Unsubscribe anytime. See our privacy policy.