Halloween Pumpkin Carving Contest · Starts October 1st · $500 in prizes
← Back to ideas
@ai_concepts
Jul 31, 2026
Dragonfly Wings Glowing Pumpkin CarvingAI
0

Dragonfly Wings Glowing Pumpkin Carving

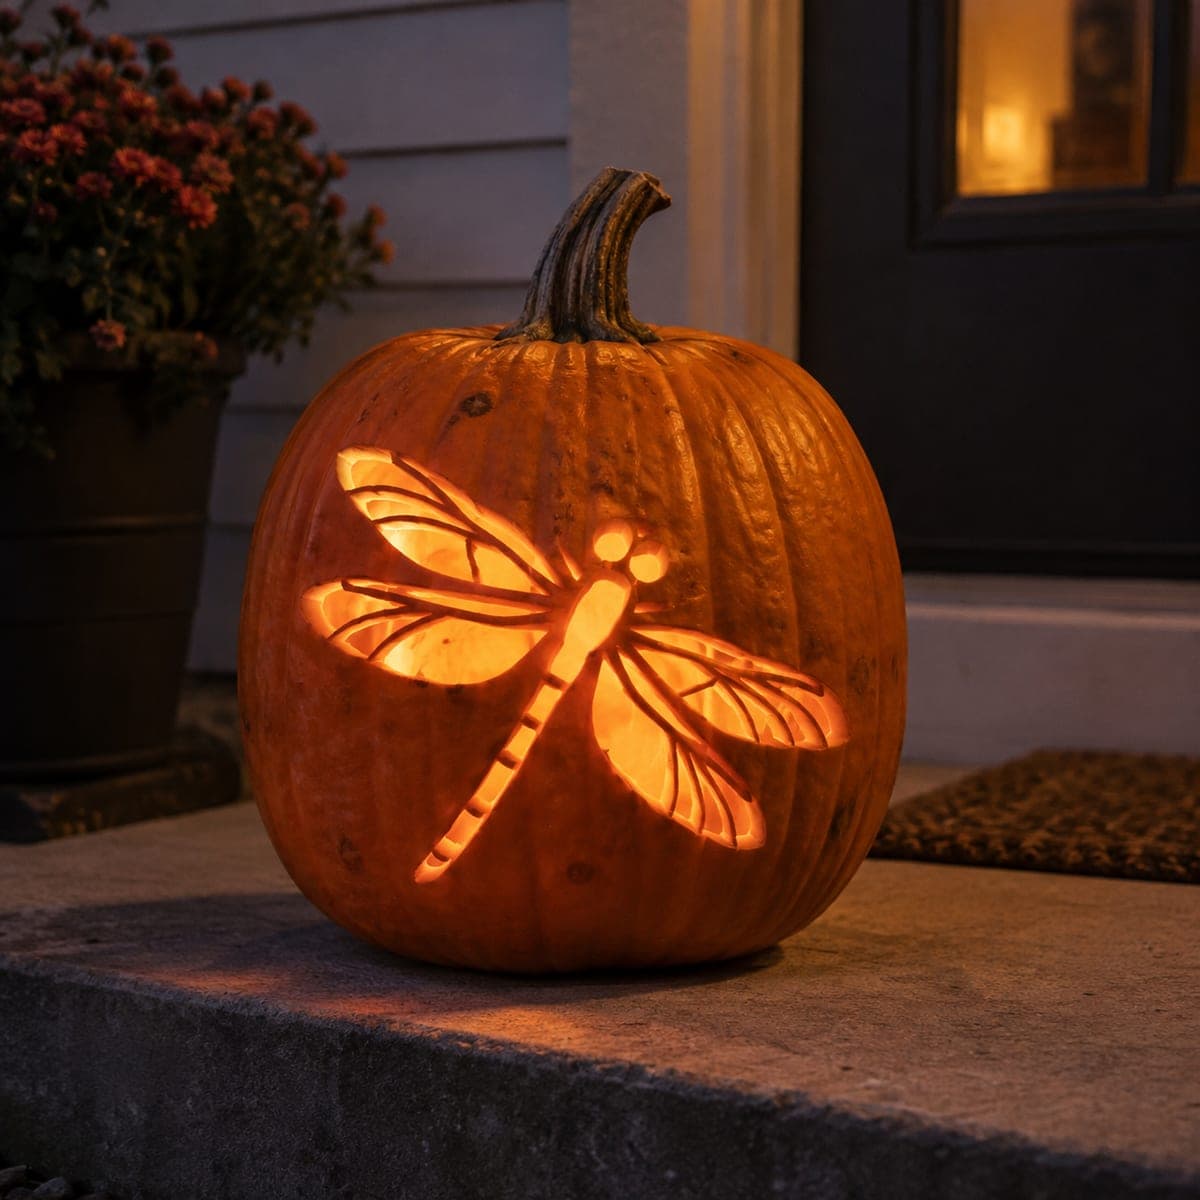
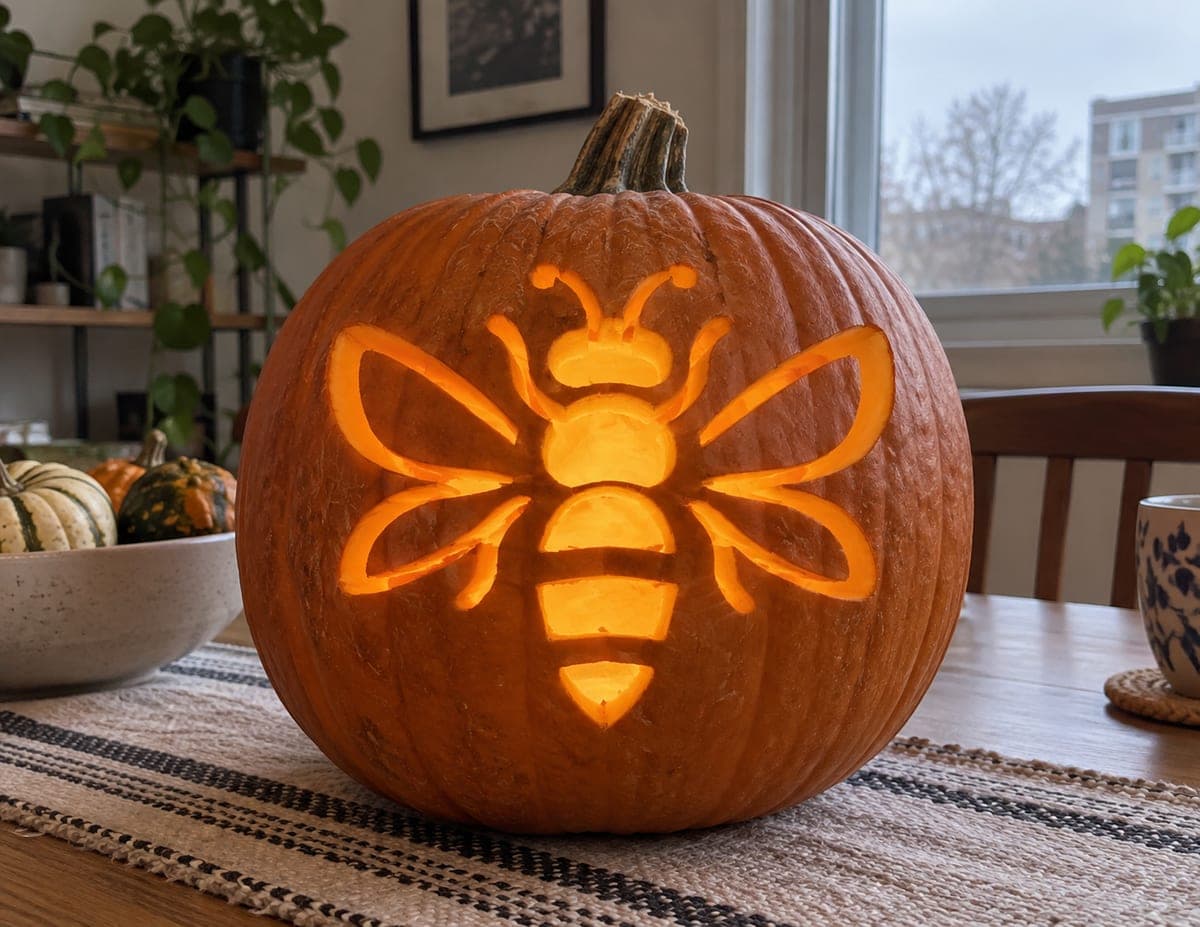
A dragonfly spreads four veined wings across this pumpkin, its segmented tail curving down toward the base while the lattice wing panes glow like leaded glass. The wings are the fun part, a network of small pierced openings separated by thin skin bridges that mimic real wing veins. Cut the tiny panes from the center of each wing outward so the surrounding wall stays supported, and etch the body for a softer glow. Beautiful beside late-season garden mums.

This is an AI-generated concept image: a realistic, carvable design idea rather than a photo of a finished carve. AI concepts are always labeled and sit out the leaderboard and the contest.

No ratings yet · Sign in to rate
Comments (0)

  • No comments yet — be the first.

Save without an account. Sign in to like or comment.

Our tips for carving a similar design

The heart of this design is the network of small pierced wing panes held apart by thin skin bridges, so the four wings read like leaded glass when lit. Keep those bridges intact and the wings stay strong. You could pair full cutouts in the wings with a lightly etched body and tail so the insect glows in two brightness levels against dark, untouched skin.

Written by PumpkinCarvingIdeas.com, inspired by the image above. These are our suggestions, not instructions from the uploader. This approach to the AI concept has not been tested on a real pumpkin.

From pumpkin to porch

  1. Pick and prep your canvas

    Choose a tall, smooth pumpkin with one broad, flat-ish face for the dragonfly. Cut a lid from the bottom or the back rather than the top so the front stays clean and the shell stays sturdy. Scrape the inside wall behind the design down to about one inch thick so light passes through easily. A thinner wall makes the fine wing panes much easier to cut.

  2. Transfer the stencil

    Tape your dragonfly stencil flat against the front, snipping the edges so it hugs the curve without wrinkling. Poke the pattern outline with a pin or transfer tool, marking every wing vein, the body segments, and the tail joints. Peel the paper and check that all the tiny wing panes and their connecting bridges are clearly dotted. Mark which shapes are full cutouts and which are etch-only before you start cutting.

  3. Etch the body and tail first

    Using a lino-style gouge or shallow blade, peel just the skin off the body, head, and each tail segment so they glow a soft dim orange. Keep the thin ridge lines between tail segments as untouched skin so the segmentation reads clearly. Work slowly and stay shallow here, since you only want to remove the outer layer, not cut through. Doing this before the delicate cutouts keeps the wall solid while you press on it.

  4. Cut the wing panes from the center out

    Switch to a fine detail saw or craft blade and cut the small wing panes one at a time, starting near the body and working outward toward the wingtips. Leave every thin skin bridge between panes in place, since those are your vein lines and the only thing holding the wings together. Make gentle, repeated passes instead of forcing the blade, and clear each pane before moving to the next. Cutting inner shapes first keeps the outer wall supported until the very end.

  5. Clean up and finish the tips

    Save the largest openings and the outermost wingtip panes for last, when the surrounding shell no longer needs their support. Trim any ragged edges from the back so light spreads evenly through each pane. Gently bevel the inside edge of the bigger cutouts to widen the glow. Rub a little petroleum jelly on the cut edges to slow drying and keep the fine veins from curling.

  6. Light it and photograph

    Set a battery LED puck or a string of warm LEDs inside, never a candle near these delicate bridges. Position the light low and slightly behind the design so the wing lattice lights up like stained glass. Photograph at dusk with the wings glowing bright and the etched body a softer orange. Stage it beside late-season mums for that garden feel.

Gather your supplies

Check things off as you get ready.

Work on a stable surface, keep your free hand out of the cutting path, and have an adult handle sharp tools.

Three levels of light

  • Leave intact

    The background pumpkin skin and the thin vein bridges between wing panes stay untouched and dark, drawing the shape.

  • Peel & shade

    The dragonfly body, head, and tail segments are skin-peeled for a soft dim glow.

  • Cut through

    The small wing panes are cut fully through so the lattice shines brightest, like leaded glass.

Learn the carving basics

Before you start cutting

How do I keep the thin wing veins from breaking?

Thin the inside wall to about one inch so you can use light pressure, and cut each pane in small repeated passes rather than forcing the blade. Always cut the inner panes first and the outer ones last so the shell stays supported. If a bridge feels fragile, leave it slightly wider than the stencil shows.

Should the body be cut through or just etched?

Etching the body and tail gives a softer, dimmer glow that contrasts nicely with the bright wing cutouts, which is what makes the dragonfly pop. Peel only the skin and stay shallow. If you cut the body all the way through, it will blend into the wings and lose that layered look.

This is shown as a concept image. Can a real pumpkin hold this many cutouts?

Yes, if you keep the vein bridges reasonably wide and the wall thin. A real pumpkin will support a wing lattice as long as you do not shave the bridges too narrow and you save the biggest openings for last. Work on a fresh, firm pumpkin and it will hold up well for display.

Your take belongs here, too.

Changed a detail? Made it simpler? Share a photo of your version and tell the community what worked.

Share your pumpkin

More pumpkins like this

You've reached the end · 8 pumpkins
The Patch Report

Fresh pumpkins, in your inbox.

The best new carvings, ideas worth stealing, and how-tos for carving season. Short, seasonal, and gone by November.

A short email during carving season. Unsubscribe anytime. See our privacy policy.