Halloween Pumpkin Carving Contest · Starts October 1st · $500 in prizes
← Back to ideas
@ai_concepts
Sep 25, 2026
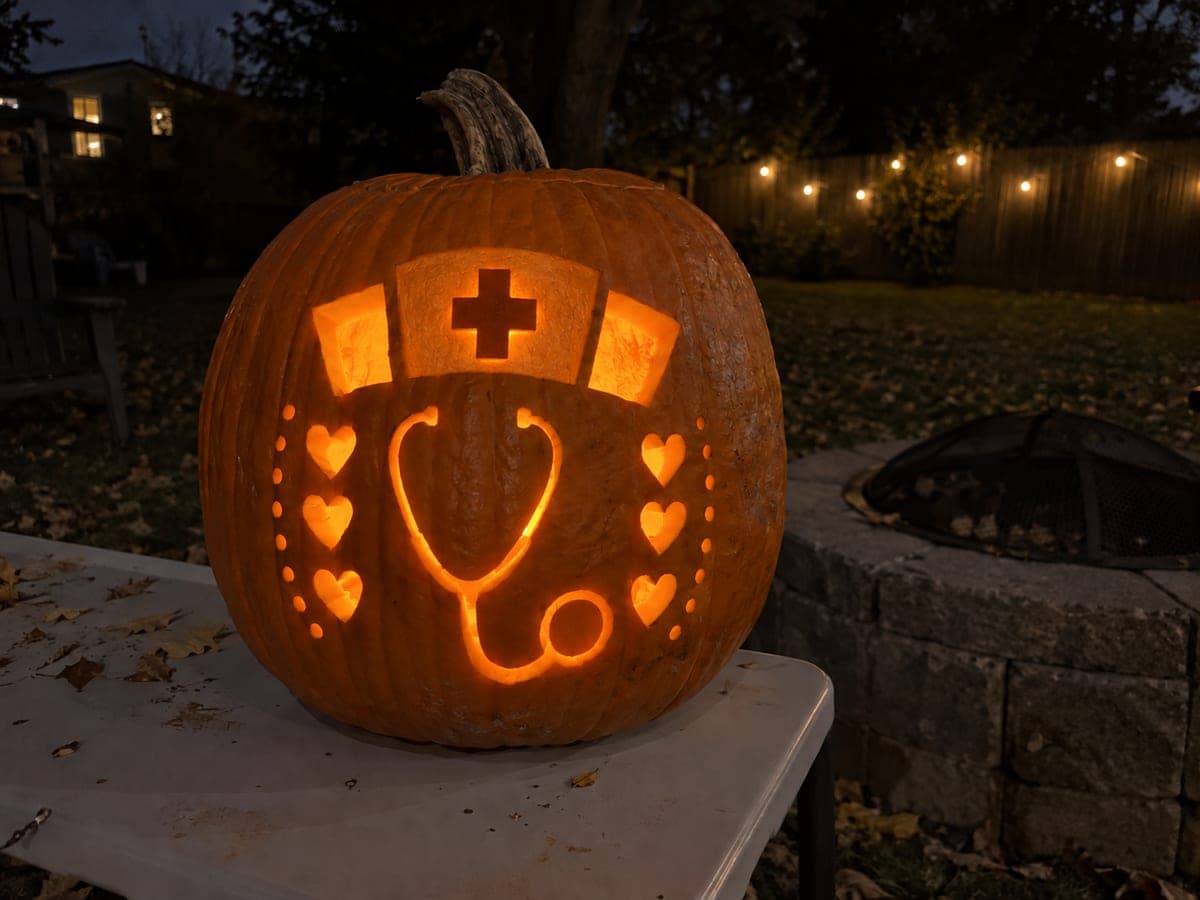
Expert Nurse Pumpkin Carving With Layered DetailAI
0

Report this carving

Tell us what is wrong. Reports are private.

Expert Nurse Pumpkin Carving With Layered Detail

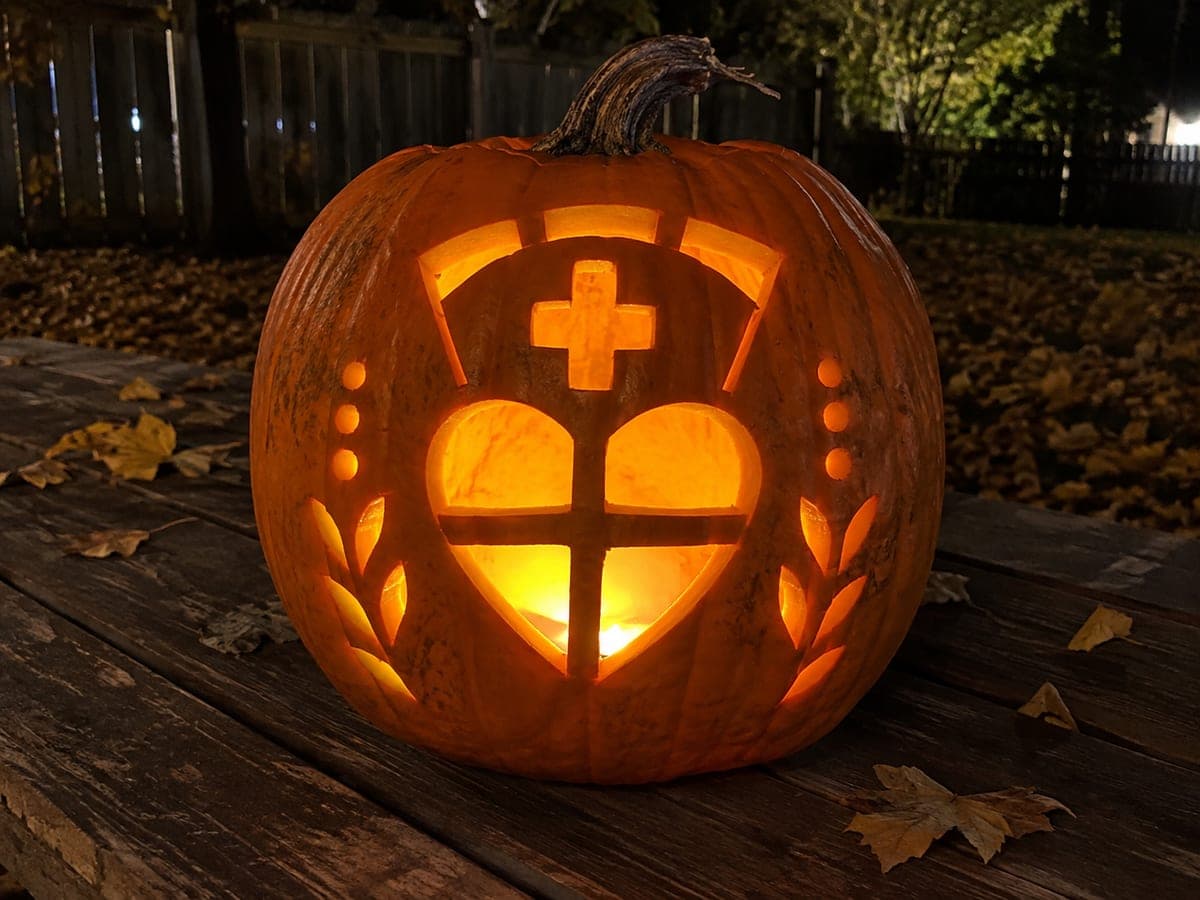
Fine nurse-themed motifs with complex interlocking apertures and shallow backed accents make this an impressive nurse pumpkin carving idea for a hospital themed display or contest. Plan the cut sequence so structural bridges are the last elements touched, working from background windows inward toward the most detailed foreground shapes. Backed detail areas should be thinned to roughly half the rind thickness for a consistent amber glow without breakthrough. Photograph this jack-o-lantern in a dark room to capture the full range of light and shadow.

No ratings yet · Sign in to rate

Comments (0)

  • No comments yet — be the first.

Save without an account. Sign in to like or comment.

Our tips for carving a similar design

The expert version earns its difficulty from complex interlocking apertures where the negative space of one opening borders the retained rind of another, leaving only narrow bridges holding the composition together. The plan is to thin the rind uniformly before marking so backed accent areas glow at consistent intensity, then cut background windows first and work progressively inward until the most delicate foreground shapes are the very last elements touched. Photographing in a dark room captures the full tonal range from bright cut-through to soft amber backed details.

From pumpkin to porch

  1. Uniform rind thinning

    Before marking any pattern, scoop the interior until the entire carving area is at a consistent thickness, around three-quarters of an inch. Use a scoop with depth markings or tape a rubber band around a spoon handle to gauge depth. Even thinning means every backed accent area will glow at the same intensity without any bright or dark patches.

  2. Pattern transfer and bridge audit

    Attach the printed pattern with tape and trace every line with a pin tool. Remove the paper and circle every planned bridge with a marker, then measure each one. Any bridge thinner than half an inch on a design this dense is a candidate for widening in the pattern before you cut. Resolve structural questions now, not mid-carve.

  3. Cut background windows

    Begin with the outermost, largest apertures that serve as the background windows of the composition. Work in confident continuous strokes, using a very fine-toothed saw blade for curves. These outer cuts relieve surface tension in the rind and make subsequent fine cuts more predictable. Confirm each background piece is free before moving inward.

  4. Work inward through medium and fine cuts

    Progress through medium-sized apertures and then the finest detail cuts, always keeping central bridges intact until the last possible moment. For cuts under a quarter inch wide, a pointed craft knife drawn in short controlled strokes gives more precision than a saw. Keep the pumpkin on a non-slip mat so it does not shift during delicate work.

  5. Carve backed accents

    With all through-cuts complete, hold a gouge nearly flat and shave backed accent areas to roughly half the remaining rind thickness. Work in short, overlapping strokes in a single direction to maintain an even surface. These areas should transmit light softly; if an area looks too bright when you test it with a flashlight, it is approaching breakthrough depth.

  6. Final inspection and photography

    Insert an LED puck and turn off all room lights. Walk the pumpkin to the display position and observe the design from a normal viewing distance before making any final adjustments. Set up a dark backdrop and camera on a tripod to capture the full range from brightest cut-through to subtlest backed glow, which a phone camera in portrait mode at night handles well.

Written with AI to match this design

Gather your supplies

Check things off as you get ready.

Work on a stable surface, keep your free hand out of the cutting path, and have an adult handle sharp tools.

Three levels of light

  • Leave intact

    Narrow structural bridges and outer shell remain fully uncarved and appear as dark silhouette lines defining each motif.

  • Peel & shade

    Backed accent areas thinned to roughly half rind thickness glow with soft amber warmth at mid intensity.

  • Cut through

    Interlocking apertures cut fully through emit bright direct light, creating the strongest tonal contrast in the design.

Learn the carving basics

Before you start cutting

How do I plan the cut sequence for interlocking apertures without losing track?

Number each opening on your printed pattern in the order you plan to cut them, starting from the outermost background shapes. Tape the numbered printout next to your workspace so you can glance at it without picking it up with messy hands. Following a written sequence prevents the temptation to jump to an exciting detail cut before the supporting structure is ready.

What is the right backed depth when the rind has already been thinned uniformly?

After initial thinning to about three-quarters of an inch, backed areas should be taken to roughly half that, so about three-eighths of an inch total wall thickness. The uniform pre-thinning means you can use depth as a consistent guide rather than judging by eye each time. Test one backed area first and check the glow before committing to the entire pattern.

How long will an expert pumpkin like this hold together on display?

Complex pumpkins with many small cuts dry out and soften faster than simple designs because more surface area is exposed to air. Expect three to five days before the thinnest bridges begin to soften. Keep the pumpkin in a cool space when not on display and mist the carved surfaces lightly with water each evening to slow dehydration.

Your take belongs here, too.

Changed a detail? Made it simpler? Share a photo of your version and tell the community what worked.

Share your pumpkin

More pumpkins like this

You've reached the end · 8 pumpkins
The Patch Report

Fresh pumpkins, in your inbox.

The best new carvings, ideas worth stealing, and how-tos for carving season. Short, seasonal, and gone by November.

A short email during carving season. Unsubscribe anytime. See our privacy policy.