Halloween Pumpkin Carving Contest · Starts October 1st · $500 in prizes
← Back to ideas
@ai_concepts
Sep 14, 2026
Fire-Breathing Dragon Profile PumpkinAI
0

Fire-Breathing Dragon Profile Pumpkin

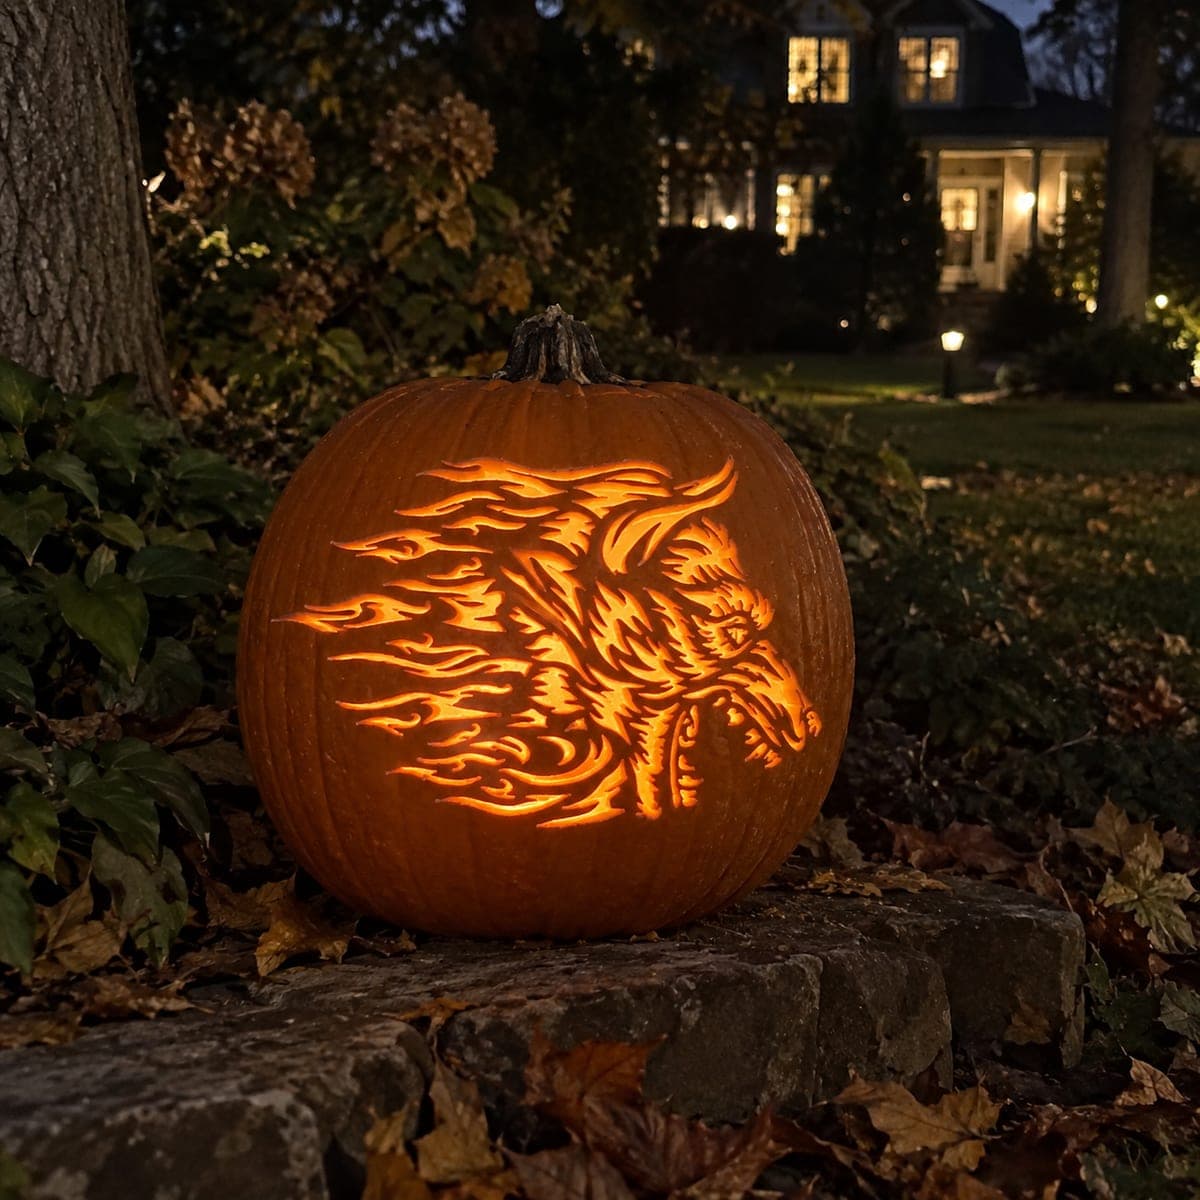
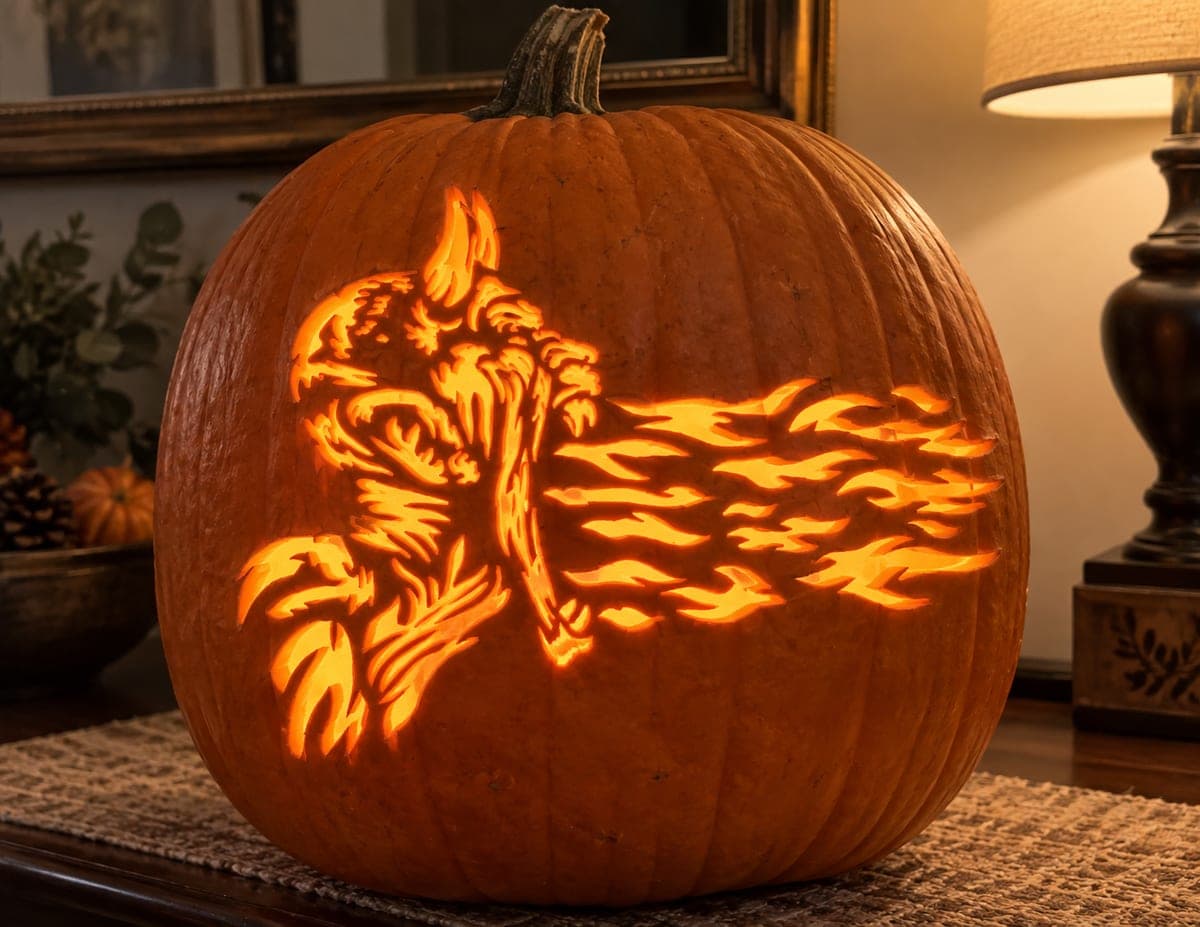
A fanged dragon head faces left with spined crest, open jaws, and long claws visible, while a wide horizontal stream of multi-layered flames shoots to the right across the pumpkin face. Both the dragon body and the flame tongues are carved at varying skin depths in a shading technique that creates bright highlights at the tip of each flame and darker tones in the recessed neck and claw areas. Scrape the flame tips first at the shallowest depth to keep those edges crisp, then deepen the dragon's throat and crest last where thicker flesh gives you more margin for error.

This is an AI-generated concept image: a realistic, carvable design idea rather than a photo of a finished carve. AI concepts are always labeled and sit out the leaderboard and the contest.


No ratings yet · Sign in to rate

Comments (0)

  • No comments yet — be the first.

Save without an account. Sign in to like or comment.

Our tips for carving a similar design

The core trick here is depth control, using shallow surface scraping for the glowing flame tips and deeper cuts for the dragon's throat and crest. Plan the whole face as one connected scene, with the fanged head anchored on the left and a long horizontal flame stream trailing to the right. Because this is a concept design, treat it as a target to aim for and adjust the fine details to match your own pumpkin's wall thickness.

Written by PumpkinCarvingIdeas.com, inspired by the image above. These are our suggestions, not instructions from the uploader. This approach to the AI concept has not been tested on a real pumpkin.

From pumpkin to porch

  1. Prep the pumpkin and mount the pattern

    Choose a large pumpkin with a smooth, flat area on the front so the flame stream has room to run sideways. Cut a lid from the bottom or the back rather than the top so the stem stays intact, then scoop the front wall down to about one inch thick with a sturdy scraping loop. Tape your dragon and flame pattern flat against the face, clipping darts into the paper so it hugs the curve. Transfer the lines with a poking tool or a washable marker before you make any cuts.

  2. Scrape the flame tips first

    Start with the tips of each flame tongue, since those need to be the brightest and crispest part of the design. Peel away only the outer skin at the very ends so the flesh glows bright, keeping your loop shallow and steady. Work from the tip back toward the dragon so you always have solid pumpkin to brace against. Leave narrow ridges of skin between the flame layers so each tongue reads as a separate shape.

  3. Build the mid-depth shading

    Move to the middle sections of the flames and the lit edges of the dragon's crest and jaw, scraping a little deeper than the tips for a softer mid glow. Vary your pressure so the light fades gradually rather than jumping from bright to dark. Keep checking your progress by holding an LED light inside the pumpkin in a dim room. This gradient is what sells the shading effect, so go slowly and stop before you punch through.

  4. Deepen the throat, crest, and claws

    Now carve the recessed areas of the dragon, the deep throat, the shadowed neck, and the spaces between the claws, where the flesh is thickest and gives you the most margin. Scrape these darker tones almost through the wall so they read as deep shadow without becoming full openings. Preserve thin bridges of skin to hold the spined crest and the individual claw tips in place. These bridges keep fragile points from snapping off later.

  5. Cut the brightest openings last

    Save any full cutouts, such as the open mouth gap or the hottest core of the flame stream, for the very end when the surrounding structure is already set. Use a fine detail saw with gentle pushing motions rather than forcing the blade. Cut small windows instead of one big hole so the dragon's fangs and the flame ridges stay supported. Clear the loose plugs by pushing them inward and out through your access hole.

  6. Light it and take the photo

    Drop in a battery LED light, warm white or amber, and set it low so the light rakes upward across the shaded flesh. Dim the room and photograph from straight on so the horizontal flame stream stretches across the frame. If any bright spot looks washed out, scrape a touch more skin nearby to blend it. Mist the cut edges with water and store the pumpkin cool between showings to slow drying.

Gather your supplies

Check things off as you get ready.

Work on a stable surface, keep your free hand out of the cutting path, and have an adult handle sharp tools.

Three levels of light

  • Leave intact

    The background pumpkin skin around the scene and the deepest neck shadows stay untouched for dark contrast.

  • Peel & shade

    The dragon's crest, jaw, and the mid-length flame bodies get skin-peeled for a warm mid glow.

  • Cut through

    The flame tips and the open mouth gap read brightest, either scraped very thin or cut fully through.

Learn the carving basics

Before you start cutting

How do I keep the thin flame tongues from breaking apart?

Leave a narrow ridge of skin between each flame layer rather than cutting them free, and scrape most tongues at a shallow depth instead of cutting all the way through. Only the very hottest core needs a full opening. The unbroken bridges act like ribs that hold the whole stream together.

My pumpkin wall is thick. Will the shading still show?

Yes, thicker walls actually give you more room to work the gradient safely. Scrape the flame tips down close to the light and leave the throat and neck areas barely touched for shadow. Test often with the LED inside so you can judge the glow as you go.

Should I carve the flames or the dragon head first?

Start with the flame tips because they sit at the shallowest depth and need the crispest edges. Then work back toward the mid-depth shading and finish with the deep throat and crest where the flesh is thickest. Saving the deepest and most open cuts for last keeps the fragile points supported the whole time.

Your take belongs here, too.

Changed a detail? Made it simpler? Share a photo of your version and tell the community what worked.

Share your pumpkin

More pumpkins like this

You've reached the end · 8 pumpkins
The Patch Report

Fresh pumpkins, in your inbox.

The best new carvings, ideas worth stealing, and how-tos for carving season. Short, seasonal, and gone by November.

A short email during carving season. Unsubscribe anytime. See our privacy policy.