Halloween Pumpkin Carving Contest · Starts October 1st · $500 in prizes
← Back to ideas
@ai_concepts
Sep 14, 2026
Intricate Spiked Dragon Head PumpkinAI
0

Intricate Spiked Dragon Head Pumpkin

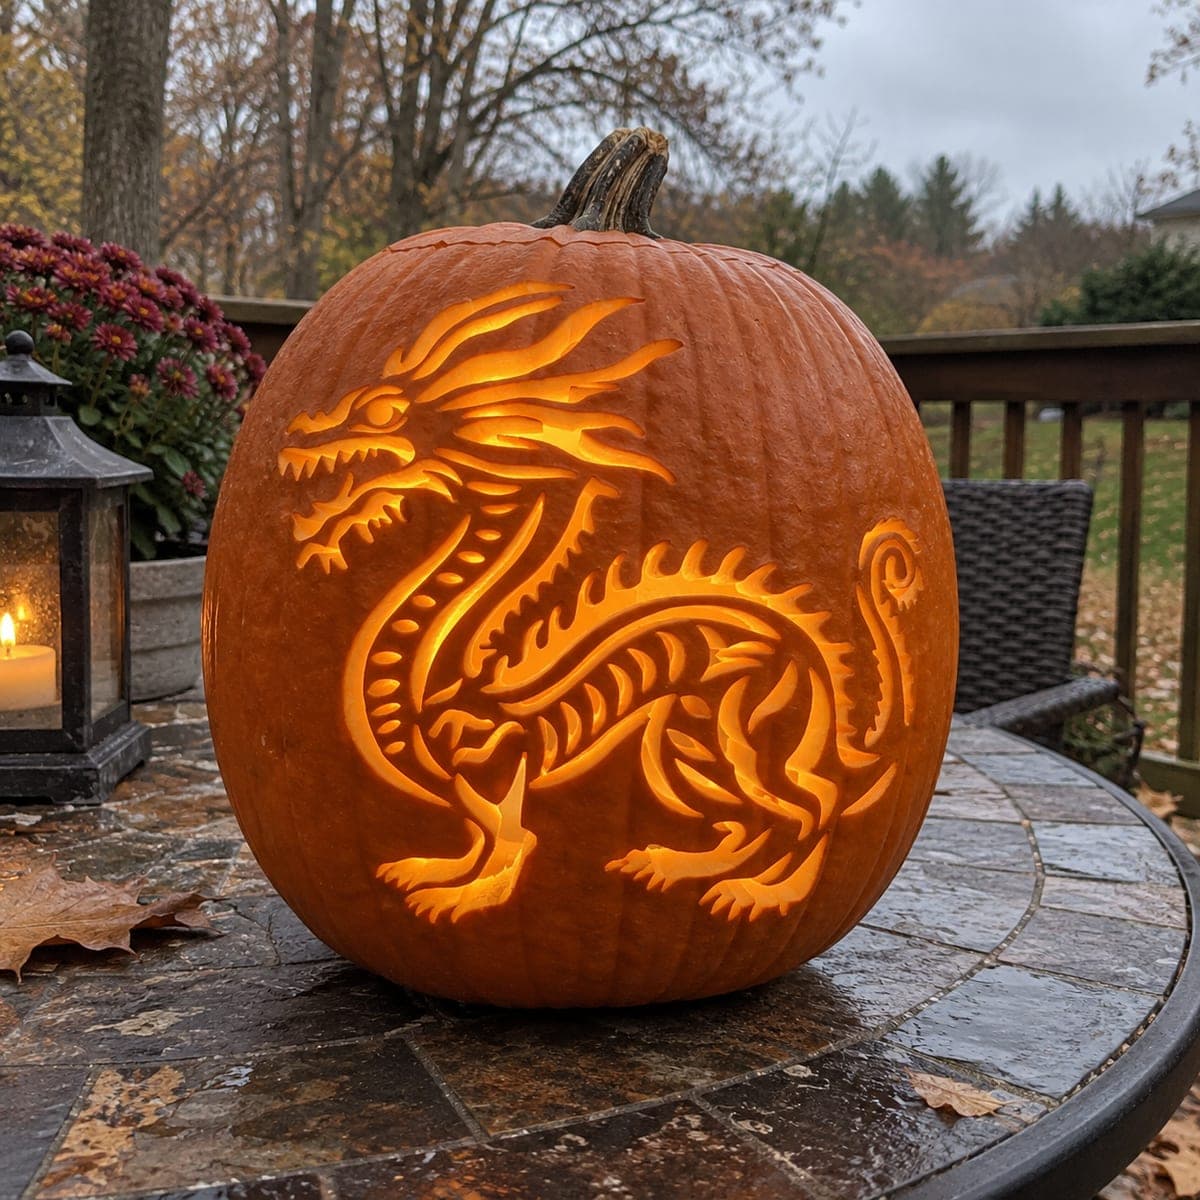
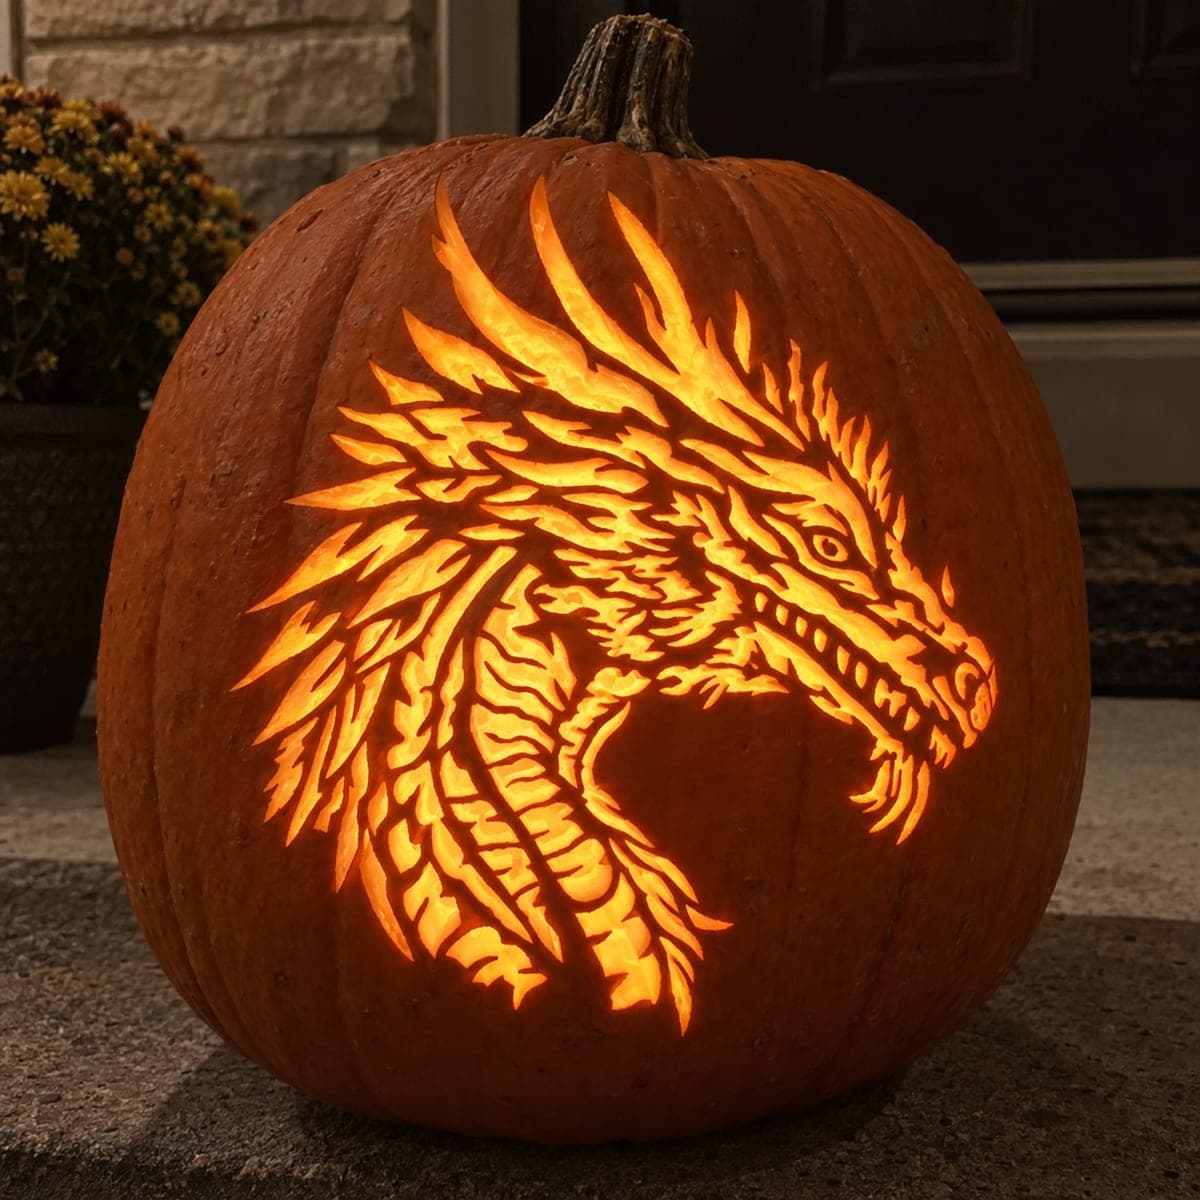
This intricate dragon head pumpkin carving idea shows a fierce side-profile dragon with a long snarling snout full of teeth, a large eye, and a dramatic swept crest of overlapping spike shapes fanning back from the skull. The shading technique peels away the outer skin and scrapes flesh to varying depths, creating tonal ranges from bright highlights at the spikes to darker mid-tones along the jaw and neck. Work on the spike crest in small segments and keep the scraping shallow near the eye so that the round iris retains a distinct dark outline.

This is an AI-generated concept image: a realistic, carvable design idea rather than a photo of a finished carve. AI concepts are always labeled and sit out the leaderboard and the contest.

No ratings yet · Sign in to rate
Comments (0)

  • No comments yet — be the first.

Save without an account. Sign in to like or comment.

Our tips for carving a similar design

The core trick here is depth control: most of this dragon is peeled and scraped skin, not cut all the way through, so the flame-like spikes read bright while the jaw and neck stay in darker mid-tones. You would carve it as a shaded relief, saving true openings for just the brightest slivers along the crest and teeth. Plan your light map before you touch a blade so you know what stays dark, what glows, and what fully cuts through.

Written by PumpkinCarvingIdeas.com, inspired by the image above. These are our suggestions, not instructions from the uploader. This approach to the AI concept has not been tested on a real pumpkin.

From pumpkin to porch

  1. Prep the pumpkin and transfer the design

    Pick a tall pumpkin with a smooth, flat front panel and light it from inside first with an LED to confirm the wall is not too thick. Cut a lid from the bottom or back so the face panel stays intact, then scoop the inside wall down to about one inch where the dragon will sit. Tape your stencil flat and poke the outlines with a transfer tool or pin, marking the eye, teeth, and each spike separately. Take a photo of the stencil before you remove it so you have a reference for the shading zones.

  2. Establish the outline and protect the eye

    Lightly score the main contours of the snout, jaw, and crest with a fine detail knife so you have clean borders to shade up to. Work the round eye first while your hand is fresh, keeping the scraping shallow around it so the iris keeps a distinct dark ring. Do not cut through anywhere yet. These early lines are your map for where highlights and shadows will fall.

  3. Peel the broad glow areas

    Using a ribbon or lino tool, peel the outer skin off the large flame and cheek areas to expose the flesh for a dim orange glow. Keep these passes even and shallow at first, since you can always remove more later. Leave the jaw, lower neck, and the dark mouth pocket as untouched skin for contrast. Step back often and check the balance of light and dark.

  4. Shade the spike crest in small segments

    Tackle the swept crest one spike at a time so you keep control of each overlapping shape. Scrape deeper toward the tips where you want the brightest highlights and leave thin dark ridges between spikes so they stay visually separate. Keep a narrow band of skin between neighboring spikes as a natural bridge for strength. Vary your depth to build the tonal range from bright edges to shadowed roots.

  5. Cut the brightest accents and teeth

    Now make your few true cutouts: the thinnest bright slivers at the spike tips and the small gaps between teeth for maximum sparkle. Cut these last so the panel stays rigid while you do all the shading. Keep each tooth and each tip attached at its base so nothing snaps off. A couple of pinpoint openings near the eye can add a fierce glint.

  6. Light it and photograph

    Drop in a bright LED puck or a couple of tea light LEDs and view it in a dark room. If any shaded area looks muddy, scrape a little deeper to lift the glow; if a highlight is too weak, thin the flesh further. Wipe the cut edges, then coat exposed flesh with petroleum jelly to slow drying. Shoot your photo at dusk on a porch for the warmest color.

Gather your supplies

Check things off as you get ready.

Work on a stable surface, keep your free hand out of the cutting path, and have an adult handle sharp tools.

Three levels of light

  • Leave intact

    The lower jaw, neck base, and the dark mouth pocket stay as untouched skin.

  • Peel & shade

    The cheek, flame accents, and crest bodies get skin-peeled for a mid orange glow.

  • Cut through

    Only the thinnest spike tips, tooth gaps, and an eye glint are cut fully through.

Learn the carving basics

Before you start cutting

This is an AI concept image, so can a real pumpkin actually hold this much detail?

Yes, a similar dragon is achievable as a shaded relief rather than full cutouts. Because most of the design is peeled and scraped skin, the wall stays intact and strong. Just keep thin bridges between the spikes and teeth so nothing breaks off.

How do I keep the crest spikes from blurring together?

Leave a narrow ridge of unscraped or lightly scraped skin between each spike to act as a dark divider. Work one spike at a time and scrape the tips deeper than the roots. That gradient is what makes each spike pop as its own shape.

Why keep the shading shallow around the eye?

The round iris needs a distinct dark outline to read as an eye instead of a glowing blob. If you scrape too deep right up to it, the ring of contrast disappears. Keep a shallow, controlled border there and save any pinpoint cut for a small glint.

Your take belongs here, too.

Changed a detail? Made it simpler? Share a photo of your version and tell the community what worked.

Share your pumpkin

More pumpkins like this

You've reached the end · 8 pumpkins
The Patch Report

Fresh pumpkins, in your inbox.

The best new carvings, ideas worth stealing, and how-tos for carving season. Short, seasonal, and gone by November.

A short email during carving season. Unsubscribe anytime. See our privacy policy.