@boo_radley
Sep 7, 2026
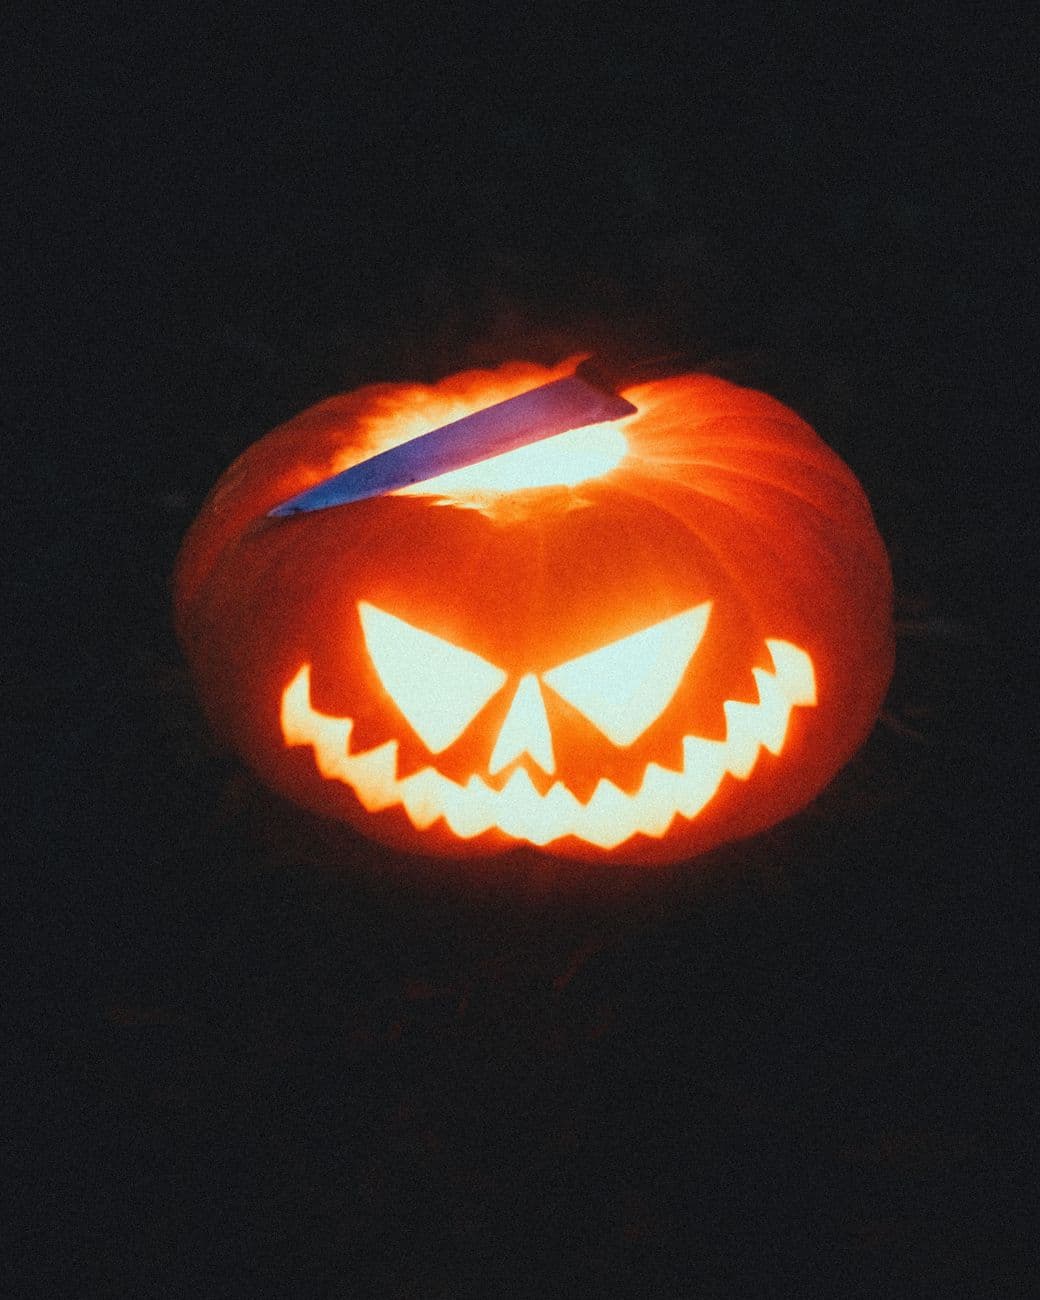
First carve of fall
No ratings yet · Sign in to rate
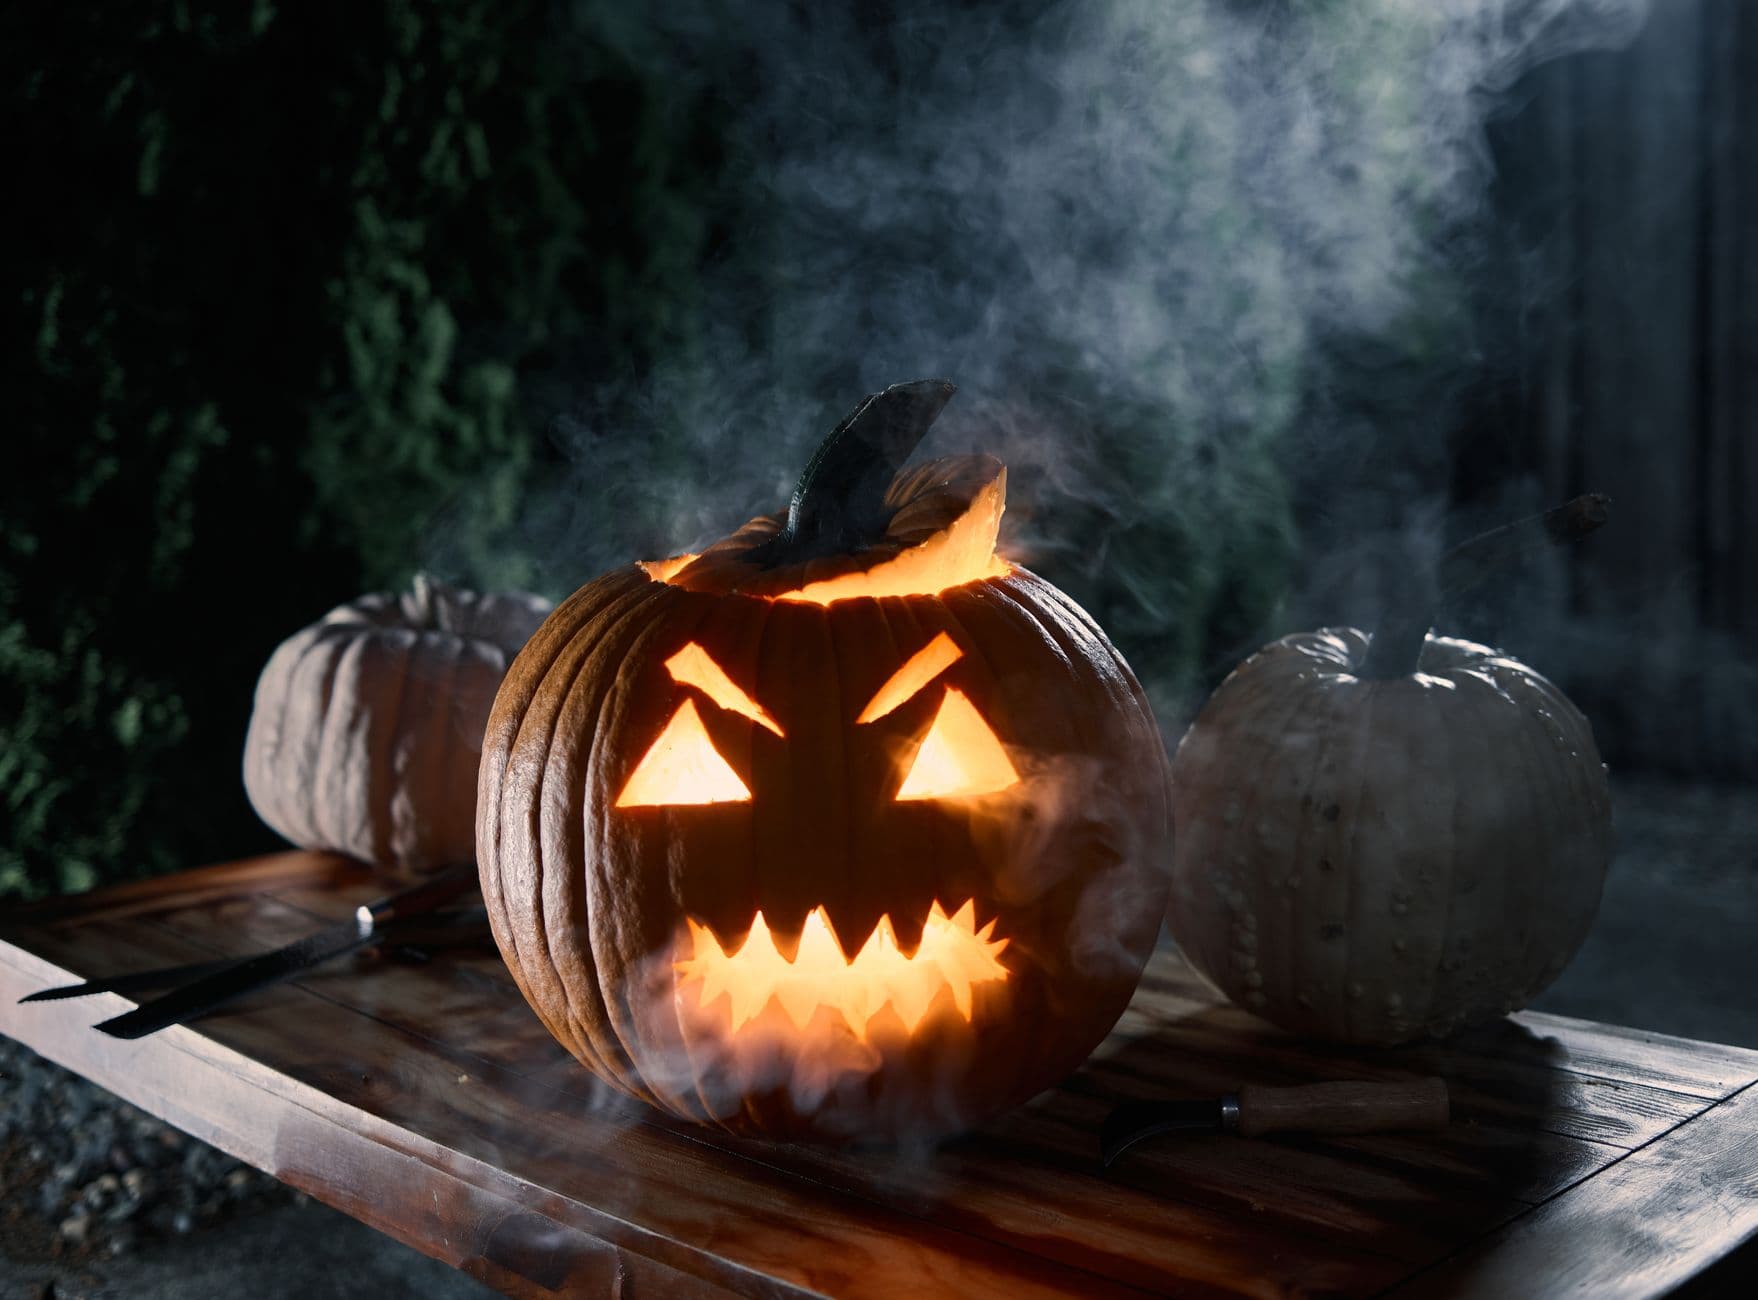
The core trick here is a clean, all-cutout face with sharp triangle eyes and a jagged sawtooth grin, all lit from inside so the shapes read from across the yard. The playful extra is a fake knife or blade prop stuck in the top for a slasher wink. Plan the face first, cut it, then add the prop last so nothing weakens the shell early.
Written by PumpkinCarvingIdeas.com, inspired by @boo_radley's photo above. These are our suggestions, not instructions from the uploader, and this approach hasn't been tested on their exact carve.
Choose a pumpkin with a smooth, flat front for the face and a sturdy stem. Cut the lid at an angle so it rests without falling in, and make a small notch at the back so you can line it up later. Scoop out the seeds and scrape the front wall down to about one inch thick. A thinner wall makes cutting the teeth much easier.
Print or draw the two angled triangle eyes, the small nose, and the wide toothy grin. Tape the pattern flat against the front and poke the outlines with a pin or awl to dot the shapes onto the skin. Space the dots close together on the zigzag mouth so the teeth stay even. Peel the paper and connect the dots lightly with a marker if it helps.
Use a small serrated carving saw and start with the eyes and nose since they are the smallest openings. Saw gently with the blade straight into the wall, letting the teeth do the work instead of forcing. Push each piece out from the inside with a finger. Cutting these interior shapes before the big mouth keeps the front strong while you work.
Work the mouth in short sections, cutting each triangle tooth one at a time rather than one long slice. Leave the points a little chunky so they do not snap off. Keep the top and bottom rows lined up as you go so the smile stays balanced. Clean up any ragged edges with a gentle second pass of the saw.
Set an LED tea light or a small battery puck inside and test the glow in a dark room. Avoid a real flame near the prop. For the knife, use a plastic toy blade and cut a thin slot in the lid or upper wall to seat it firmly. Angle it so it looks buried but keeps most of the shell intact.
Wipe the face edges clean and dab a little petroleum jelly on the cut lines to slow drying. Turn off the room lights and shoot from slightly below to make the grin loom. A touch of haze or a smoke machine gives that glowing halo around the top. Refrigerate the pumpkin overnight between showings to keep it fresh.
Check things off as you get ready.
Work on a stable surface, keep your free hand out of the cutting path, and have an adult handle sharp tools.
The whole orange body and the top around the stem stay untouched and dark.
Optional thin shading around the eyes or mouth edges can be skin-peeled for a soft rim of glow.
The triangle eyes, nose, and full sawtooth grin are cut all the way through for the brightest light.
Thin the inside wall to about one inch so the saw glides through without prying. Cut each tooth as its own small triangle instead of forcing one long cut. Leave the tips slightly blunt rather than razor sharp, since a hair of extra width keeps them attached.
Use a lightweight plastic or toy blade, never a real knife, especially with kids around. Cut a snug slot in the lid or upper wall and seat the prop so it stands on its own. Keep it well away from the LED light and check that nothing overheats.
An LED tea light gives a steady bright glow that makes the eyes and grin pop without any fire risk. A real flame could scorch the plastic prop and dry the pumpkin faster. Battery lights also let you close the lid fully and still get an even shine.
Changed a detail? Made it simpler? Share a photo of your version and tell the community what worked.
The best new carvings, ideas worth stealing, and how-tos for carving season. Short, seasonal, and gone by November.




Comments (0)