Halloween Pumpkin Carving Contest · Starts October 1st · $500 in prizes
← Back to ideas
@ai_concepts
Sep 14, 2026
Flame-Tailed Fanged Ghost PumpkinAI
0

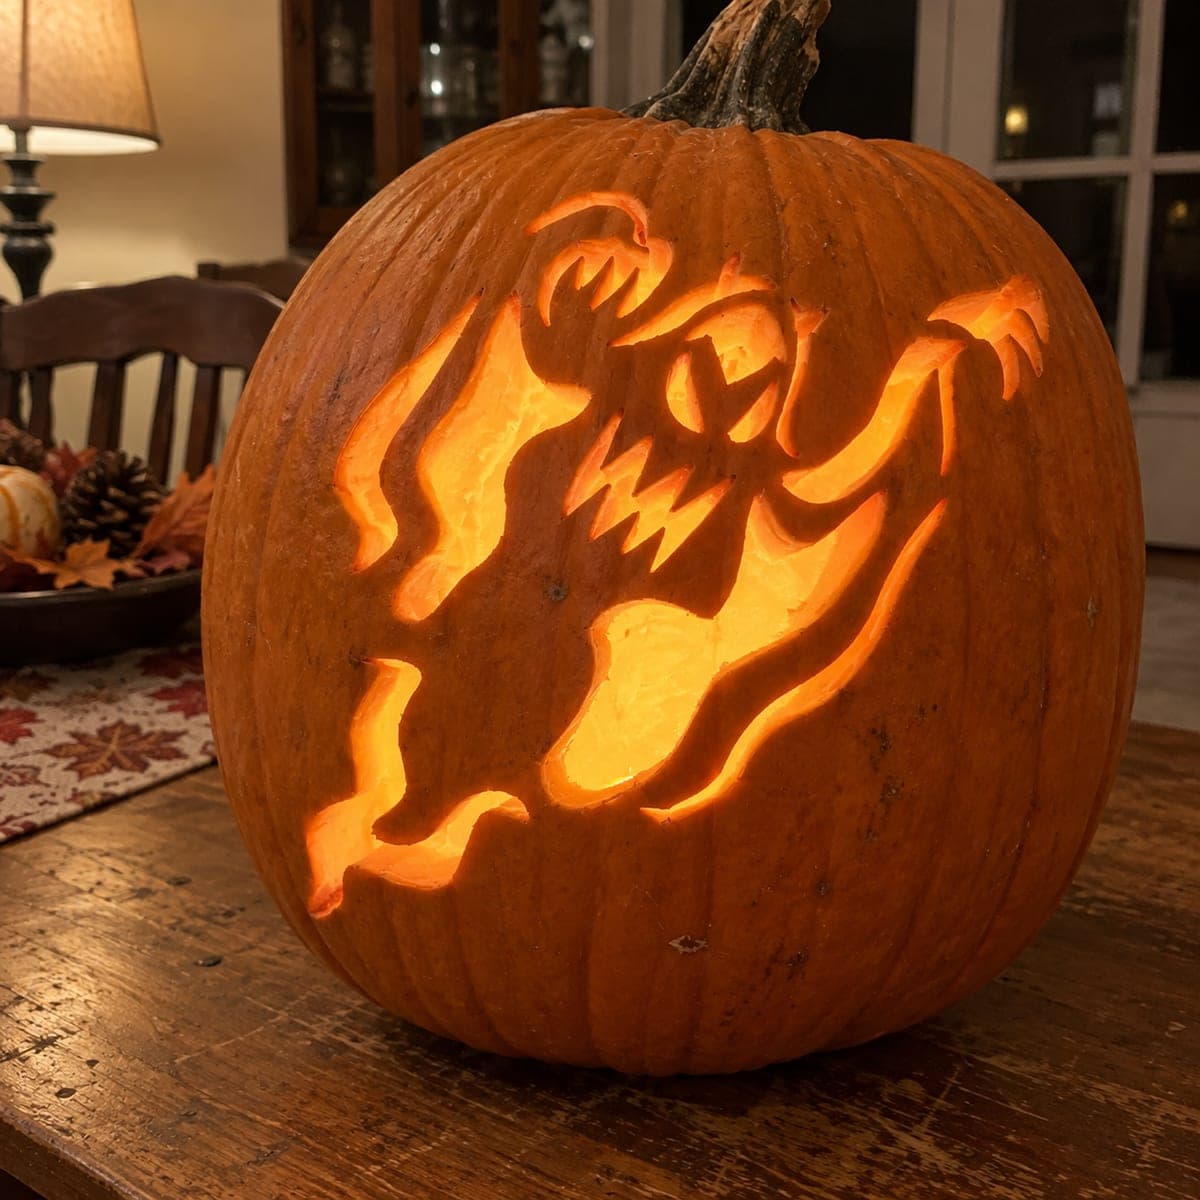
Flame-Tailed Fanged Ghost Pumpkin

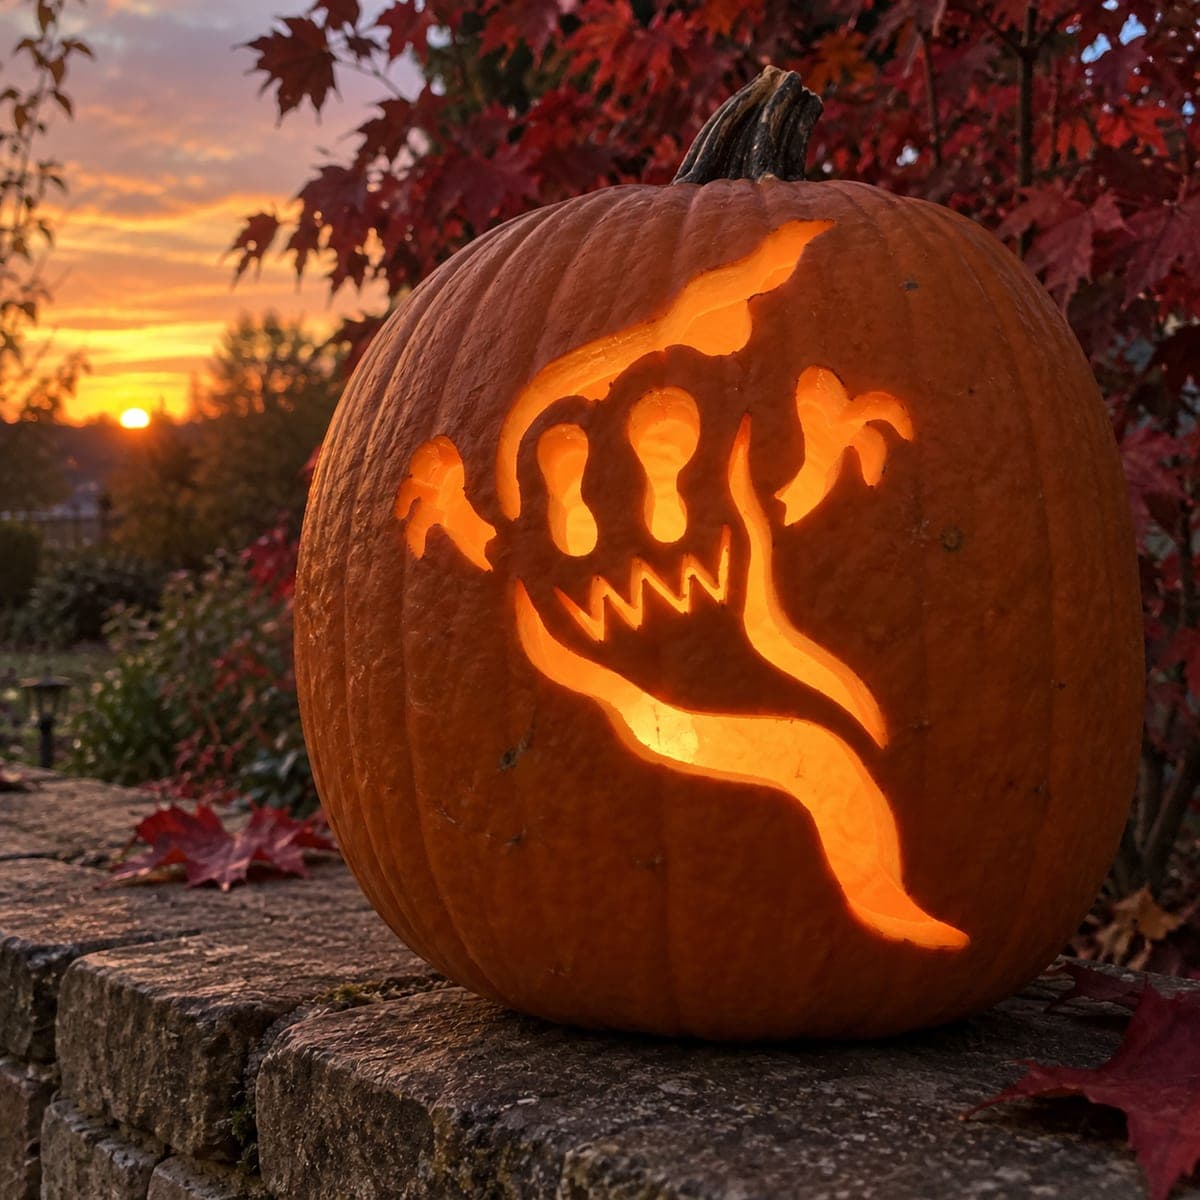
A sharp-fanged ghost with hollow oval eyes and raised clawed arms surges diagonally across the pumpkin face, its body tapering into a flame-like tail at the lower right. The cutout carving pierces through the body outline and the jagged zigzag mouth so glowing light escapes through every cavity. Tackle the tight zigzag teeth row first with a fine-tip saw before opening the larger body sections, keeping the skin bridge between the upper arm and the eye area intact so the whole figure holds together.

This is an AI-generated concept image: a realistic, carvable design idea rather than a photo of a finished carve. AI concepts are always labeled and sit out the leaderboard and the contest.

No ratings yet · Sign in to rate
Comments (0)

  • No comments yet — be the first.

Save without an account. Sign in to like or comment.

Our tips for carving a similar design

This design is a single flowing silhouette: a fanged ghost with hollow oval eyes and raised clawed arms that streams diagonally into a flame tail. The core trick is cutting all the light through the body outline while leaving skin bridges that hold the whole figure together. Plan your bridges before any blade touches the shell, because once the big body sections are open there is no going back.

Written by PumpkinCarvingIdeas.com, inspired by the image above. These are our suggestions, not instructions from the uploader. This approach to the AI concept has not been tested on a real pumpkin.

From pumpkin to porch

  1. Prep and transfer the design

    Since this is an AI concept, pick a real pumpkin with a broad, smooth front to hold the tall diagonal shape. Cut a wide lid from the bottom instead of the top so the pumpkin sits stable, then scrape the front wall down to about one inch. Tape your printed pattern on and poke the outline with a transfer tool or pushpin. Focus your dots on the tooth points, eye edges, and the flame tail curves.

  2. Score the outline and mark your bridges

    Before cutting, use a pencil or dull tool to lightly score the full ghost outline so you can see the whole shape. Mark the skin bridge between the upper arm and the eye area, and any small connectors along the tail, so you remember to leave them uncut. These slim strips of skin are what keep the figure from collapsing. Double check that every floating piece connects to the main body somewhere.

  3. Cut the zigzag teeth first

    Start with the tight jagged mouth using a fine-tip saw, since it is the most delicate area. Cut each triangle point slowly, sawing into the valleys and easing out rather than forcing the blade. Doing this while the shell is still fully intact gives you the most support and the cleanest points. Take your time here, because rushed teeth chip easily.

  4. Open the eyes and small claw gaps

    Move to the hollow oval eyes and the narrow gaps between the clawed fingers next. Keep your fine saw for the tips of the claws so they stay crisp and attached at their base. Work from the center of each shape outward, popping small plugs free gently. Leave the largest body openings for last so the pumpkin keeps its strength as long as possible.

  5. Cut the large body and flame tail last

    Now open the big body outline and the sweeping flame tail with a slightly larger saw. Cut in short strokes and support the surrounding shell with your free hand as pieces release. Protect the marked skin bridge near the upper arm and eye so the top of the ghost does not sag. Clean up all the cut edges with a small detail tool for a sharp glowing line.

  6. Light it and photograph

    Drop in an LED puck or two so the light reaches every cavity evenly, never a candle near these thin cuts. Set the pumpkin outside at dusk against a dark backdrop so the flame tail and grin really pop. Snap your photo while there is still a little warm color in the sky. Share it with the community and note which bridge saved your figure.

Gather your supplies

Check things off as you get ready.

Work on a stable surface, keep your free hand out of the cutting path, and have an adult handle sharp tools.

Three levels of light

  • Leave intact

    The broad untouched pumpkin face around the ghost stays dark, framing the figure.

  • Peel & shade

    Skin-peel a faint halo just outside the flame tail if you want a soft glowing edge without a full cut.

  • Cut through

    Cut fully through the body outline, oval eyes, zigzag teeth, claw gaps, and flame tail for the brightest light.

Learn the carving basics

Before you start cutting

Which part do I really cut first?

Start with the tight zigzag teeth row using a fine-tip saw while the shell is still fully intact. The surrounding pumpkin gives the delicate points maximum support at that stage. If you save the teeth for last, the weakened shell makes them far more likely to crack.

How do I keep the ghost from falling apart?

Leave the skin bridge between the upper arm and the eye area uncut, and add small connectors along the tail as needed. These slim strips hold the whole diagonal figure together. Mark them before you cut so you never accidentally saw through them.

Do the claw tips need to be that thin?

Keep the claw fingers attached at their base and avoid making the points razor thin, since fragile tips snap on a real pumpkin. A gentle taper reads as clawed without being structurally weak. Use your fine saw and cut slowly around each finger.

Your take belongs here, too.

Changed a detail? Made it simpler? Share a photo of your version and tell the community what worked.

Share your pumpkin

More pumpkins like this

You've reached the end · 8 pumpkins
The Patch Report

Fresh pumpkins, in your inbox.

The best new carvings, ideas worth stealing, and how-tos for carving season. Short, seasonal, and gone by November.

A short email during carving season. Unsubscribe anytime. See our privacy policy.