Halloween Pumpkin Carving Contest · Starts October 1st · $500 in prizes
← Back to ideas
@ai_concepts
Aug 8, 2026
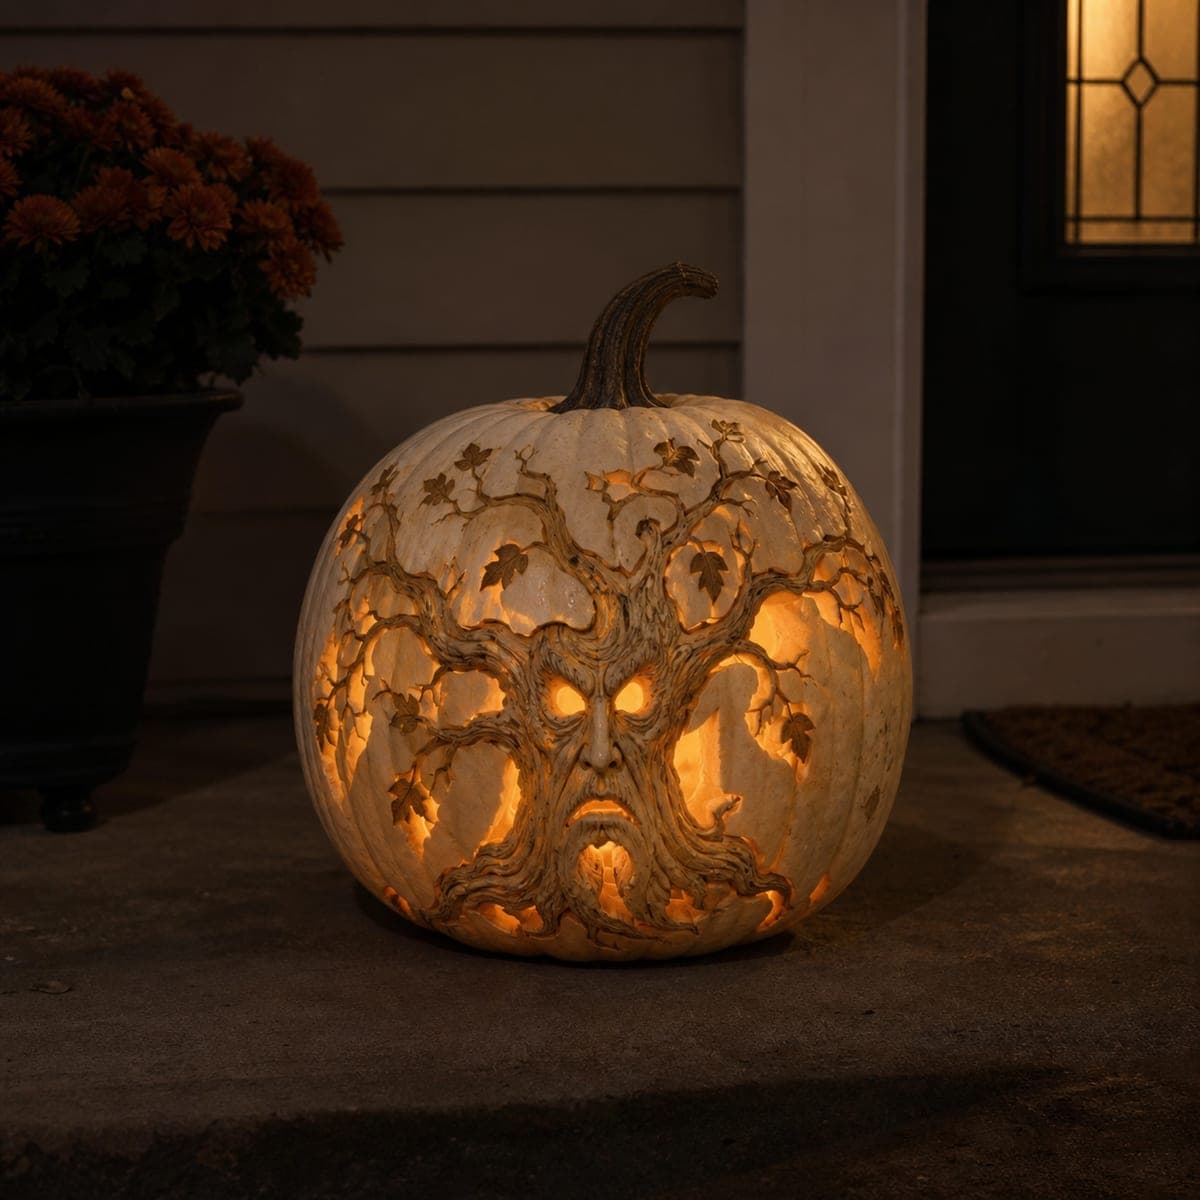
Haunted Tree Face White Pumpkin CarvingAI
0

Haunted Tree Face White Pumpkin Carving

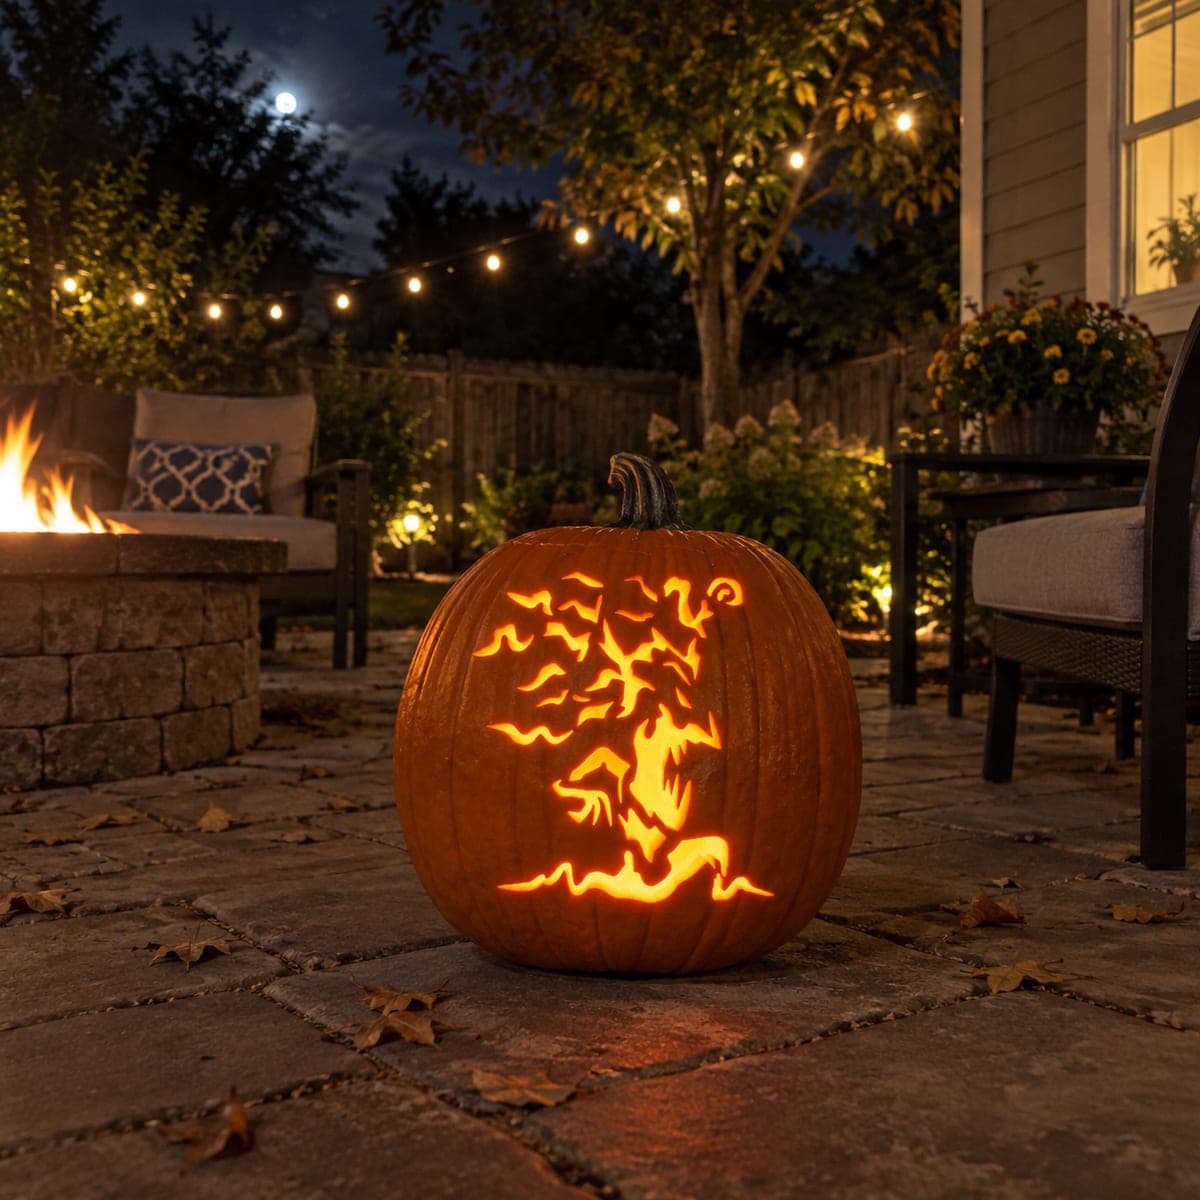
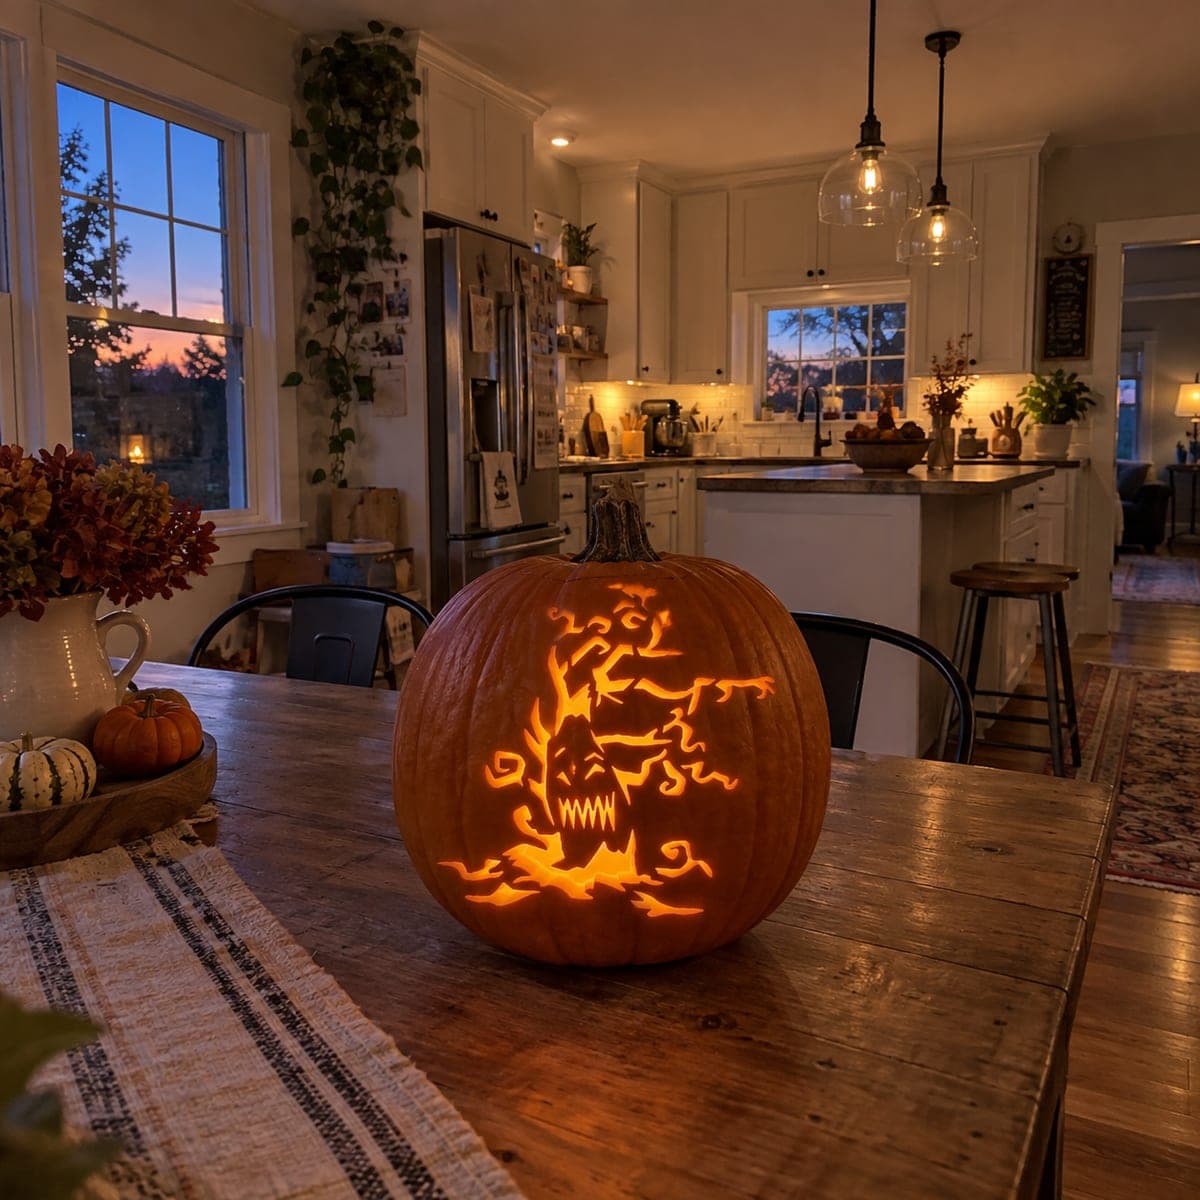
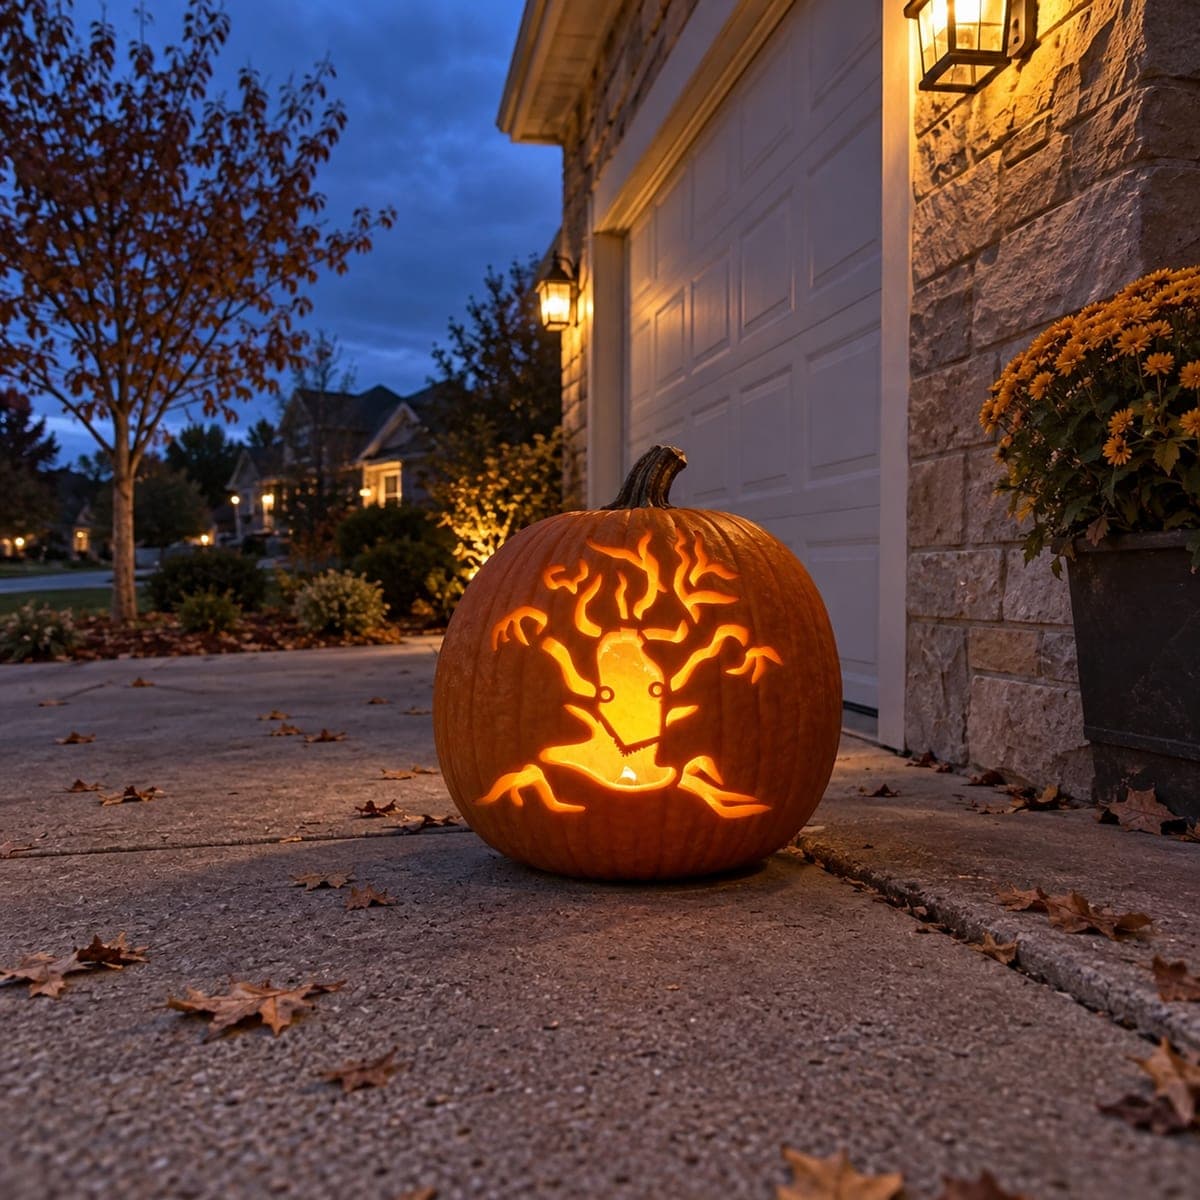
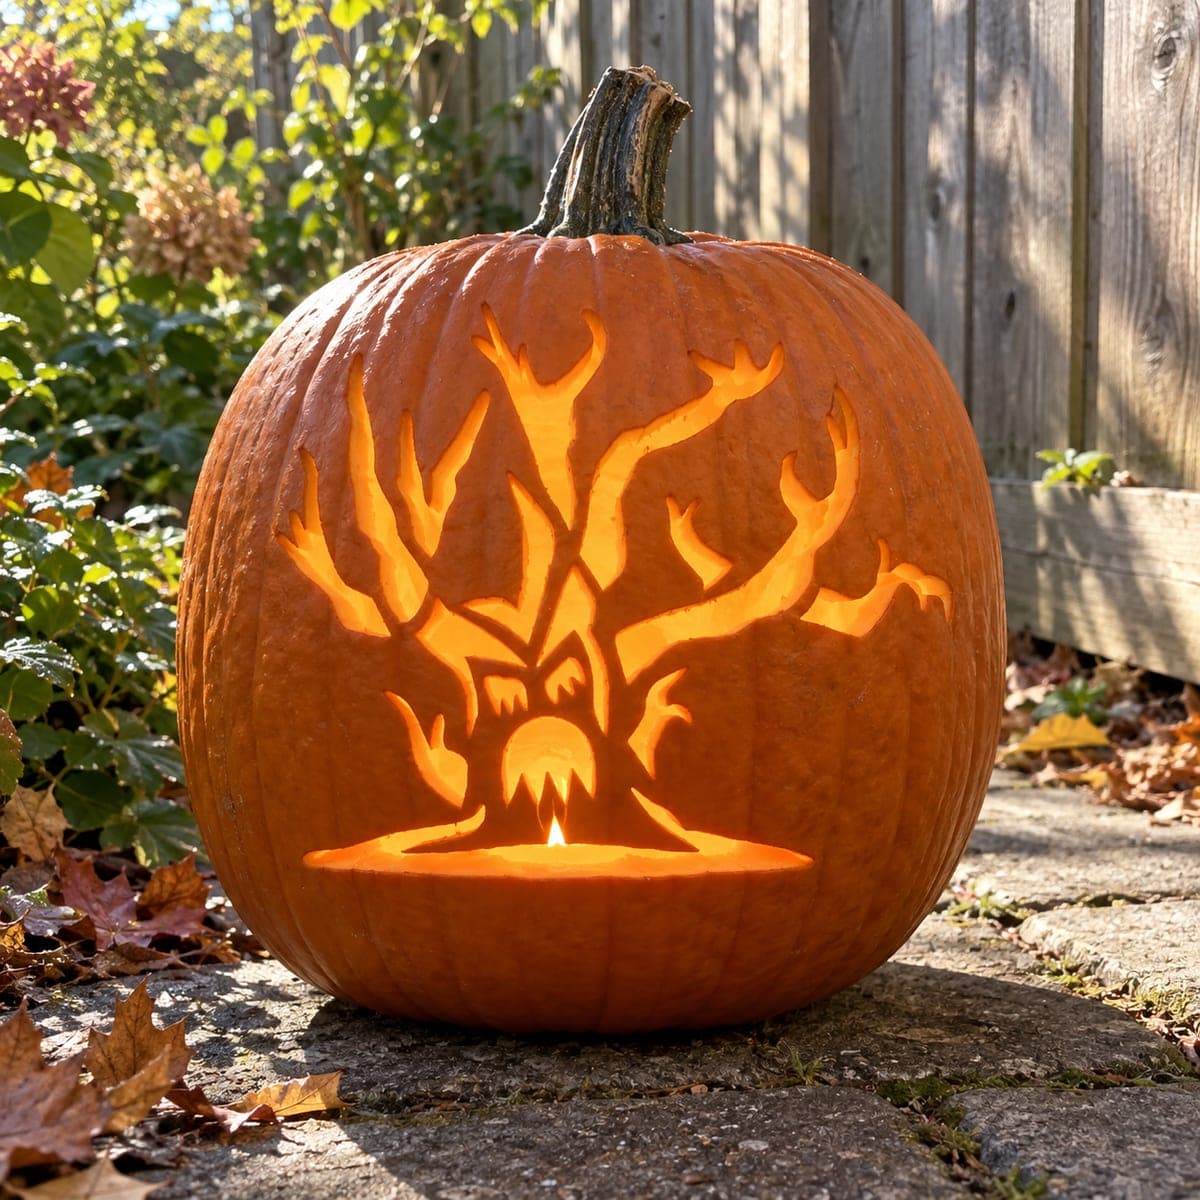
Gnarled branches spread across a ghostly white pumpkin, twisting around a scowling tree spirit face carved into the trunk. The white rind is the secret: peeled areas glow warm gold at night while the pale skin stays cold and moonlit, doubling the eerie contrast. Carve the face's hollow eyes deepest so they burn brightest, then let the branch lines taper to shallow scratches at the tips. Flank your doorway with a pair for a haunted-orchard effect.

This is an AI-generated concept image: a realistic, carvable design idea rather than a photo of a finished carve. AI concepts are always labeled and sit out the leaderboard and the contest.

No ratings yet · Sign in to rate
Comments (0)

  • No comments yet — be the first.

Save without an account. Sign in to like or comment.

Our tips for carving a similar design

The core trick here is contrast on a white pumpkin: the pale rind stays cold and moonlit while shaved and cut areas glow warm gold. You build the face and branches mostly through relief shading, scraping the skin to different depths, and reserve a few true cutouts for the eyes and mouth. Plan the whole tree first, keep branch lines connected, and save the deepest, brightest openings for last.

Written by PumpkinCarvingIdeas.com, inspired by the image above. These are our suggestions, not instructions from the uploader. This approach to the AI concept has not been tested on a real pumpkin.

From pumpkin to porch

  1. Pick a pale pumpkin and open it

    Choose a smooth white or ghost pumpkin with a flat-ish face area for the tree spirit. Cut a lid or, better, a wide access hole in the back so the front stays intact for shading. Scoop the pulp and thin the inside carving wall to about one inch where the face and branches will sit. A thinner wall makes shading glow more evenly.

  2. Transfer the tree and face design

    Tape your stencil over the front and poke the outline through with a pin or transfer tool. Map the trunk and scowling face in the center, then let the branches fan upward and outward toward the top and sides. Mark which lines are deep gouges and which taper to shallow scratches so you keep a clear plan. Step back and check the whole tree reads before you cut anything.

  3. Shade the bark and branches

    Using a ribbon or loop tool, scrape away just the outer skin along the branch lines to expose the lighter flesh underneath. Vary your pressure so thick main limbs go deeper and glow more, while twig tips stay barely scratched and dim. Work the face brow, cheeks, and beard as flowing bark texture using the same shading motion. This raised, uncarved skin between lines becomes the dark bark ridges that give the tree its gnarled look.

  4. Deepen the face features

    Carve the frowning brow, nose, and mustache in deeper relief so shadows pool and the face looks three-dimensional. Keep the ridges of the nose and cheekbones as raised untouched skin so they stay dark against the glowing hollows. Thin the flesh gradually around the eyes and mouth so light will build there. Take your time; the face is the focal point and small depth changes read strongly at night.

  5. Cut the eyes and mouth last

    Once all shading is done, make your true cutouts: the two hollow eyes and the open mouth. Cut these all the way through so they burn brightest, and carve the eyes deepest and cleanest for that glowing stare. Leave narrow bridges of skin where branches or the mouth need support so nothing sags. Save these openings for last so the pumpkin stays sturdy while you work the detailed shading.

  6. Light it and photograph

    Drop in a bright LED puck or string, never a candle, and aim the light up toward the eyes. Set the pumpkin in low ambient light so the warm cutouts contrast against the cold pale rind. If you want the haunted-orchard effect, carve a second one and flank a doorway. Mist the surface lightly and shoot at dusk for the moonlit glow.

Gather your supplies

Check things off as you get ready.

Work on a stable surface, keep your free hand out of the cutting path, and have an adult handle sharp tools.

Three levels of light

  • Leave intact

    The pale rind background and the raised bark ridges of the trunk, nose, and cheekbones stay untouched and moonlit.

  • Peel & shade

    The branch lines, twigs, leaves, and flowing beard get skin-peeled to varying depths for a soft gold glow.

  • Cut through

    The hollow eyes and open scowling mouth are cut through for the brightest burning light.

Learn the carving basics

Before you start cutting

Do I need a white pumpkin for this to work?

A white pumpkin gives the strongest effect because the pale skin stays cold and moonlit while your peeled areas glow warm gold. You can carve the same tree spirit on an orange pumpkin, but the contrast will be softer. If you use orange, lean harder on depth differences to keep the branches readable.

How do I keep the thin branch tips from breaking?

Carve the twig tips as shallow surface scratches rather than cutouts, so they never weaken the wall. Only the eyes and mouth go all the way through. Keep any branch that must be open connected with small skin bridges so the design stays supported.

How deep should the eyes be compared to the branches?

The eyes should be your deepest work, cut fully through so they burn brightest and draw the viewer in. Branches range from medium peels on main limbs to barely-there scratches at the tips. This depth gradient is what gives the tree its gnarled, three-dimensional look.

Your take belongs here, too.

Changed a detail? Made it simpler? Share a photo of your version and tell the community what worked.

Share your pumpkin

More pumpkins like this

You've reached the end · 8 pumpkins
The Patch Report

Fresh pumpkins, in your inbox.

The best new carvings, ideas worth stealing, and how-tos for carving season. Short, seasonal, and gone by November.

A short email during carving season. Unsubscribe anytime. See our privacy policy.