Halloween Pumpkin Carving Contest · Starts October 1st · $500 in prizes
← Back to ideas
@ai_concepts
Sep 25, 2026
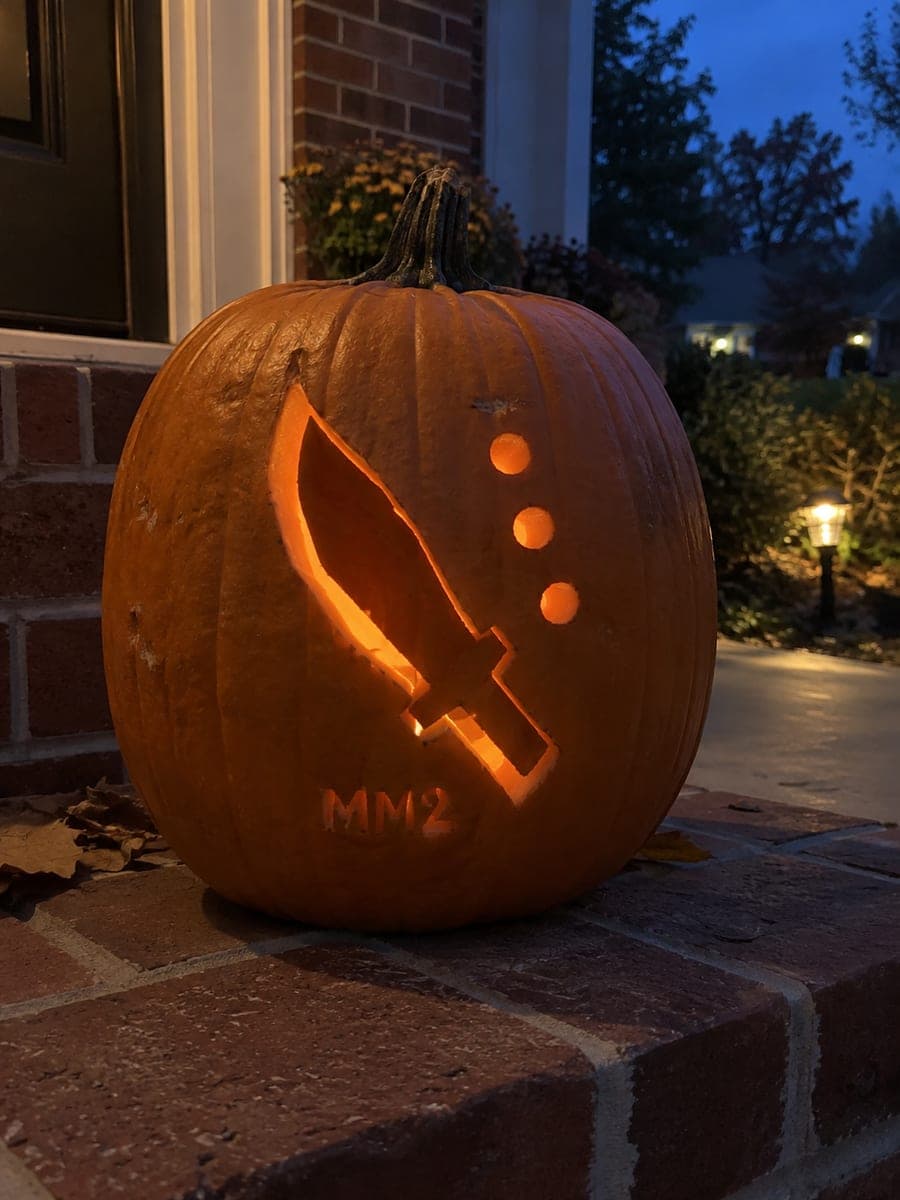
MM2 Knife Sheriff Star Question-Mark PumpkinAI
0

Report this carving

Tell us what is wrong. Reports are private.

MM2 Knife Sheriff Star Question-Mark Pumpkin

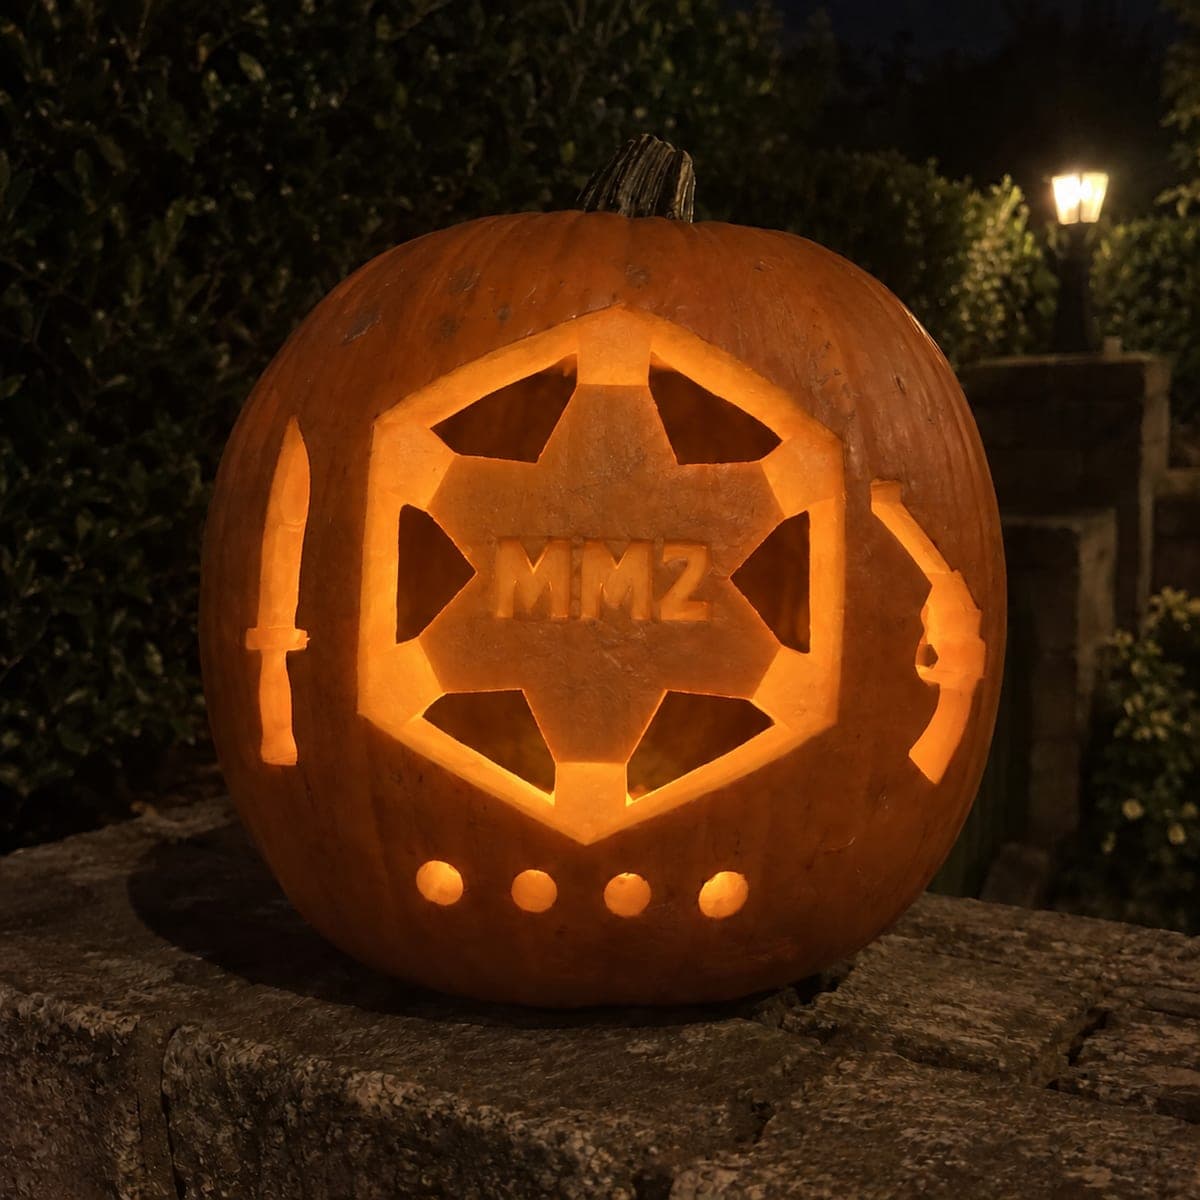
The intermediate murder mystery 2 pumpkin carving opens a hollow knife, a solid star-shaped aperture, and a question-mark hook with its dot as a separate hole, arranging the three game icons across the face. Carve the star shape by scoring the five points first, then removing the material between them, keeping each point broadly connected to the outer rind. The question mark reads best when the hook and dot are aligned vertically, so use a ruler on the stencil before pinning.

No ratings yet · Sign in to rate
Comments (0)

  • No comments yet — be the first.

Save without an account. Sign in to like or comment.

Our tips for carving a similar design

The three game icons are arranged across the pumpkin face with the star as the visual anchor at center. Carving the five-pointed star by scoring each point first and removing material between them maintains the star's shape better than trying to cut the whole outline at once. Aligning the question mark hook and its separate dot hole vertically before cutting ensures the symbol is immediately readable.

From pumpkin to porch

  1. Prepare the pumpkin

    Cut the lid from the back and scoop the interior to a consistent 2 cm wall. Use a pumpkin with a wide, relatively flat front face so all three icons can fit without competing for space. Mark a rough horizontal center line on the carving face to help position the icons evenly.

  2. Transfer the stencil

    Pin-transfer all three icon outlines and the question mark dot position. Use a ruler to verify the hook and dot of the question mark are aligned vertically before removing the stencil paper. Mark any bridges or narrow structural points on the star shape with a colored pencil.

  3. Carve the star shape

    Score all five point outlines shallowly first, then remove the material between each pair of adjacent points. Keep each point broadly connected to the outer rind at its tip rather than coming to an extreme narrow tip. Work around the star methodically, doing opposite points in pairs to keep the shape balanced.

  4. Cut the knife aperture

    Carve the knife shape as a clean hollow opening, starting with the wider handle end and finishing with the blade tip. Keep the blade end at least 4 mm wide. The knife and star are the two most prominent icons, so placing them with adequate spacing prevents the design from looking crowded.

  5. Cut the question mark hook and dot

    Cut the curved hook of the question mark as a single smooth opening, using a detail knife for the inner curve. Then cut the separate dot hole below it using a small punch or round cutter. Verify the dot is directly below the hook's end point before cutting.

  6. Light and display

    A standard warm LED tea light illuminates all three icons evenly. The star will appear as a solid glowing form while the knife and question mark appear as bright line shapes, giving the three icons a naturally varied visual weight that matches the game's own icon hierarchy.

Written with AI to match this design

Gather your supplies

Check things off as you get ready.

Work on a stable surface, keep your free hand out of the cutting path, and have an adult handle sharp tools.

Three levels of light

  • Leave intact

    The rind between and surrounding all three icons stays dark as the design background.

  • Peel & shade

    No shallow relief on this design.

  • Cut through

    The knife aperture, all star gaps between the five points, and the question mark hook and dot hole are fully cut through.

Learn the carving basics

Before you start cutting

How do I keep the five star points from bending or snapping when cutting between them?

Score each point boundary line shallowly before removing any full-depth material, so you have a precise guide before applying cutting pressure. Remove the material between two adjacent points at a time, alternating around the star so no one area is structurally isolated early.

What is the right spacing between the three icons on the pumpkin face?

Aim for at least 2 cm of intact rind between the edge of each icon and its neighbor. Tighter spacing looks crowded and weakens the structural walls. If the pumpkin is smaller than expected, reduce the size of the icons proportionally rather than eliminating the spacing.

Should the question mark hook and dot be the same brightness when lit?

The hook, being a larger opening, will naturally glow brighter than the small dot hole. This is fine and actually helps the question mark read correctly at a glance. If you want the dot to feel more prominent, cut it slightly larger than the stencil suggests.

Your take belongs here, too.

Changed a detail? Made it simpler? Share a photo of your version and tell the community what worked.

Share your pumpkin

More pumpkins like this

You've reached the end · 8 pumpkins
The Patch Report

Fresh pumpkins, in your inbox.

The best new carvings, ideas worth stealing, and how-tos for carving season. Short, seasonal, and gone by November.

A short email during carving season. Unsubscribe anytime. See our privacy policy.