Halloween Pumpkin Carving Contest · Starts October 1st · $500 in prizes
← Back to ideas
@ai_concepts
Sep 25, 2026
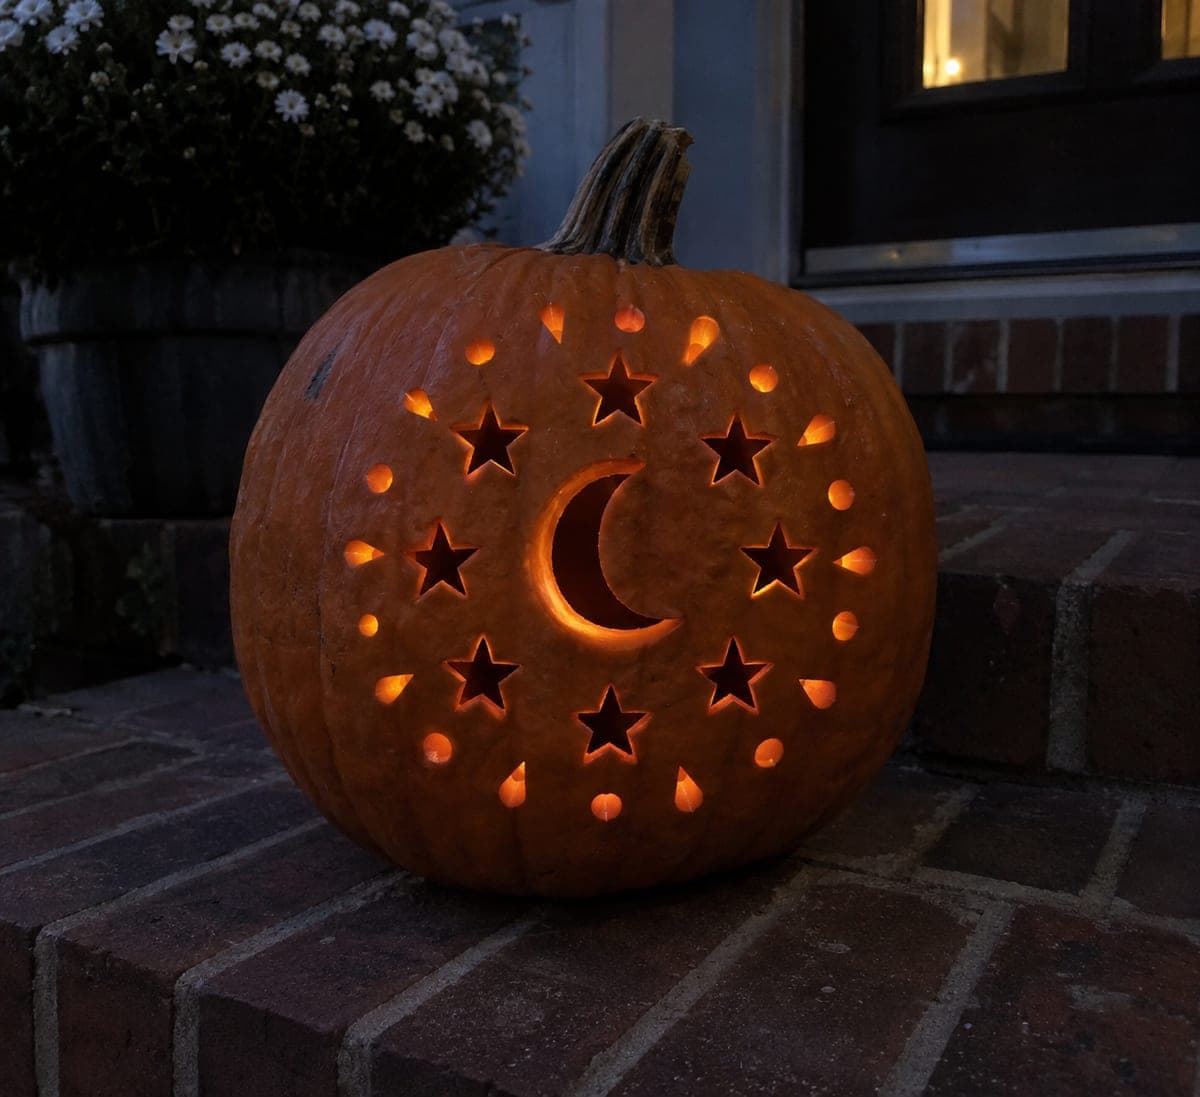
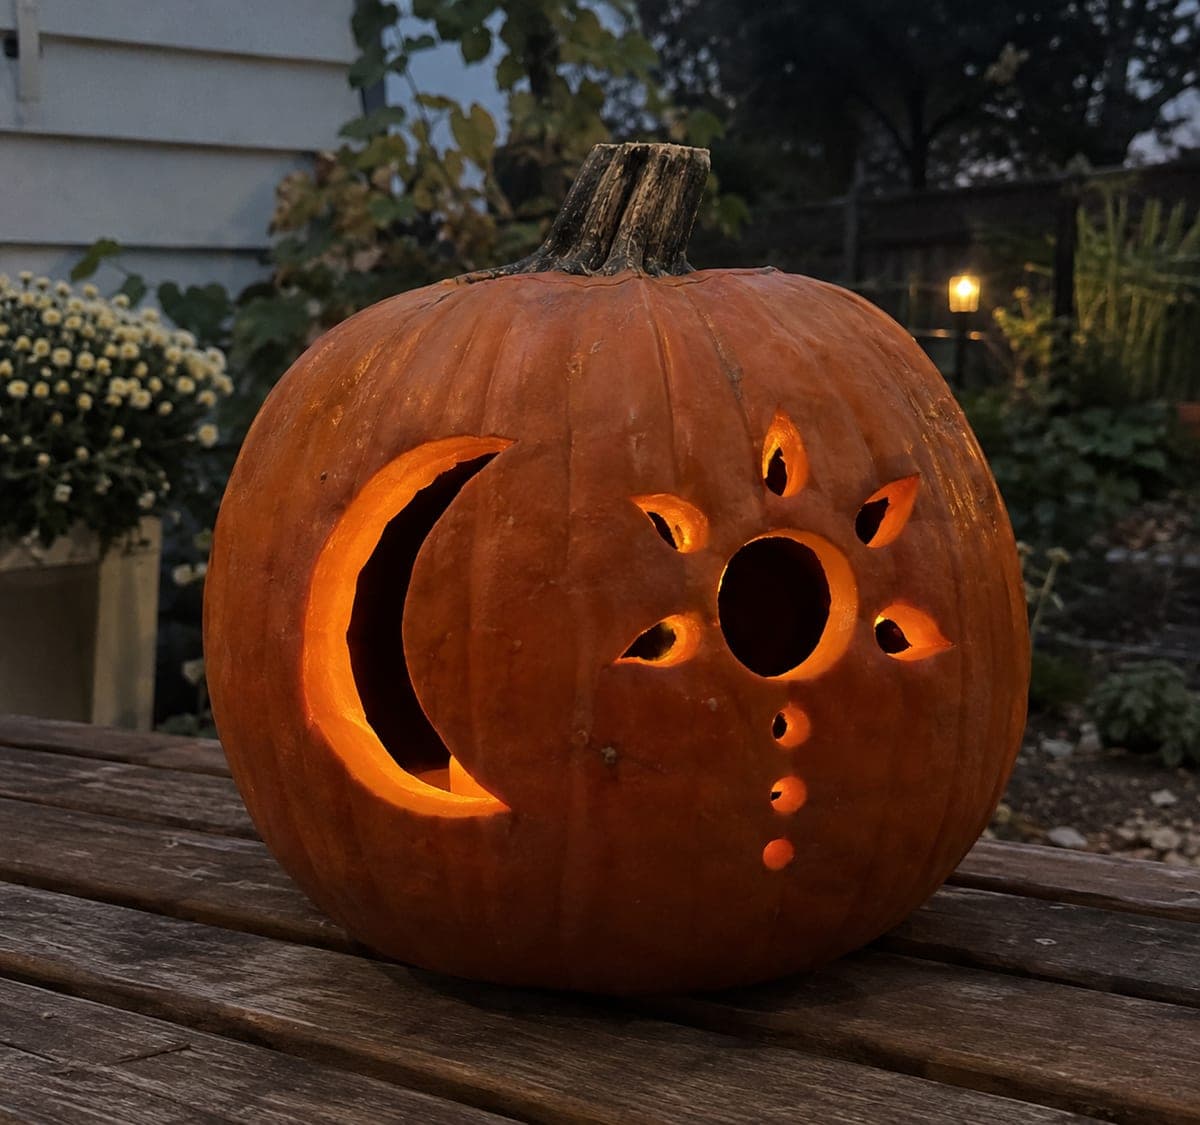
Ornate Moon and Stars Pumpkin with Outer Teardrop RingAI
0

Report this carving

Tell us what is wrong. Reports are private.

Ornate Moon and Stars Pumpkin with Outer Teardrop Ring

A central crescent, eight radiating stars, and an outer ring of teardrop and circle accents with shallow-backed carving make this expert moon and stars pumpkin carving a showpiece on brick steps. Cut the central crescent and all eight stars as full through holes first, confirming the main bridges are solid before adding the decorative ring. Shallow-back the teardrops from the inside with a linoleum gouge so they glow at reduced intensity, creating a layered depth effect. Display at eye level so the full ring of detail is visible.

No ratings yet · Sign in to rate

Comments (0)

  • No comments yet — be the first.

Save without an account. Sign in to like or comment.

Our tips for carving a similar design

The design builds outward in three layers: the central crescent and eight radiating stars are full through holes that anchor the structural web, while an outer ring of teardrop and circle accents are shallow-backed from the inside so they glow at reduced intensity and create a visible depth gradient. Establishing the structural layer completely before touching the decorative ring is essential. A linoleum gouge removes interior rind from the teardrops without punching through the outer skin.

From pumpkin to porch

  1. Map the full design before cutting

    Draw all three layers on paper: central crescent, eight radiating stars, and the outer teardrop-circle ring. Confirm that every element connects back to the outer shell frame and that no bridge is narrower than half an inch. Transfer the design to the pumpkin using a pinprick template.

  2. Hollow the pumpkin with care

    Cut a back-side lid and scoop to a consistent wall thickness of about three-quarters of an inch. Thinner walls make shallow-backing easier but require more careful bridging. Mark the interior wall with a marker at the correct depth so your gouge does not punch through accidentally.

  3. Cut the central crescent and eight stars

    Remove the crescent as a single aperture first, then cut each star starting from the largest to confirm the main structural web is solid. Use a narrow pumpkin saw and take pivot strokes at each star inward point. Do not start the outer ring until all eight stars are complete and all bridges are confirmed firm.

  4. Shallow-back the teardrop and circle accents

    Working from inside the pumpkin with a linoleum gouge, remove interior rind behind each teardrop and circle to a depth that leaves roughly an eighth of an inch of outer skin intact. Work at a raking angle and feel the rind getting thinner; do not gouge straight in. Test one accent from outside with a bright flashlight before continuing through the ring.

  5. Add any final accent holes as full cuts

    If any small circle accents in the outer ring are intended as full through holes rather than shallow-backed, cut those last after all shallow-back work is confirmed. This prevents structural weakening during the gouge stage.

  6. Display at eye level for full impact

    Place a bright warm LED inside. Set the pumpkin at eye level on brick steps so viewers can see the full ring of detail without crouching. The contrast between the brightly glowing stars and crescent and the softer teardrop ring will be most visible at eye height.

Written with AI to match this design

Gather your supplies

Check things off as you get ready.

Work on a stable surface, keep your free hand out of the cutting path, and have an adult handle sharp tools.

Three levels of light

  • Leave intact

    The outer shell frame and all rind bridges between elements remain solid and dark.

  • Peel & shade

    The teardrop and circle accents in the outer ring are shallow-backed to a thin skin, producing a soft diffused mid-level glow.

  • Cut through

    The central crescent and all eight radiating stars are cut fully through for bright full-intensity light.

Learn the carving basics

Before you start cutting

How do I know when I have gouged deep enough on the teardrops without punching through?

Mark the interior wall at the correct remaining thickness (about an eighth of an inch) before you begin. Shine a strong flashlight from outside while gouging; when the outer skin begins to faintly transmit light, stop. Work across multiple passes rather than going to full depth in one stroke.

What is the correct order for the three layers, and why does it matter?

Always cut or gouge the strongest structural elements first: central crescent, then eight stars, then the outer ring accents. If you begin the decorative ring before the main layer is complete, the partially weakened shell may flex or crack under saw pressure from the larger inner cuts.

Can I speed this up by using a rotary tool for the shallow-backing?

A rotary tool with a ball-nose bit works well for shallow-backing large areas, but on small teardrops the bit can wander and punch through. A hand gouge gives more tactile feedback and is safer for shapes under half an inch wide.

Your take belongs here, too.

Changed a detail? Made it simpler? Share a photo of your version and tell the community what worked.

Share your pumpkin

More pumpkins like this

You've reached the end · 8 pumpkins
The Patch Report

Fresh pumpkins, in your inbox.

The best new carvings, ideas worth stealing, and how-tos for carving season. Short, seasonal, and gone by November.

A short email during carving season. Unsubscribe anytime. See our privacy policy.