Halloween Pumpkin Carving Contest Β· Starts October 1st Β· $500 in prizes
← Back to ideas
@ai_concepts
Aug 28, 2026
Painted Skeleton Ribcage No-Carve Pumpkin IdeaAI
0

Painted Skeleton Ribcage No-Carve Pumpkin Idea

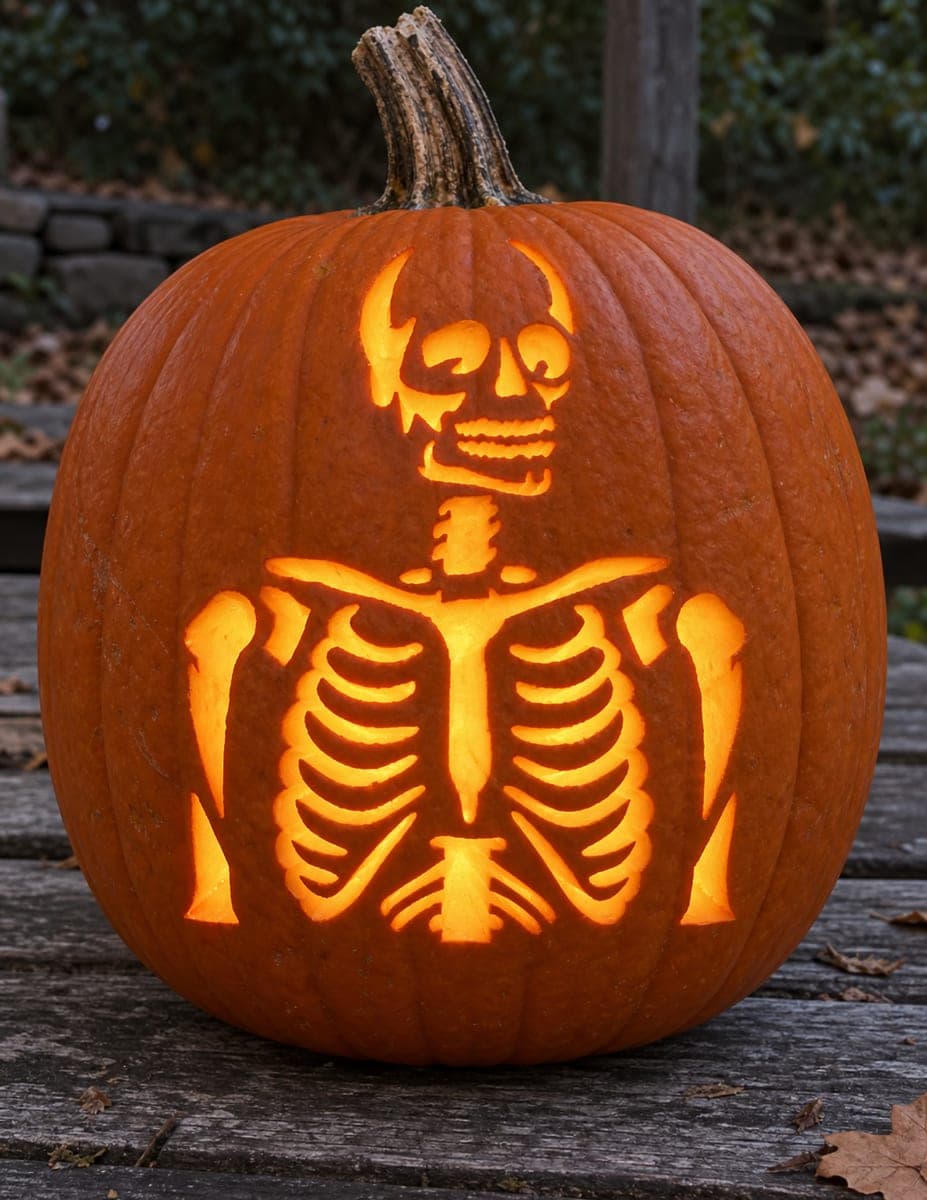
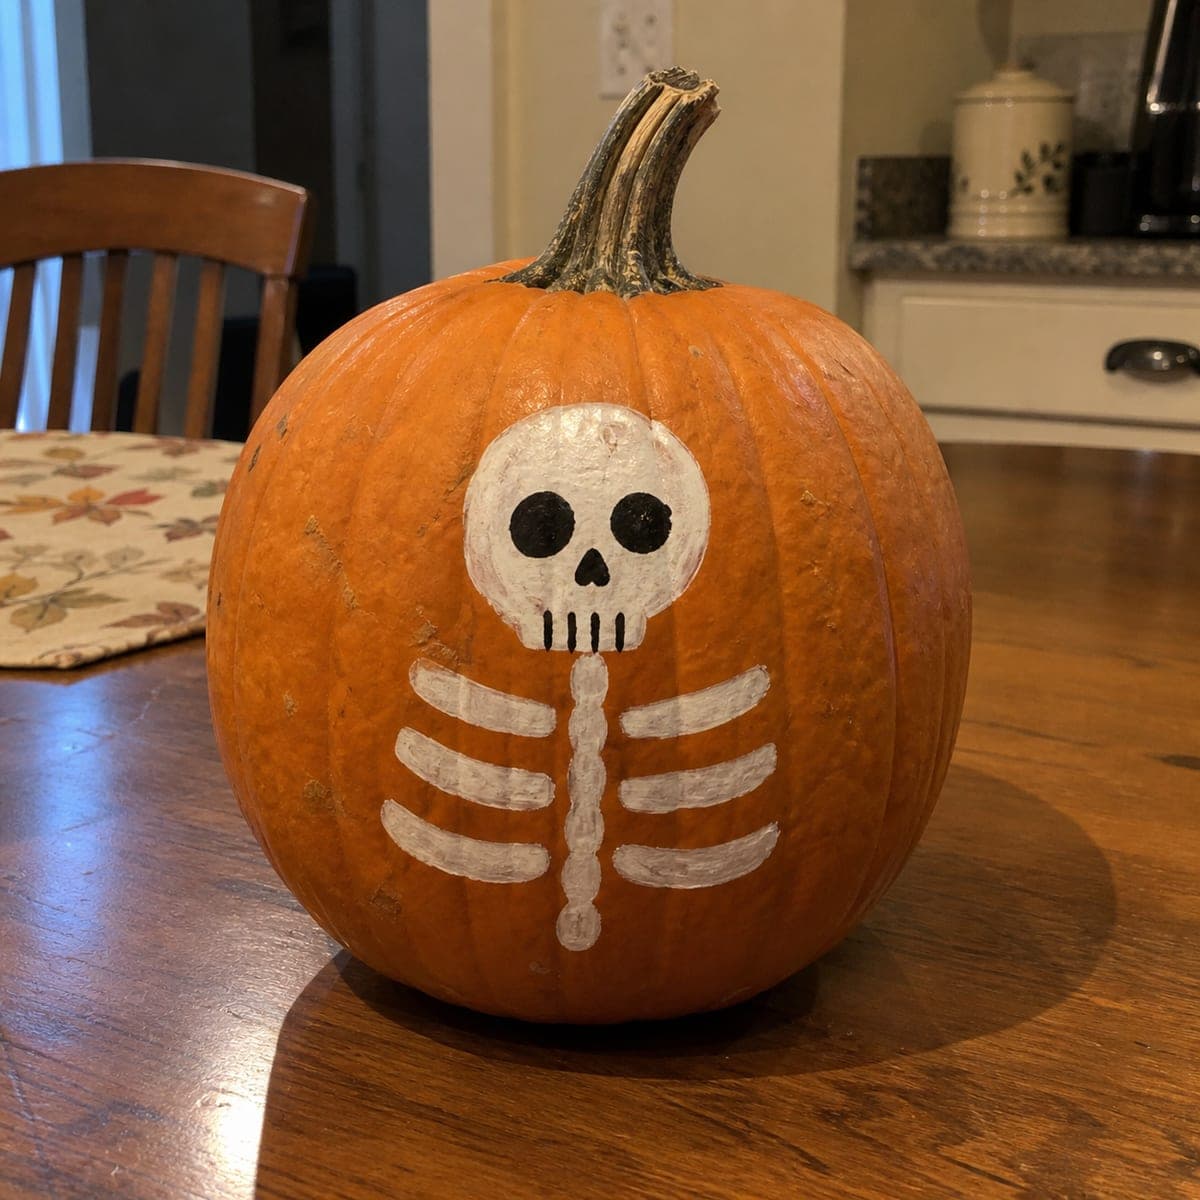
A white skeleton chest with a skull face is painted directly onto an orange pumpkin, the graphic contrast of white on orange giving this no-carve design instant Halloween impact. The intentionally simple brushwork keeps it approachable for first-time painters and makes a great craft project to do with kids. Use white craft paint and a medium flat brush to block in the skull and ribcage, then add the black eye sockets and small rib details with a fine liner brush. Because no carving is involved, the pumpkin stays fresh through the entire holiday season.

This is an AI-generated concept image: a realistic, carvable design idea rather than a photo of a finished carve. AI concepts are always labeled and sit out the leaderboard and the contest.

No ratings yet Β· Sign in to rate

Comments (0)

  • No comments yet β€” be the first.

Save without an account. Sign in to like or comment.

Our tips for carving a similar design

The core trick here is a centered skull sitting above a symmetrical ribcage, using bone shapes as your only design. Instead of painting, you can carve the same look by skin-peeling the bones so they glow soft orange while the background stays dark. Cut fully through only the eye sockets so they read as the brightest, spookiest part of the face.

Written by PumpkinCarvingIdeas.com, inspired by the image above. These are our suggestions, not instructions from the uploader. This approach to the AI concept has not been tested on a real pumpkin.

From pumpkin to porch

  1. Plan and transfer the layout

    Pick a tall, round pumpkin with a smooth front panel so the skull and ribs sit evenly. Print or draw a simple skull with two large eye sockets, a small nose, and three or four gently curved rib pairs flanking a straight spine. Tape the pattern flat to the front and poke through the outlines with a pushpin, spacing dots close together on curves. Peel off the paper and connect the dots lightly with a washable marker.

  2. Open the lid and clean out the shell

    An adult should cut a lid from the bottom or the back rather than the top so the stem stays intact for looks. Scoop out the seeds and scrape the inside of the front wall until it is about one inch thick. A thinner wall makes skin-peeling much easier and lets more light through. Blot the inside dry before you start detailing.

  3. Skin-peel the skull and ribs

    Using a lino-style gouge or a peeling loop tool, shave off just the orange skin inside your bone outlines to expose the pale flesh underneath. Keep the depth shallow and even so all the bones glow at the same brightness. Round the top of the skull and taper the ends of each rib for a natural bone shape. Leave the spine as a peeled vertical bar with small knobs to echo the painted version.

  4. Add the fine dark details

    The eye sockets, nose, and the little lines under the mouth stay dark, so leave that skin completely untouched. Trace crisp edges around them with a detail knife so they hold their shape against the glowing bone. Keep thin gaps between ribs as untouched skin bridges so nothing sags. Step back and check that the skull reads clearly from a few feet away.

  5. Cut through the eye sockets last

    Once all the shallow work is done, an adult should cut fully through only the two round eye sockets for the brightest accents. Cut big openings last so the shell stays firm while you carve everything else. Angle the blade slightly outward so the holes look larger from the front. Ease out the plugs gently to avoid cracking the surrounding face.

  6. Light it and take your photo

    Set a battery LED puck or string inside and never use a candle, since heat warps the thin peeled areas. Position the light low and toward the front so it fills the eye cutouts and washes up through the ribs. Photograph in a dark room with the pumpkin at eye level on a table. Rub a little petroleum jelly on the cut edges to slow drying and keep the glow looking fresh.

Gather your supplies

Check things off as you get ready.

Work on a stable surface, keep your free hand out of the cutting path, and have an adult handle sharp tools.

Three levels of light

  • Leave intact

    The orange background and the eye sockets, nose, and mouth lines that stay dark for contrast

  • Peel & shade

    The skull dome, the curved ribs, and the beaded spine, all shaved to a dim bone-colored glow

  • Cut through

    Only the two round eye sockets, opened fully for the brightest spooky highlight

Learn the carving basics

Before you start cutting

Do I have to carve this, or can I just paint it like the image?

You can absolutely paint it with white craft paint and a fine black liner for a fresh, no-carve version that lasts all season. If you want the bones to glow at night, the carved skin-peel method described here gives you that effect. Both start from the same simple skull-and-ribs layout, so pick whichever suits your time and tools.

How do I keep the thin ribs from tearing or sagging?

Keep the peels shallow and leave untouched skin bridges in the gaps between each rib. Since you are only removing skin and not cutting all the way through, the ribs stay supported by the pumpkin wall. Work slowly with a loop tool and avoid digging deep, which is what causes drooping.

Why cut the eye sockets last instead of first?

The eye holes are the only full cutouts, and open holes weaken the shell. Doing all your shallow peeling while the pumpkin is still solid keeps the surface firm and easy to control. Save the two openings for the very end so nothing flexes or cracks while you detail the skull.

Your take belongs here, too.

Changed a detail? Made it simpler? Share a photo of your version and tell the community what worked.

Share your pumpkin

More pumpkins like this

You've reached the end Β· 8 pumpkins
The Patch Report

Fresh pumpkins, in your inbox.

The best new carvings, ideas worth stealing, and how-tos for carving season. Short, seasonal, and gone by November.

A short email during carving season. Unsubscribe anytime. See our privacy policy.