@veiledvine
Sep 7, 2026
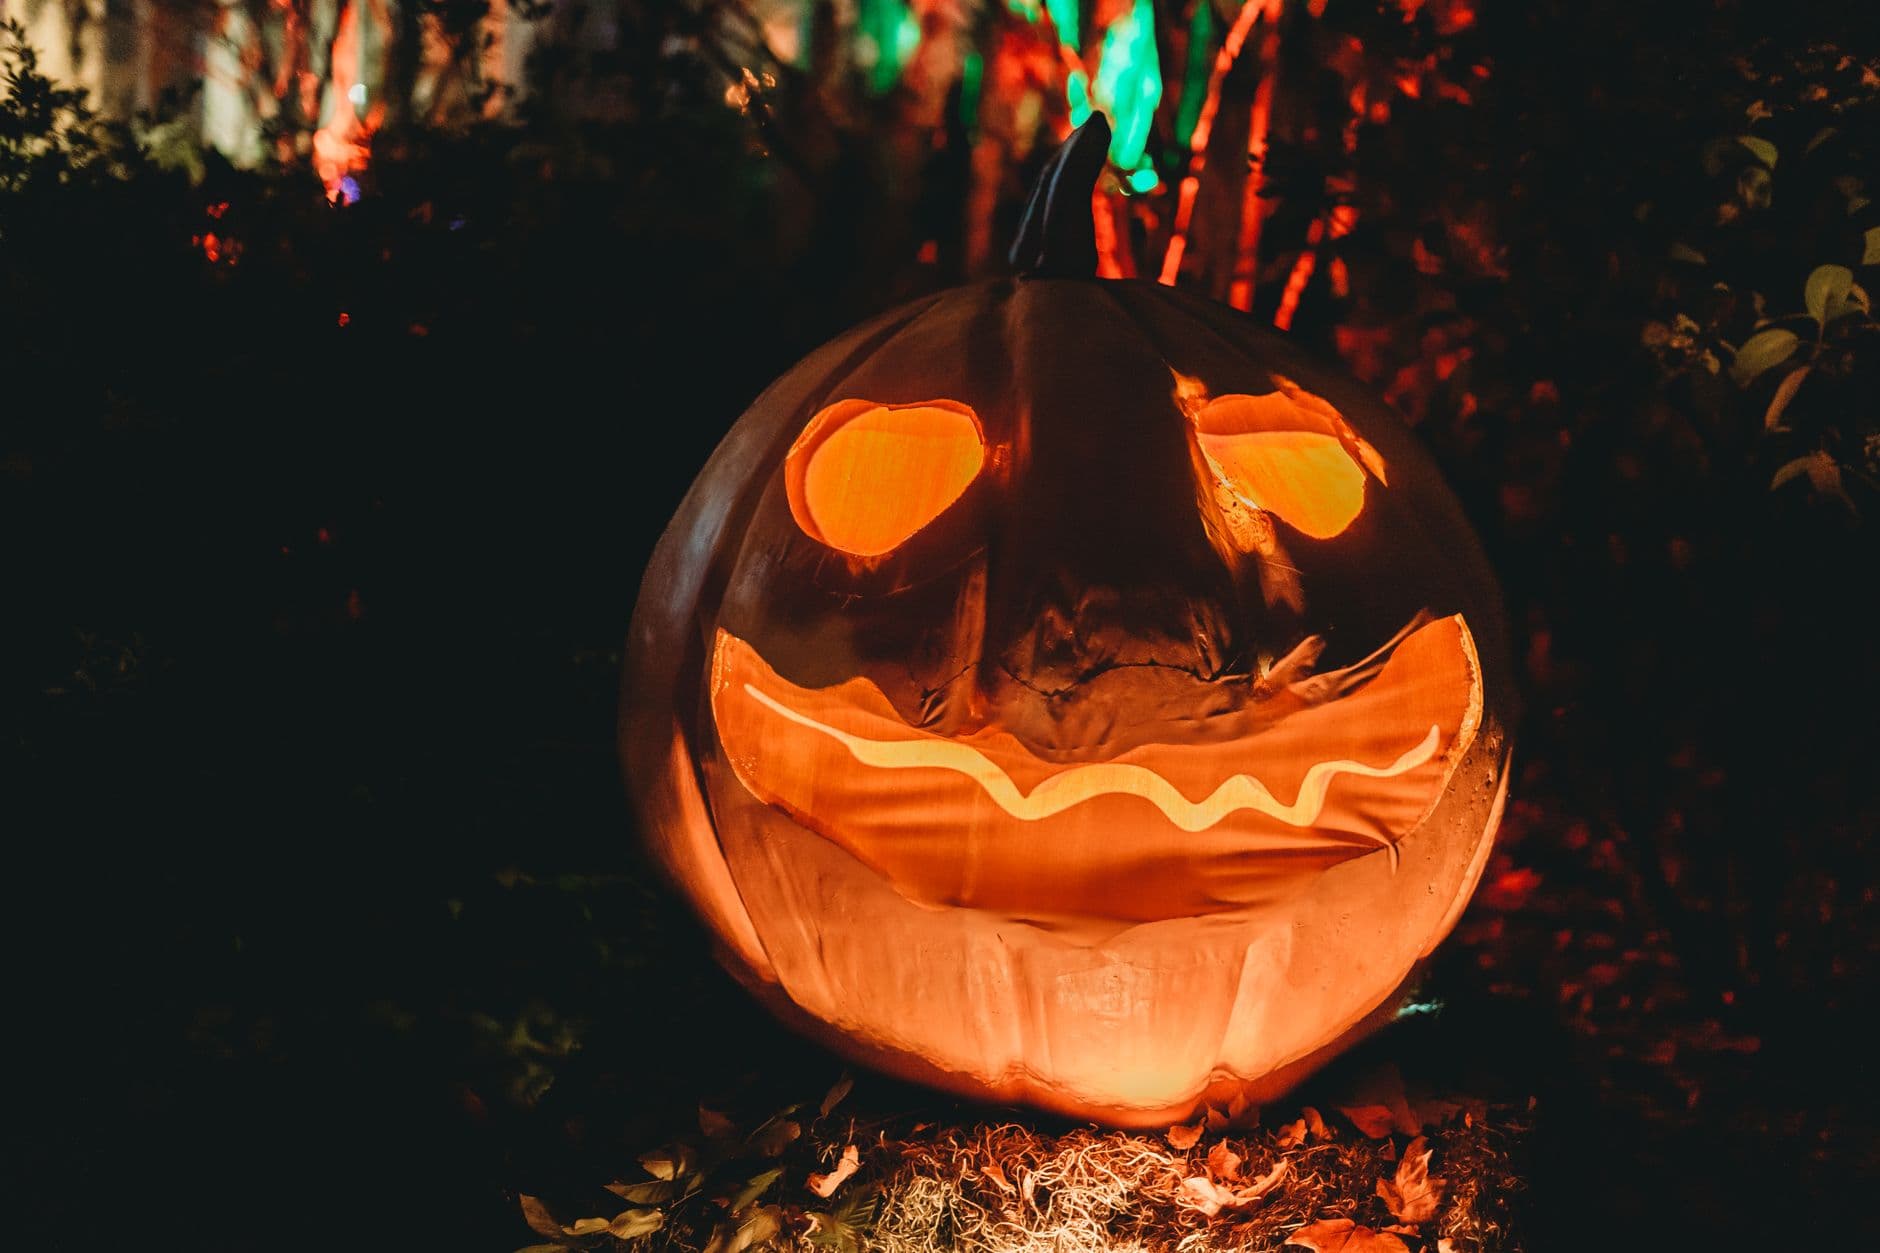
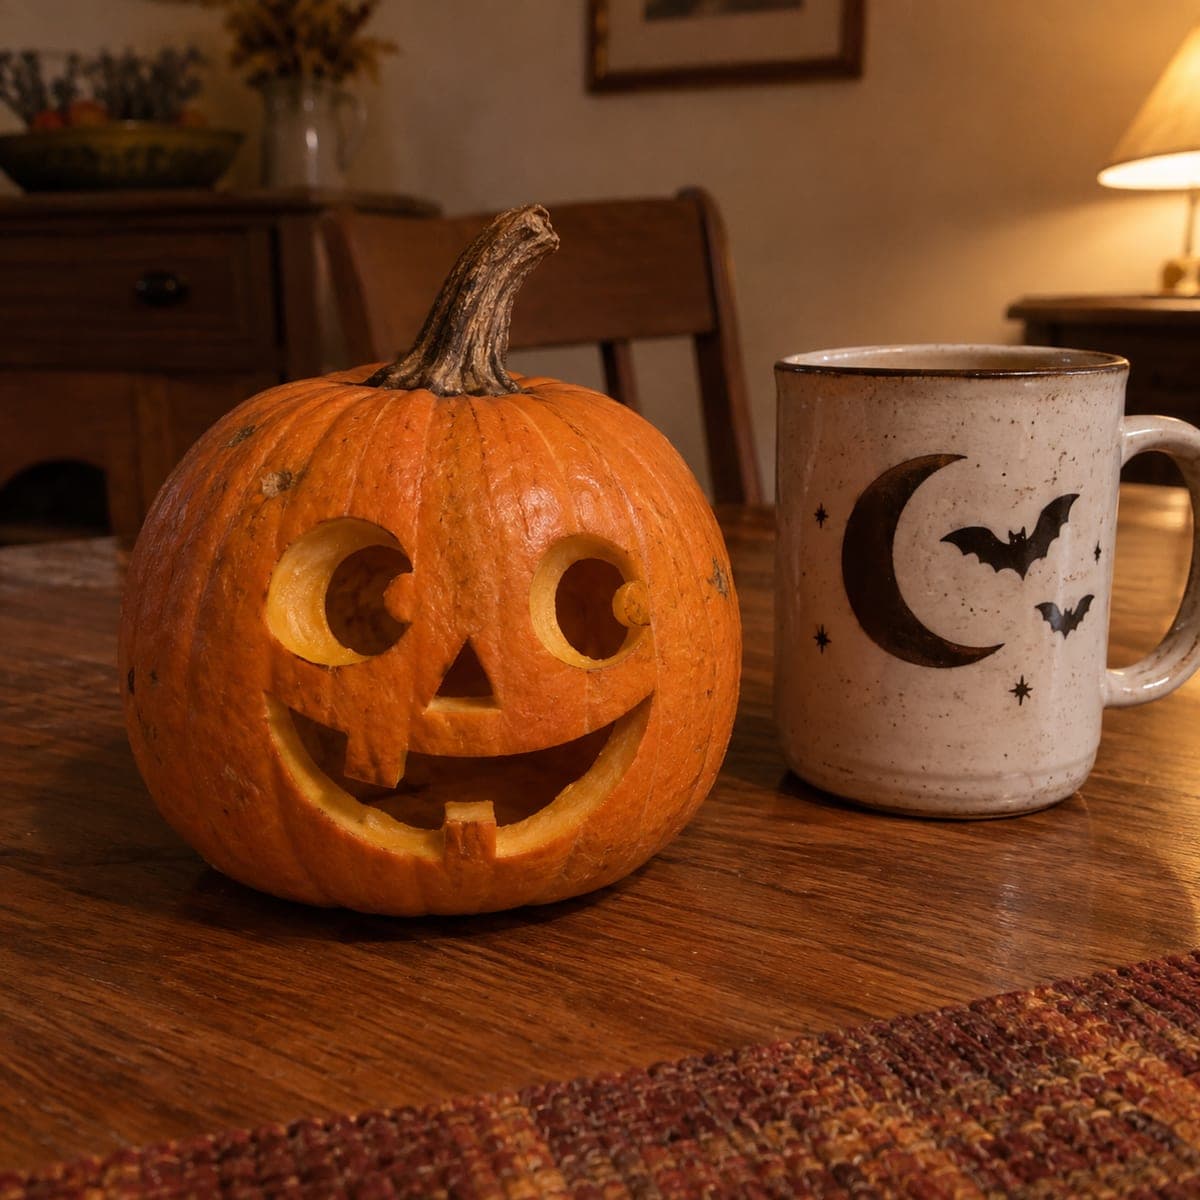
This is the timeless jack-o-lantern grin, and the core trick is contrast between clean cutout shapes and softer peeled areas. Two teardrop eyes and a wide toothy smile do all the work, so keep the shapes bold and rounded. A wavy peeled line across the mouth gives that soft inner glow without weakening the smile.
Written by PumpkinCarvingIdeas.com, inspired by @veiledvine's photo above. These are our suggestions, not instructions from the uploader, and this approach hasn't been tested on their exact carve.
Choose a large, round pumpkin with a smooth face and a sturdy stem. Wipe it down and set it on a stable table with a towel underneath. Cut a lid at an angle around the stem so it rests back in place without falling through. Scoop out the seeds and pulp, then thin the front wall to about one inch so it carves easily.
Sketch two large teardrop eyes angled slightly toward the center for a happy look. Draw a wide smile that curves up at the corners, then add a row of blocky teeth along the top and bottom edges. Keep the teeth chunky rather than thin so they stay strong. Step back and check the spacing before you cut anything.
Use a lino or shallow gouge to skin off just the top layer inside part of the mouth, leaving the deeper orange to shine dim. Scrape a gentle wavy line through the middle of the smile so it will read as a soft ribbon of light. This peeled skin glows warm without cutting all the way through. Take your time and keep the depth even.
With a small serrated carving saw, cut out both teardrop eyes using gentle sawing motions, not force. Push the cut pieces inward and out through the lid opening. Keep the rounded shape smooth by making short connecting cuts. Clean up any ragged edges with the tip of the saw.
Save the big mouth for last so the pumpkin stays strong while you work. Cut along the outer smile line, following the tooth shapes so a few chunky teeth stay attached top and bottom. Remove the waste pieces carefully. Trim the inside edges so the light passes cleanly through the grin.
Drop in a battery LED light or two for a steady, safe glow, never a candle. Set the pumpkin on a bed of straw or leaves for that cozy porch look. Shoot your photo at night with the background dim so the face pops. A little colored light behind it adds a spooky mood.
Check things off as you get ready.
Work on a stable surface, keep your free hand out of the cutting path, and have an adult handle sharp tools.
The whole outer face and the space around the eyes stay untouched dark orange skin.
The wavy ribbon line and the softer patches inside the mouth get skin-peeled for a dim glow.
The two teardrop eyes and the open toothy smile are cut through for the brightest light.
Draw them chunky and wide rather than thin and pointed, since fat teeth hold much better. Cut the mouth last so the pumpkin wall stays firm while you work. If a tooth feels loose, leave a little extra pumpkin behind it for support.
Not at all, this classic grin is easy to freehand with a washable marker. Start with two teardrop eyes and a wide curved smile, then add teeth. If you make a mistake, just wipe the marker off and redraw.
That effect comes from peeling only the top layer of skin rather than cutting all the way through. The thinned pumpkin lets a dim orange light pass, while the full cutouts stay brightest. Combining both on one face adds depth and a friendly, warm look.
Changed a detail? Made it simpler? Share a photo of your version and tell the community what worked.
The best new carvings, ideas worth stealing, and how-tos for carving season. Short, seasonal, and gone by November.

Comments (0)