Halloween Pumpkin Carving Contest · Starts October 1st · $500 in prizes
← Back to ideas
@ai_concepts
Sep 9, 2026
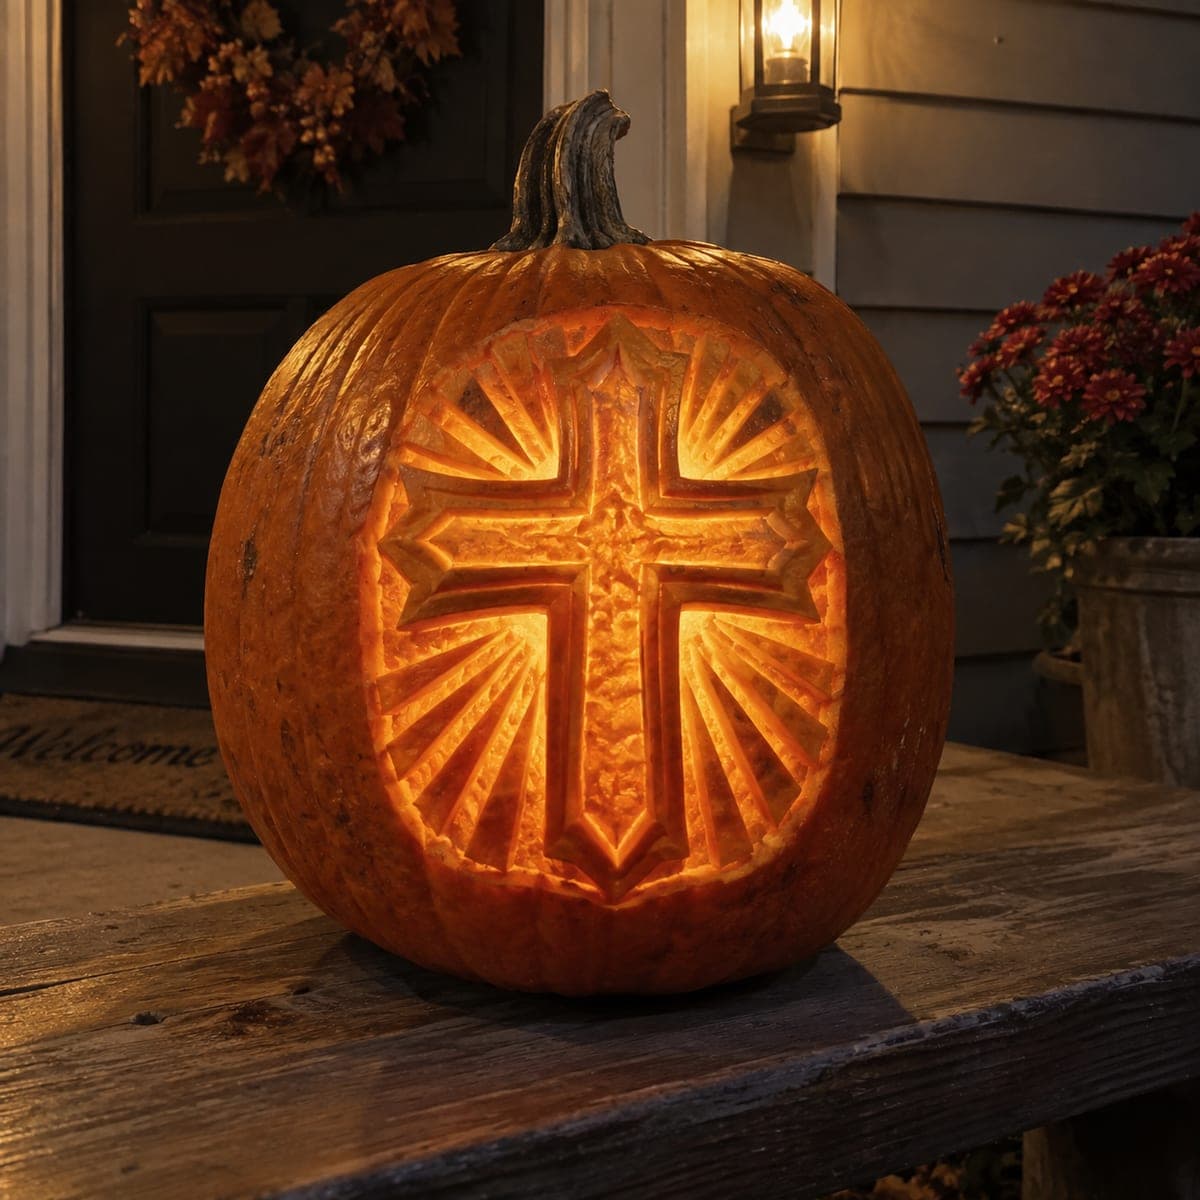
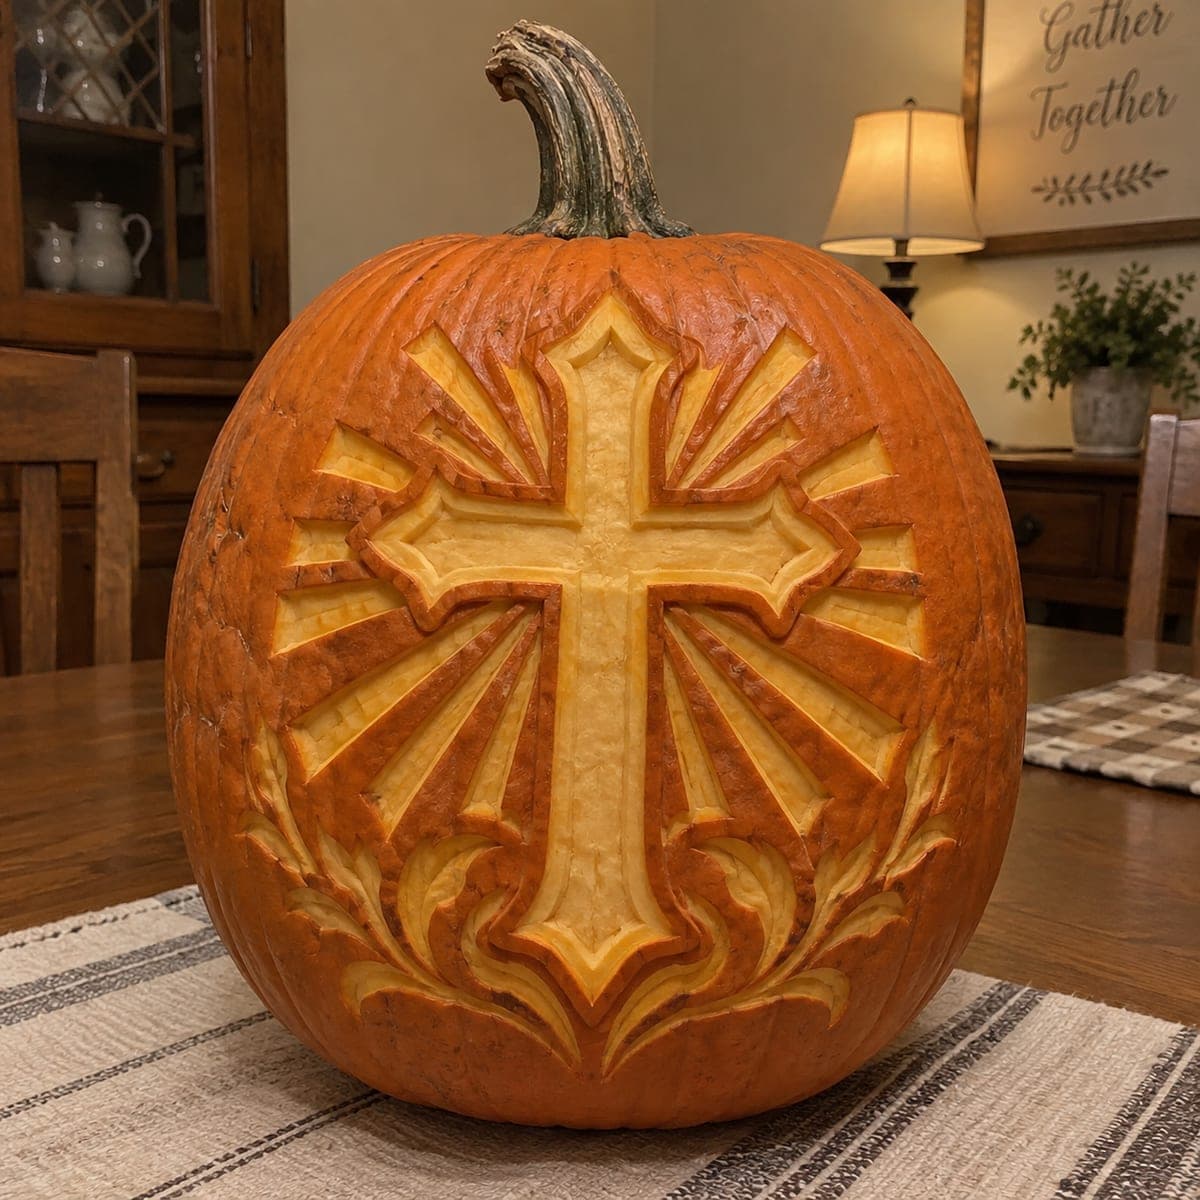
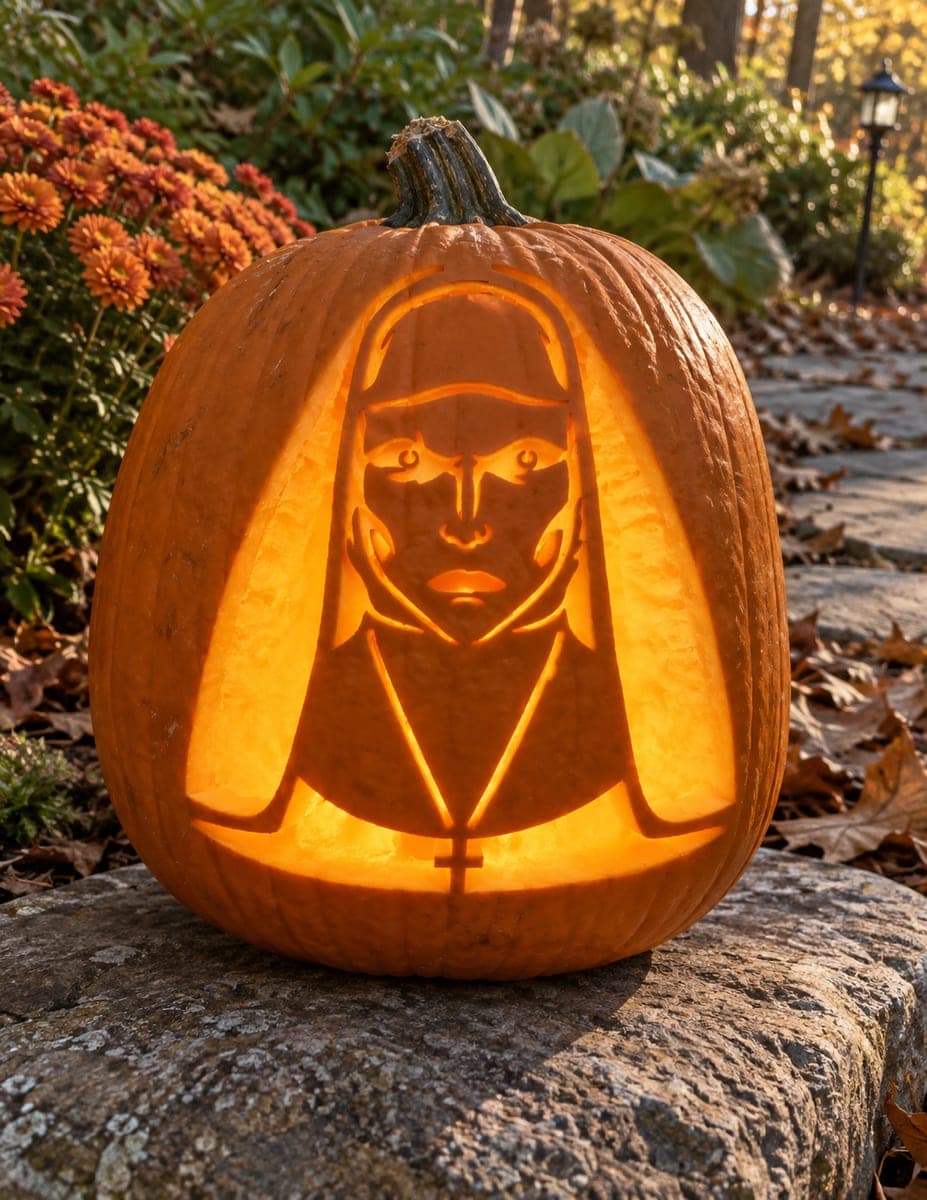
Radiant Cross Carved Pumpkin with Sunburst DesignAI
0

Radiant Cross Carved Pumpkin with Sunburst Design

A bold ornate cross with flared ends and layered sunburst rays fills the pumpkin face, all carved in a consistent shallow relief that reads as a glowing motif by day or night. The symmetrical sunburst lines radiating from behind the cross create a striking halo effect, and the layered depth makes the cross stand forward from the background. Mark the center point of the pumpkin, then use a ruler to draw the radiating lines evenly before carving the cross shape first as the focal anchor. This faith-inspired pumpkin carving idea works as a tasteful fall decoration that carries meaning beyond Halloween.

This is an AI-generated concept image: a realistic, carvable design idea rather than a photo of a finished carve. AI concepts are always labeled and sit out the leaderboard and the contest.
No ratings yet · Sign in to rate

Comments (0)

  • No comments yet — be the first.

Save without an account. Sign in to like or comment.

Our tips for carving a similar design

The core trick here is layered relief carving, where nothing is cut all the way through and the whole image is built from shallow depth changes in the skin and flesh. You keep the ornate cross raised as the focal anchor, sink the sunburst rays and flourishes just behind it, and let the untouched background stay dark. This design reads as a glowing motif in daylight and softly from within at night.

Written by PumpkinCarvingIdeas.com, inspired by the image above. These are our suggestions, not instructions from the uploader. This approach to the AI concept has not been tested on a real pumpkin.

From pumpkin to porch

  1. Prep the pumpkin and plan the layout

    Choose a large pumpkin with a smooth, flat front face and wipe it clean. Find the center of the face and mark it, since the whole sunburst radiates from that point. This is a relief design, so you do not need to cut a lid or fully hollow it for structure, but scraping the inside wall down a bit will help light pass through later. Keep the sharp tools with an adult and work on a stable, non-slip surface.

  2. Transfer the cross and radiating lines

    Tape your stencil in place, or draw freehand using a ruler to keep the sunburst rays even and symmetrical from the center. Mark the ornate cross with its flared ends first as the focal anchor, then the straight rays fanning out behind it, then the leafy flourishes across the bottom. Use a poking tool or washable marker to lay down every line before you cut anything. Step back and check that both sides match before moving on.

  3. Outline the cross and score the design

    With a fine detail blade, score along the outline of the cross and the edges of each ray to about a quarter inch deep. These score lines act as clean stopping walls so your peeling does not run into the areas you want to keep raised. Take your time on the flared ends and the pointed ray tips, using slow controlled cuts. Keep the cross fully bordered so it will stand forward from everything around it.

  4. Peel the background layers

    Switch to a shaving loop or ribbon tool and skin off the outer orange rind on the sunburst rays and the bottom flourishes, exposing the lighter flesh beneath. Peel a little deeper right behind the cross so it visually pops forward, and leave the flesh on the cross itself the highest and brightest. Work in thin passes rather than gouging, checking the tone as you go. The strips between rays that you leave untouched will stay dark and create the striking halo contrast.

  5. Refine the depth and shading

    Compare the ray tips to the cross and adjust so there is a clear step in depth between the raised cross, the mid peeled rays, and the dark background gaps. Smooth any rough flesh with the loop tool so the surface catches light evenly. Clean up the flared points and the curls of the flourishes with the detail blade. Small depth changes read as shading, so subtle is better than deep here.

  6. Light it and photograph

    Set a battery LED puck or string inside, never a candle, since thin peeled flesh scorches. Because this is relief and not cut through, the glow will be soft and warm rather than bright beams, which suits the design. Rub a little petroleum jelly on the cut edges to slow drying and keep the contrast crisp. Shoot photos in a dim room to show off the daytime and nighttime glow.

Gather your supplies

Check things off as you get ready.

Work on a stable surface, keep your free hand out of the cutting path, and have an adult handle sharp tools.

Three levels of light

  • Leave intact

    The narrow strips of skin between the sunburst rays and the outer background, kept dark for the halo contrast.

  • Peel & shade

    The radiating rays, the bottom flourishes, and the raised cross itself, skinned to glow dim orange.

  • Cut through

    None on this relief design, since nothing is cut fully through; the depth peeled just behind the cross reads brightest.

Learn the carving basics

Before you start cutting

Do I need to cut all the way through the pumpkin?

No. This is a relief or shading design, so you only remove the outer skin and a bit of flesh to different depths. Keeping the wall intact lets the whole image glow softly instead of throwing hard beams of light. A thinned inner wall behind the design helps a little more light come through.

How do I keep the sunburst rays even and symmetrical?

Mark the exact center of the pumpkin face first, then use a ruler to draw each ray outward from that single point. Work in matched pairs, one on each side, so both halves stay balanced. Draw and double check every line before you cut, since even carving is far easier than fixing an uneven ray.

Why carve the cross first?

The cross is the focal anchor, so establishing it early keeps the design centered and correctly proportioned. Once its outline is scored, you can peel the rays and flourishes around it without accidentally cutting into it. Leaving the cross the highest, least peeled layer is what makes it stand forward from the background.

Your take belongs here, too.

Changed a detail? Made it simpler? Share a photo of your version and tell the community what worked.

Share your pumpkin

More pumpkins like this

You've reached the end · 8 pumpkins
The Patch Report

Fresh pumpkins, in your inbox.

The best new carvings, ideas worth stealing, and how-tos for carving season. Short, seasonal, and gone by November.

A short email during carving season. Unsubscribe anytime. See our privacy policy.