Halloween Pumpkin Carving Contest · Starts October 1st · $500 in prizes
← Back to ideas
@ai_concepts
Sep 25, 2026
Simple Darth Vader Face Glowing PumpkinAI
0

Report this carving

Tell us what is wrong. Reports are private.

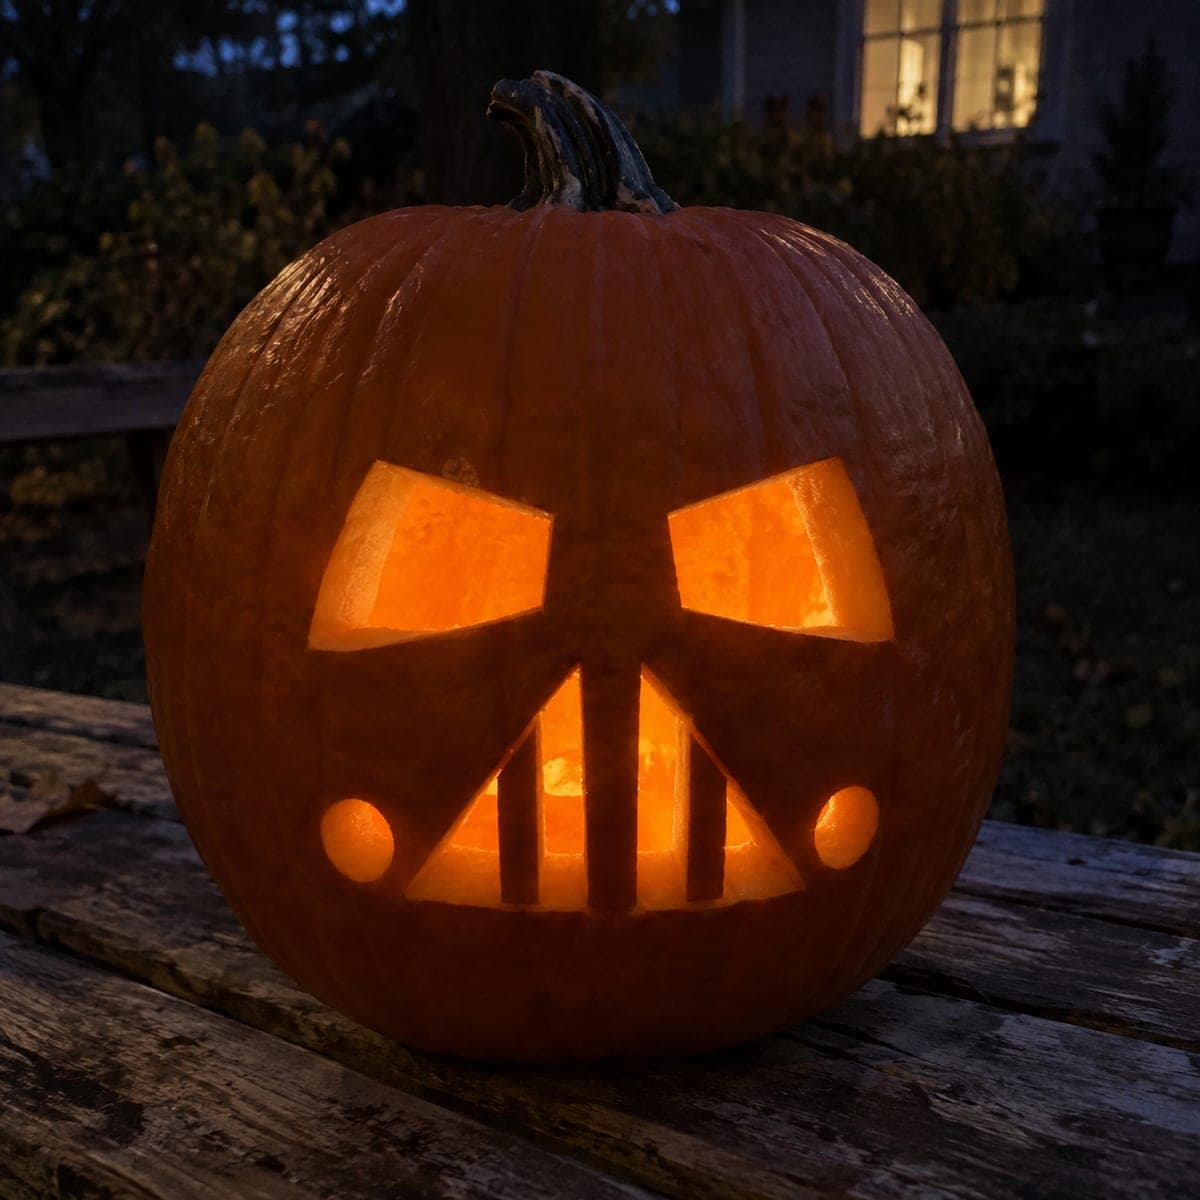
Simple Darth Vader Face Glowing Pumpkin

Darth Vader's unmistakable helmet face glows through a pumpkin in a simple cutout format with separated eyes and cheek vents. For this easy darth vader pumpkin carving idea, cut the eye lenses and cheek vent rectangles as separate openings, then root the mouth grille bars firmly into the upper and lower lips so nothing falls loose. Work top-to-bottom when cutting to keep the rind stable as material is removed. A single candle inside produces the deep amber glow that suits the villain's dark aesthetic.

No ratings yet · Sign in to rate
Comments (0)

  • No comments yet — be the first.

Save without an account. Sign in to like or comment.

Our tips for carving a similar design

Darth Vader's iconic face is built from separate aperture cuts: the eye lenses, cheek vent rectangles, and mouth grille, each carved as individual openings. The mouth grille bars stay firmly rooted into both the upper and lower lips so no bar can fall loose. Cutting top-to-bottom as you work keeps the rind stable as material is progressively removed.

From pumpkin to porch

  1. Hollow the pumpkin

    Cut a back panel or lid and remove all interior pulp. Thin the carving face to about three-quarters of an inch. Vader's design uses several separate apertures in close proximity, and even wall thickness helps each opening cut cleanly without the saw jumping into an adjacent line.

  2. Transfer the mask pattern

    Print the Vader mask face at scale, tape it securely to the pumpkin, and trace all aperture outlines and grille bar positions with a pin tool. Mark the grille bar roots clearly with a pen so they are visible after the paper is removed.

  3. Cut the eye lenses first

    Start at the top of the design by cutting the eye lens apertures. These are the largest openings and establish the proportions of the whole mask. Adults handle all cutting. Remove each piece cleanly before moving downward.

  4. Cut the cheek vent rectangles

    Cut the rectangular cheek vent openings on each side of the face, working from the top edge of each rectangle downward. Keep the corners sharp by stopping the cut short at each corner and re-entering from the perpendicular direction to meet it cleanly.

  5. Carve the mouth grille

    Cut the open spaces between the grille bars, leaving each bar rooted to the upper lip at its top and the lower lip at its bottom. Work one bar space at a time, confirming each bar is still firmly anchored before cutting the adjacent space.

  6. Add light and display

    Insert a candle or amber-tinted LED. The deep amber glow suits the villain's dark aesthetic. Position the pumpkin at eye level so the full mask face is clearly visible to arriving guests.

Written with AI to match this design

Gather your supplies

Check things off as you get ready.

Work on a stable surface, keep your free hand out of the cutting path, and have an adult handle sharp tools.

Three levels of light

  • Leave intact

    Grille bars, cheek structure, and helmet surround stay as dark uncut rind

  • Peel & shade

    None on this design

  • Cut through

    Eye lens apertures, cheek vent rectangles, and mouth grille spaces are fully cut through

Learn the carving basics

Before you start cutting

What is the best way to cut the rectangular cheek vents neatly?

Use a narrow blade and cut each side of the rectangle in a separate stroke, stopping at the corners and re-entering perpendicularly to complete each angle. Trying to turn the saw blade in a tight corner usually produces a ragged edge. Finish each corner with a small detail knife to square it off cleanly.

How thick should the mouth grille bars be to stay intact?

Each bar should be at least three-eighths of an inch wide at its thinnest point. Bars much thinner than that are prone to snapping when the adjacent space is cut. If the design places bars very close together, consider widening each bar slightly and narrowing the spaces between them so the structural budget is in the right place.

The eye lenses look unequal in size after cutting. Can I fix it?

Use a small paring knife to carefully trim the smaller aperture outward until it matches the larger one. Trim in very thin slices and check symmetry frequently by stepping back from the pumpkin. Taking material away is easy; putting it back is not, so work gradually.

Your take belongs here, too.

Changed a detail? Made it simpler? Share a photo of your version and tell the community what worked.

Share your pumpkin

More pumpkins like this

You've reached the end · 8 pumpkins
The Patch Report

Fresh pumpkins, in your inbox.

The best new carvings, ideas worth stealing, and how-tos for carving season. Short, seasonal, and gone by November.

A short email during carving season. Unsubscribe anytime. See our privacy policy.