Halloween Pumpkin Carving Contest · Starts October 1st · $500 in prizes
← Back to ideas
@ai_concepts
Sep 25, 2026
Simple Jack Skellington Face Pumpkin CarvingAI
0

Report this carving

Tell us what is wrong. Reports are private.

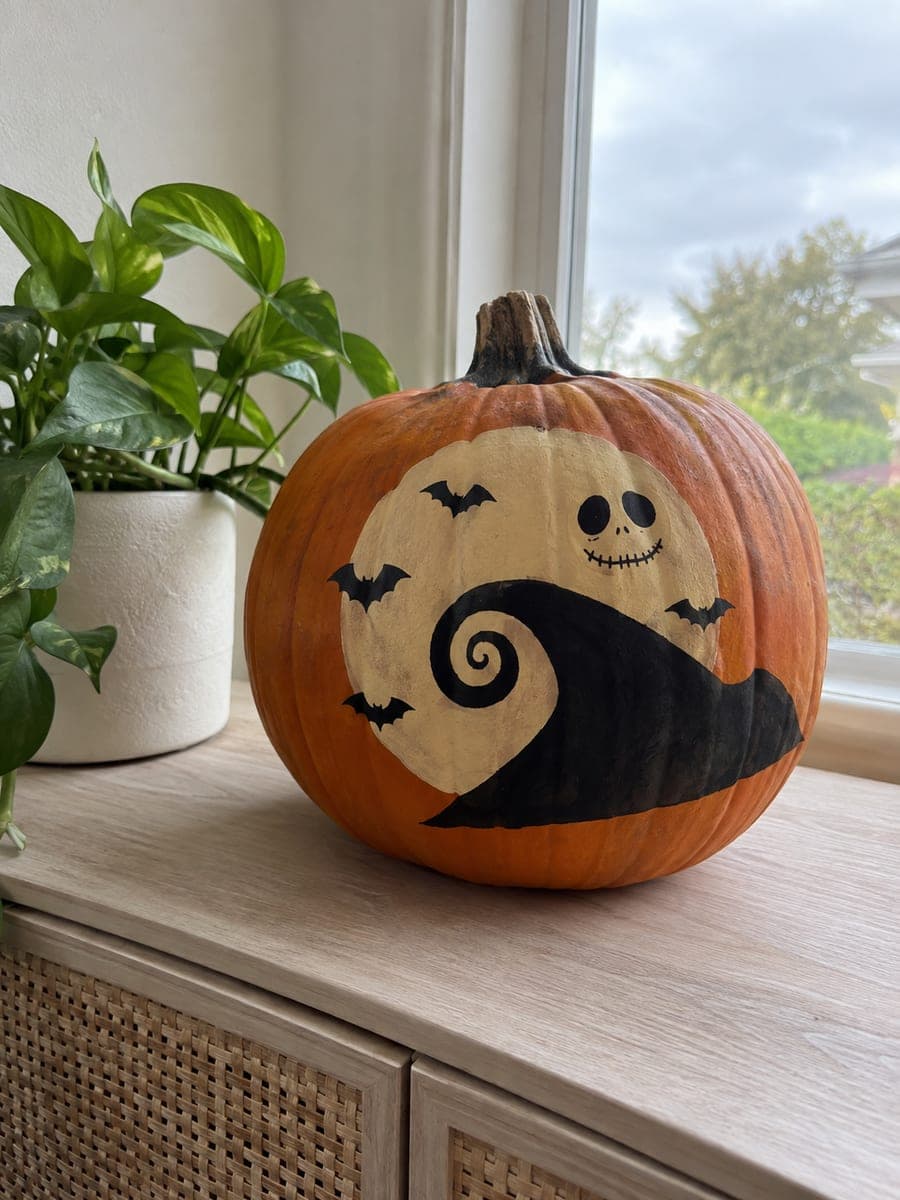
Simple Jack Skellington Face Pumpkin Carving

Large empty eye sockets, a separate nose hole, and spaced mouth slots bring Jack Skellington's skull face to life on this easy Jack Skellington pumpkin carving, with broad rind gaps keeping the mouth teeth rooted. This is one of the most recognizable beginner pumpkin carving ideas for Nightmare Before Christmas fans. Score the eye outline first to confirm placement is symmetrical before committing to the full cut.

No ratings yet · Sign in to rate

Comments (0)

  • No comments yet — be the first.

Save without an account. Sign in to like or comment.

Our tips for carving a similar design

Two large empty eye sockets, one smaller nose hole, and a row of spaced mouth slots build Jack's face from a handful of simple cuts. The design has no retained interior elements to worry about, just correctly spaced open shapes separated by wide rind bridges. Scoring the eye outlines first to check symmetry before cutting through is the one step that makes the biggest difference in the finished result.

From pumpkin to porch

  1. Hollow the pumpkin

    Cut a back lid and scoop to about one inch of wall thickness. Jack's large eye sockets are the widest cuts in the design; a slightly thicker wall keeps the upper face from caving under its own weight after both are removed.

  2. Transfer and check symmetry

    Tape the stencil and perforate the full face. Before removing the stencil, draw a vertical center line through the stem down the pumpkin's front to use as a symmetry check once you connect the perforation dots with a marker.

  3. Score the eye outlines first

    Run a shallow scoring pass around both eye sockets with a small saw or gouge. Step back and compare each eye's shape and position relative to the center line. Adjust the marker lines now if anything looks off; it is far easier to redraw a marker line than to fix a miscut eye socket.

  4. Cut the eye sockets

    Open one eye at a time, sawing along the scored outline. Push the removed piece inward and extract from the back. Cut the second eye using the first as a symmetry reference. Adults should handle all saw work.

  5. Cut the nose and mouth slots

    Open the triangle or oval nose hole next. Then cut each mouth slot individually, leaving a wide rind bridge between every slot. Six to eight slots across the grin width gives a clear stitched look. Keep the saw perpendicular to the rind for clean slot edges.

  6. Light and display

    Insert an LED candle and place the pumpkin at eye level. The large eye sockets flood with warm light and the spaced grin slots give the distinctive stitched Jack expression. No additional decoration is needed.

Written with AI to match this design

Gather your supplies

Check things off as you get ready.

Work on a stable surface, keep your free hand out of the cutting path, and have an adult handle sharp tools.

Three levels of light

  • Leave intact

    The nasal bridge between the eyes, rind between mouth slots, and all outer rind stay solid and dark

  • Peel & shade

    None, all contrast is pure cutout versus solid rind

  • Cut through

    Both eye sockets, the nose hole, and all mouth slots glow at full brightness

Learn the carving basics

Before you start cutting

My two eye sockets came out at slightly different angles. Can I fix it after cutting?

Minor angle differences are barely noticeable once the pumpkin is lit, because the large open areas flood with light and the shape reads as Jack even with slight asymmetry. If one eye is noticeably smaller, carefully extend one edge of the cut with a fine saw to bring it closer to matching.

Jack's nose in some images is a triangle and in others is more oval. Which is easier to cut?

A rounded oval nose is slightly easier to cut cleanly because there are no sharp corners to navigate. A triangle nose is more recognizable as Jack's signature face. Either works at the easy difficulty level; choose whichever is clearest on your stencil.

Does the design need a circle outline around the skull face to read as Jack?

No, the three face elements read as Jack without any outer skull circle. Adding a circular border cut would increase difficulty and remove structural rind unnecessarily. The face alone is recognizable and works best as a straightforward easy carve.

Your take belongs here, too.

Changed a detail? Made it simpler? Share a photo of your version and tell the community what worked.

Share your pumpkin

More pumpkins like this

You've reached the end · 8 pumpkins
The Patch Report

Fresh pumpkins, in your inbox.

The best new carvings, ideas worth stealing, and how-tos for carving season. Short, seasonal, and gone by November.

A short email during carving season. Unsubscribe anytime. See our privacy policy.