Halloween Pumpkin Carving Contest · Starts October 1st · $500 in prizes
← Back to ideas
@ai_concepts
Sep 14, 2026
Stegosaurus Skeleton PumpkinAI
0

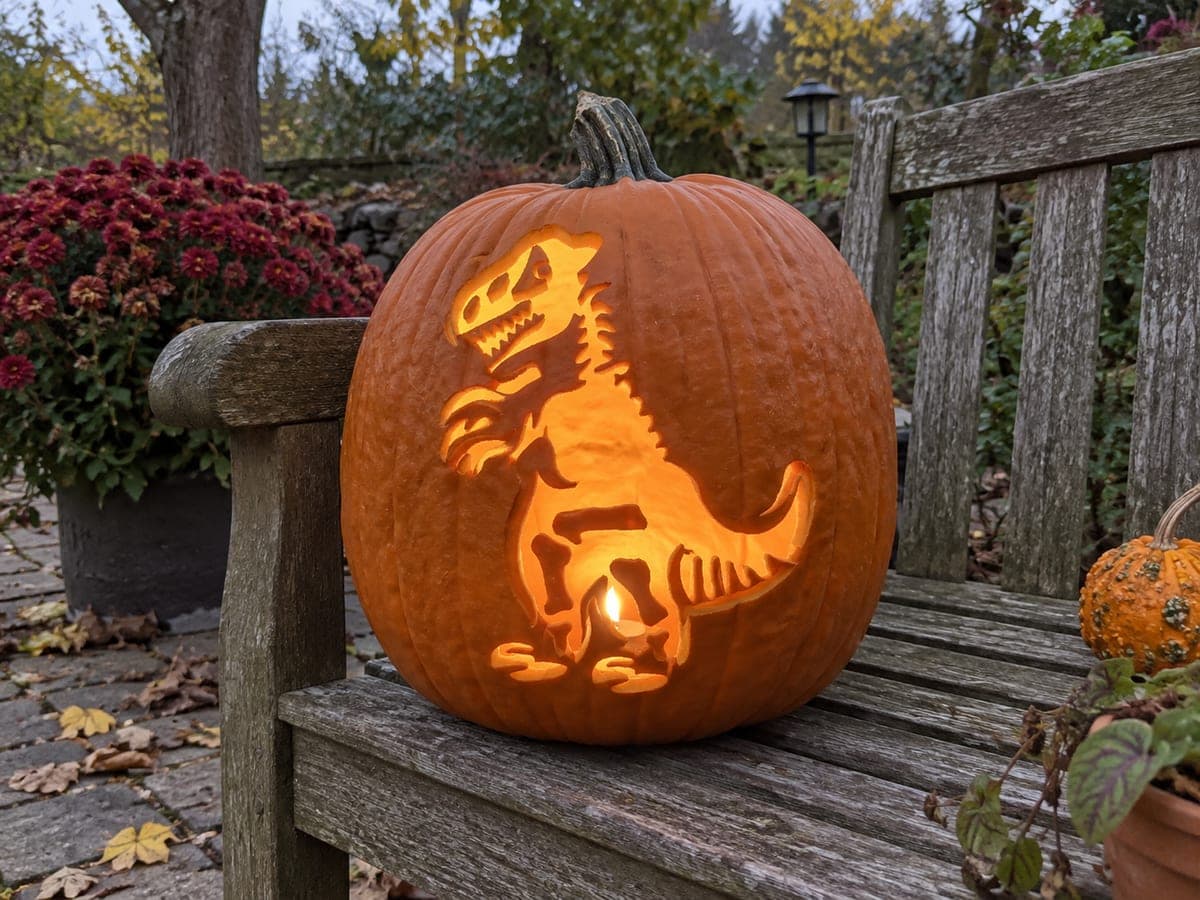
Stegosaurus Skeleton Pumpkin

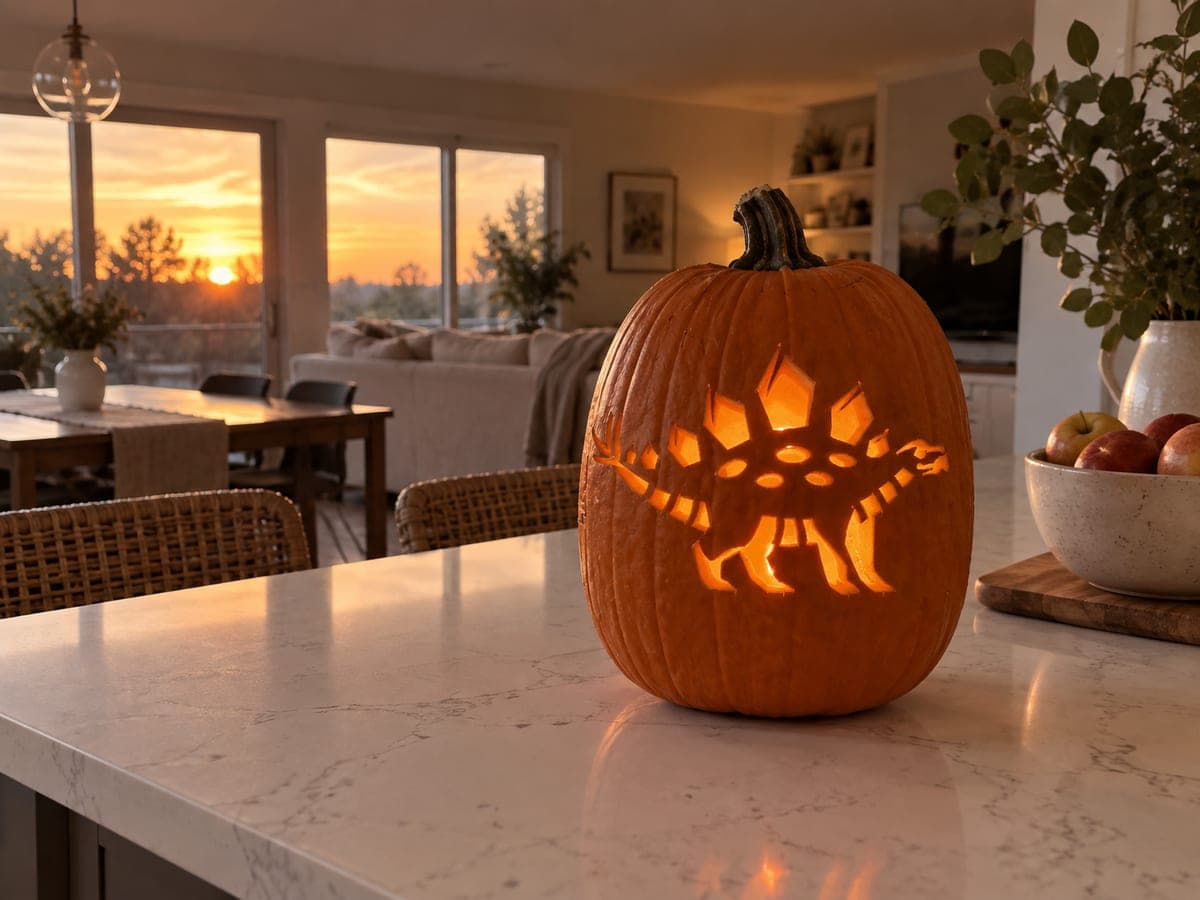
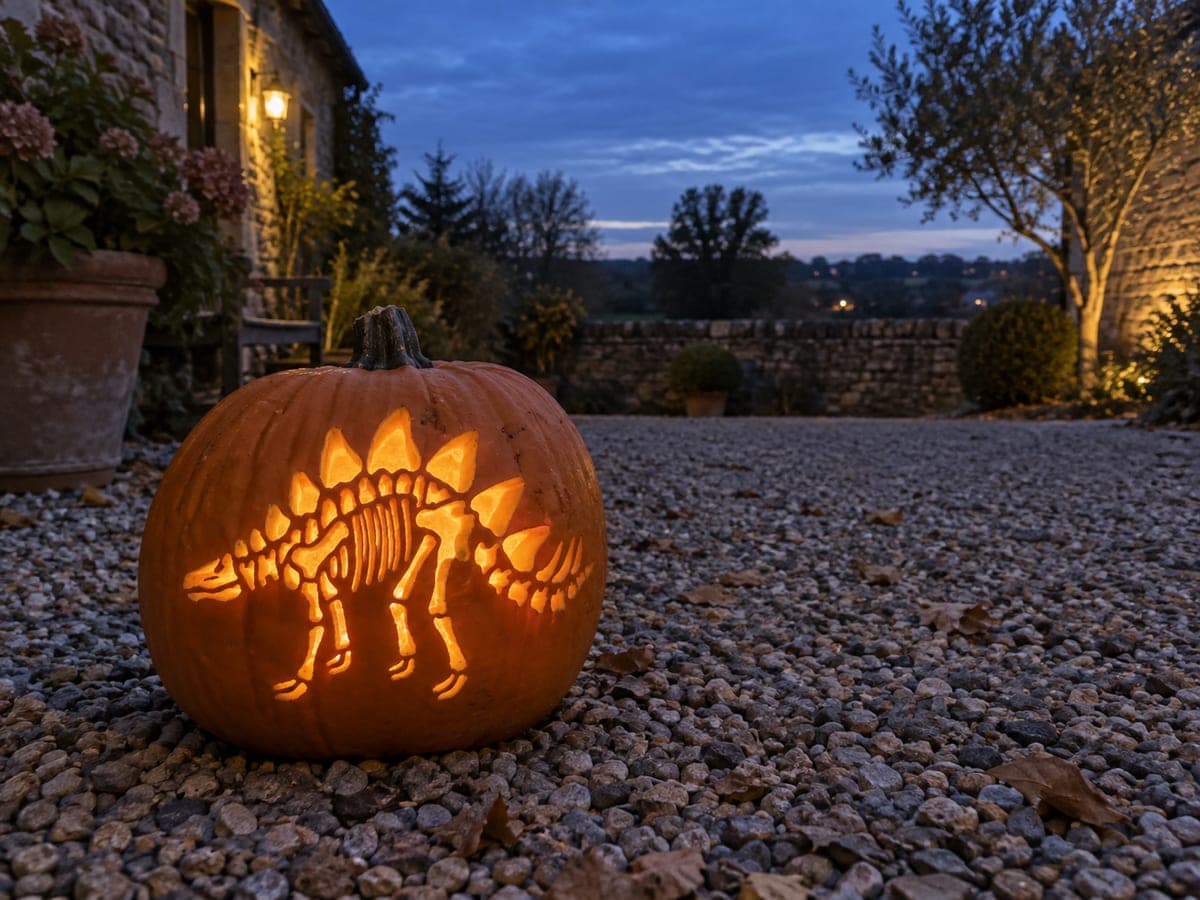
A full stegosaurus skeleton stretches across this pumpkin with exposed ribs, a segmented spine, and a prominent row of back plates all cut through the rind so the bones glow orange against the dark rind. The tight spaces between each rib are the most delicate part of this hard-difficulty pumpkin carving idea. Carve each rib gap individually from the spine outward rather than trying to clear the whole rib cage at once, which keeps the thin rind strips between ribs from flexing and snapping.

This is an AI-generated concept image: a realistic, carvable design idea rather than a photo of a finished carve. AI concepts are always labeled and sit out the leaderboard and the contest.

No ratings yet · Sign in to rate
Comments (0)

  • No comments yet — be the first.

Save without an account. Sign in to like or comment.

Our tips for carving a similar design

The core trick here is treating the ribs as a series of separate cuts rather than one big opening, which keeps the thin rind strips between them strong enough to stay put. You build the skeleton from a solid spine spine outward: back plates on top, ribs below, then legs and skull. Every bone is a full cutout so the LED inside makes the whole animal glow orange against the dark rind.

Written by PumpkinCarvingIdeas.com, inspired by the image above. These are our suggestions, not instructions from the uploader. This approach to the AI concept has not been tested on a real pumpkin.

From pumpkin to porch

  1. Pick a tall pumpkin and a clean stencil

    Choose a wide, fairly tall pumpkin with a smooth flat face so the long stegosaurus body has room to stretch. A concept like this one photographs best on an even surface with few ribs or lumps in the way. Print or draw a skeleton stencil sized to fill most of the front. Tape it flat, snipping the edges of the paper so it hugs the curve without wrinkling.

  2. Open the back and clean out

    An adult should cut a lid or a wide hole in the back of the pumpkin, not the top, so the carved face stays intact and the light hides behind. Scoop out the seeds and pulp, then scrape the inside wall behind the design down to about one inch thick. A thinner wall makes the many small bone cutouts far easier and cleaner to punch through. Dry the inside with a paper towel.

  3. Transfer the whole skeleton

    Poke through the stencil lines with a pin or a transfer tool, following the spine, plates, ribs, legs, and skull. Space the dots close together on the tight rib gaps so you can read the pattern once the paper comes off. Peel the stencil and connect the dots with a washable marker if the layout looks faint. Step back and check that the spine reads as one continuous line before you cut anything.

  4. Carve the spine and plates first

    Start with the segmented spine and the row of triangular back plates, since these anchor the whole design. Use a small saw tool and let it do the work with light pressure. Cutting the spine first gives you a fixed reference for where each rib begins. Leave the large leg and skull openings for later so the pumpkin keeps its rigidity while you work the fine detail.

  5. Cut each rib gap one at a time

    Work the ribs individually from the spine downward, clearing one narrow gap before moving to the next. This is the delicate part, so resist the urge to hollow the whole rib cage at once, which lets the thin strips flex and snap. Support the strip with a finger from behind as you finish each cut and gently push the waste piece inward, not outward. Take breaks to keep your hand steady.

  6. Finish big openings, light, and photograph

    Now cut the largest shapes, the leg bones and the skull, since removing big pieces last keeps the pumpkin strong through the fine work. Nudge out any clinging bits with a poker tool and tidy ragged edges. Drop in a battery LED, not a candle, so the glow is steady and the thin bones stay safe. Photograph it at dusk against a dark background to make the orange bones pop.

Gather your supplies

Check things off as you get ready.

Work on a stable surface, keep your free hand out of the cutting path, and have an adult handle sharp tools.

Three levels of light

  • Leave intact

    The dark rind around the animal, which reads as the empty space behind the skeleton

  • Peel & shade

    Optional faint shading just inside the plate edges to soften them, scraped thin for a dim glow

  • Cut through

    The spine, back plates, every rib, the leg bones, and the skull, all cut through so the bones glow brightest

Learn the carving basics

Before you start cutting

How do I keep the thin strips between the ribs from snapping?

Thin the pumpkin wall to about one inch first, which reduces how hard you have to push. Carve one rib gap at a time from the spine outward instead of clearing the whole cage at once. Support each strip from behind with a finger as you make the final cut.

Should I cut the big leg and skull openings early?

No, save all the largest openings for last. While the pumpkin still has most of its material, it stays rigid, which makes the fine rib work much steadier. Removing big pieces early would leave the face flimsy and prone to cracking.

This is a hard design. Can I simplify it?

Yes. You can keep the row of back plates and the spine as the main features and reduce the number of ribs, spacing them wider apart. A simpler skull and thicker leg bones also read well from a distance and are far more forgiving for a first attempt.

Your take belongs here, too.

Changed a detail? Made it simpler? Share a photo of your version and tell the community what worked.

Share your pumpkin

More pumpkins like this

You've reached the end · 8 pumpkins
The Patch Report

Fresh pumpkins, in your inbox.

The best new carvings, ideas worth stealing, and how-tos for carving season. Short, seasonal, and gone by November.

A short email during carving season. Unsubscribe anytime. See our privacy policy.