@squashbuckler
Sep 5, 2026
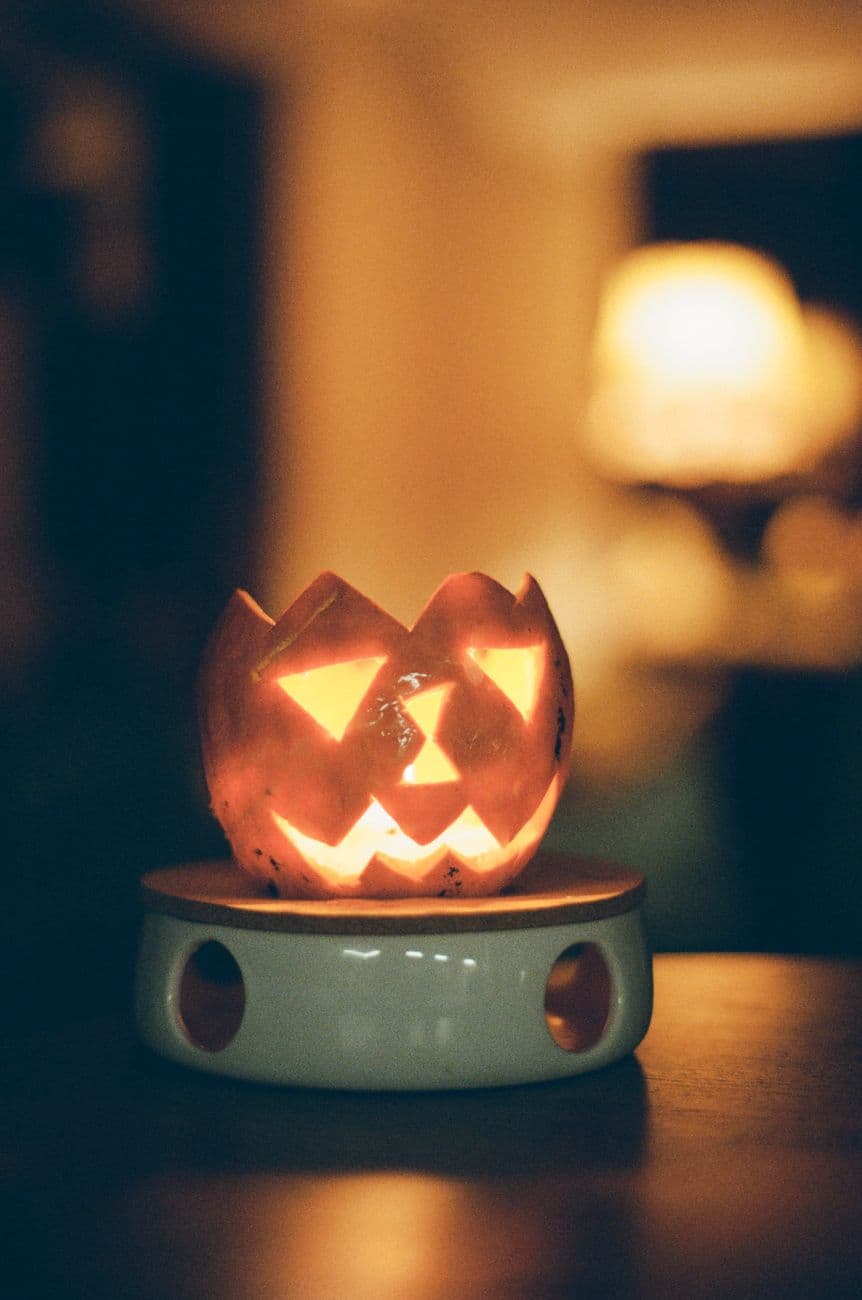
Tealight jack
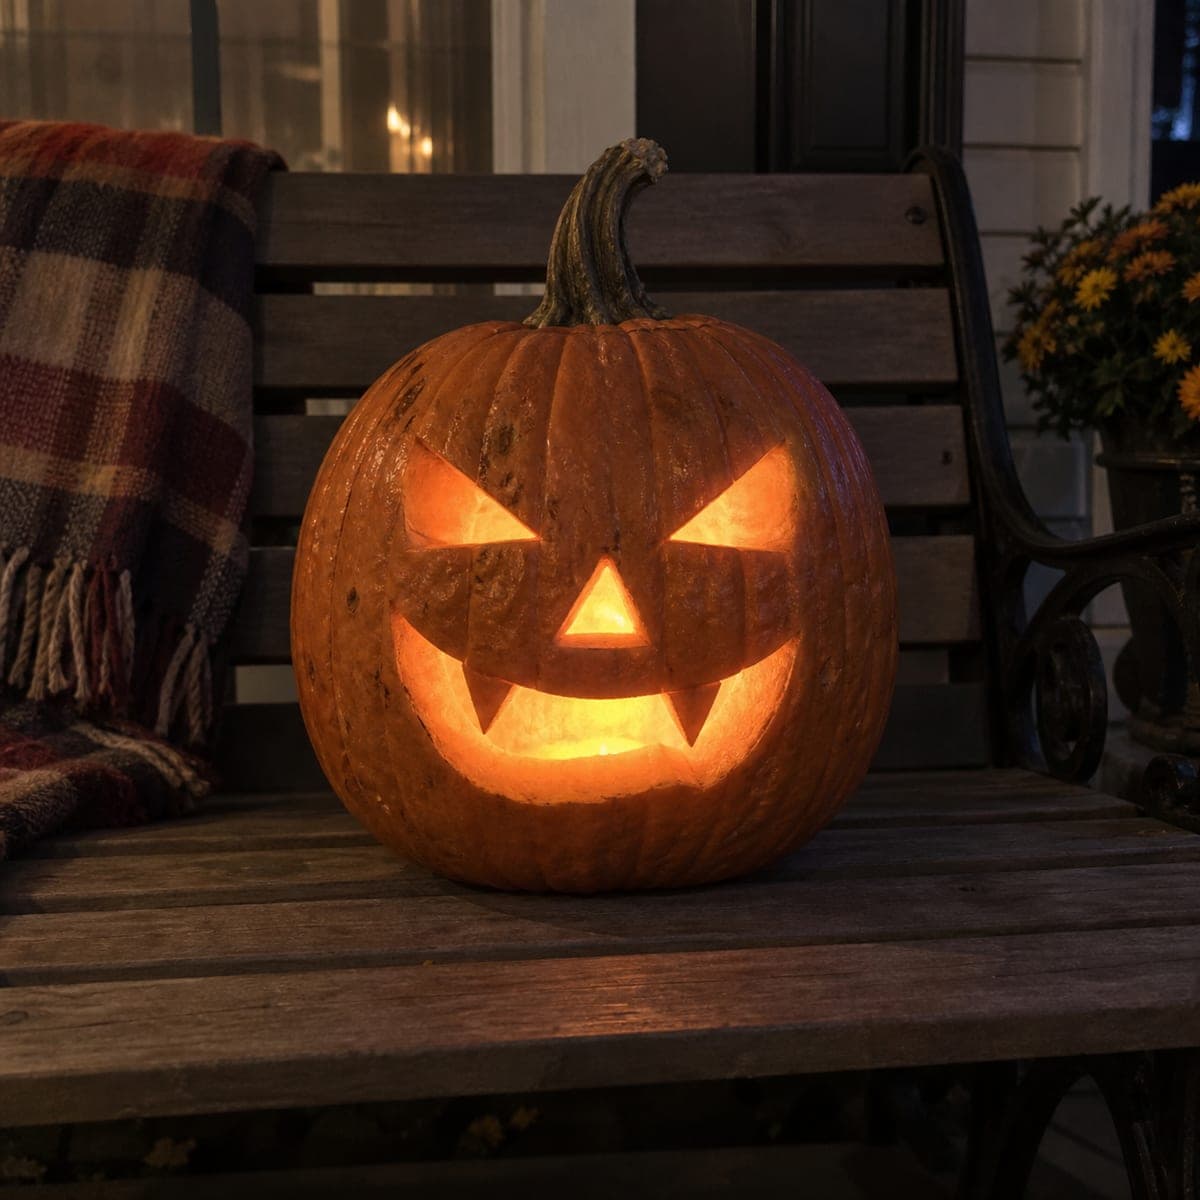
A palm-sized jack with a crown-cut top doing candle duty on the living room table. Small carve, big cozy.
No ratings yet · Sign in to rate
A palm-sized jack with a crown-cut top doing candle duty on the living room table. Small carve, big cozy.
The whole charm here is scale and simplicity: a tiny pumpkin with a zigzag crown-cut top and the most classic face possible, two triangle eyes, a triangle nose, and a toothy grin. The trick is cutting clean straight edges on a small surface so the light reads sharp. Keep the walls thinned but sturdy since a little pumpkin has less material to work with.
Written by PumpkinCarvingIdeas.com, inspired by @squashbuckler's photo above. These are our suggestions, not instructions from the uploader, and this approach hasn't been tested on their exact carve.
Choose a palm-sized pumpkin with a flat spot to sit on. Wipe it clean and dry it. With a washable marker, sketch two triangle eyes, a triangle nose, and a zigzag mouth on the smoothest side. Keep the shapes generous since fine detail gets lost at this scale.
Instead of a round lid, draw a zigzag line around the top for a pointed crown look. Have an adult make the cuts with a small serrated carving saw, angling the blade inward so the lid rests on a ledge and will not fall in. Lift the top off by its stem. Set it aside so you can drop it back on later if you like.
Scrape out the seeds and pulp with a sturdy spoon or a scoop tool. Thin the front wall where the face goes to about half an inch so the light passes through easily. A thinner wall on a small pumpkin cuts much cleaner. Wipe the inside dry when you are done.
Cut the triangle eyes and nose first while the pumpkin is still strong. Use a small detail saw and push gently, letting the tool do the work. Save the wide zigzag mouth for last so the face does not weaken as you go. Push the cut pieces out from the inside for crisp edges.
Trim any ragged edges and gently even out the triangle points. Drop a battery LED tealight inside for a warm, safe glow. Skip real candles, especially on a small pumpkin where the walls sit close to the flame. Put the crown top back on or leave it off to let more light escape.
Set the finished jack on a small dish or stand and dim the room lights. A warm lamp in the background adds cozy depth, just like the pictured scene. Take your photo slightly above eye level so the grin catches the light. Share it with the community when you are happy with it.
Check things off as you get ready.
Work on a stable surface, keep your free hand out of the cutting path, and have an adult handle sharp tools.
The outer skin across the body stays dark and holds the pumpkin's shape.
Lightly scrape a thin halo around the eyes or mouth if you want a soft orange glow framing the face.
The two triangle eyes, the nose, the zigzag grin, and the crown notches at the top glow brightest.
They can if you rush. Thin the front wall to about half an inch and cut slowly with a small saw rather than forcing a big knife. Carve the eyes and nose before the wide mouth so the face keeps its strength as long as possible.
Draw the zigzag line all the way around with a marker before cutting so you have a guide. Keep the triangle points roughly the same height and width. Angle the blade inward on every cut so the lid rests on a ledge and does not drop inside.
We recommend a battery LED tealight instead. A small pumpkin has thin walls that sit close to any flame, which scorches the inside and dries it out fast. An LED gives the same warm flicker and is safe to leave on the table.
Changed a detail? Made it simpler? Share a photo of your version and tell the community what worked.
The best new carvings, ideas worth stealing, and how-tos for carving season. Short, seasonal, and gone by November.


Comments (0)