Halloween Pumpkin Carving Contest · Starts October 1st · $500 in prizes
← Back to ideas
@ai_concepts
Sep 25, 2026
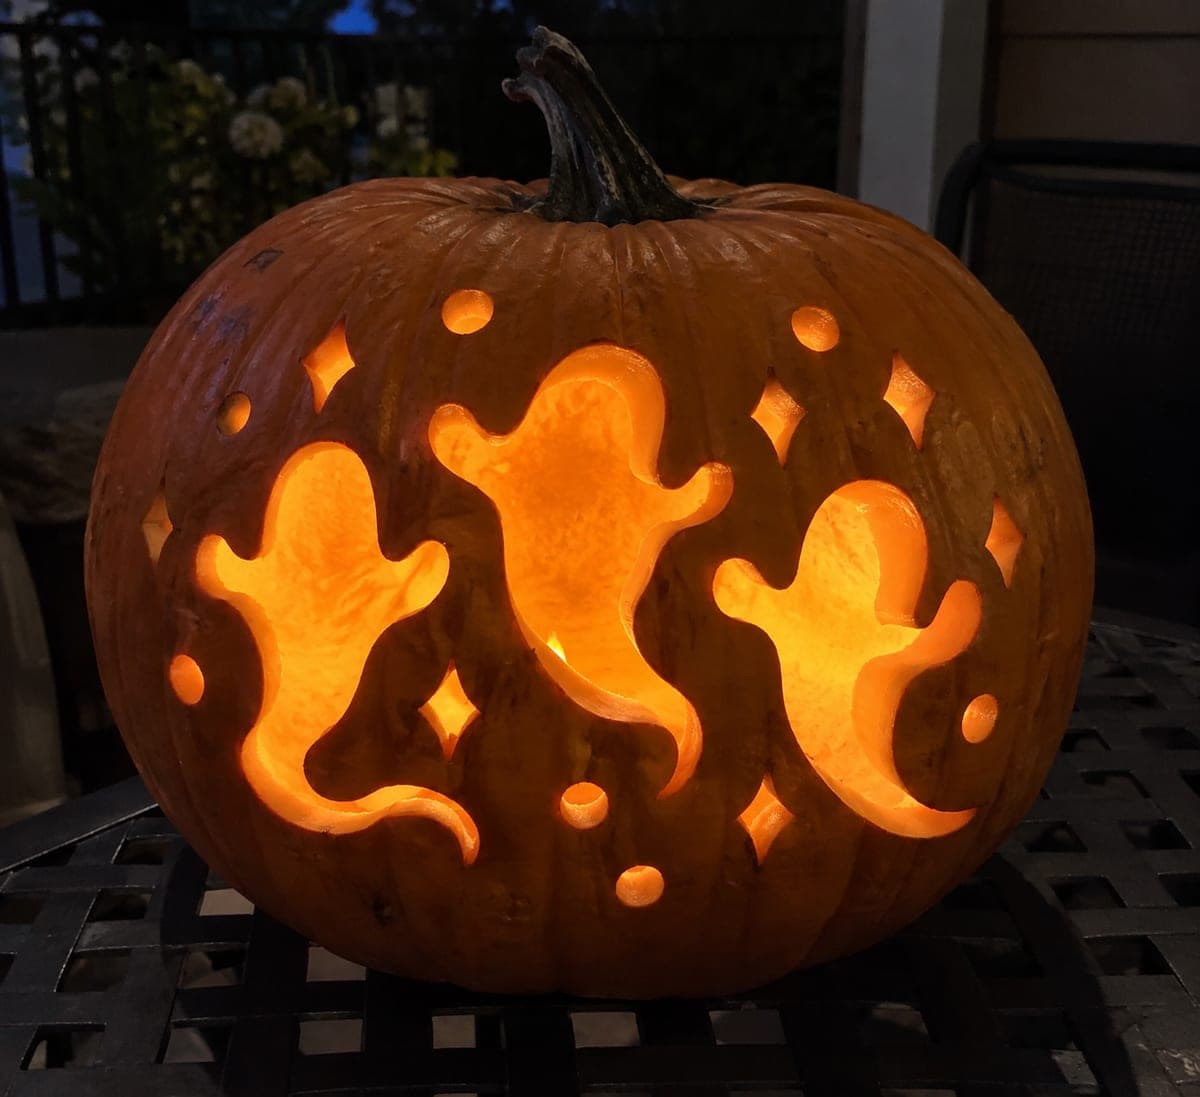
Three Swooping Ghost Pumpkin With Diamond AccentsAI
0

Report this carving

Tell us what is wrong. Reports are private.

Three Swooping Ghost Pumpkin With Diamond Accents

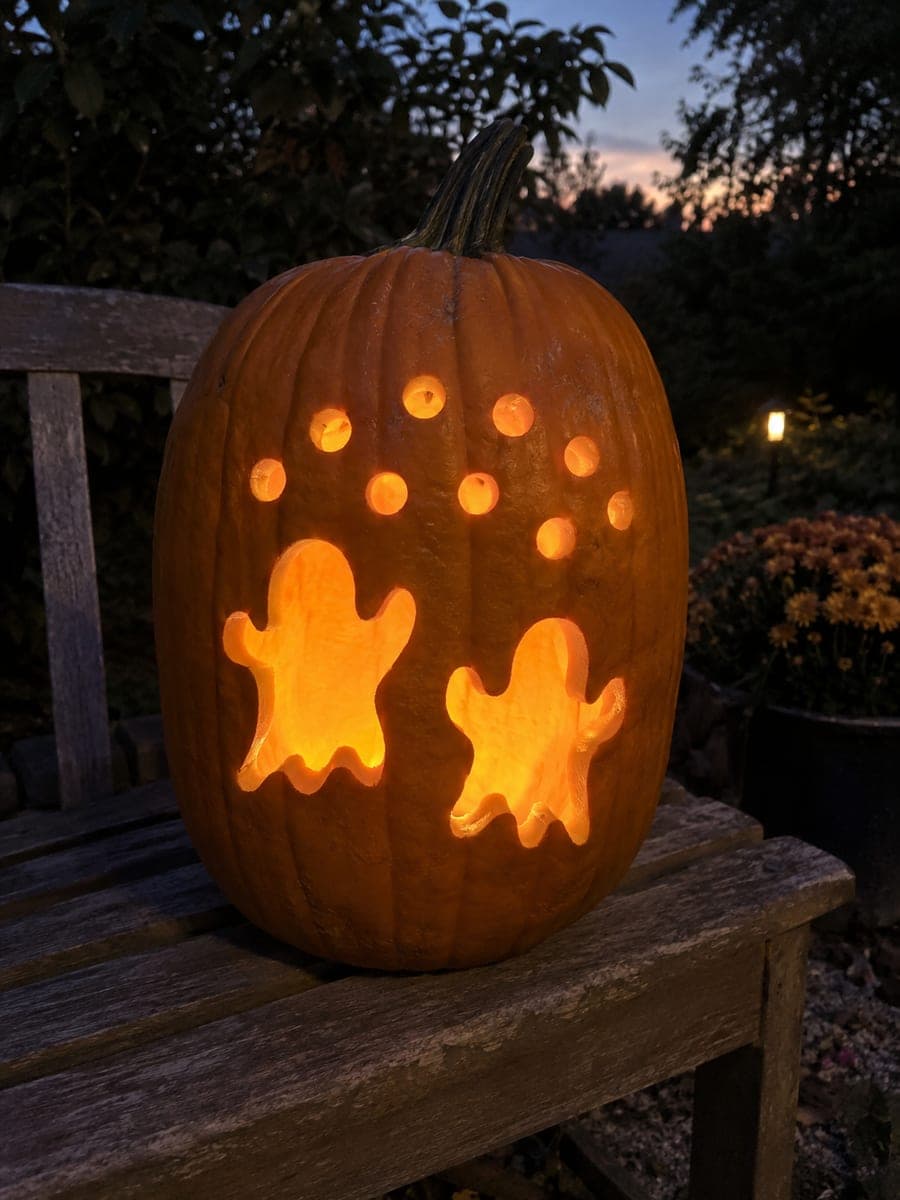
Three separate empty ghost silhouettes with curved tails sweep across the wide face of a pumpkin alongside diamond and round accent apertures, the whole composition held together by a broad connecting shell. Stagger the three ghosts slightly in height so they appear to be flying at different levels, which also helps distribute the open area evenly across the shell. On a patio table the trio of glowing ghost shapes creates a haunting, animated-looking display.

No ratings yet · Sign in to rate
Comments (0)

  • No comments yet — be the first.

Save without an account. Sign in to like or comment.

Our tips for carving a similar design

Three separate empty ghost silhouettes with curved tails sweep across a wide pumpkin face alongside diamond and round accent apertures, with the whole composition held by a broad connecting shell. Staggering the three ghosts at slightly different heights creates the illusion of flight at different levels and also distributes the open area evenly so no single section of shell carries too much of the structural load.

From pumpkin to porch

  1. Hollow the wide pumpkin

    Cut a large bottom lid and hollow the interior thoroughly, scraping the wall behind the ghost area to about half an inch. A wide pumpkin has generous surface area, so take time to scrape the full front face rather than just the area behind each shape.

  2. Lay out three staggered ghosts

    Mark three ghost positions across the face at slightly different heights: one near the top of the face area, one at mid-height, and one slightly lower. Each ghost should point in a slightly different direction to suggest motion. Leave at least one inch of rind between each ghost shape.

  3. Add diamond and round accent positions

    Sketch diamond and round accent apertures in the spaces between and around the ghosts. These secondary shapes fill the composition without competing with the three main ghost forms. Keep them smaller than the ghost openings so the hierarchy reads clearly.

  4. Pin-transfer and score all outlines

    Transfer all three ghost patterns and each accent shape by pin-piercing the printed templates, then score all the outlines with a craft knife tip. The full scoring stage is especially important on a wide design because it shows whether any bridged areas are too narrow before any full cuts are made.

  5. Cut ghosts first, accents second

    Cut each ghost's curved tail, body, and head in one continuous pass per ghost. Complete all three ghosts before cutting the diamond and round accents. Cut the accents last so the intact rind around them provides maximum support during the smaller, more precise cuts.

  6. Light on a patio table

    Insert a warm battery LED and set the pumpkin on a patio table. The trio of glowing ghost shapes at staggered heights, surrounded by diamond and round accents, creates a haunting animated display that reads well across a full patio or garden space.

Written with AI to match this design

Gather your supplies

Check things off as you get ready.

Work on a stable surface, keep your free hand out of the cutting path, and have an adult handle sharp tools.

Three levels of light

  • Leave intact

    All rind bridges between the three ghosts, the perimeter rind connecting the composition at the edges, and the back of the pumpkin remain dark orange.

  • Peel & shade

    None. This silhouette design has no skin-peel shading component.

  • Cut through

    All three complete ghost silhouette openings including their curved tails, and all diamond and round accent apertures, are cut fully through.

Learn the carving basics

Before you start cutting

How do I cut a clean curved ghost tail on a real pumpkin without the tip breaking off?

The curved tail needs a broad enough base where it connects to the ghost body. Keep the tail at least three-quarters of an inch wide at its base and taper it gradually rather than ending in a sharp hairline point. A craft knife following the scored line is more precise than a saw for the tight tail curve.

How do I keep the three ghost shapes from looking randomly placed?

Before transferring any pattern, mark the three center points of each ghost at intentionally different heights and note which direction each ghost faces. A simple sketch on paper of the full composition first is the best way to work out the arrangement before committing to the rind.

Should the diamond accents have sharp or slightly rounded corners?

Sharp corners are easier to achieve on pumpkin rind than on foam or plastic because the flesh responds well to a pointed knife cut. Score each corner precisely and cut into it from two angles to meet cleanly at the point. Rounded corners require more controlled knife work and are fine if sharp corners are difficult, but sharp-cornered diamonds look crisper when lit.

Your take belongs here, too.

Changed a detail? Made it simpler? Share a photo of your version and tell the community what worked.

Share your pumpkin

More pumpkins like this

You've reached the end · 8 pumpkins
The Patch Report

Fresh pumpkins, in your inbox.

The best new carvings, ideas worth stealing, and how-tos for carving season. Short, seasonal, and gone by November.

A short email during carving season. Unsubscribe anytime. See our privacy policy.