Halloween Pumpkin Carving Contest · Starts October 1st · $500 in prizes
← Back to ideas
@ai_concepts
Sep 25, 2026
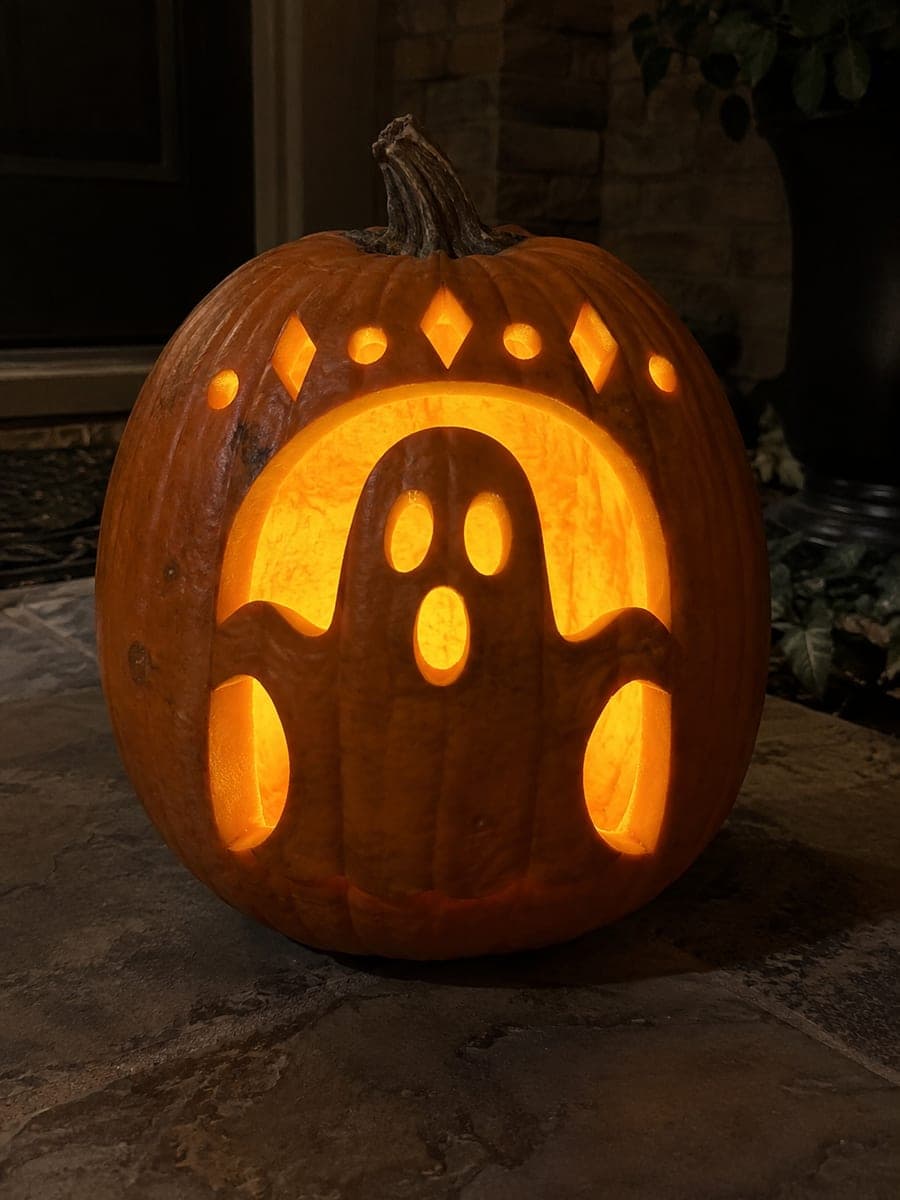
Solid Ghost Pumpkin Framed in Glowing Arch WindowAI
0

Report this carving

Tell us what is wrong. Reports are private.

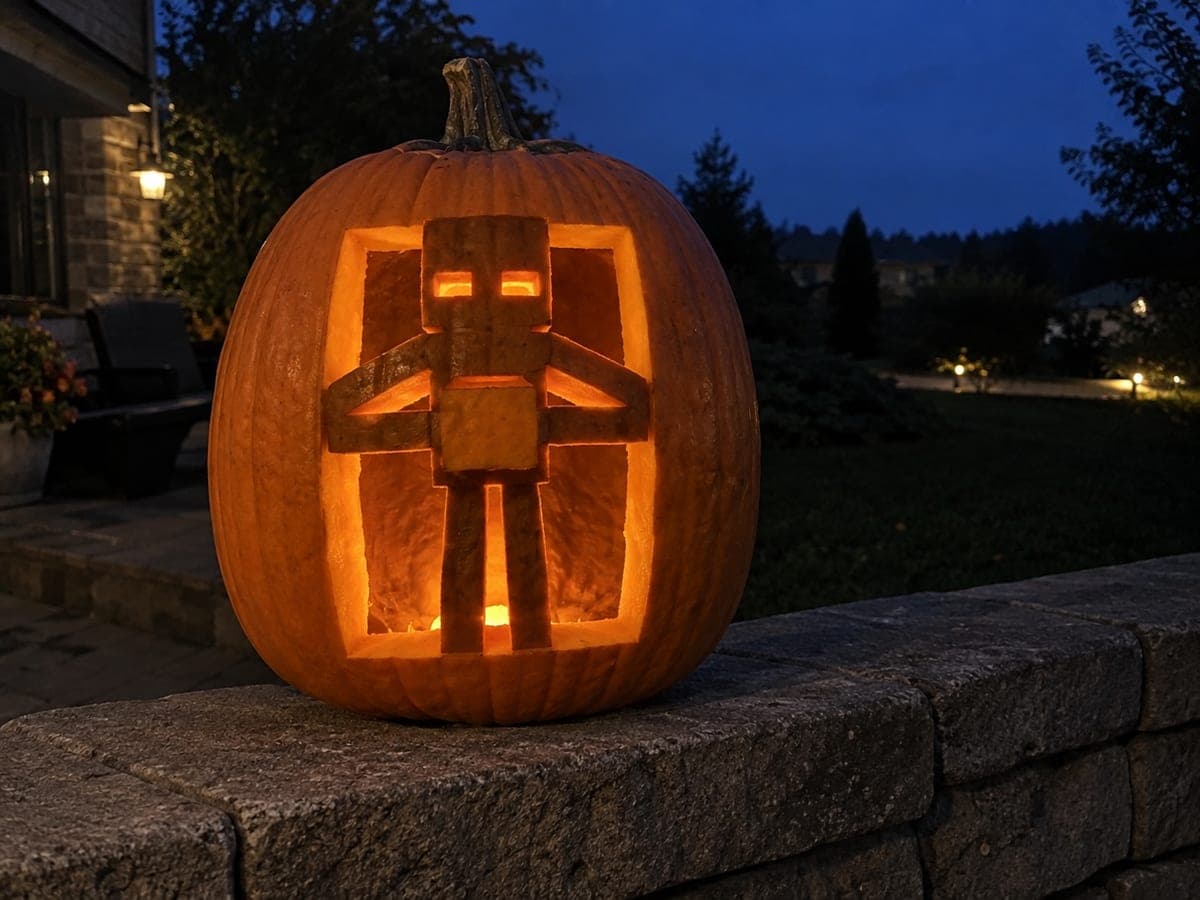
Solid Ghost Pumpkin Framed in Glowing Arch Window

A retained solid orange ghost connected inside a broad arch-shaped cut-through window gives this expert ghost pumpkin carving idea its striking silhouette-in-reverse effect, with the ghost's arms and base attaching firmly to the arch frame. Cut the outer arch opening first, then carefully remove material around the ghost body from the inside, leaving the connection points at the arms and base wide and substantial. Oval facial holes and diamond accents outside the arch add secondary points of light.

No ratings yet · Sign in to rate
Comments (0)

  • No comments yet — be the first.

Save without an account. Sign in to like or comment.

Our tips for carving a similar design

A retained solid orange ghost is connected inside a broad arch-shaped cut-through window, with the ghost's arms and base attaching firmly to the arch frame. Cutting the outer arch opening first and then carefully removing material around the ghost body from inside, while leaving the connection points wide and substantial, is the safest sequence for this reverse silhouette. Oval facial holes and diamond accents outside the arch add secondary points of light.

From pumpkin to porch

  1. Hollow and mark the arch outline

    Hollow the pumpkin thoroughly to thin walls. Sketch the full arch outline on the rind, making it large enough to contain the ghost body with at least three-quarters of an inch of clearance on all sides between the ghost's edge and the arch frame. Mark the ghost body inside the arch boundary.

  2. Mark the connection points

    Explicitly mark the four connection points where the ghost attaches to the arch: both arm tips and the base on each side. These connection points must be at least three-quarters of an inch wide. Mark them visually distinct from the cut-through areas so you do not accidentally cut them away.

  3. Cut the outer arch opening first

    Cut the full arch shape from the outside, removing the rind between the arch boundary and the pumpkin's outer edge. This creates the arch window opening while the ghost area in the center is still solid rind. Use a pumpkin saw for the straight sides and a craft knife for the curved arch crown.

  4. Remove rind around the ghost from inside

    Working from the interior, carefully remove the rind surrounding the ghost body within the arch window. Use a narrow craft knife and work in small sections, checking the connection point widths after every few inches of cutting. The ghost should be held in place at the arms and base only.

  5. Cut the facial holes and exterior accents

    Add small oval holes to the ghost body for facial features. Cut the diamond and round accent apertures outside the arch boundary. These smaller elements add secondary light points and visual complexity to a composition that would otherwise be very stark.

  6. Inspect connections and light

    Carefully test each connection point by pressing lightly on the ghost body to confirm it is stable. Insert a warm battery LED. The retained orange ghost will appear as a solid silhouette against the bright arched opening, a dramatic reverse of the usual glowing-shape approach.

Written with AI to match this design

Gather your supplies

Check things off as you get ready.

Work on a stable surface, keep your free hand out of the cutting path, and have an adult handle sharp tools.

Three levels of light

  • Leave intact

    The retained solid orange ghost body and all rind outside the arch opening remain dark, creating the reverse silhouette effect.

  • Peel & shade

    None. This design uses a full-cut approach with no skin-peel shading.

  • Cut through

    The full arch opening surrounding the ghost, the oval ghost facial holes, and all exterior diamond and round accents are cut through for light.

Learn the carving basics

Before you start cutting

What happens if the ghost body starts to detach from the arch frame during cutting?

Stop immediately and apply petroleum jelly or a small amount of toothpick-applied craft glue along the attachment point to hold it temporarily while you finish the adjacent cuts. Work even more slowly near the remaining connection points and widen each connection if possible before proceeding.

How do I mark the ghost body clearly enough inside the arch to avoid cutting through a connection point?

Use a bold marker to shade the connection zones before you begin cutting inside the arch. Any area shaded in marker is a keep zone, and any unshaded area inside the arch boundary is a cut zone. Visual distinction at this stage is the most reliable way to avoid the most costly possible mistake in this design.

Does this retained-ghost technique work on foam or plastic pumpkins as well?

Yes, and those materials are actually more forgiving for a first attempt at this technique because they do not rot or dry out while you work. The scoring and cutting method is the same, but foam and plastic hold the connection points without softening over a long carving session the way real pumpkin rind can.

Your take belongs here, too.

Changed a detail? Made it simpler? Share a photo of your version and tell the community what worked.

Share your pumpkin

More pumpkins like this

You've reached the end · 8 pumpkins
The Patch Report

Fresh pumpkins, in your inbox.

The best new carvings, ideas worth stealing, and how-tos for carving season. Short, seasonal, and gone by November.

A short email during carving season. Unsubscribe anytime. See our privacy policy.