@carvequeen
Sep 7, 2026

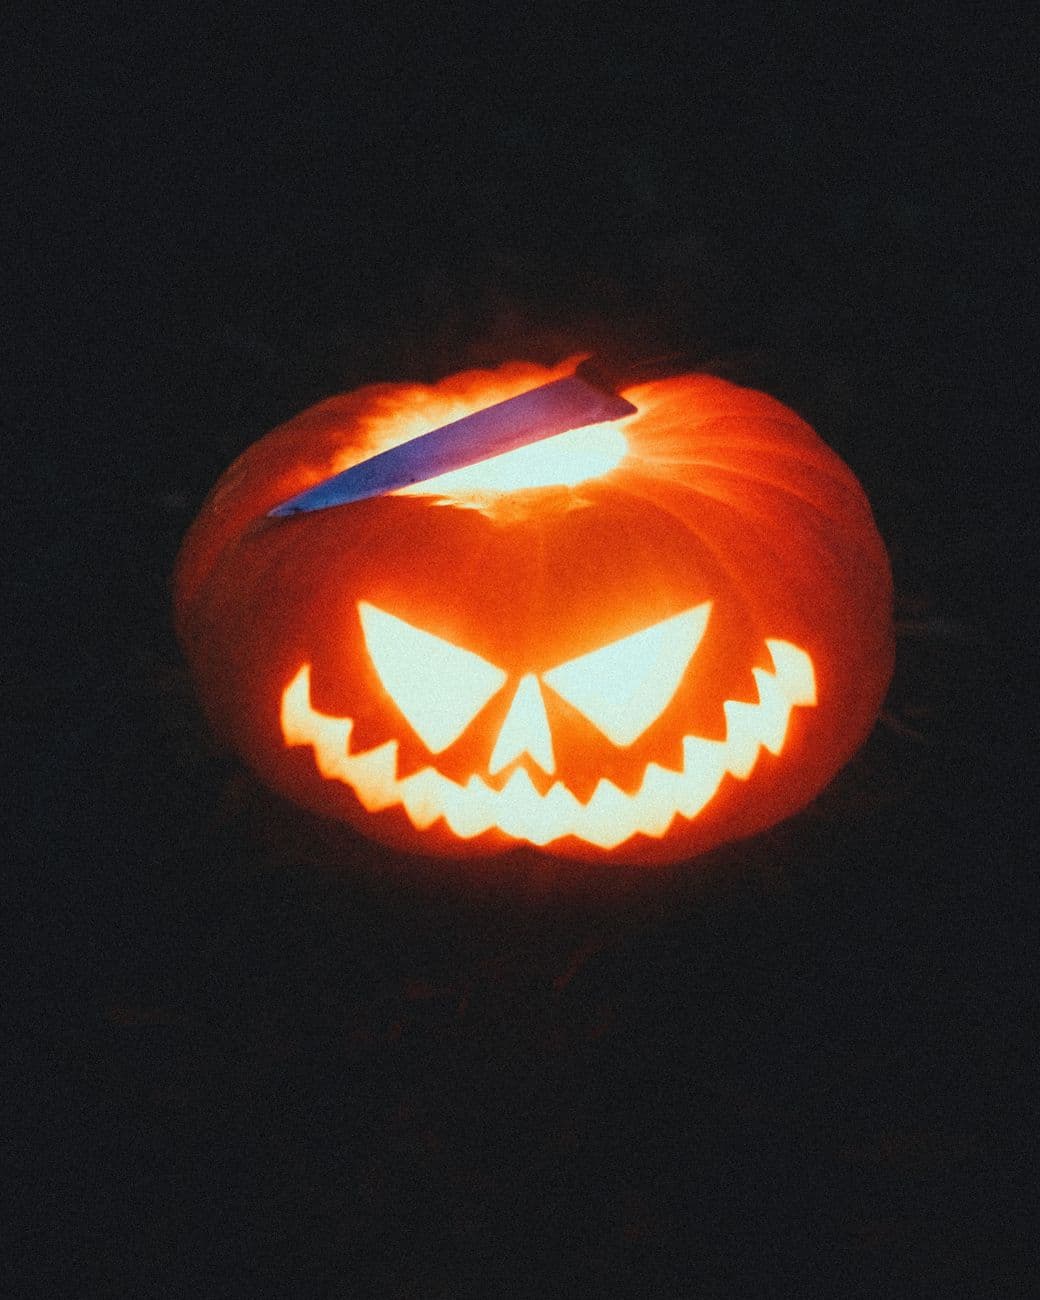
The whole trick here is the toothy mouth, where a row of pointed teeth is left in place while the gaps around them are cut clean through. Angled triangle eyes and a small triangle nose keep the face reading as a friendly menace. Everything is a straight through cut, so the glow comes from full openings rather than shading.
Written by PumpkinCarvingIdeas.com, inspired by @carvequeen's photo above. These are our suggestions, not instructions from the uploader, and this approach hasn't been tested on their exact carve.
Choose a round, firm pumpkin with a flat-ish front for the face. Cut a lid at an angle so it drops back in without falling through, or cut a hole in the bottom for easier lighting. Scoop the insides and scrape the front wall down to about one inch thick. A thinner front wall makes every cut easier and lets more light out.
Tape a printed stencil of angled eyes, a triangle nose, and a wide toothy grin onto the front. Poke through the outlines with a pin or a poker tool, spacing dots close together on the curved lines. Peel the paper and connect the dots lightly with a marker so you can see the full face. Double check that each tooth has skin on both sides before you cut.
Start with the smaller shapes while the pumpkin is still strong. Use a small serrated carving saw and let the blade do the work with gentle back and forth strokes. Cut the two angled eyes and the triangle nose, pushing the pieces out from inside. Adults should handle the blades, and always cut away from your hand.
Save the big mouth for last so the pumpkin stays sturdy. Cut along the top and bottom edges of the grin, then carve out the dark gaps between each tooth rather than the teeth themselves. Work slowly around the points so you do not snap a tooth off. Leaving the teeth attached top and bottom keeps them strong.
Trim any ragged edges with a paring knife and shave the inside edges at a slight bevel to brighten the openings. Drop in an LED tealight or a small battery puck, never a real flame. If a tooth looks loose, dab a little petroleum jelly on the cut edges to slow drying. Test the glow in a dark room and widen any gap that looks dim.
For that moody shot, set the jack low and shoot in near darkness so the face carries the frame. A colored gel or a phone light off to the side adds the purple and red wash seen here. Keep the LED bright and warm for the strongest orange glow. Snap a few angles before the pumpkin softens.
Check things off as you get ready.
Work on a stable surface, keep your free hand out of the cutting path, and have an adult handle sharp tools.
The outer orange skin of the face stays untouched and dark.
Optional light scraping just inside the mouth edge can add a soft glow ring, though this classic look barely needs it.
The angled eyes, triangle nose, and the gaps between the grinning teeth are cut all the way through for the brightest light.
Carve the dark gaps between the teeth instead of the teeth themselves, and leave each tooth connected at the top and bottom. Work slowly with a small blade around the points. If the pumpkin wall feels thick, scrape the inside thinner so you are not forcing the saw.
Cut the small eyes and nose first while the pumpkin is at full strength. Save the wide grin for last, since a big opening weakens the front wall. This order keeps everything stable until the final cuts.
Use a bright warm LED tealight or a small battery puck placed inside, not a candle. For the colored mood in the photo, add a separate colored light or gel outside the pumpkin. Bevel the inside edges of your cuts so more light escapes.
Changed a detail? Made it simpler? Share a photo of your version and tell the community what worked.
The best new carvings, ideas worth stealing, and how-tos for carving season. Short, seasonal, and gone by November.

Comments (0)