Halloween Pumpkin Carving Contest · Starts October 1st · $500 in prizes
← Back to ideas
@ai_concepts
Aug 11, 2026
Vintage Bicycle Etched Pumpkin DesignAI
0

Vintage Bicycle Etched Pumpkin Design

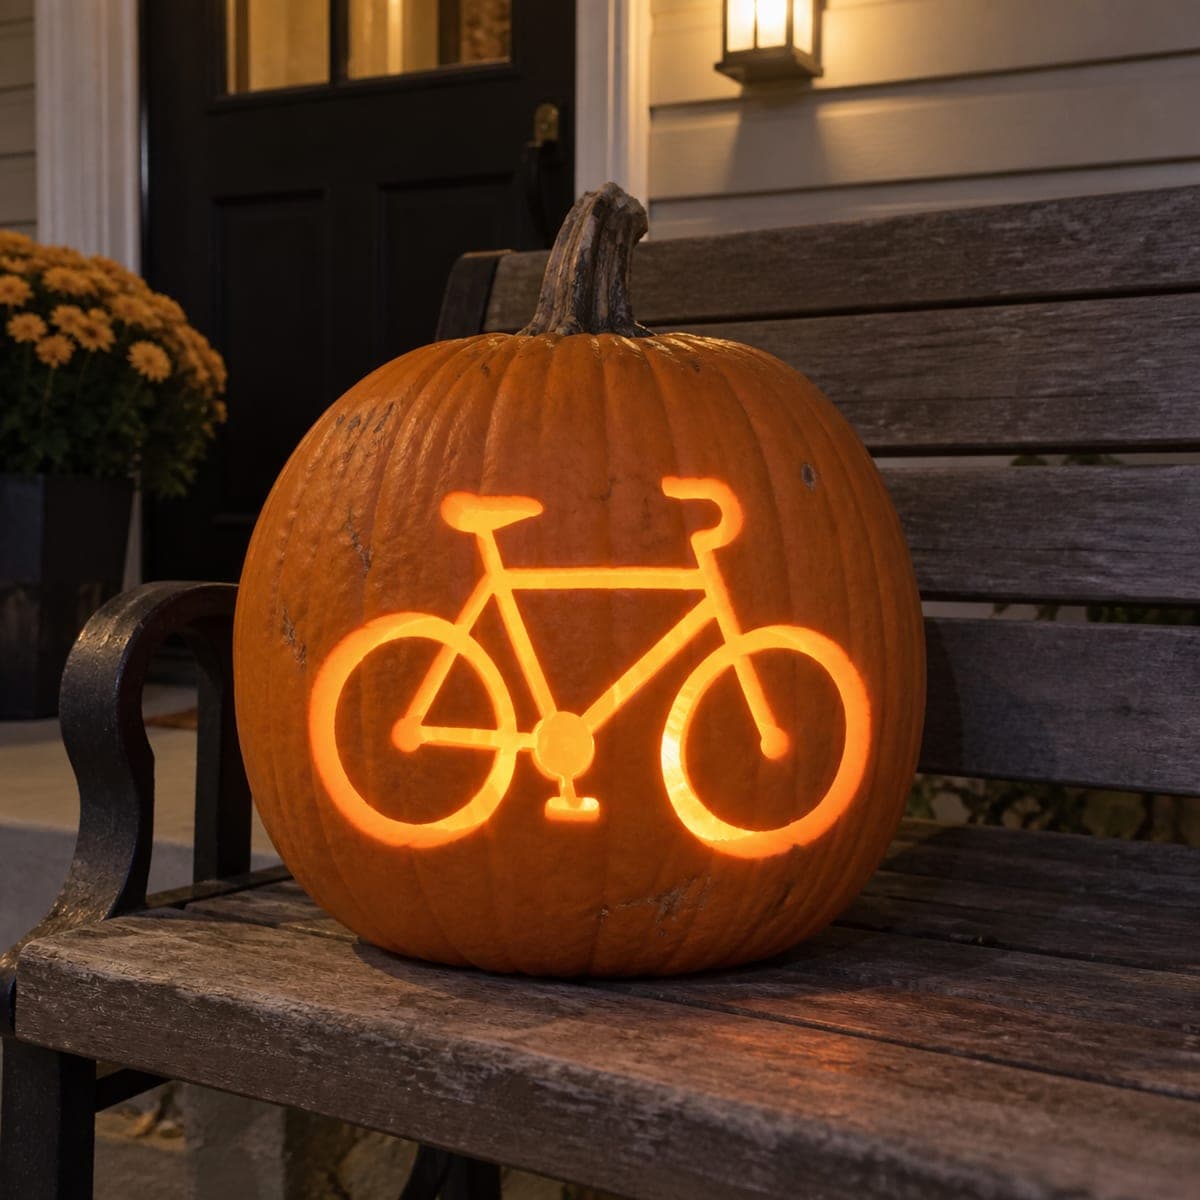
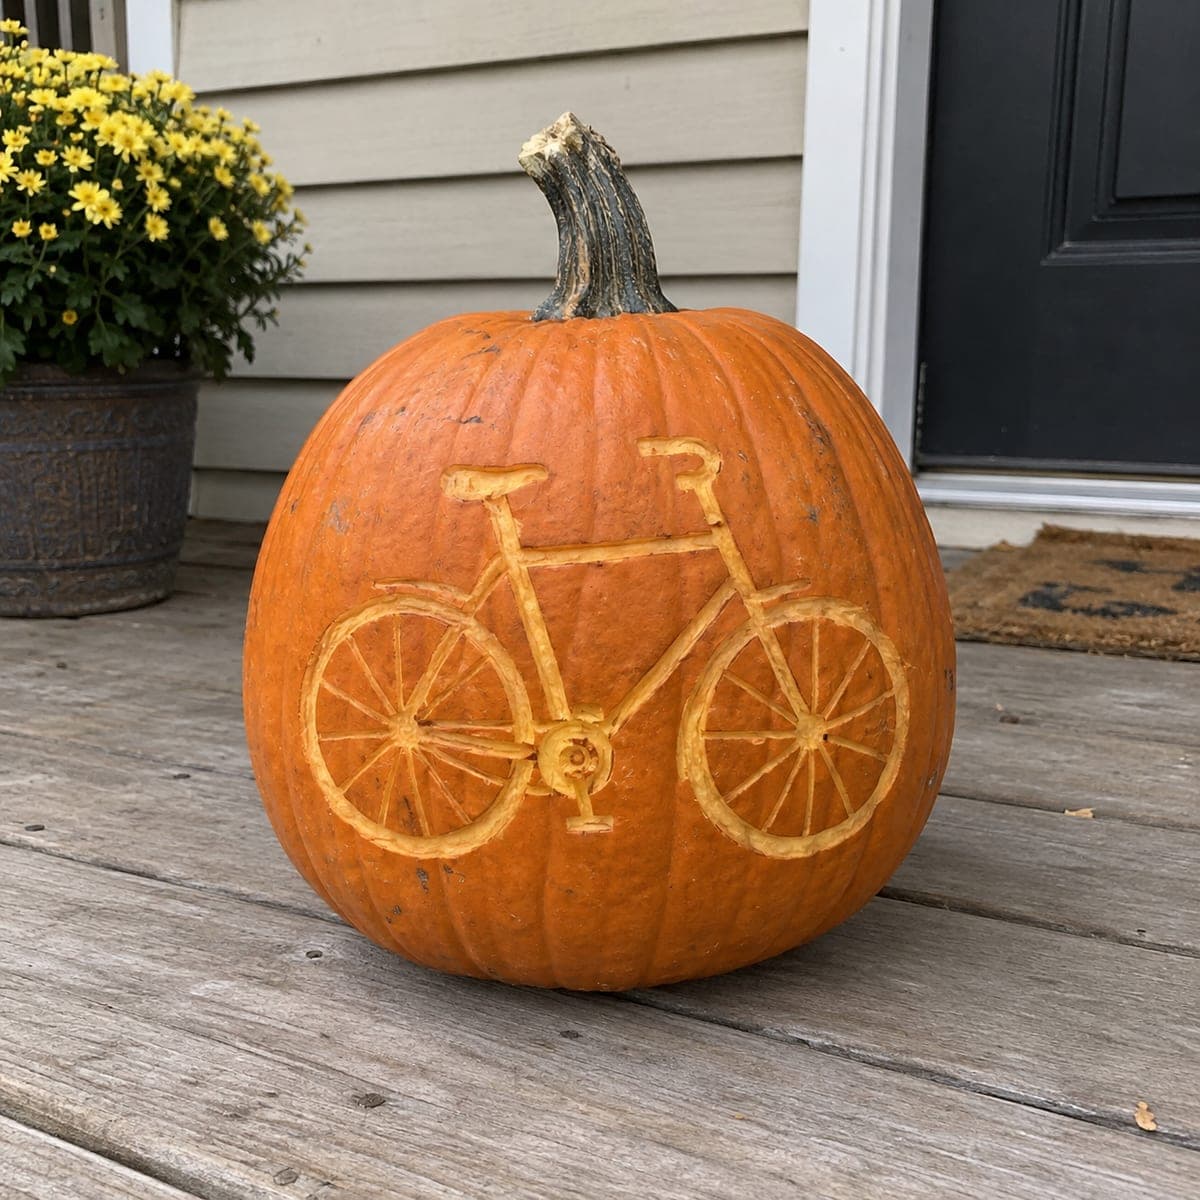
A classic road bicycle with spoked wheels, dropped handlebars, and a full frame is etched across the face of this pumpkin. The lines are peeled just through the skin, which keeps the thin spokes intact where a cut-through design would collapse. Use a compass or a round lid to score the two wheel circles before carving, since perfect circles are the difference between charming and wobbly on a design like this.

This is an AI-generated concept image: a realistic, carvable design idea rather than a photo of a finished carve. AI concepts are always labeled and sit out the leaderboard and the contest.

No ratings yet · Sign in to rate
Comments (0)

  • No comments yet — be the first.

Save without an account. Sign in to like or comment.

Our tips for carving a similar design

The core trick here is etching rather than cutting all the way through. Every line, from the spoked wheels to the dropped handlebars, is peeled only through the skin so the light glows dim orange along the drawing and the thin spokes never lose their support. Because the design lives or dies on two clean circles, score both wheels with a compass or a round lid before you touch a blade.

Written by PumpkinCarvingIdeas.com, inspired by the image above. These are our suggestions, not instructions from the uploader. This approach to the AI concept has not been tested on a real pumpkin.

From pumpkin to porch

  1. Pick a smooth face and clean the inside

    Choose the flattest, widest side of the pumpkin as your canvas so the bicycle sits without distortion. Cut a lid from the bottom instead of the top, which keeps the stem intact and lets you set the pumpkin down over a light later. Scoop the inside wall behind your design down to about one inch thick with a sturdy scoop. A thinner wall makes shallow etching easier and lets more glow come through.

  2. Transfer the pattern and score the wheels

    Tape your bicycle stencil flat against the face and poke the main lines with a transfer tool or pin. Before you commit, set a compass or trace a round lid to mark the two wheel circles as true, even rings. Perfect circles are what separate a charming bike from a wobbly one, so take your time here. Connect the frame, handlebars, and seat lines between the wheels.

  3. Peel the frame and outer rims first

    Using a small detail knife or a lino-style gouge, remove only the top skin along the thicker lines: the frame tubes, both wheel rims, the seat, and the handlebars. Keep the peeled channels shallow and even so they read as one continuous drawing. Work slowly and let the tool do the cutting rather than forcing it. Adults should handle all sharp tools.

  4. Etch the delicate spokes

    Peel each spoke as a thin skin-deep line radiating from the hub to the rim. Do not cut through, since a cut-out spoke this thin would collapse and ruin the wheel. Keep the strokes light and consistent in width so all the spokes match. If a line looks faint, widen it slightly rather than digging deeper.

  5. Deepen a few accents for contrast

    To give the bike some life, scrape the frame lines and rims a touch deeper so they glow brighter than the fine spokes. This layered shading makes the drawing feel three-dimensional under light. Wipe away pulp with a damp cloth and check the whole face from a few feet back. Even out any line that jumps out as too dark or too bright.

  6. Light it and photograph

    Set a battery LED puck or string inside and place the pumpkin over it through the bottom opening. Skip real candles, since the heat dries out shallow etching fast and dulls the glow. Dim the room and take your photo at dusk when the peeled lines read warmest. A light coat of petroleum jelly on the cut edges slows drying if you want it to last a few extra days.

Gather your supplies

Check things off as you get ready.

Work on a stable surface, keep your free hand out of the cutting path, and have an adult handle sharp tools.

Three levels of light

  • Leave intact

    The open pumpkin skin around and inside the bike stays untouched and dark.

  • Peel & shade

    The fine spokes, seat, and handlebars are peeled just through the skin for a soft dim glow.

  • Cut through

    Nothing is cut fully through on this design; the deepest scraped frame lines and rims read brightest without opening the wall.

Learn the carving basics

Before you start cutting

Why not cut the spokes all the way through for more light?

Cut-through spokes this thin would snap or collapse before you finished the wheel. Etching keeps every spoke supported by the skin beneath it. You still get a clear glowing line, just softer than a full cutout.

How do I keep the two wheels looking even?

Score both circles with a compass or a traced round lid before any peeling, and try to match their diameters. Mark the hub center first, then draw outward so the spokes land evenly. Locking in true circles at the start prevents the lopsided look that ruins bike designs.

This is a concept image, so will a real pumpkin glow the same?

The pictured pumpkin is an AI concept, but the technique works on a real one. Thin the wall behind the design to about an inch and keep your etching shallow and even, and the peeled lines will glow warm. Use an LED so heat does not dry out the shallow cuts.

Your take belongs here, too.

Changed a detail? Made it simpler? Share a photo of your version and tell the community what worked.

Share your pumpkin

More pumpkins like this

You've reached the end · 8 pumpkins
The Patch Report

Fresh pumpkins, in your inbox.

The best new carvings, ideas worth stealing, and how-tos for carving season. Short, seasonal, and gone by November.

A short email during carving season. Unsubscribe anytime. See our privacy policy.