@crowsnestcarver
Sep 5, 2026
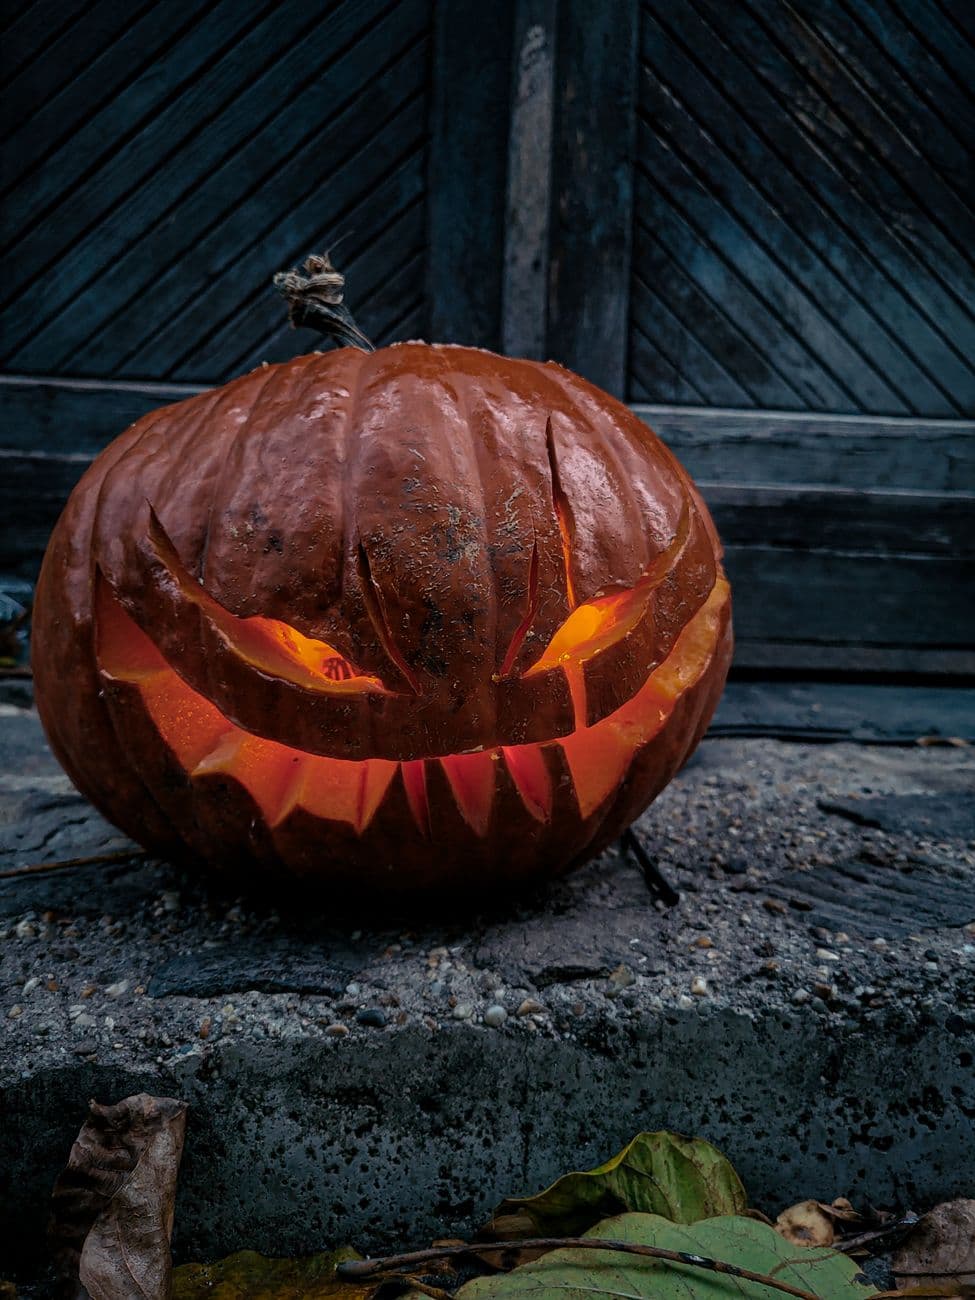
Wet grin at the barn door
Rain-slick and glowing, with slit eyes and a curling jagged smile on the stone step of an old barn.
No ratings yet · Sign in to rate
Rain-slick and glowing, with slit eyes and a curling jagged smile on the stone step of an old barn.
The whole face leans on two devices: thin slit eyes that read as sly and a wide, curling row of jagged teeth cut fully through for the brightest glow. Keep the eyes narrow and angled so the light only peeks out, then let the mouth do the heavy lifting. Leave the top and sides of the pumpkin untouched so the smooth, rain-slick skin frames the grin.
Written by PumpkinCarvingIdeas.com, inspired by @crowsnestcarver's photo above. These are our suggestions, not instructions from the uploader, and this approach hasn't been tested on their exact carve.
Choose a short, round pumpkin with a smooth face so the grin sits low and wide. Cut a lid from the bottom or the back rather than the top, which keeps the front skin clean and makes it easy to seat an LED. Scoop the inside until the front wall is about one inch thick. A thinner wall on the mouth area will make cutting the teeth easier.
Sketch or tape on a stencil with two upward-slanted slit eyes and a long crescent mouth full of pointed teeth. Center the mouth so it curls up at both ends for that sly look. Poke the outline with a pin or an awl, spacing dots close together along the tooth edges. Step back and check that the eyes tilt inward toward the nose line.
Use a small detail saw or a craft knife to cut the two thin eye slits. Keep them narrow, since wide eyes lose the sneaky feel. Angle the blade slightly outward so the inner edge catches light and glows. Cut these before the mouth so the pumpkin stays sturdy while you work on the small shapes.
Save the big mouth opening for last because it removes the most material. Cut each triangular tooth gap one at a time, leaving the points of the teeth attached top and bottom as natural bridges. Work slowly at the corners where the smile curls up. Push cut pieces out from the inside to avoid snapping a tooth.
Drop in a warm LED tea light or a small battery puck, not a candle, since the thin teeth and slits can scorch. If you want a pupil effect like the photo, you can leave a tiny sliver of skin or a bead inside one eye. Test the light in a dark room and widen any gaps that stay too dim.
Set the pumpkin on stone, brick, or a weathered step for that old-barn feel. Mist the skin lightly with water to get the rain-slick shine. Shoot at dusk with the LED as the main light and a dark backdrop behind it. Scatter a few fallen leaves in front to finish the scene.
Check things off as you get ready.
Work on a stable surface, keep your free hand out of the cutting path, and have an adult handle sharp tools.
The smooth top, sides, and cheeks stay untouched so the wet skin reads dark and glossy.
The inner edges of the slit eyes can be shaved thin for a dim orange pupil-like glow.
The jagged mouth and the two eye slits are cut fully through for the brightest light.
Leave each tooth attached at both the top and bottom edges so it acts as a bridge rather than a loose spike. Cut the gaps between teeth one at a time and push the scrap out from the inside. Working with a thinner front wall in the mouth area also reduces stress on the points.
Keep them narrow, roughly the width of a pencil or slightly more. Thin slits give that sly, squinting expression and let just a sliver of light escape. If they turn out too dim, you can widen them a little at a time until the glow reads well.
Lightly mist the skin with water just before shooting so it catches the light. Use a warm LED inside and photograph at dusk against a dark background like weathered wood or stone. Avoid a flash, which flattens the glow and kills the mood.
Changed a detail? Made it simpler? Share a photo of your version and tell the community what worked.
The best new carvings, ideas worth stealing, and how-tos for carving season. Short, seasonal, and gone by November.








Comments (0)