Pumpkin carving templates
1155 free printable stencils. Download, print, trace, carve.
366 results · Page 6 of 11
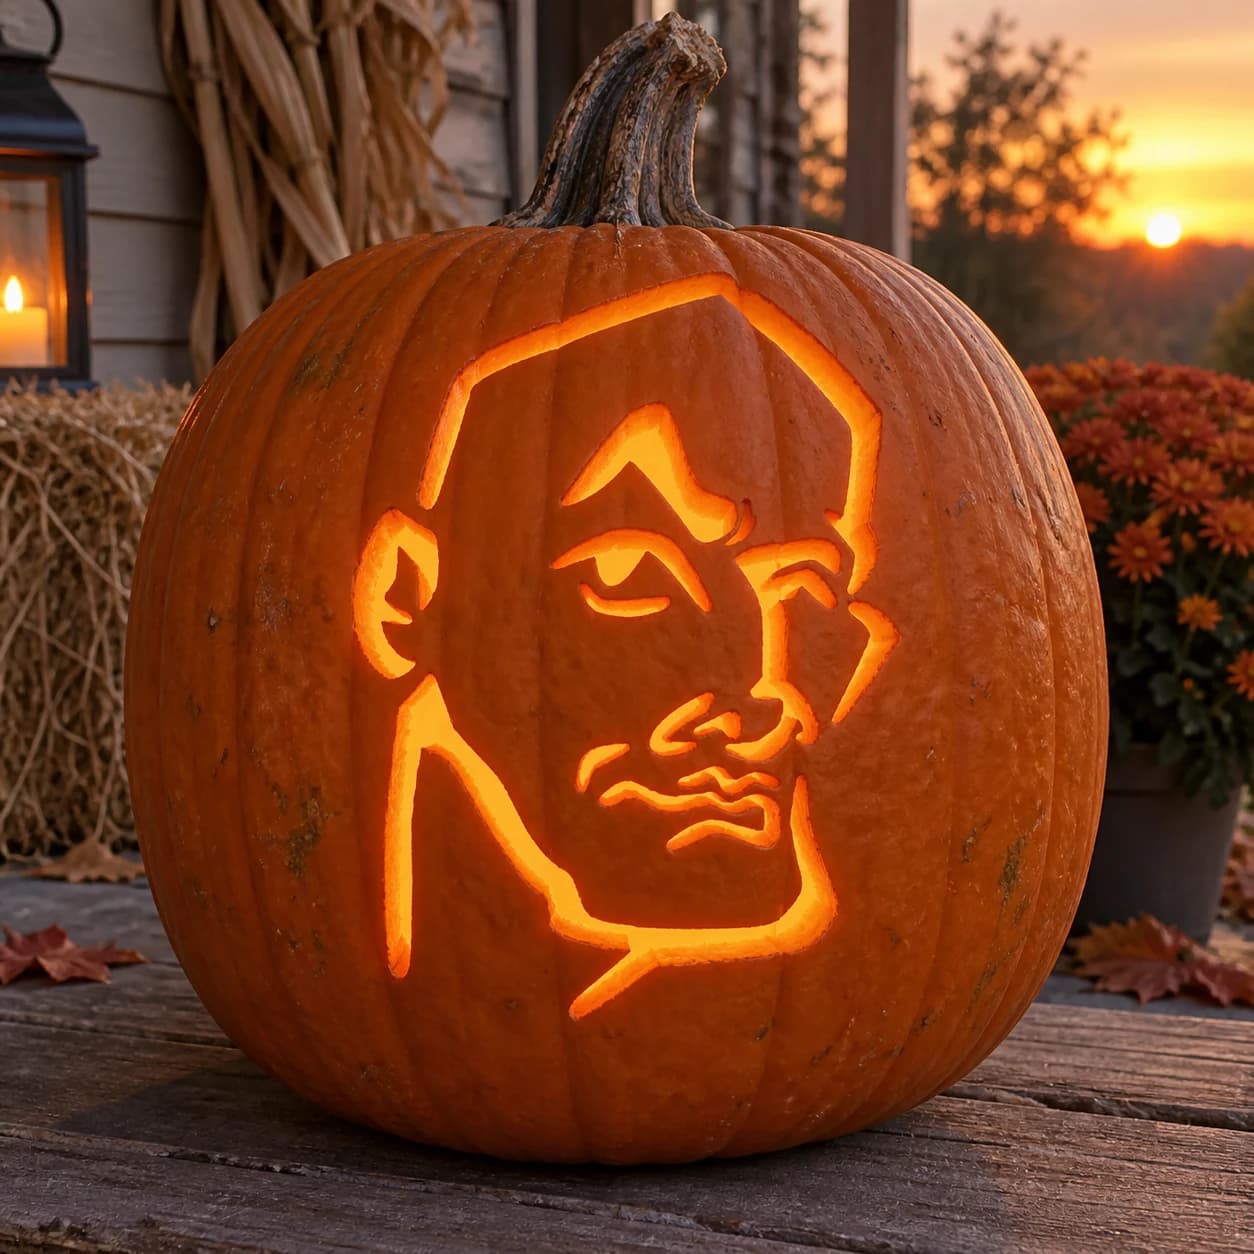
Male Portrait Pumpkin Stencil
A male portrait rendered in spare, angular linework fills this hard pumpkin stencil: a large angular head shape, a distinctive widow's peak hairline, deep-set eye sockets with small cutout irises, a long straight nose, and a square jaw with a chin dimple. The design uses wide open negative shapes separated by just a few thin structural bridges, so the lit portrait reads as a bold, high-contrast face. The narrow bridge between the nose and the upper lip is the most vulnerable point, so score it lightly before making any cuts on either side of it.
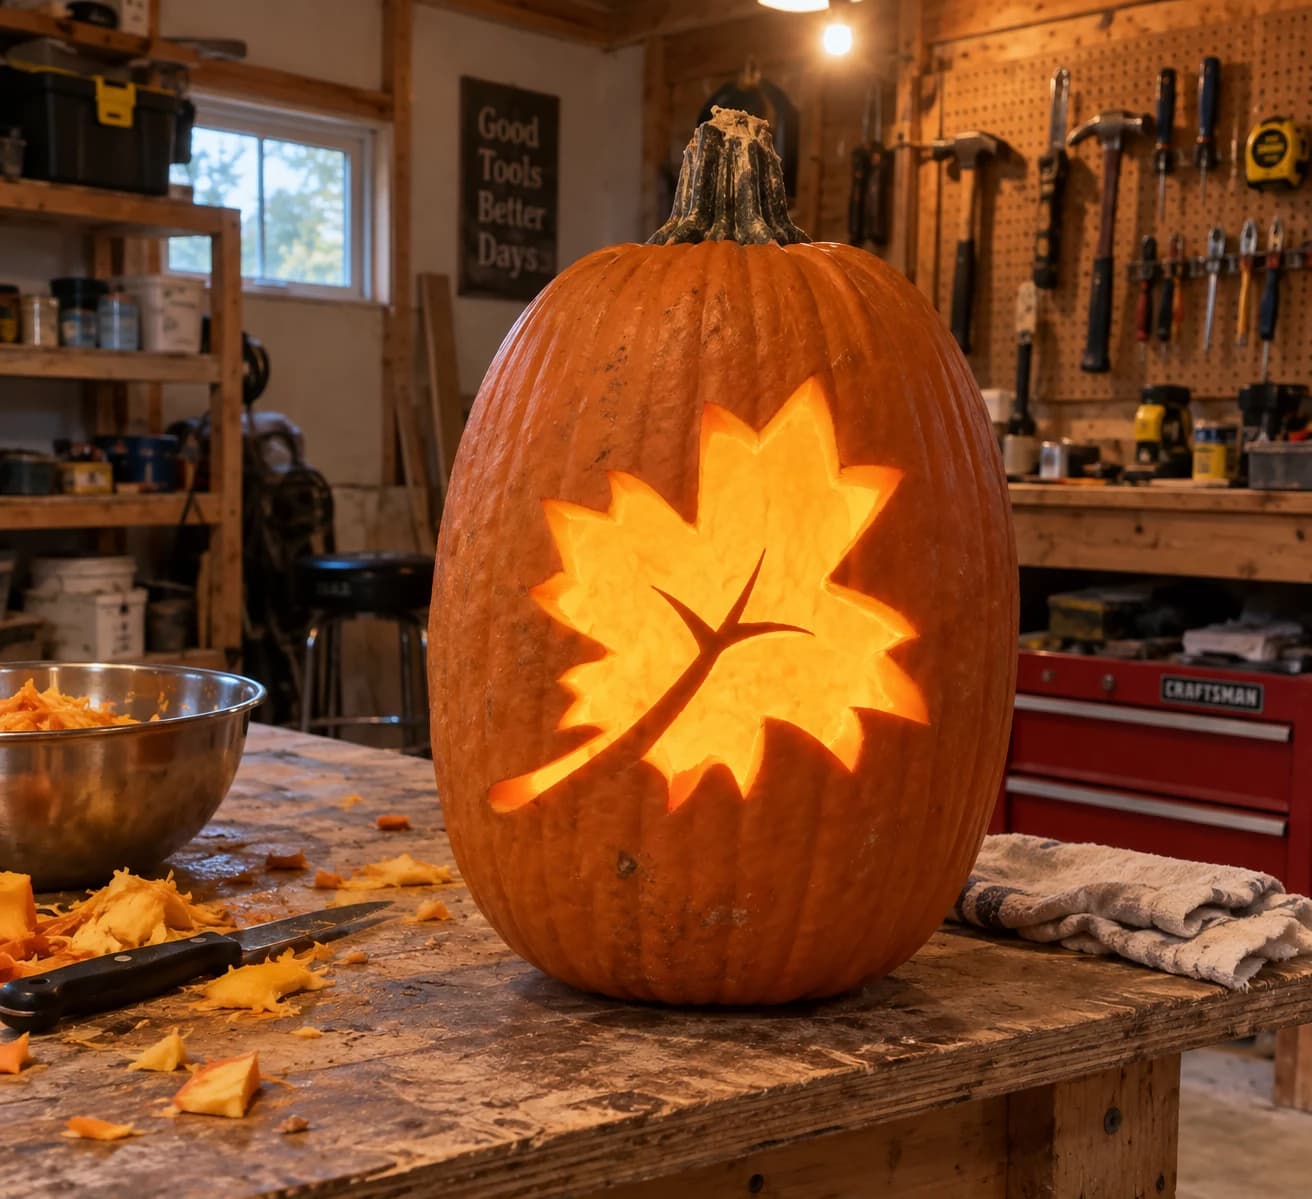
Maple Leaf Pumpkin Stencil
A single large maple leaf fills most of the stencil, tilted slightly to the right with its stem curving down and left. The leaf has seven pointed lobes with gently serrated edges and a central vein ridge left solid, creating a two-section open cut on each side of the midrib. Lit from inside, the two halves of the leaf glow symmetrically while the narrow central vein remains as an unlit orange line. Keeping that vein bridge intact is the key structural challenge: cut the left lobe section completely before moving to the right so you're never cutting beside an already-open neighbor.
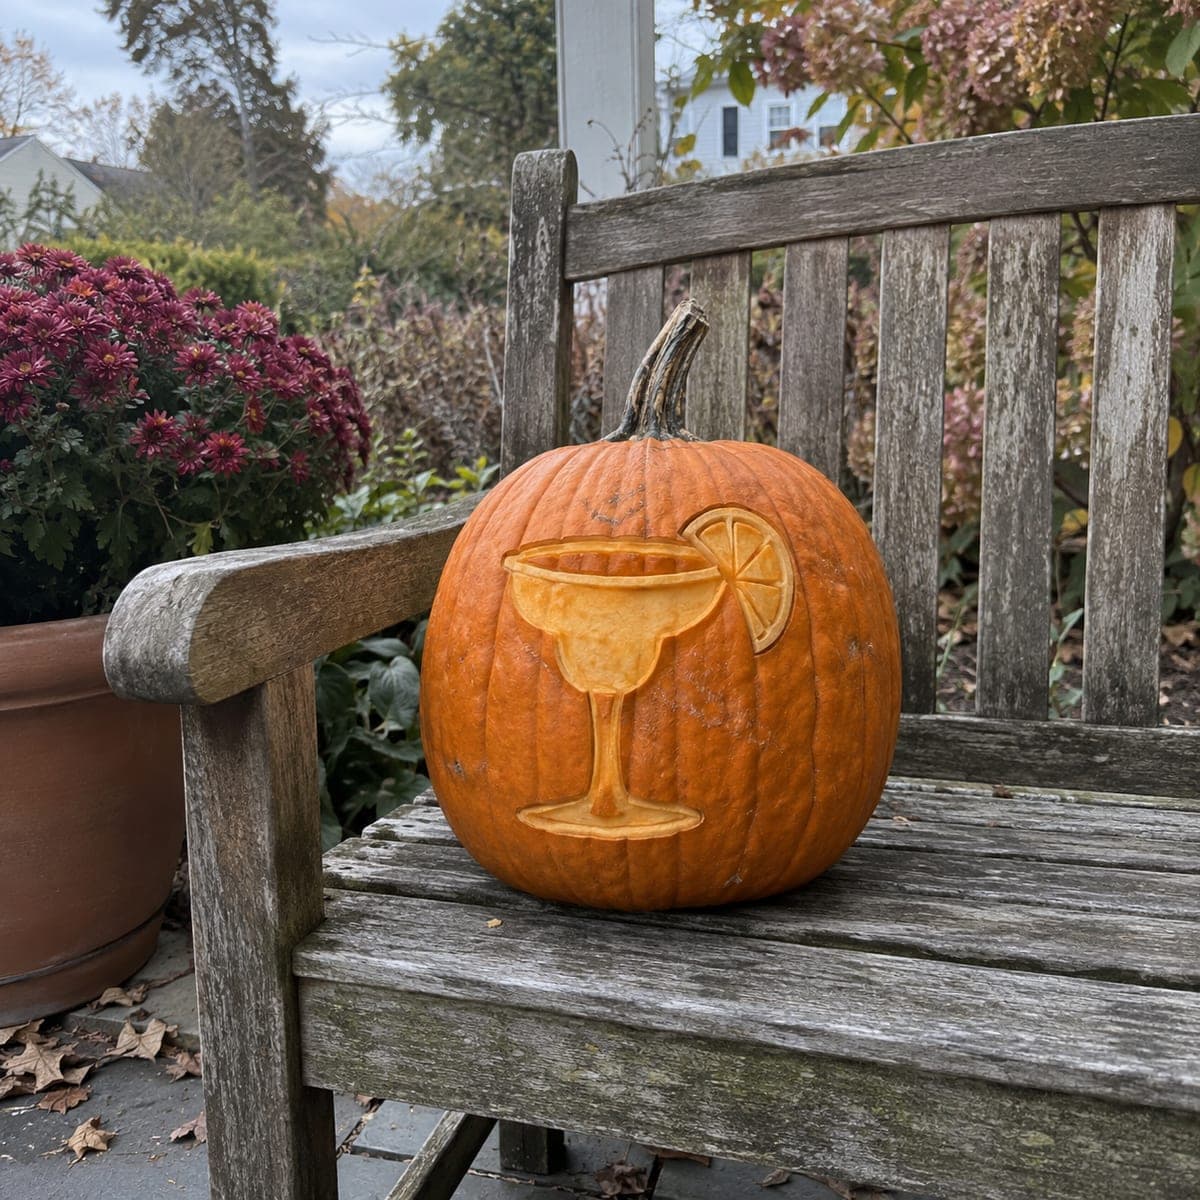
Margarita and Citrus Wheel
A wide-rimmed margarita glass on a slender stem, garnished with a citrus wheel notched onto the rim, its segments radiating like a tiny sun. This is a shading design: the glass, stem, and fruit are shaved to different depths so the salt-rimmed bowl reads brighter than the stem. Etch the citrus wheel's thin segment lines with a V-tool after the broad shapes are done so they stay crisp.
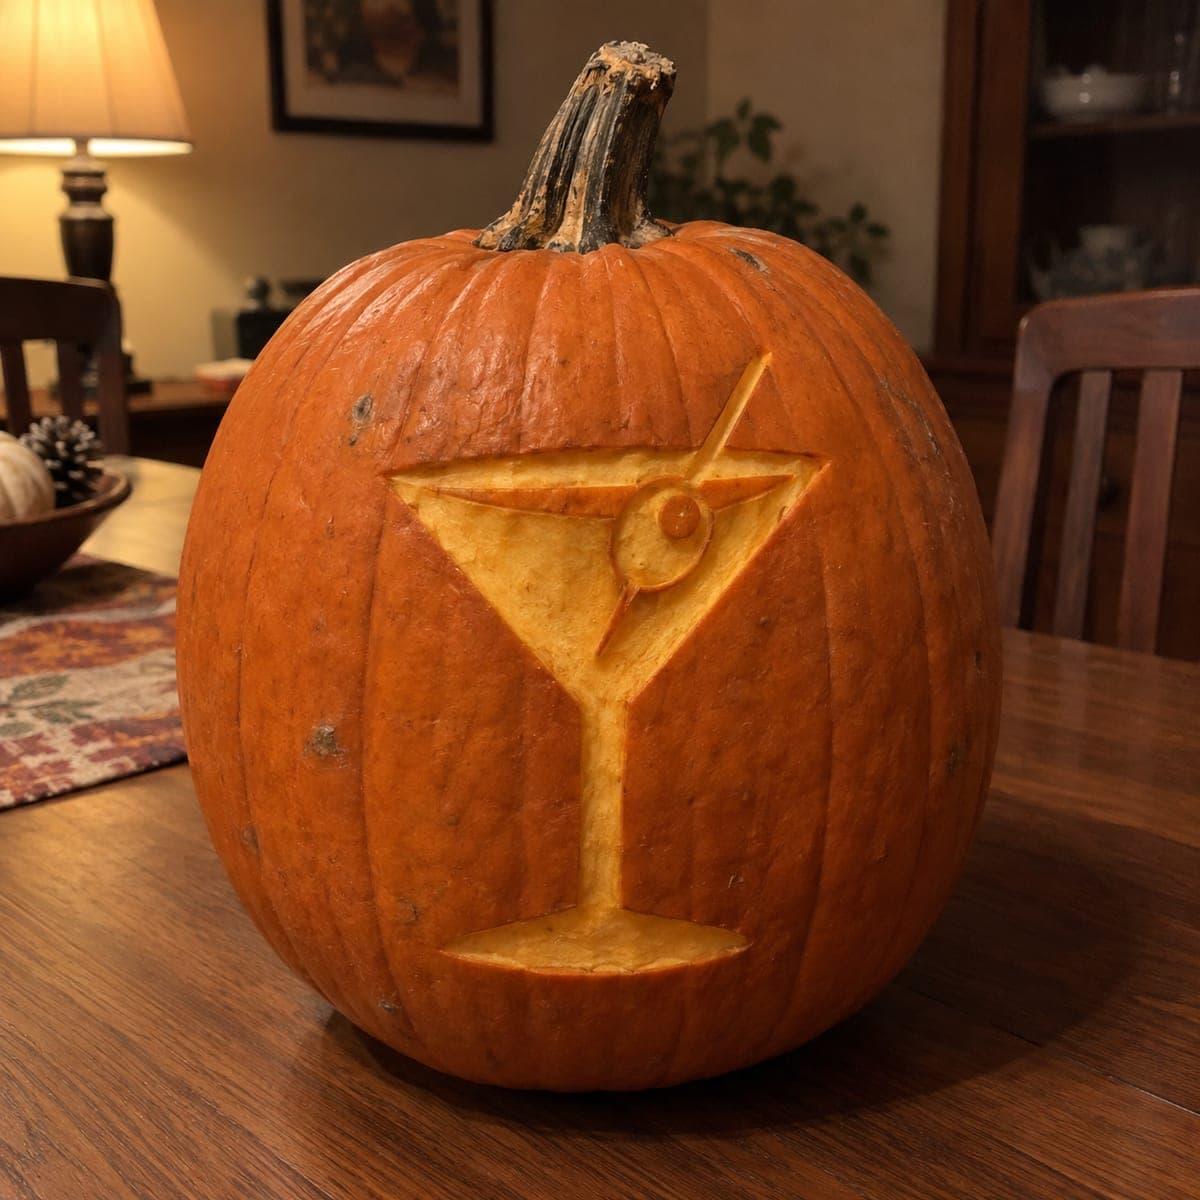
Martini Glass with Olive
A tall martini glass with a skewered olive resting on the rim, drawn in clean bar-sign style from the wide conical bowl down the slender stem to the round base. It carves as skin-shave shading, so the glass appears as smooth pale relief against the dark rind with no pierced openings. A medium project overall; keep your peeling depth even across the big bowl, and leave the thin stem for careful last strokes.
Maryland Pumpkin Stencil
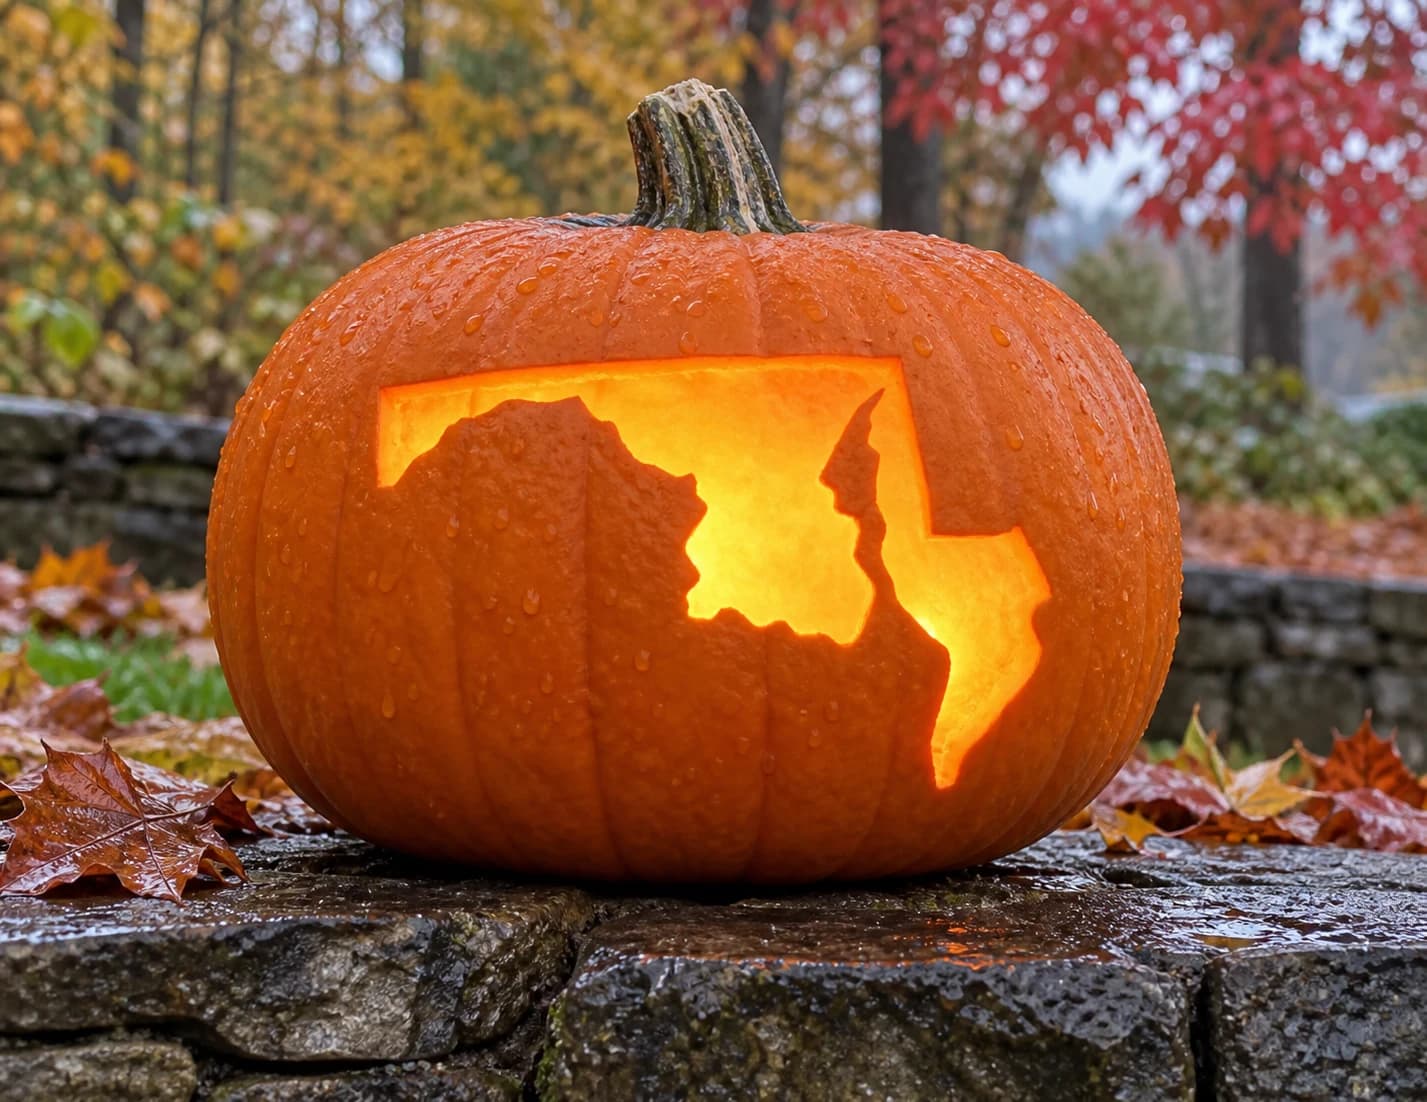
Maryland's instantly recognizable outline appears as a single cut-through silhouette on this pumpkin stencil, showing the state's wide rectangular body, the deeply indented Chesapeake Bay notch along the right side, the narrow Eastern Shore peninsula, and the small western panhandle extending to the left. Because the Bay notch splits the right edge into two separate lobes, the wall between them is slender. Cut the inner Bay-notch corners first using a pointed blade so that delicate section doesn't flex and tear while you remove the larger open areas.
Massachusetts Pumpkin Stencil
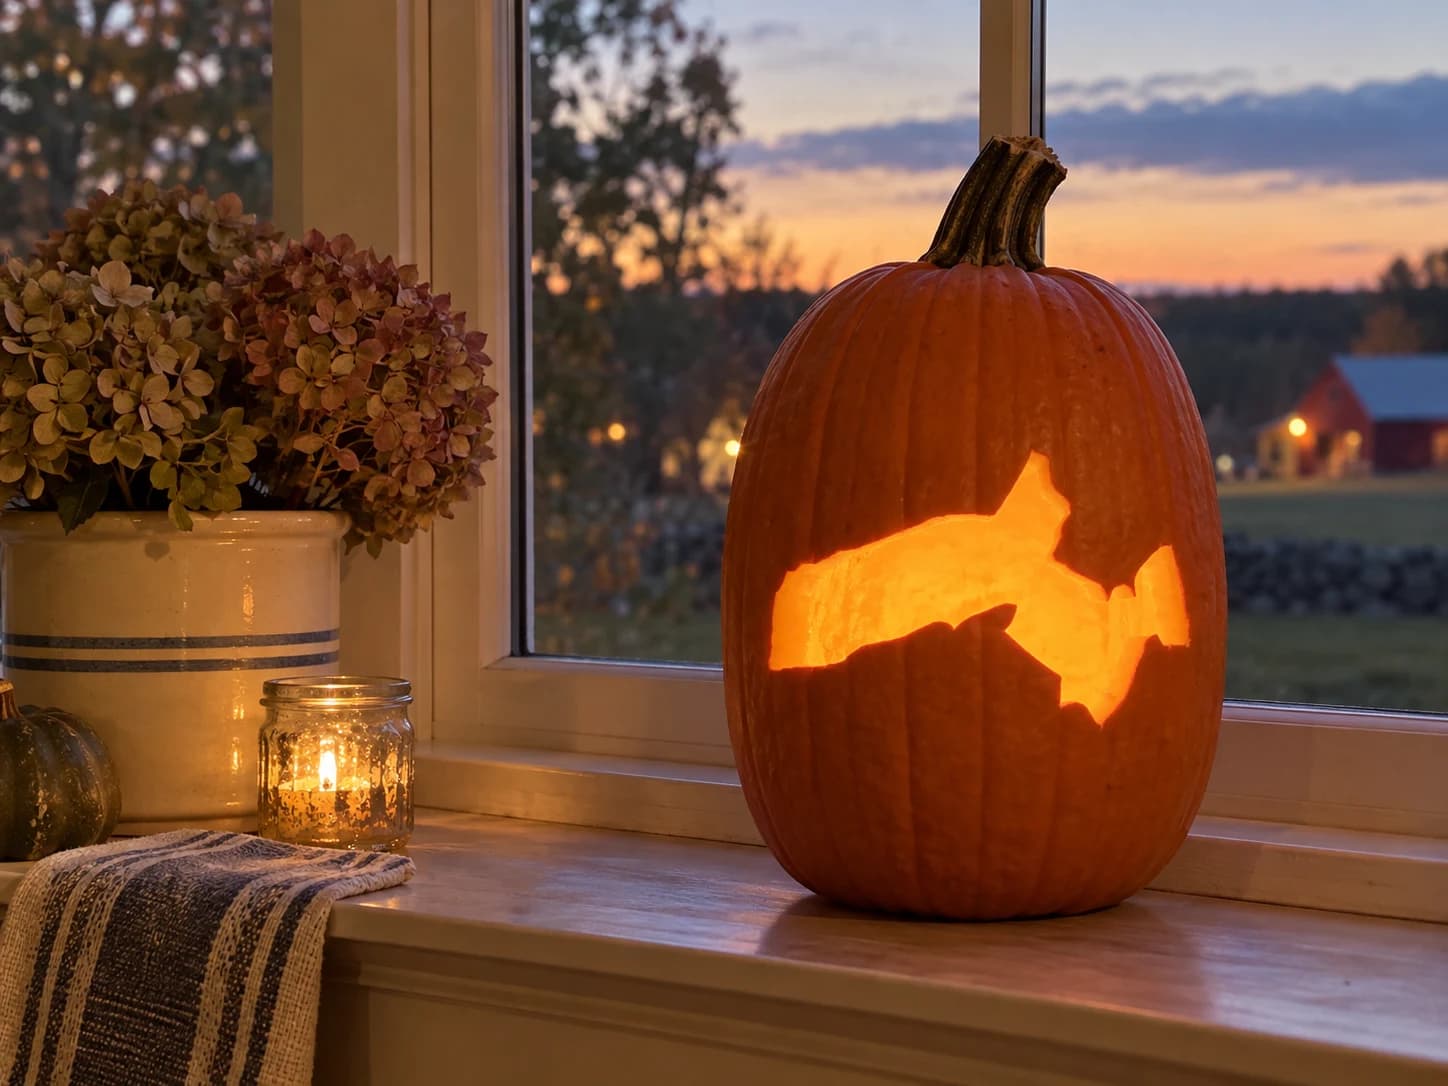
Massachusetts appears as a wide, roughly rectangular landmass in this pumpkin stencil, tapering toward a notched right edge that represents Cape Cod's elbow and the smaller hook of the outer cape on the lower right. The entire state outline is carved as one open silhouette, so the jagged southeastern coastline and the separated cape hook both need steady hands. Cut the narrow cape-tip shape separately before removing the large mainland body, keeping that small piece in place with a pin until both cuts are complete.

Mini Face with Twin Teeth
Sized for small pumpkins, this friendly face uses two triangle eyes, a tiny triangle nose, and a rectangular mouth with two square teeth notched into the top edge. All openings cut straight through, and the compact layout keeps every feature close together so it reads clearly on a little gourd. On thin-walled mini pumpkins, use a fine serrated blade and light pressure to avoid splitting the shell between cuts.
Minnesota State Shape
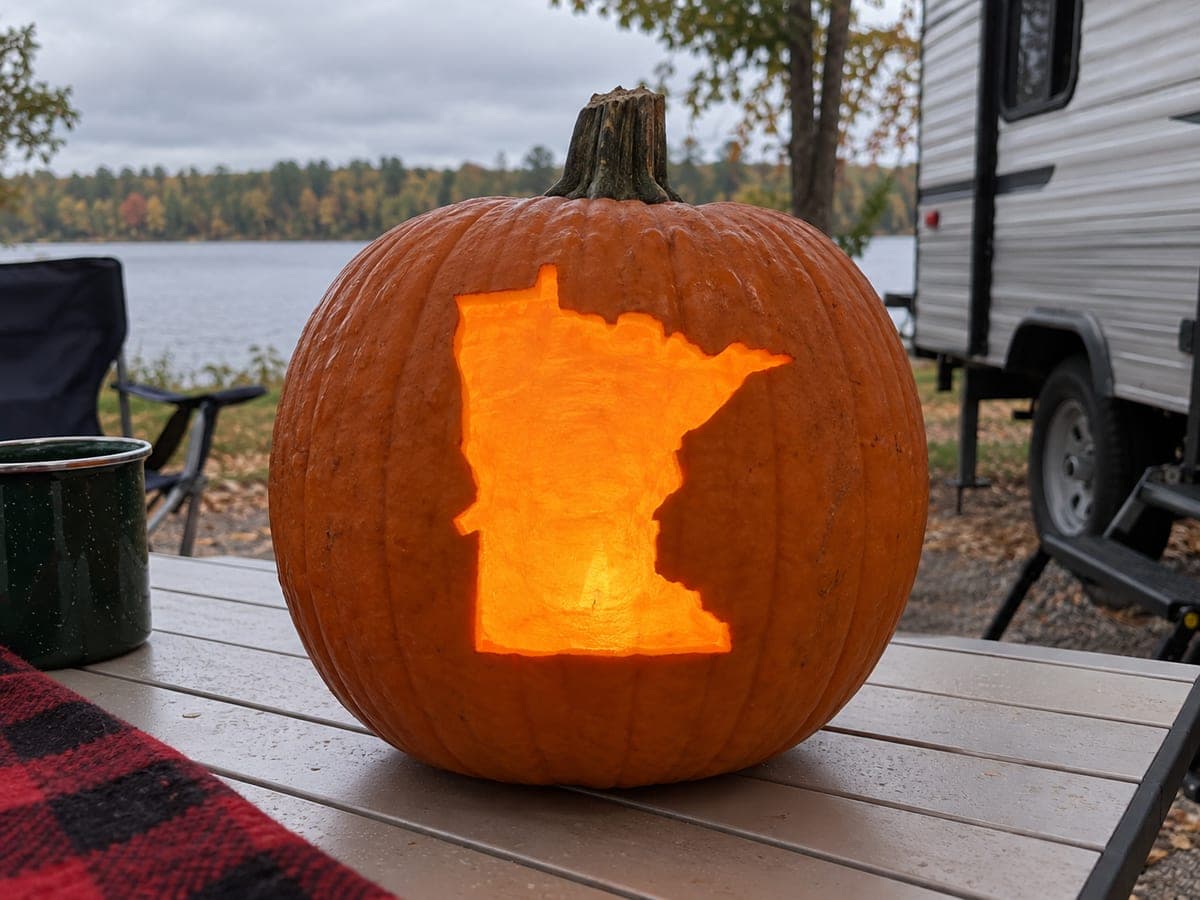
The full outline of Minnesota carved as one glowing state-shaped window, from the flat southern border up to the jagged Arrowhead along Lake Superior. The entire silhouette is cut through in a single piece, leaving the surrounding pumpkin wall to frame it. Take your time on the notched northeast shoreline, sawing gently along each small zigzag, and pop the big piece out in sections rather than all at once.
Mississippi Heart Lettering
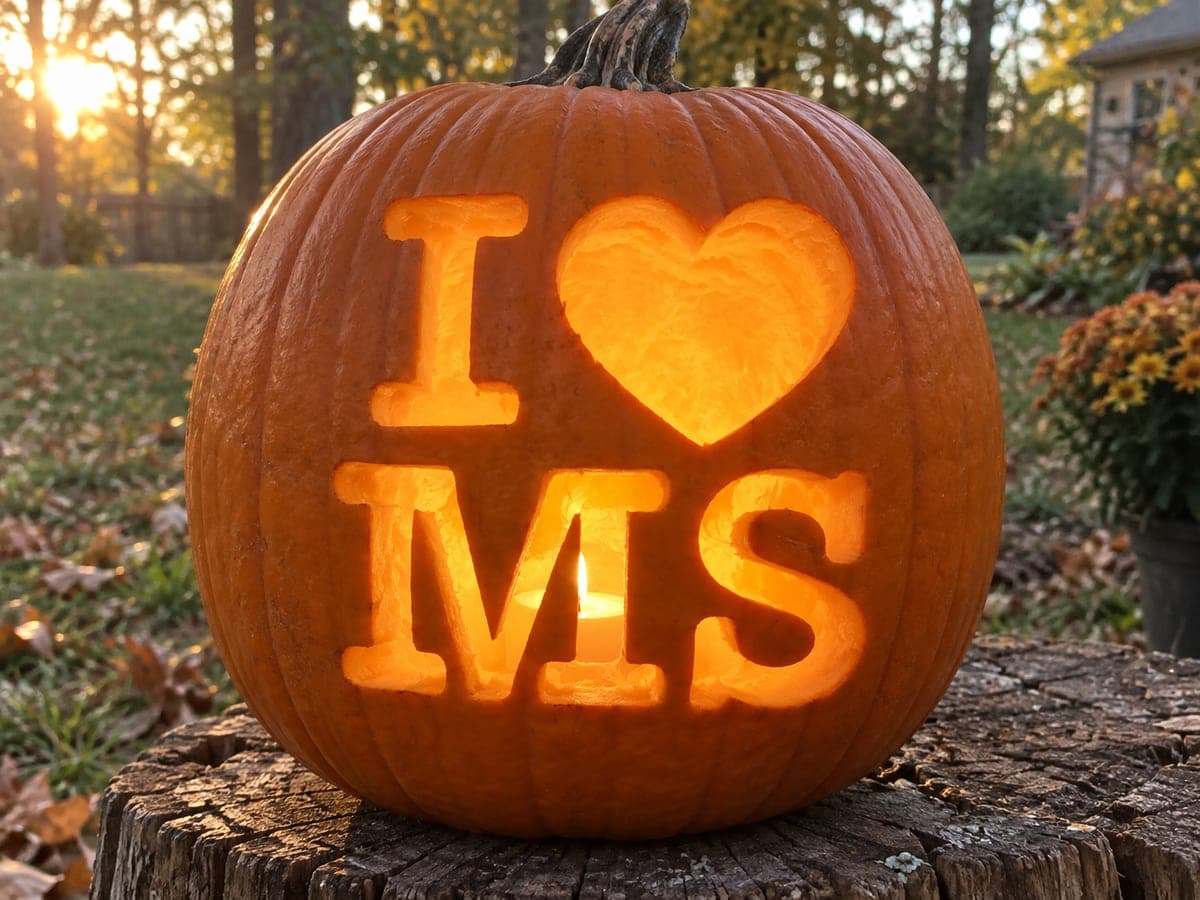
This hometown tribute stacks I heart on the top line and MS below in thick block letters, with a plump heart doing the talking. Each letter and the heart are pierced as separate bold shapes with plenty of shell between them, keeping the wall strong. For this easy design, cut the S from the center outward in two hooked passes so its curves stay even, then finish with the heart.
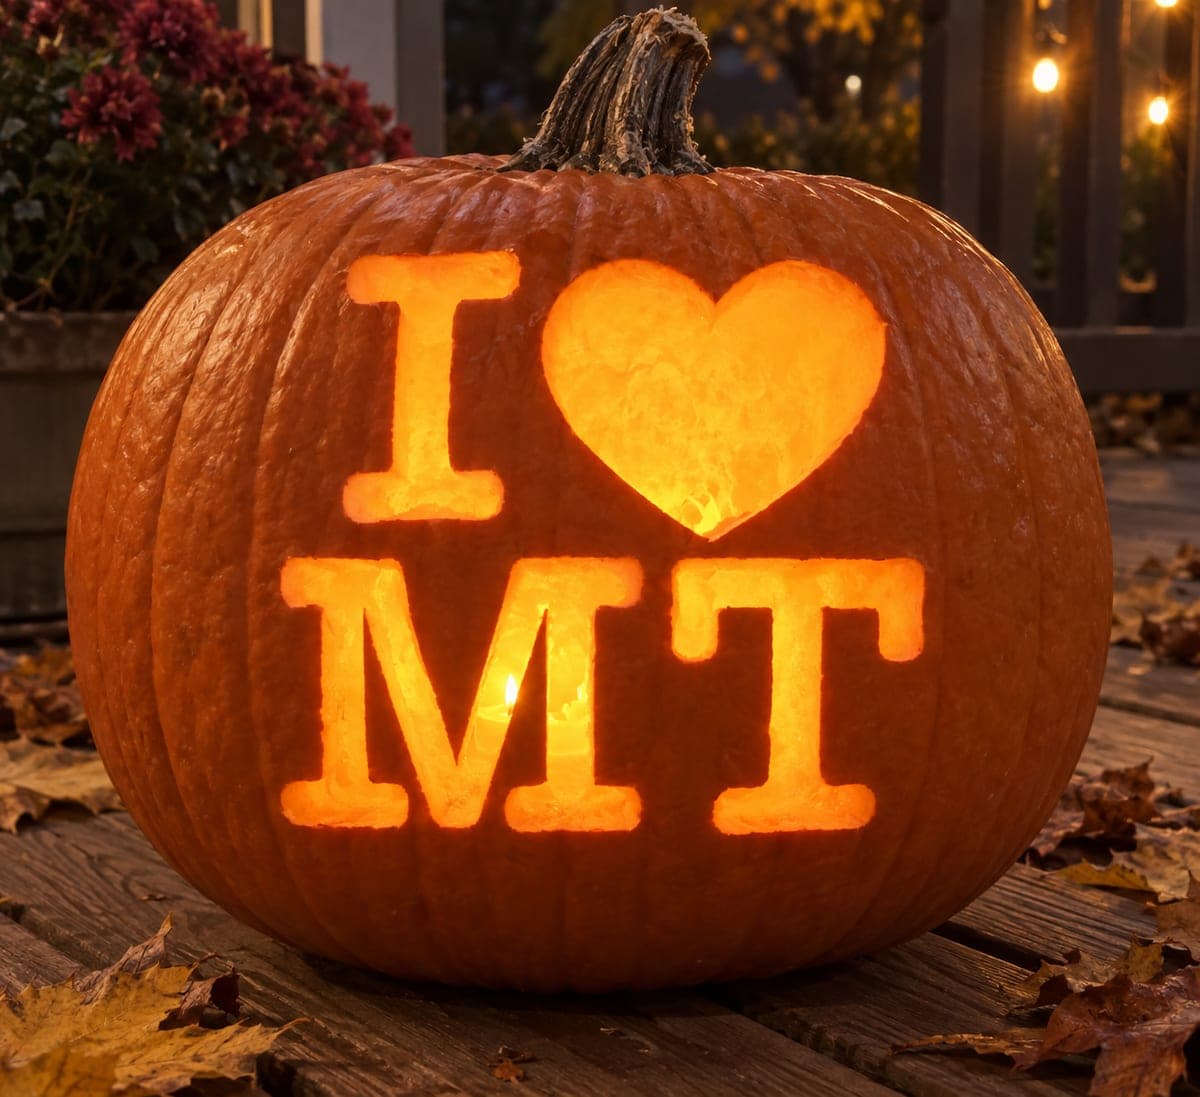
Montana Heart Lettering
Big block letters spell out I heart MT across two rows, with a bold solid heart standing in for the word love. The I, the heart, and the letters M and T are each pierced through as chunky separate shapes, so the message reads clearly from the street. It is an easy lettering pattern; just keep the inner corners of the M crisp by making relief cuts into each notch before removing the piece.
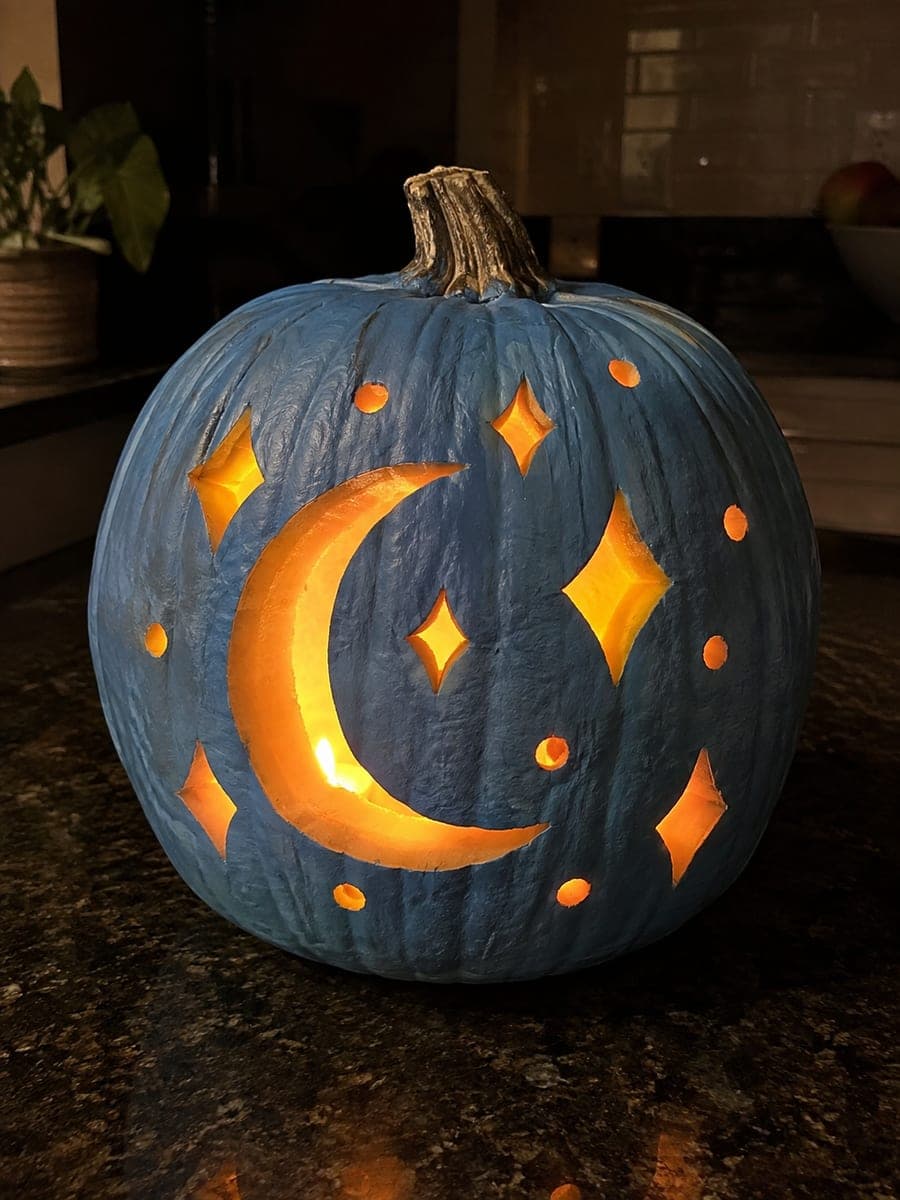
Moon and Six Diamond Sparkles
A large crescent moon anchors the center while six diamond sparkles and a scattering of small round dots twinkle around it, turning the whole pumpkin into a patch of night sky. Every moon, diamond, and dot is a separate pierced opening, so the pattern wraps light in all directions. Carve the crescent first, then the diamonds from largest to smallest, using a drill or apple corer for the tiny circles.
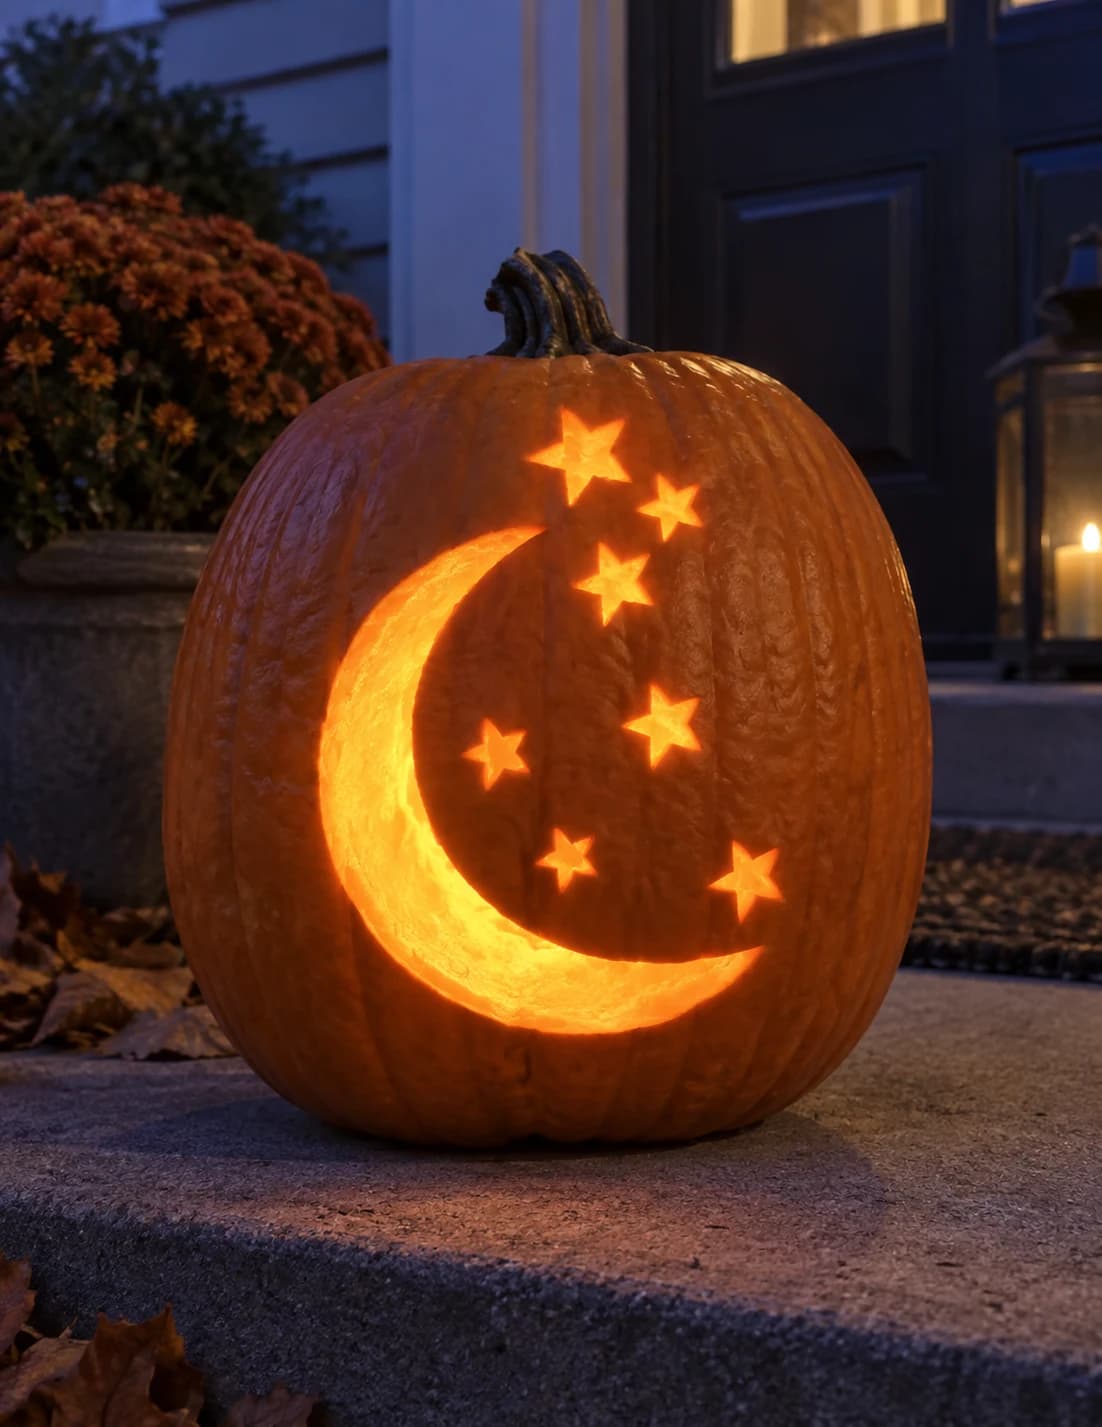
Moon and Stars Pumpkin Stencil
A slim crescent moon curves on the left side of this space pumpkin stencil while seven five-pointed stars of varying sizes are scattered across the open field to its right, all shapes cut through as separate glowing elements. The smallest stars are only an inch or so across and sit as isolated islands on the pumpkin face; carve those tiny stars first with a craft knife tip or small saw while the wall is at full stiffness, then remove the larger crescent and remaining stars in order from smallest to largest.

Moonlit Cat & Six Stars
A sitting cat gazes up at a crescent moon while six small stars scatter across the night sky, its long tail curling into an elegant spiral. This is a shading design, so the moon, stars, and cat outline are shaved into the skin and glow as luminous grooves rather than open holes. Rated hard for its long unbroken curves, carve the tail spiral in one slow continuous pass and keep your groove depth consistent so the glow stays even.
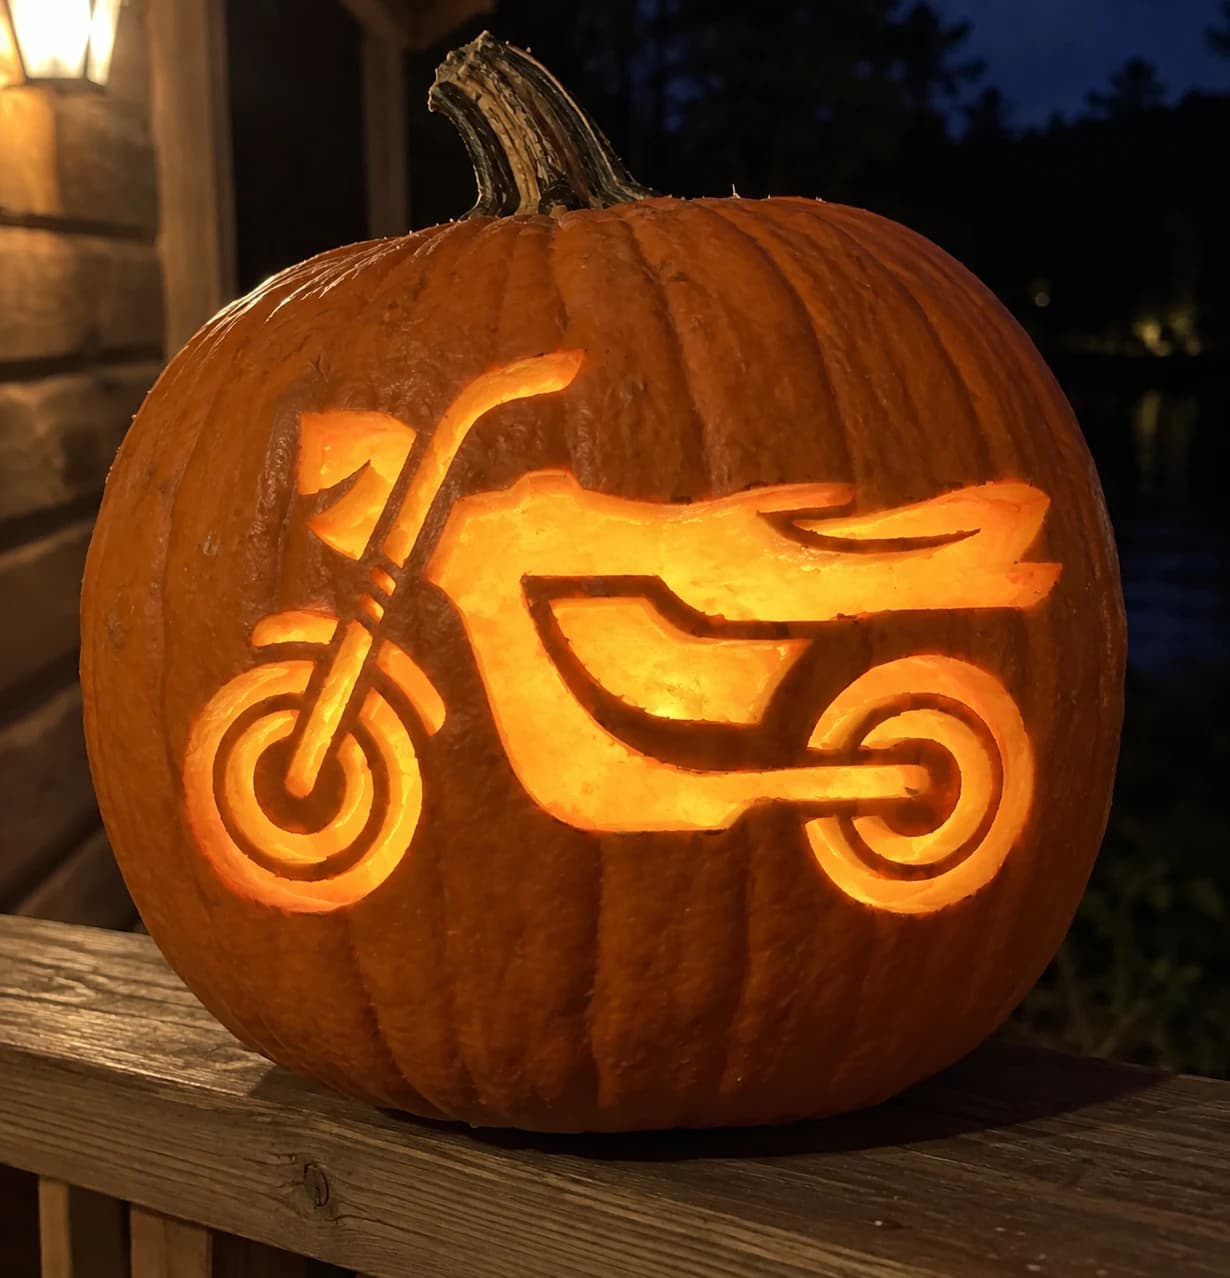
Motorcycle Pumpkin Stencil
A side-profile motorcycle fills this hard pumpkin stencil with mechanical detail: the front fork and handlebars, a sculpted fuel tank, streamlined seat fairing, and two large concentric-ring wheels. The design uses a mix of solid pumpkin bridges and open cut areas so the bike reads as a crisp silhouette when the jack-o-lantern is lit. The thin fork tubes and the thin strip separating the seat from the rear fairing are the most fragile elements. Carve the two large wheel ring sections first to establish the bottom of the composition before working inward through the frame details.
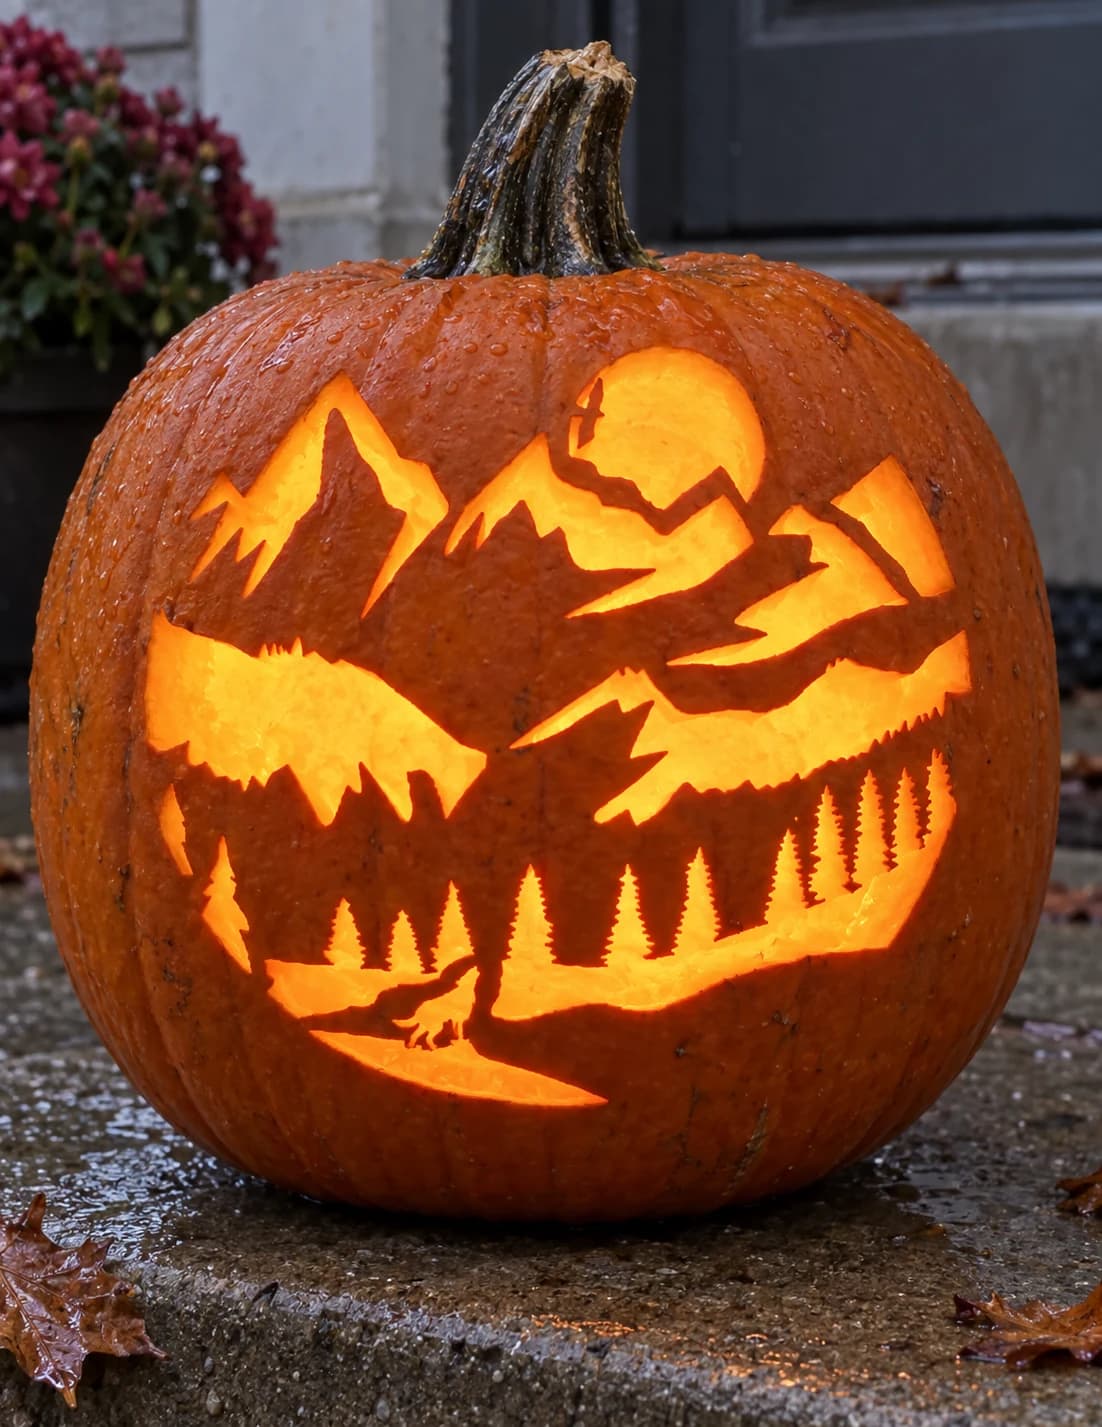
Mountain Wolf Scene Pumpkin Stencil
This expert-level pumpkin stencil presents a layered wilderness panorama: jagged mountain peaks and a partially obscured moon sit above a mid-ground of ridgelines, while the foreground holds a row of spiky pine trees and a tiny howling wolf on a plateau. Dozens of separate cut-through shapes at varying scales build depth across the whole composition. Tackle the tiny wolf and the narrowest tree spires first, as those fragile points are easiest to cut cleanly before surrounding sections are removed and the pumpkin wall softens.
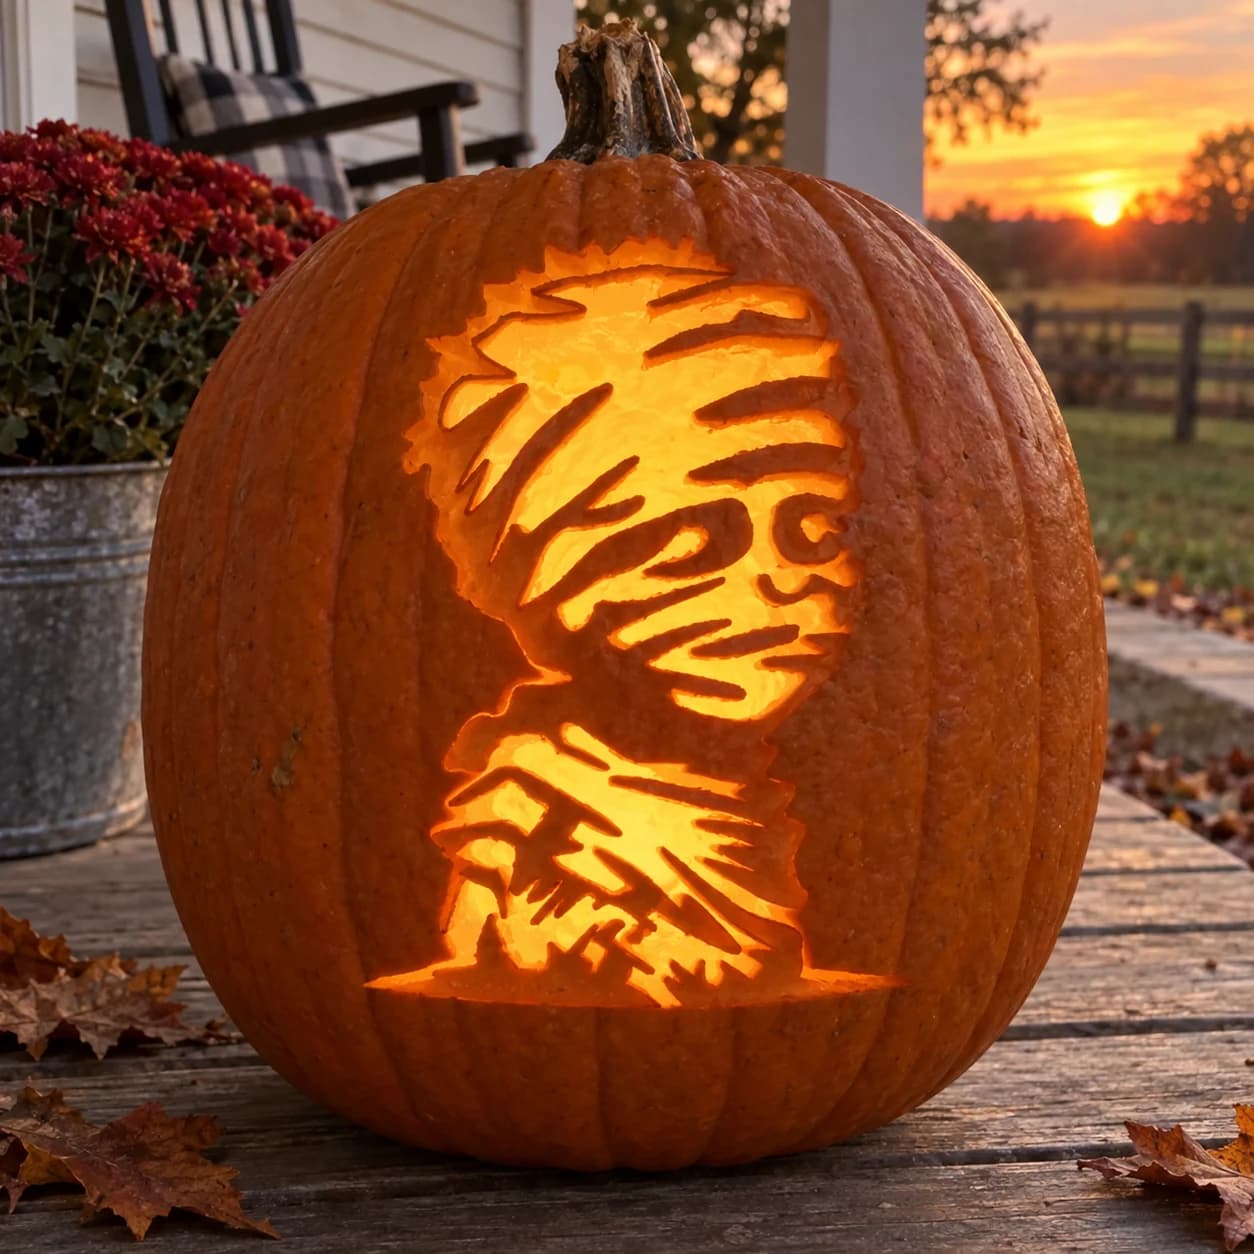
Mummy Pumpkin Stencil
A mummy's head and shoulders rise from a base of wrapping strips in this expert pumpkin stencil, the face emerging through layered horizontal and diagonal bandage cut-outs that reveal a single visible eye and a grimacing mouth. The design is dense with interlocking cut shapes separated by thin strips of uncut pumpkin that simulate gauze wrapping. Work from the face outward, completing the eye and mouth details before tackling the long bandage strips so the central features stay stable throughout.
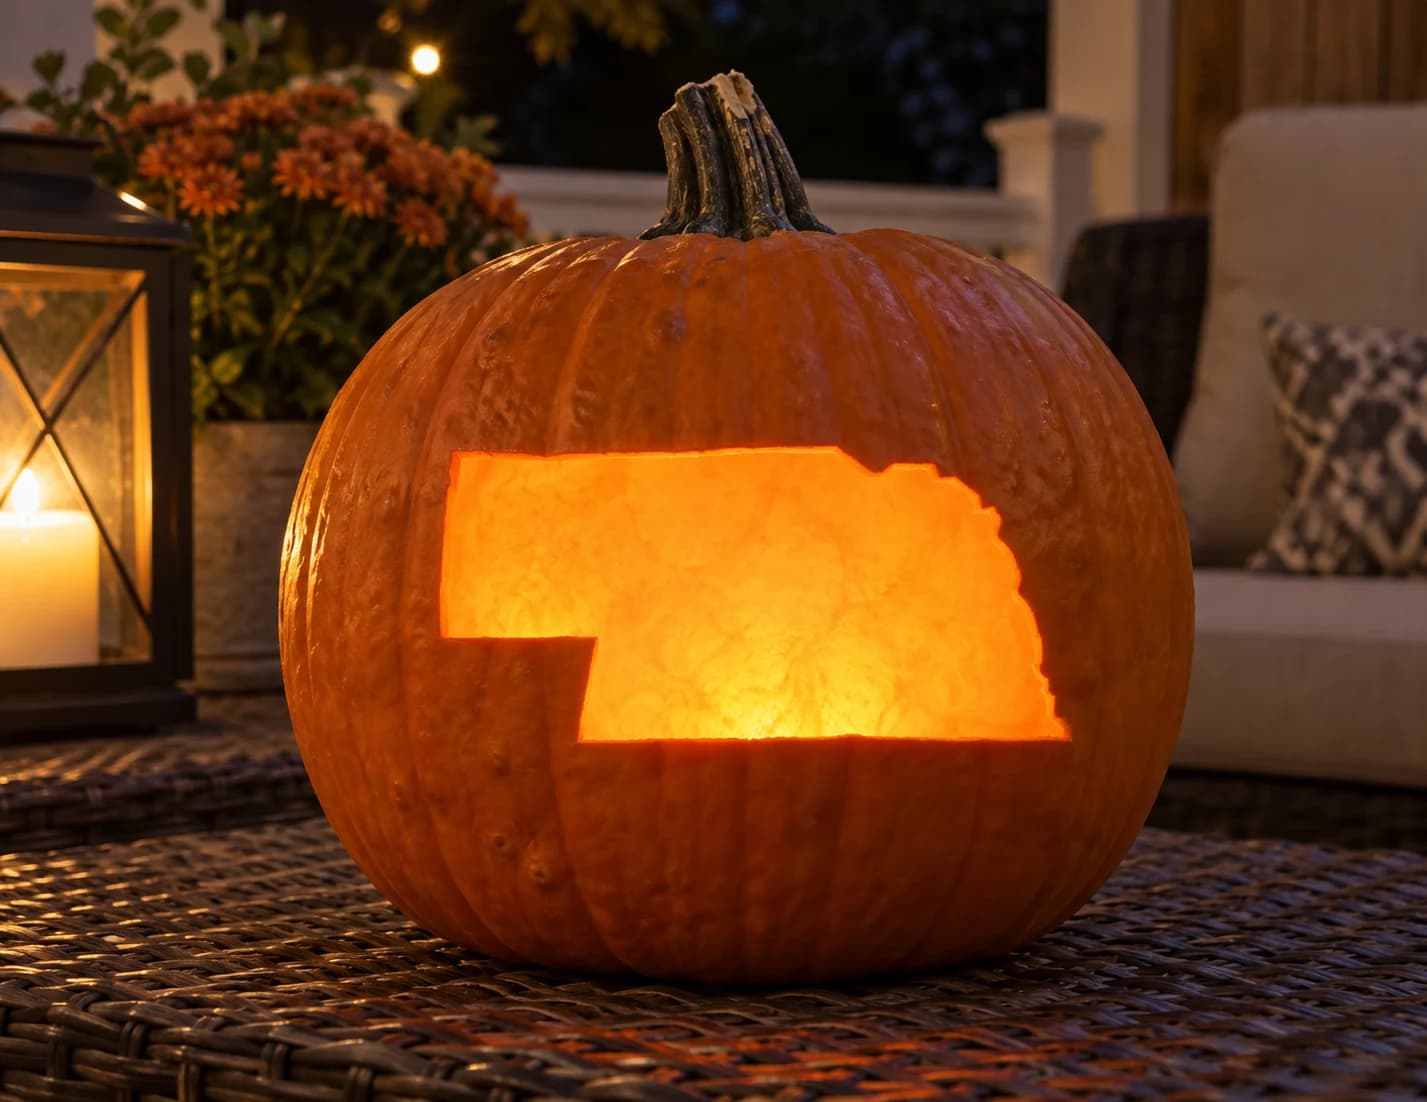
Nebraska Pumpkin Stencil
Nebraska's broad, low-slung silhouette is the subject of this beginner pumpkin stencil. Three sides of the state are almost perfectly straight, creating a near-rectangle, while the northeastern corner carries a small notched step-down where the Missouri River forms the border. Carved as a single open cutout, the state glows clearly and distinctly when lit. The step in the upper-right corner is the only detail that requires care: cut directly into the corner rather than rounding it so the state outline stays accurate.
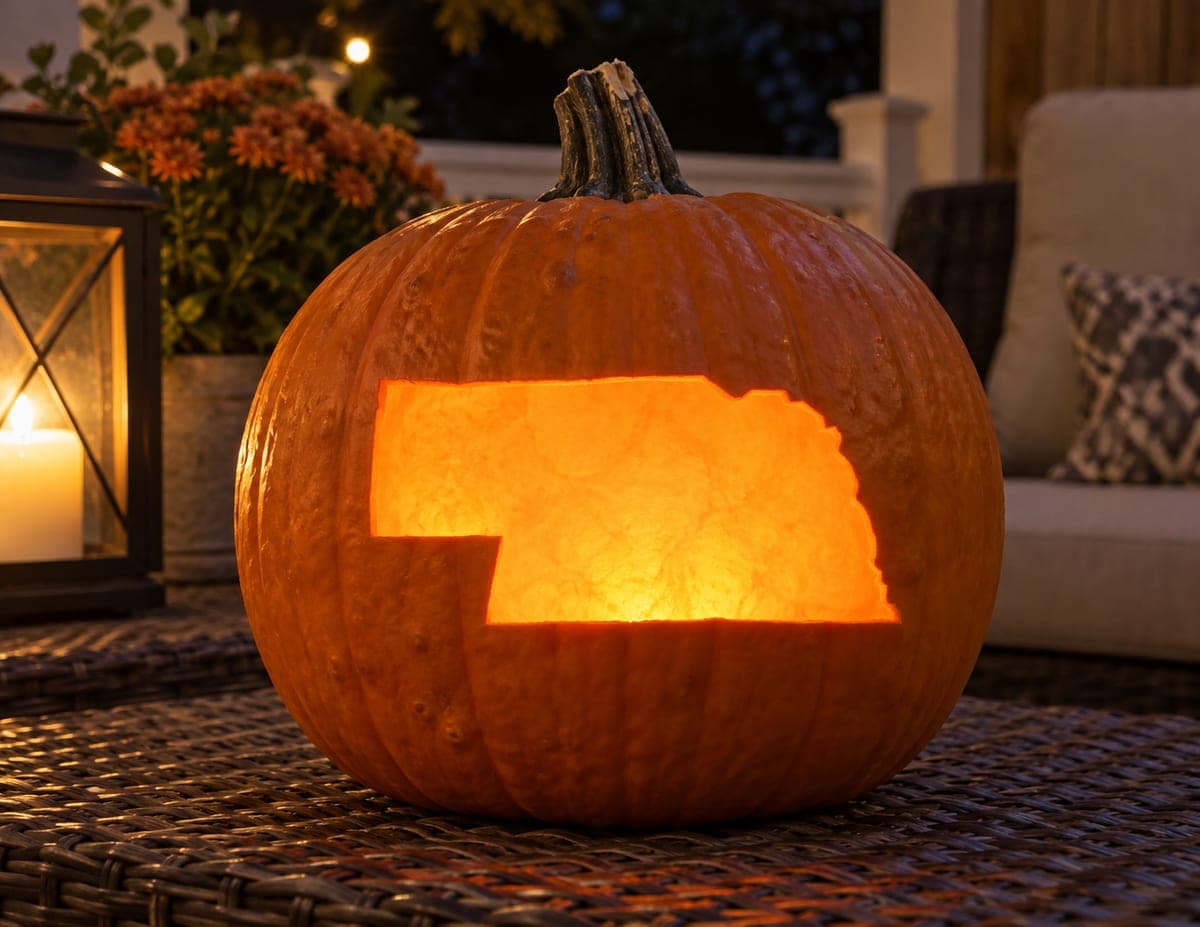
Nebraska State Shape
The unmistakable outline of Nebraska, panhandle and all, cut fully through the pumpkin wall so the entire state glows as one bold window of light. There is nothing left inside the shape, making it a clean, graphic statement of Cornhusker pride. Rated medium because of the long straight edges; score the border lines first, then remove the shape in two or three sections so the corners stay sharp.
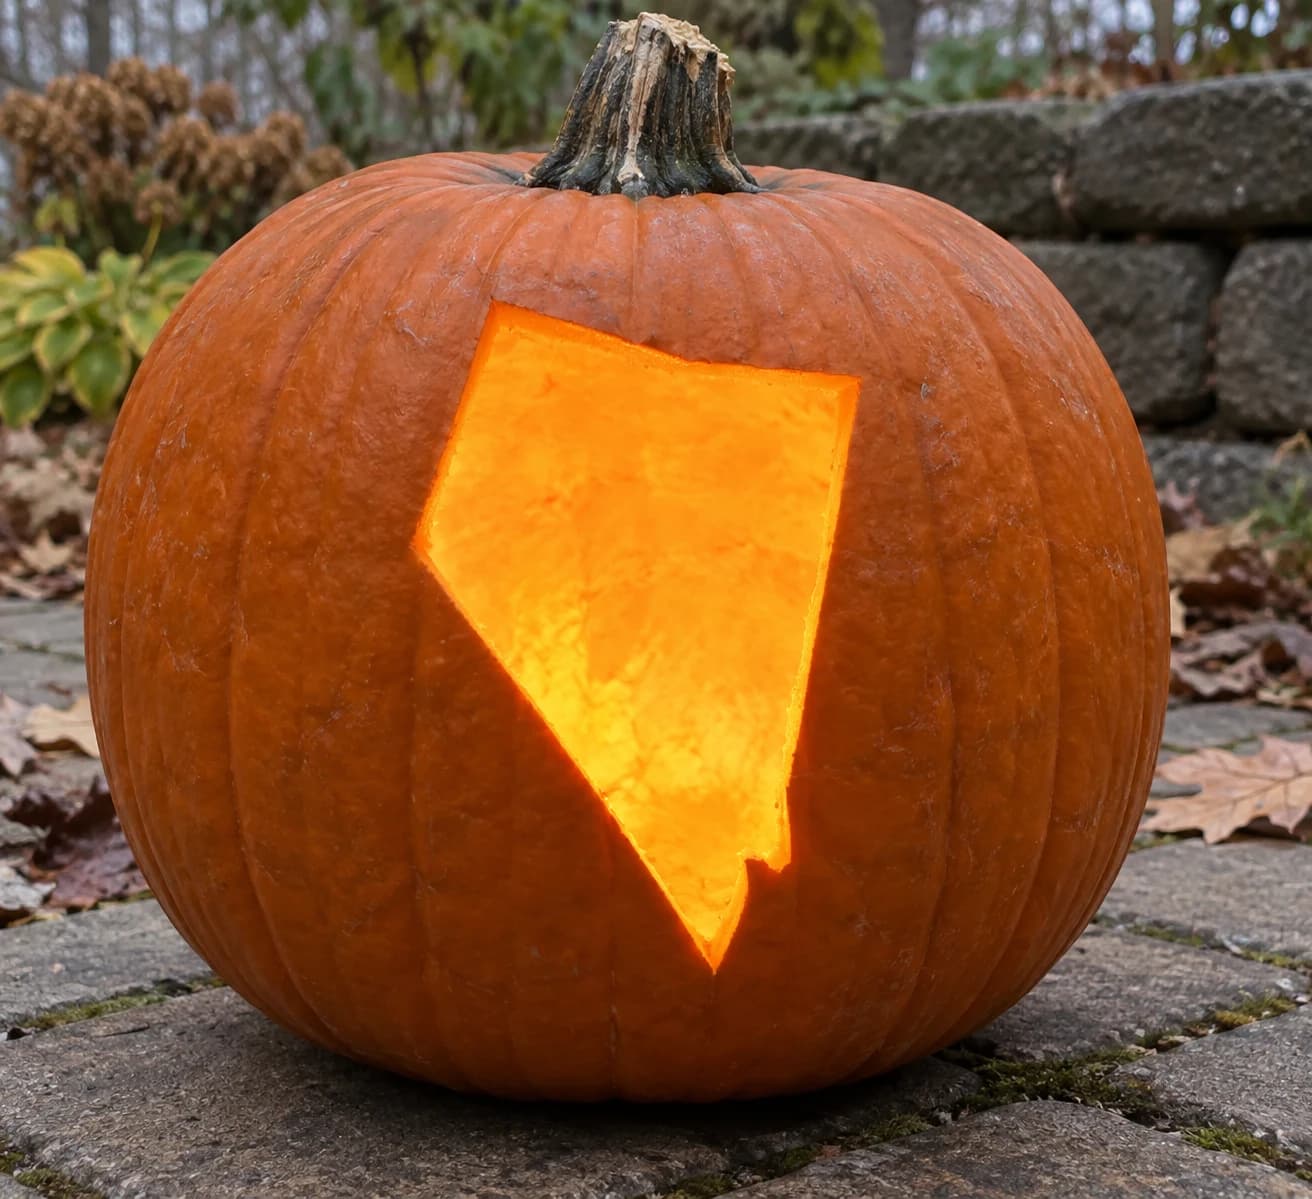
Nevada Pumpkin Stencil
Nevada's distinctive silhouette gives this beginner pumpkin stencil its character: a wide flat top, a long diagonal slash running from the upper-right corner down to the lower-left, and a small rectangular notch cut into the southern tip where the Colorado River forms the state line. The whole shape is carved as one open cutout so the jack-o-lantern's candle light illuminates the full state outline. The diagonal left edge is the identifying feature; carve it as a single long confident stroke rather than short segments so the line stays true.
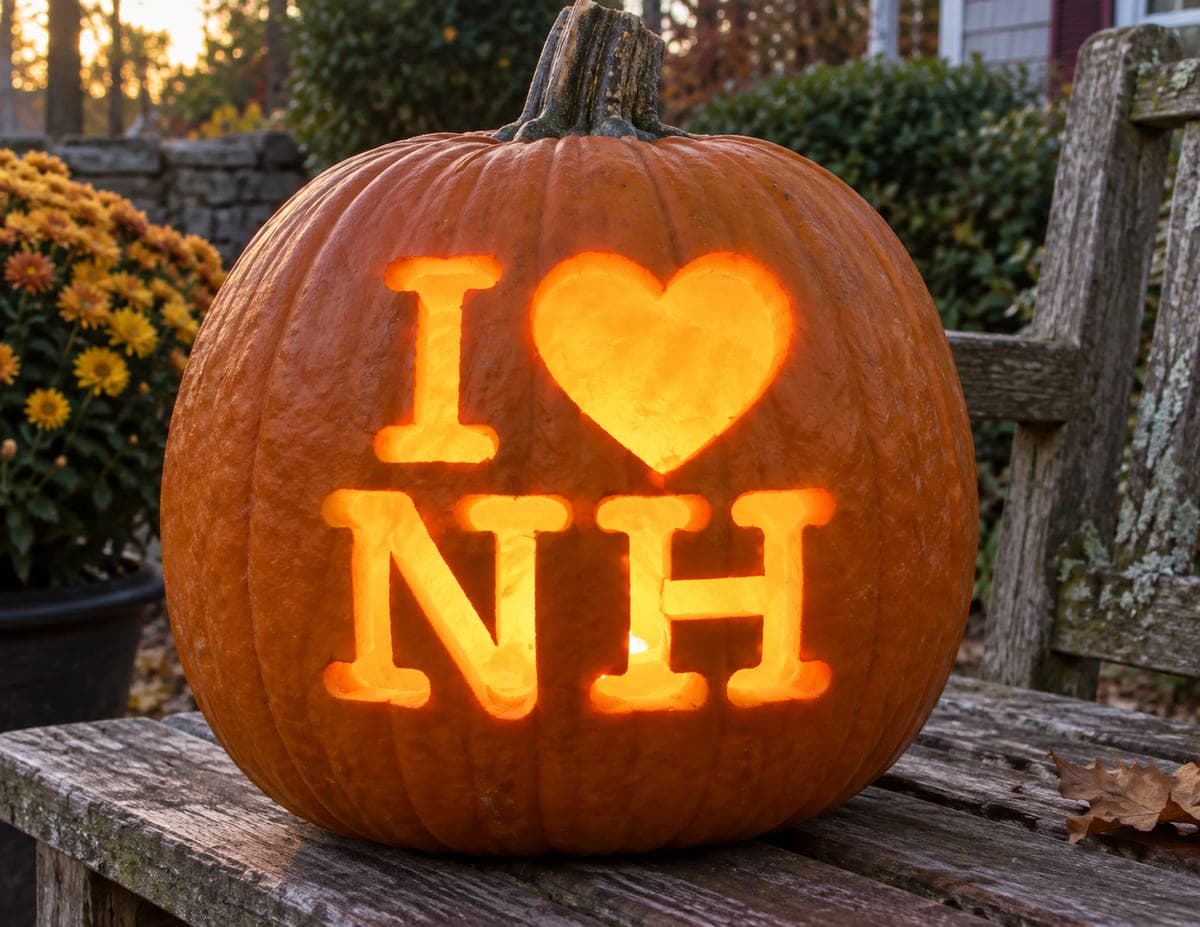
New Hampshire Heart Lettering
Bold serif lettering spells out the classic message: a big capital I and a chunky heart on the top line, with N and H stacked below. Every letter and the heart are cut straight through, so the whole declaration of Granite State pride glows brightly at dusk. This easy lettering design just needs clean corners; cut each letter's straight strokes first, then finish the serifs, and save the simple heart shape for a satisfying last piece.
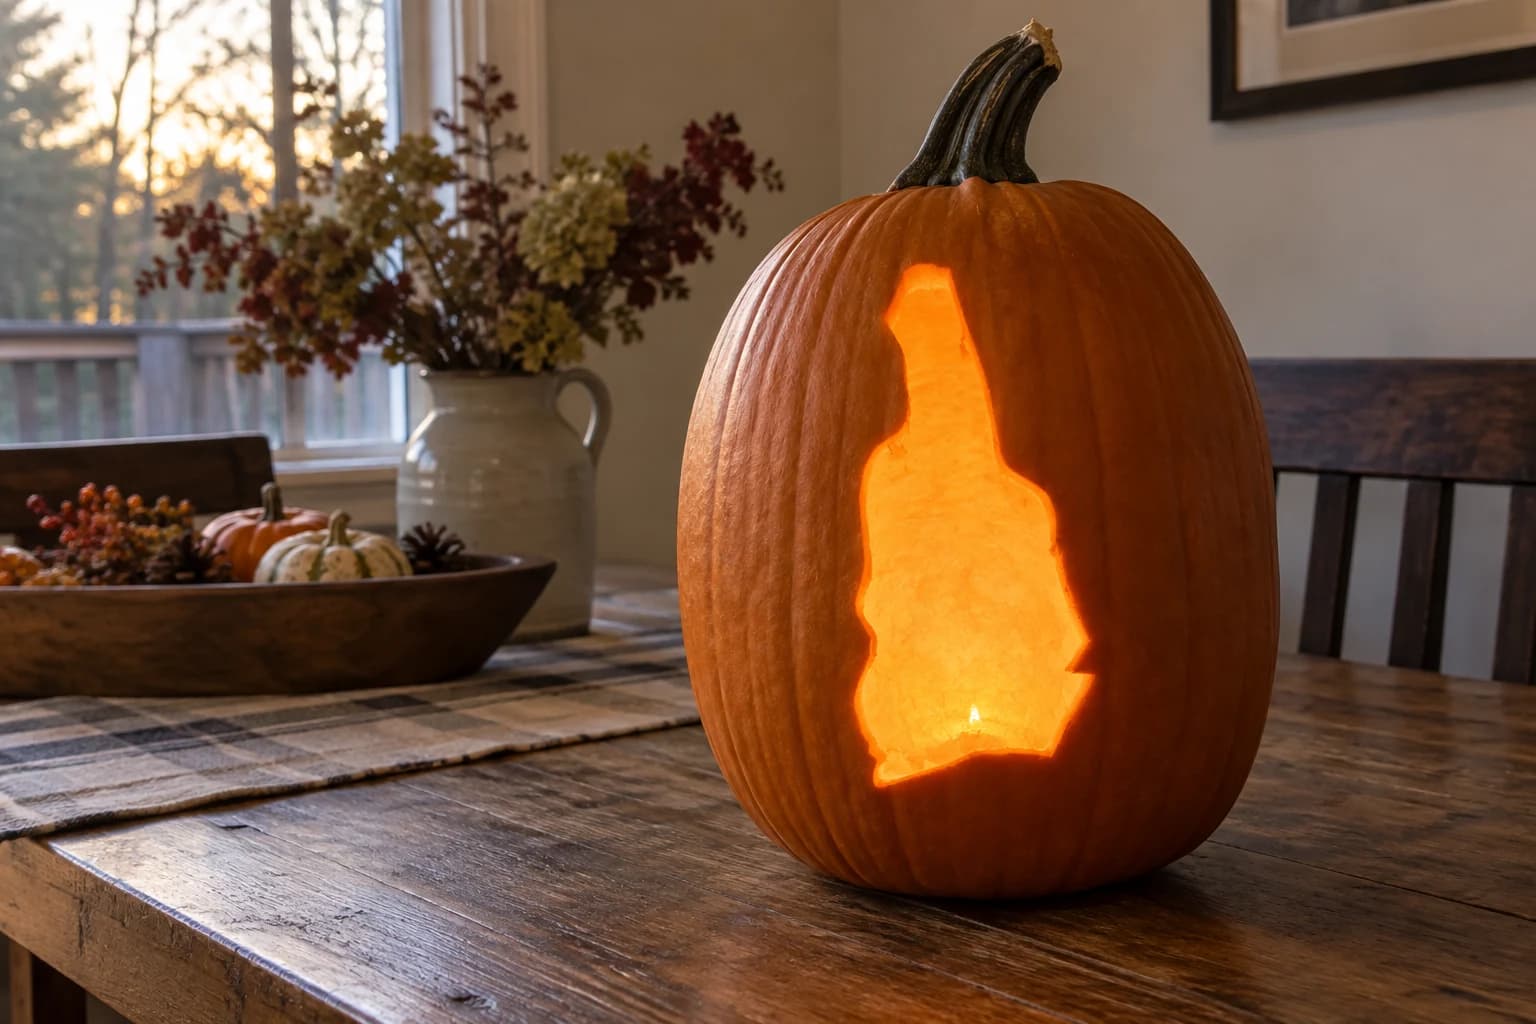
New Hampshire Pumpkin Stencil
New Hampshire's tall, narrow silhouette makes this an immediately recognizable state pumpkin stencil. A thin pointed protrusion at the top-left traces the Connecticut River notch, the left edge steps inward in several gentle curves, and the bottom has a shallow notch separating the main body from the small southeastern coastal corner. Carved as a single open shape, the state glows as a tall vertical cutout. The narrow protrusion at the top-left is the most fragile part: carve inward from either side of that tip last to avoid snapping it off early.
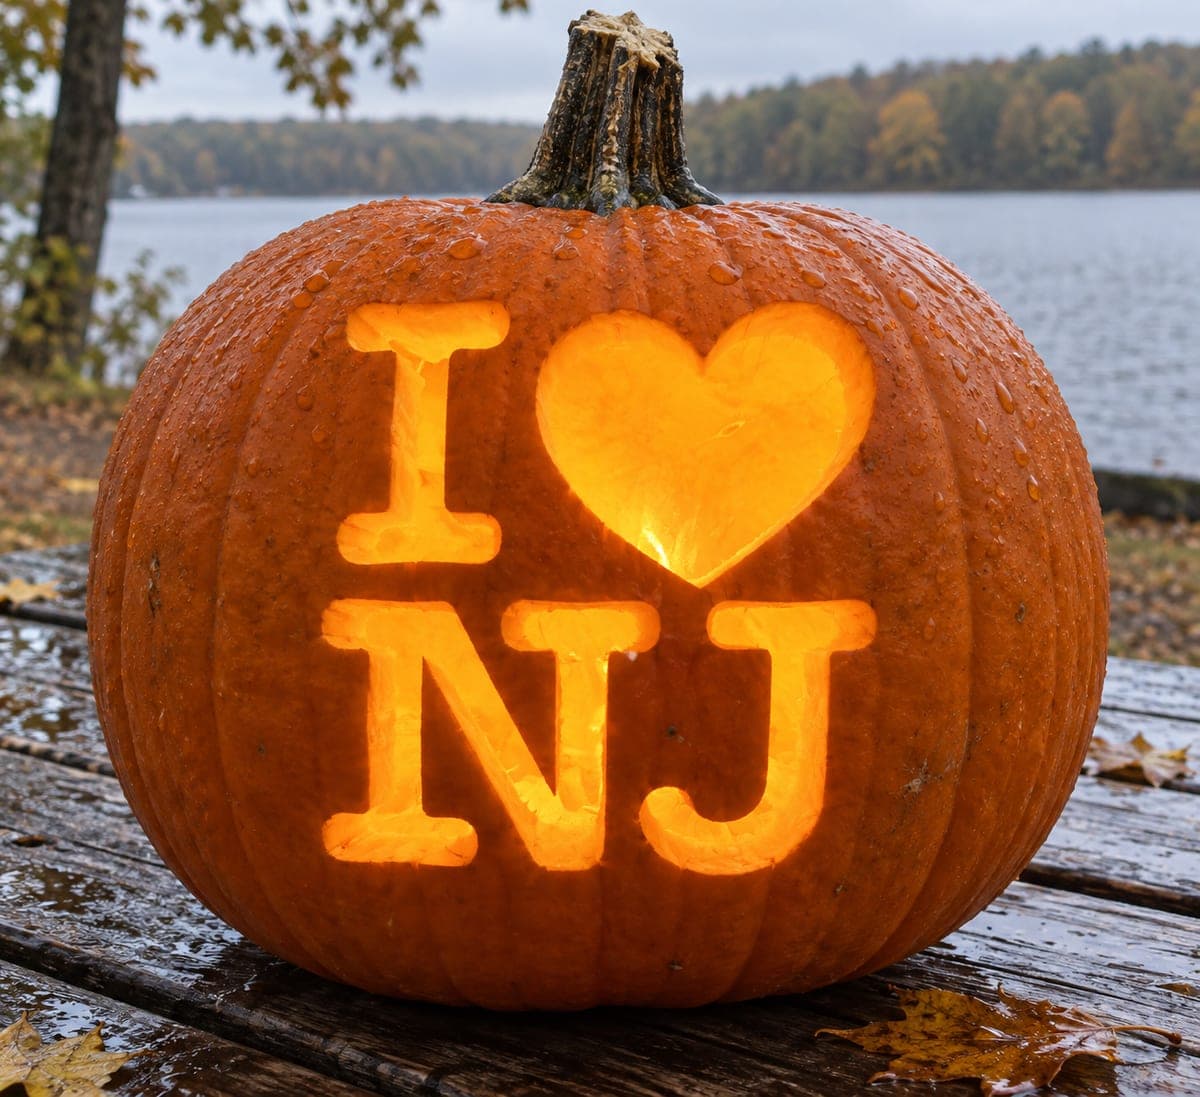
New Jersey Heart Lettering
Show some Garden State love with this bold lettering design: the word I, a big glowing heart, and the letters N and J stacked in a classic two-row layout, all pierced fully through the pumpkin wall. The chunky serif letters are forgiving for an easy carve; cut each letter stroke as its own piece rather than one big chunk, and save the J's curved hook for last since its tail is the thinnest part.
New Mexico Pumpkin Stencil
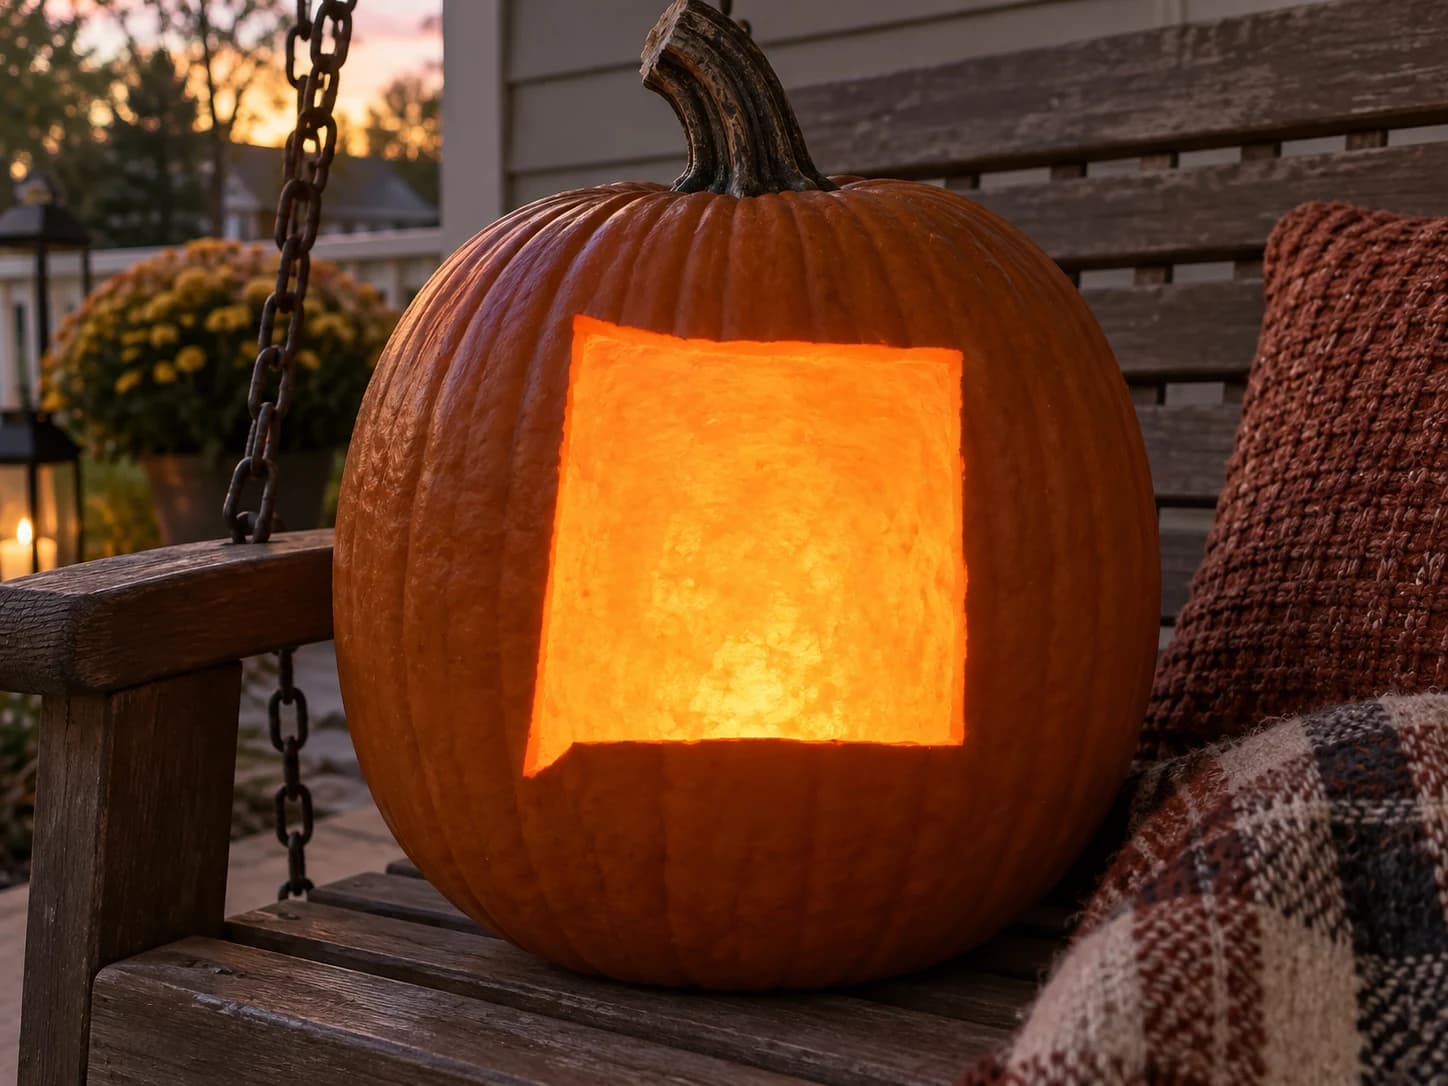
New Mexico's silhouette is a nearly perfect square with one small rectangular notch cut into the upper-left corner where the Colorado border steps slightly northward. This beginner-friendly pumpkin stencil carves as a single large open shape, glowing as a bold square of light on the finished jack-o-lantern. The one detail that differentiates it from a plain square is that upper-left step: score the corner notch cleanly before removing the bulk of the shape so the step stays sharp rather than rounding off.
North Carolina State Shape
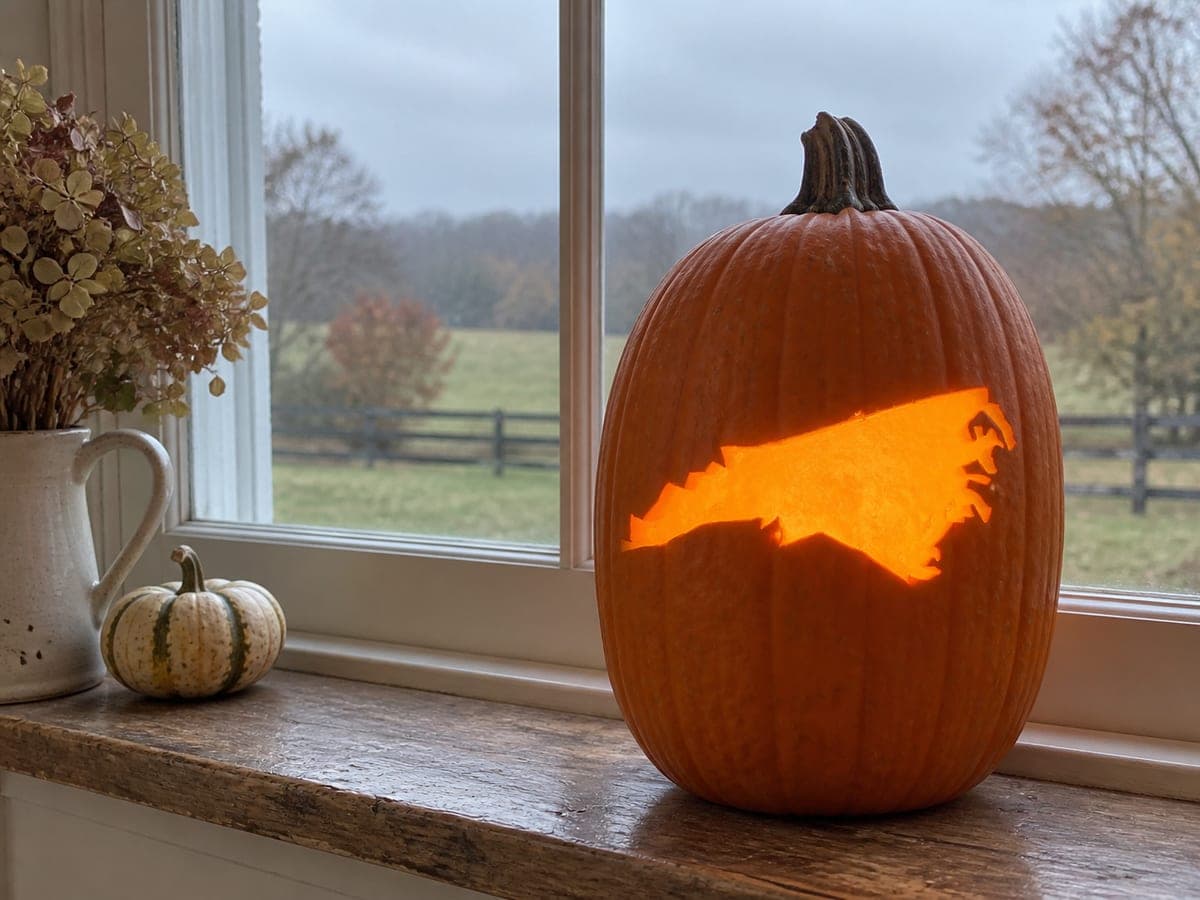
North Carolina stretches across the pumpkin as one long glowing cutout, from the pointed western mountain tip to the fringed Outer Banks coastline on the right. The entire state interior is removed so the distinctive wedge shape reads clearly at night. Rated hard because of the fine barrier-island fingers along the coast; cut the smooth northern border first, then work the ragged eastern edge slowly with a detail saw, leaving the thinnest points for last.
Octopus Face Pumpkin Stencil
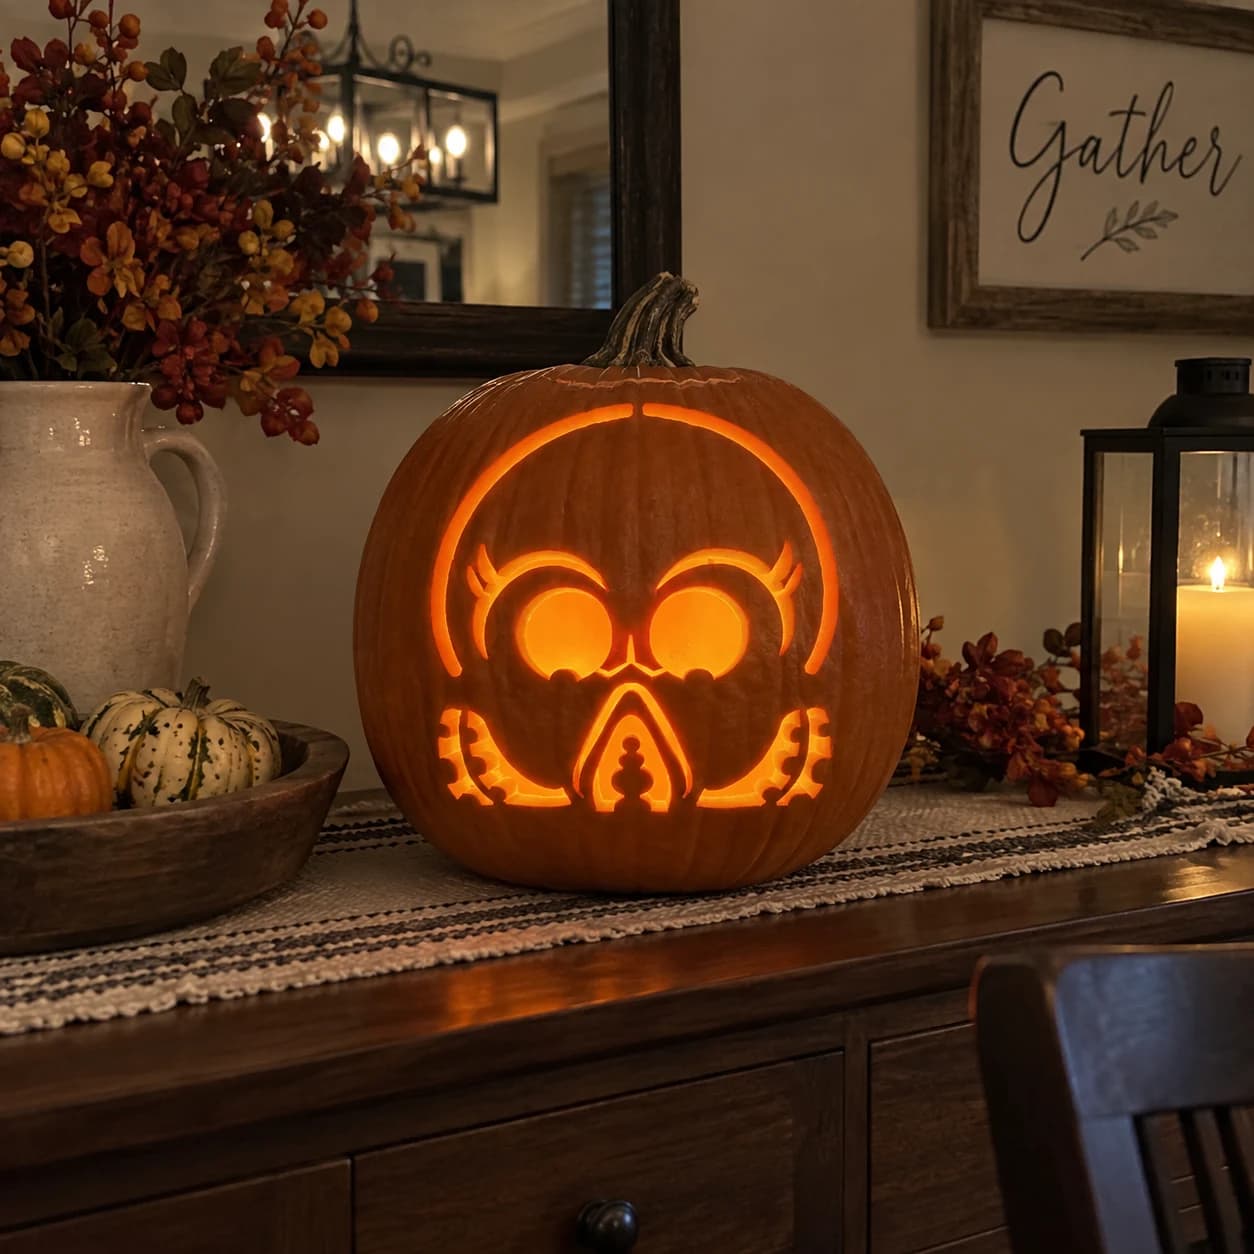
A stylized cartoon octopus face fills this hard pumpkin stencil with a nearly circular head outline, two large round eyes with lash-like detail above them, a central beak-like nose bridge, and a decorative lower section featuring a symmetrical arch with layered cutwork and scalloped tentacle bases on each side. The round eyes are solid islands of pumpkin skin that must be preserved while the surrounding face is cut away. Carve the outer circular head arc first, then remove the face background working around the solid eye discs, and finish with the fine scalloped cuts at the bottom.
One Tooth Jack-o-Lantern Pumpkin Stencil
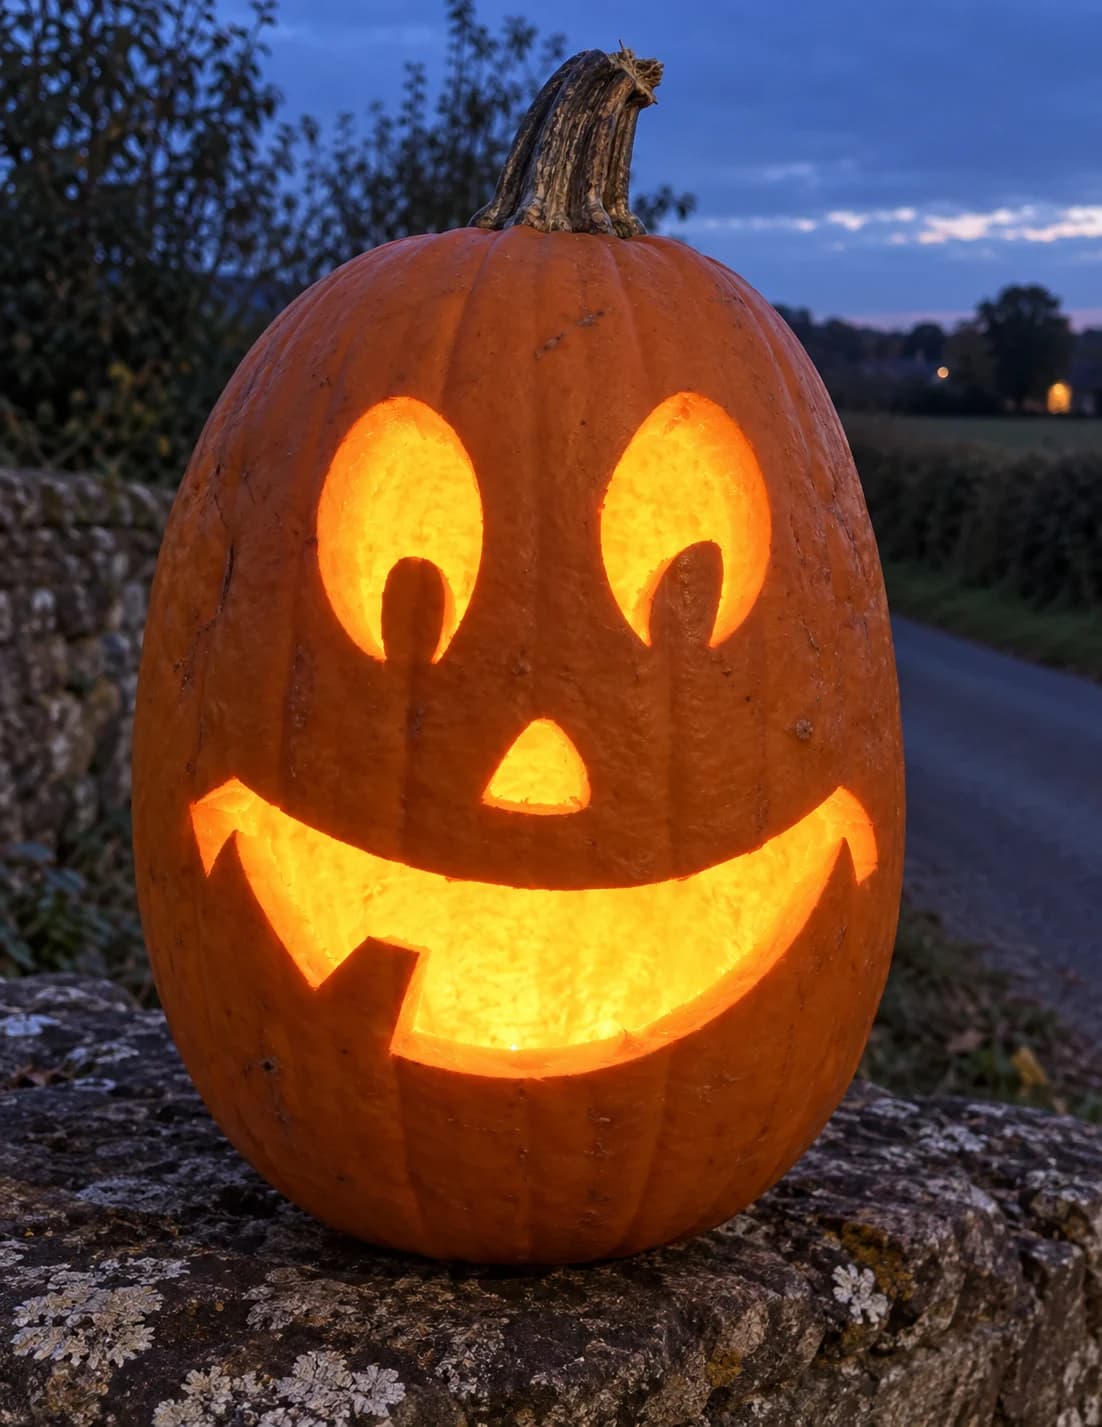
This jack-o-lantern face pumpkin stencil keeps it deliberately minimal: two teardrop eye shapes each with a crescent notch cut from the bottom to suggest a raised brow, a small triangular nose, and a wide grinning mouth with one single center tooth left intact at the top lip. All four openings are pierced so they glow together, and the lone tooth bridging the smile is the only delicate detail in the whole design. Cut the single tooth gap on either side of that center tooth in two careful inward strokes, meeting cleanly at the base so it does not detach.
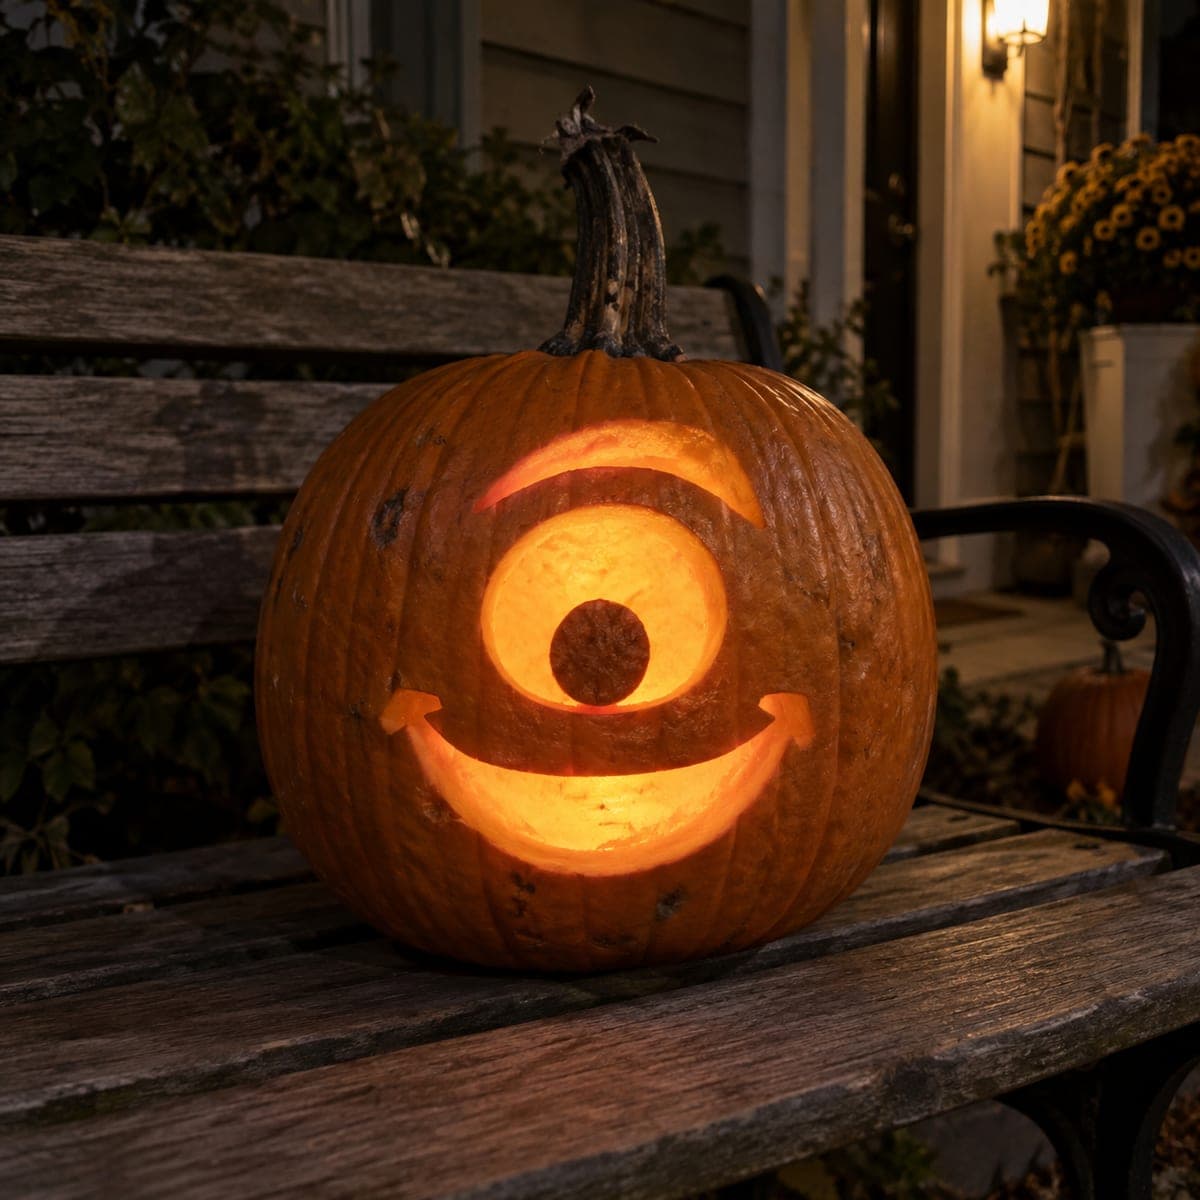
One-Eye Arched-Brow Smile
A single giant eye dominates this friendly monster face, with a dark round pupil left in place at its center and a curved brow arched above. Below, a huge grin sweeps ear to ear with pointed dimples at each corner. The eye ring, brow, and smile are cut through while the pupil stays as an island of shell, which is what earns the medium rating; anchor that pupil with a toothpick from behind if it feels loose.
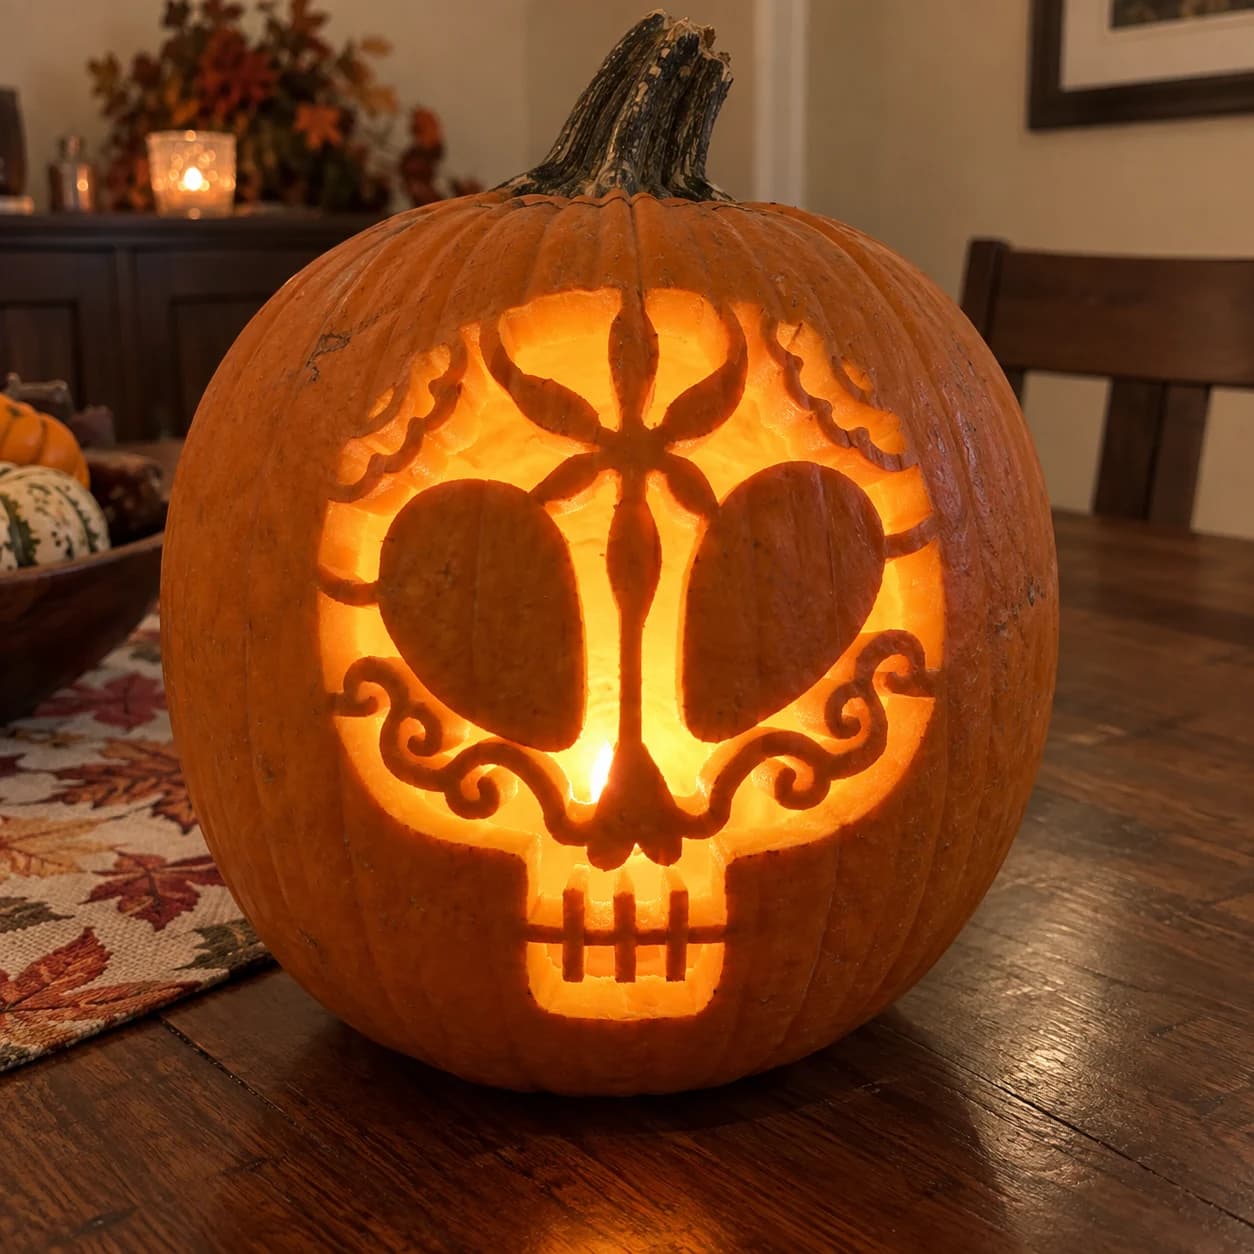
Ornate Sugar Skull Pumpkin Stencil
This sugar-skull pumpkin stencil features a circular skull face filled with symmetrical Dia de los Muertos ornamentation: two large almond-shaped eye sockets, a central floral cross motif above them, scrollwork tendrils curling outward on both cheeks, and a rectangular tooth-grid at the chin. The design carves as a mix of open negative spaces and solid orange bridges that define each decorative element. Cut the cheek scrollwork before removing the large eye sockets, since the thin curling lines are easier to control while the surrounding wall is still solid.
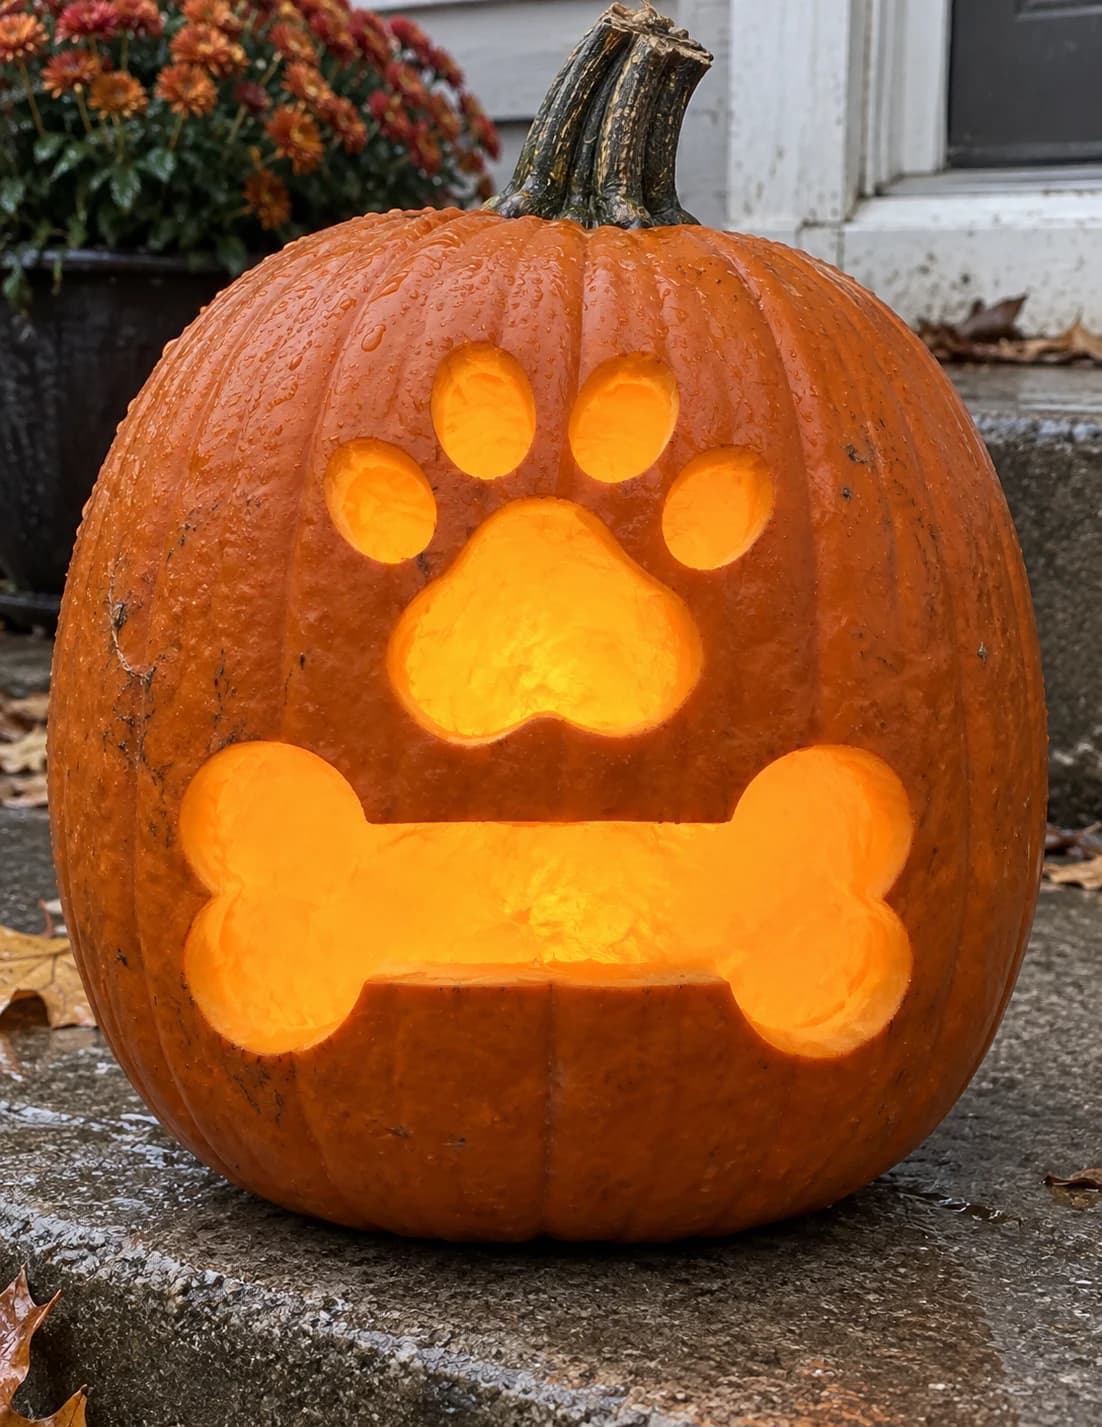
Paw Print and Bone Pumpkin Stencil
A dog paw print stacked above a classic dog bone forms this two-element dog pumpkin stencil, with the paw showing one main pad and four oval toe pads, and the horizontal bone below featuring two knobbed ends and a straight shaft. Both shapes are carved as separate open silhouettes that glow on the finished jack-o-lantern, the paw sitting centered above the bone with a clear gap of skin between them. Cut the paw toe pads and main pad first, then carve the bone, so any flexing of the pumpkin wall during the lower cut does not disturb the already-removed paw above.
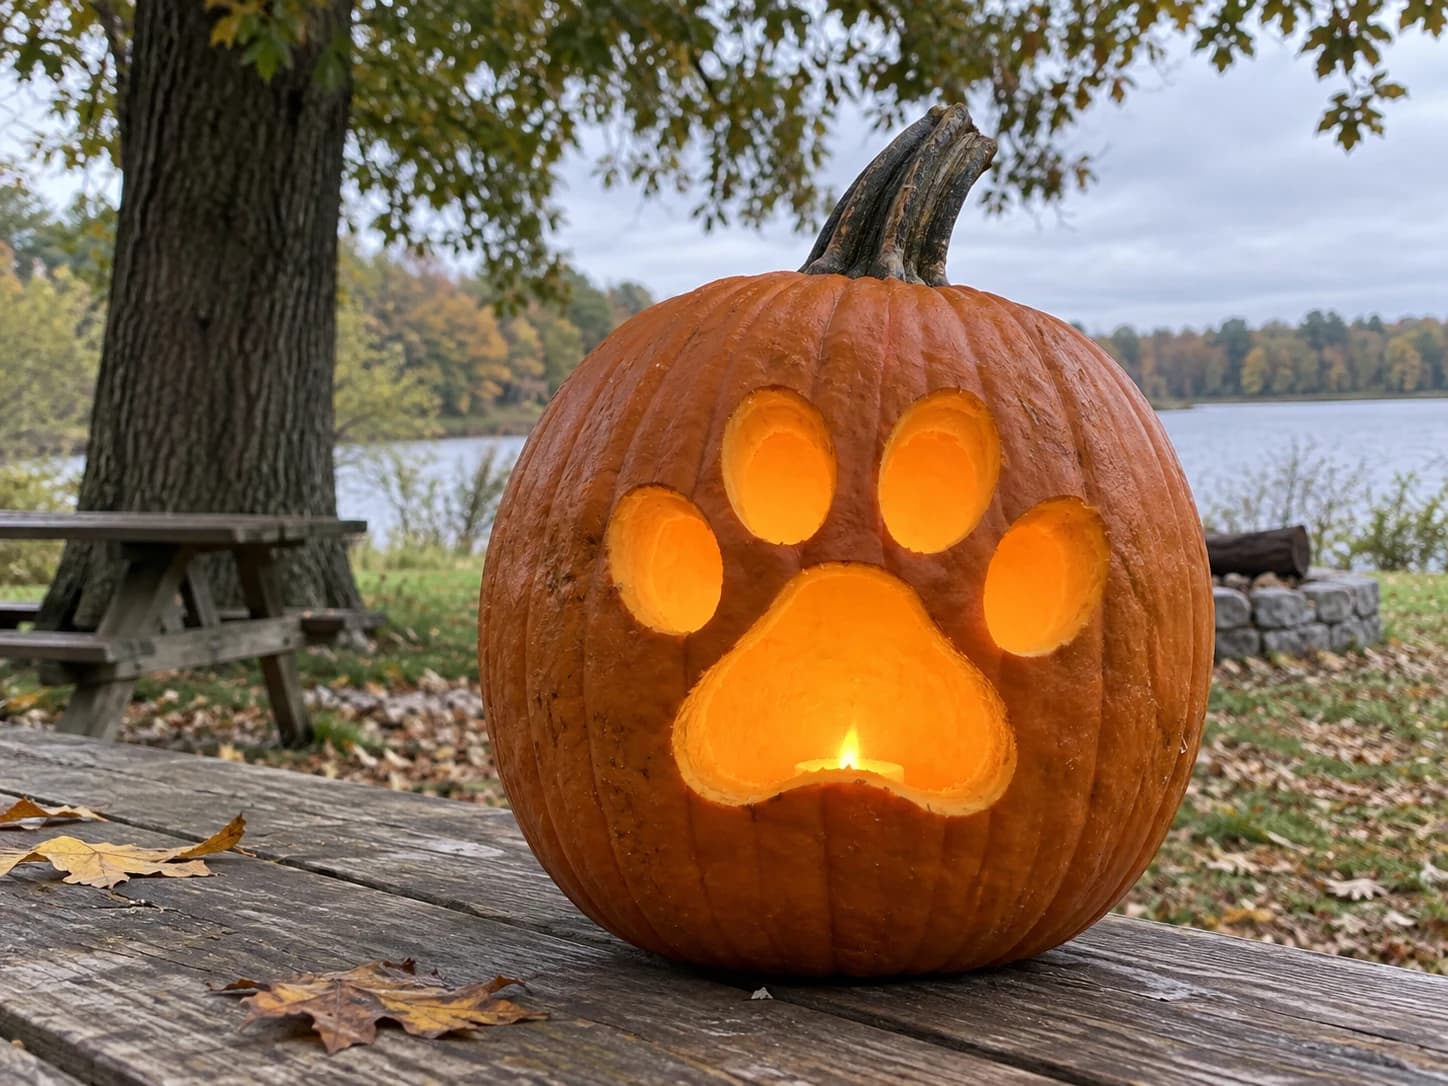
Paw Print Pumpkin Stencil
A large paw print with one big central pad and four oval toe pads fills the face of this pumpkin stencil, each pad carved as a separate pierced cutout surrounded by solid orange wall. Lit from inside, the glowing ovals float against the dark background and read instantly as a cat or dog track. Cut the four smaller toe pads first while the central pad wall is still fully intact to keep the surrounding skin from flexing and cracking during the trickier large cut.
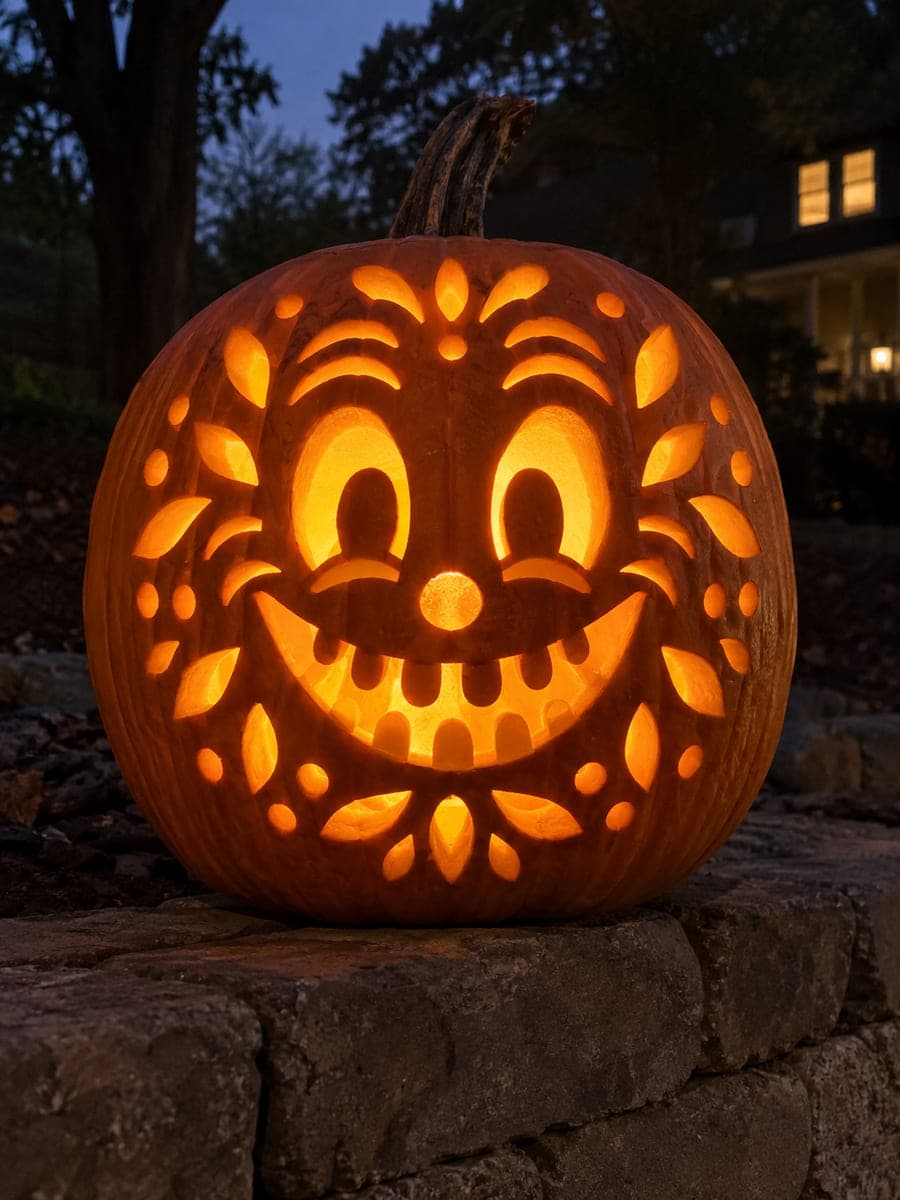
Petal Border and Button Nose
A whimsical folk-art face with pupil-in-eye ovals, arched lash brows, a button nose, and a scalloped grin full of rounded teeth, all surrounded by a lush border of petals, leaves, and teardrops. Dozens of small openings cut through, which is what earns the expert rating despite the friendly look. Work from the center of the face outward to the border so early cuts never weaken the wall around later ones.
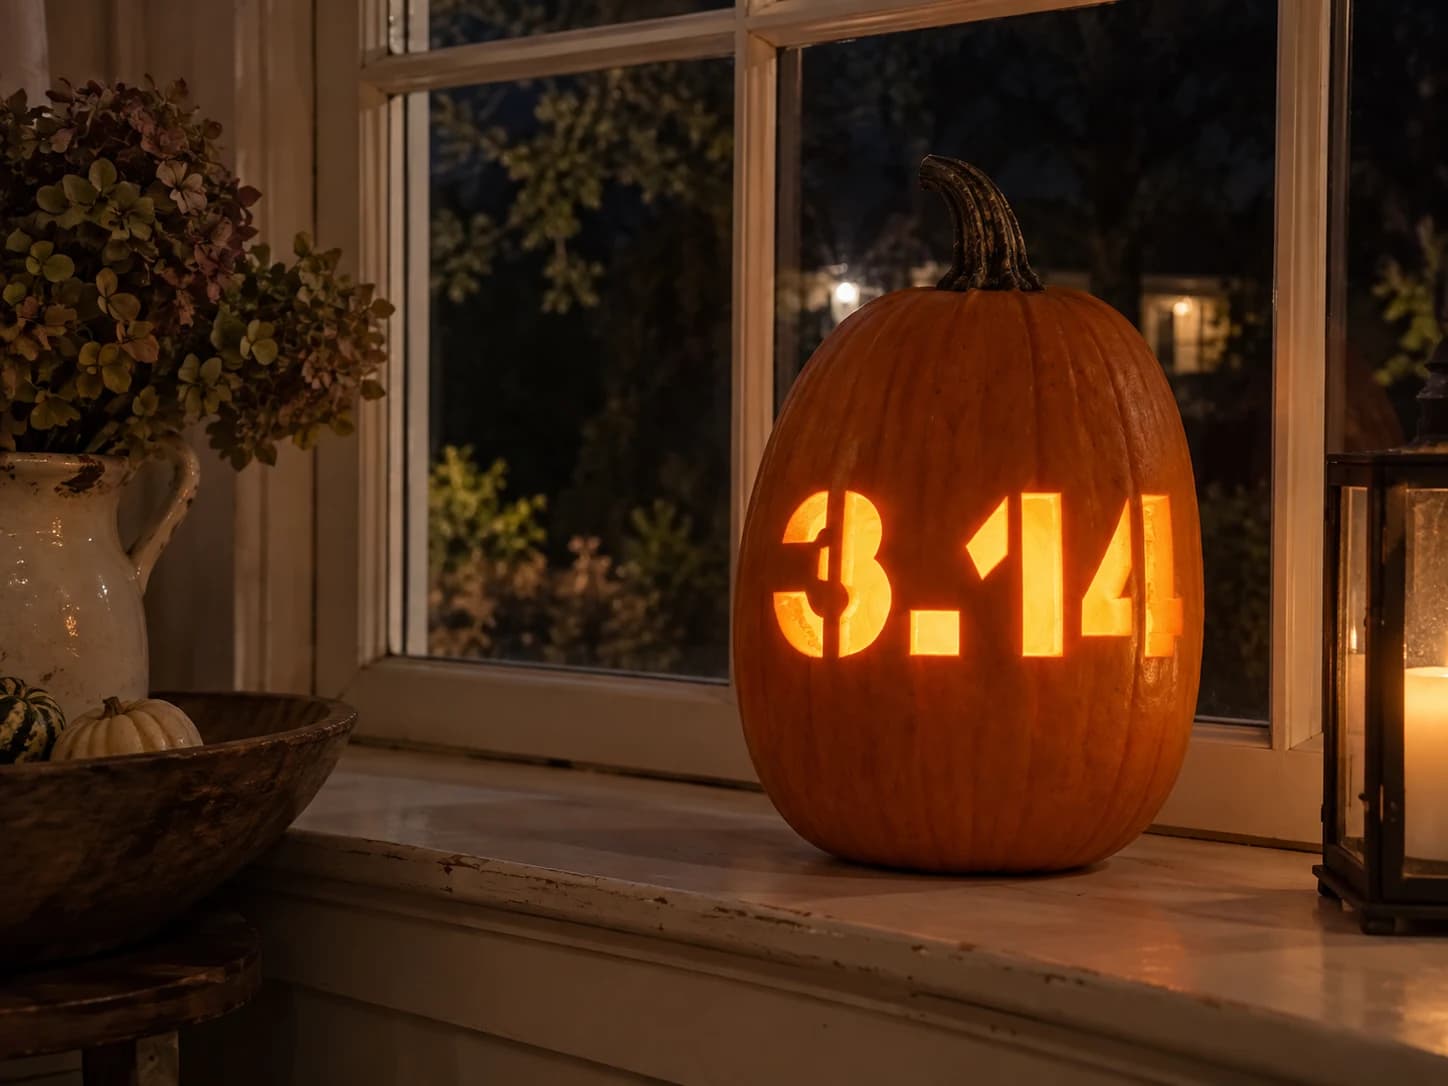
Pi 3.14 Pumpkin Stencil
The numerals 3.14, rendered in a bold block typeface, fill this pumpkin stencil from edge to edge, referencing the mathematical constant pi. Each digit is a large, solid cut-out shape: the curved halves of the 3, the rectangular decimal point, and the straight-sided 1 and 4 are all pierced through and blaze with candlelight. Because the counter (enclosed area) of the 3 must be retained as separate floating islands of skin, tape small pieces of orange peel back in place after cutting to hold them, or plan to let them fall free for a fully open look.
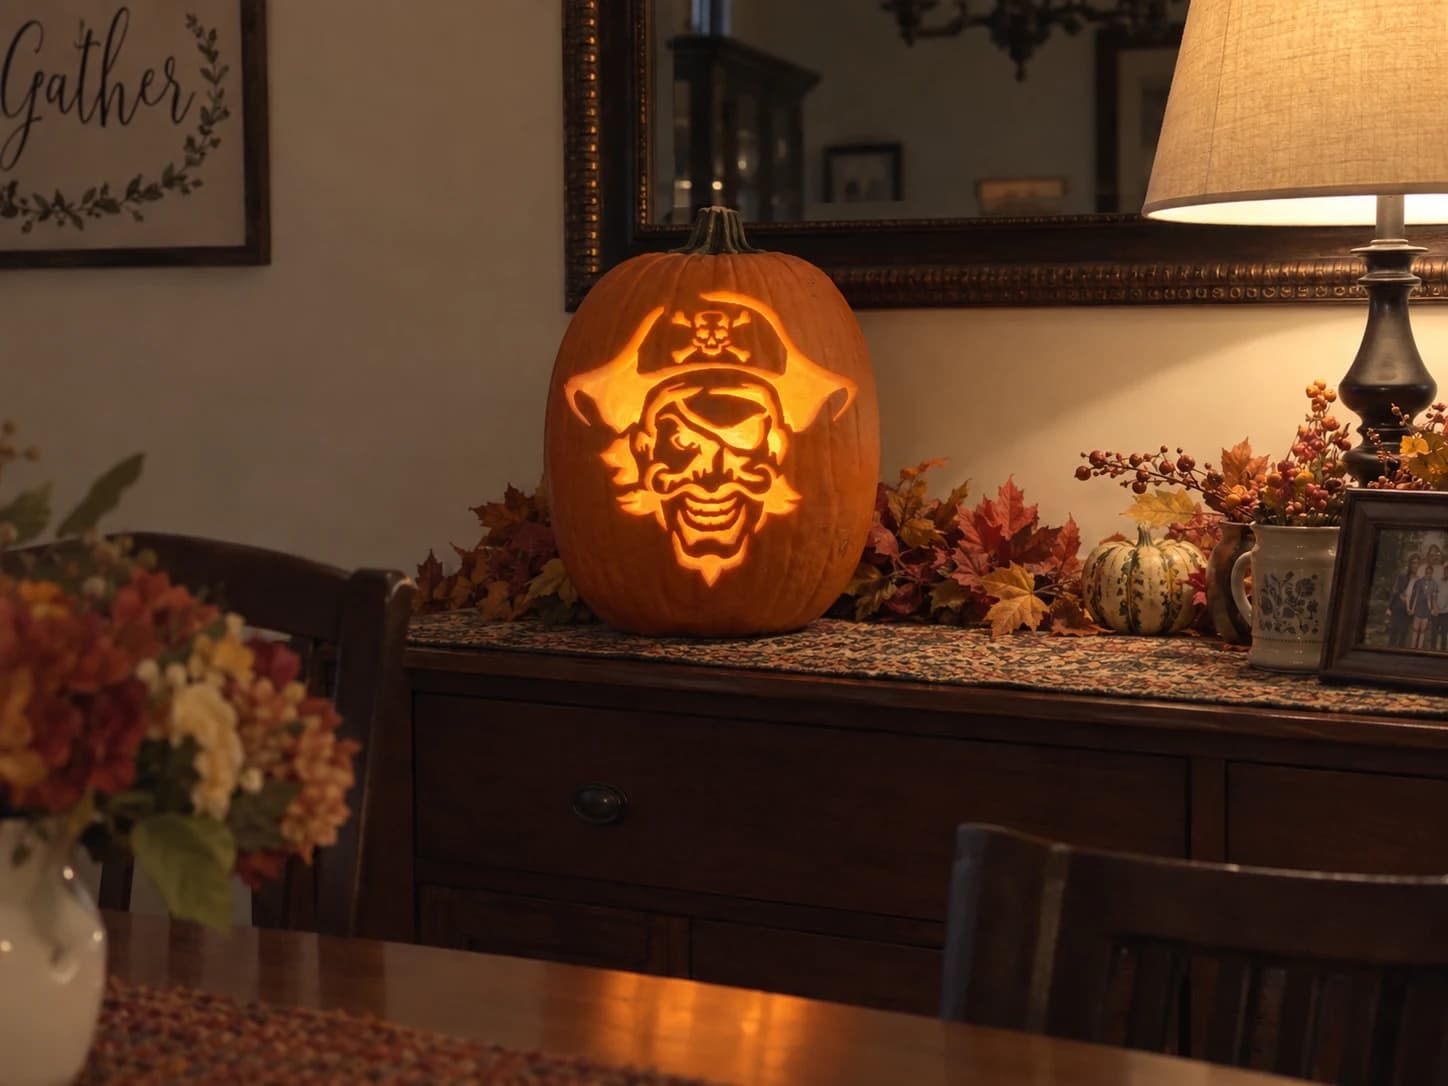
Pirate Pumpkin Stencil
A grinning pirate face topped by a tricorn hat is the subject of this hard pumpkin stencil: a skull-and-crossbones badge on the hat brim, a round-brimmed hat spreading wide, a leather eye patch over one eye, a weathered face with deep laugh lines, a broad toothy smile, and a pointed goatee at the chin. The lit design reveals a cheerful swashbuckler portrait full of character. Cut the small skull-and-crossbones elements on the hat first while the surrounding skin is firm, then work down through the face, saving the wide hat brim last.
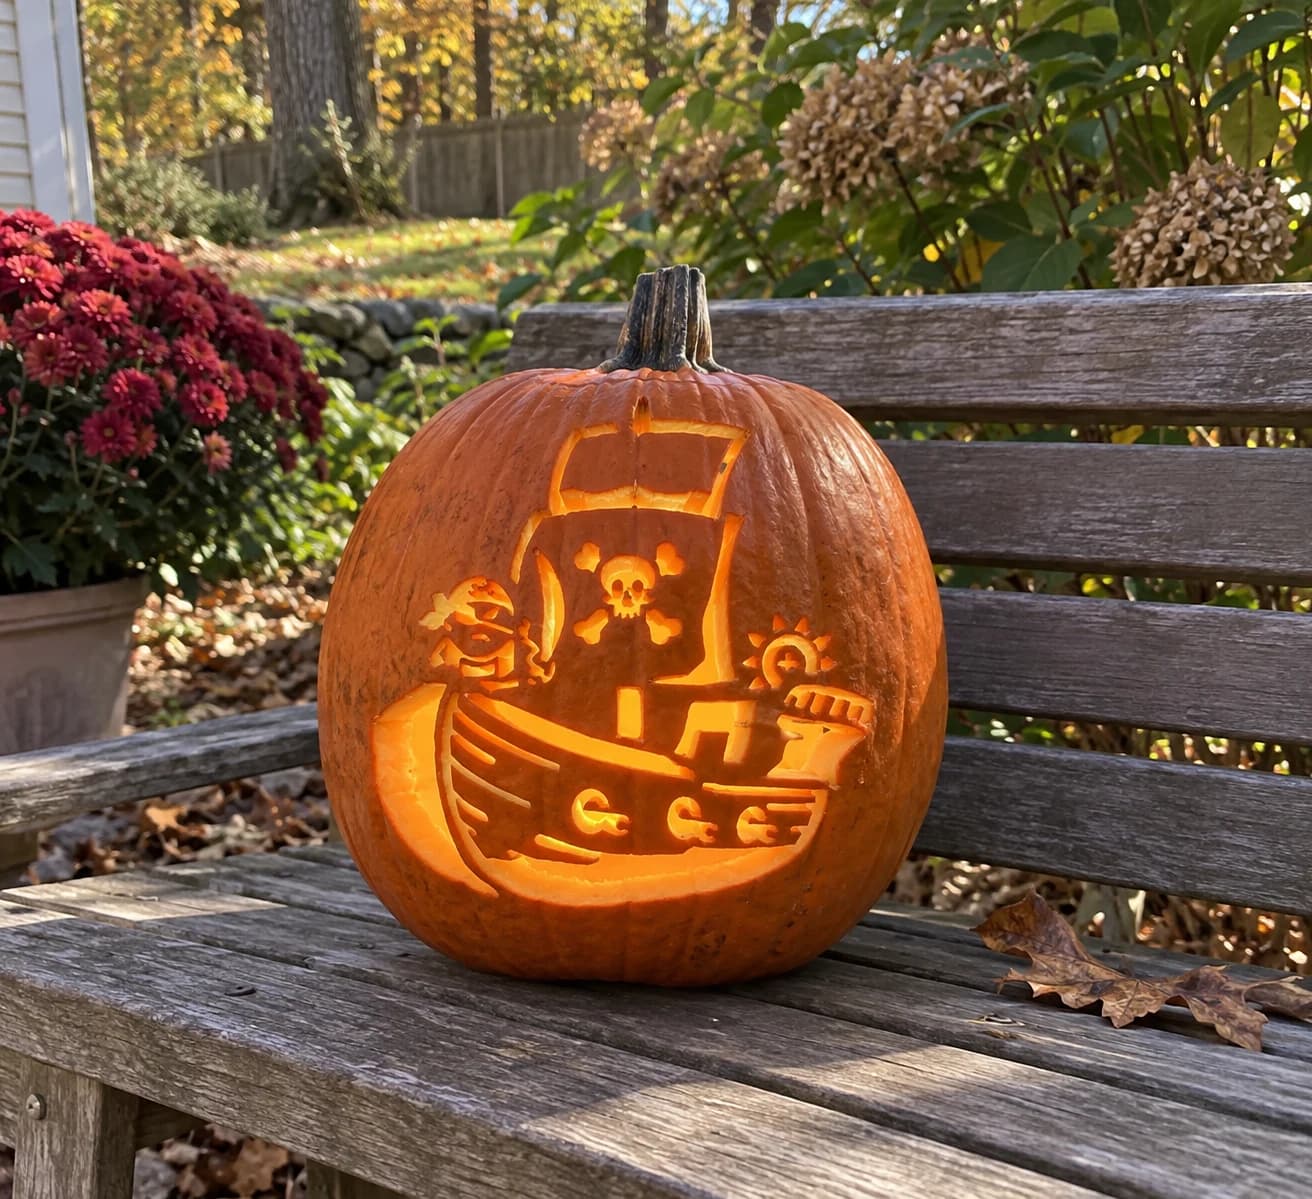
Pirate Ship Pumpkin Stencil
A pirate ship viewed broadside fills this expert pirate pumpkin stencil, with a large sail bearing a skull-and-crossbones cutout, a cartoonish pirate figure standing at the bow with a sword, a cannon on the stern deck, and decorative hull porthole hooks below. The design has many small isolated cut pieces, including the skull's eye sockets and crossbones, the cannon barrel, and the pirate's facial features. Carve the skull-and-crossbones details on the sail first, since they sit within a large solid background that holds them firmly while you work the tiny pieces.
Pirate Skull Pumpkin Stencil
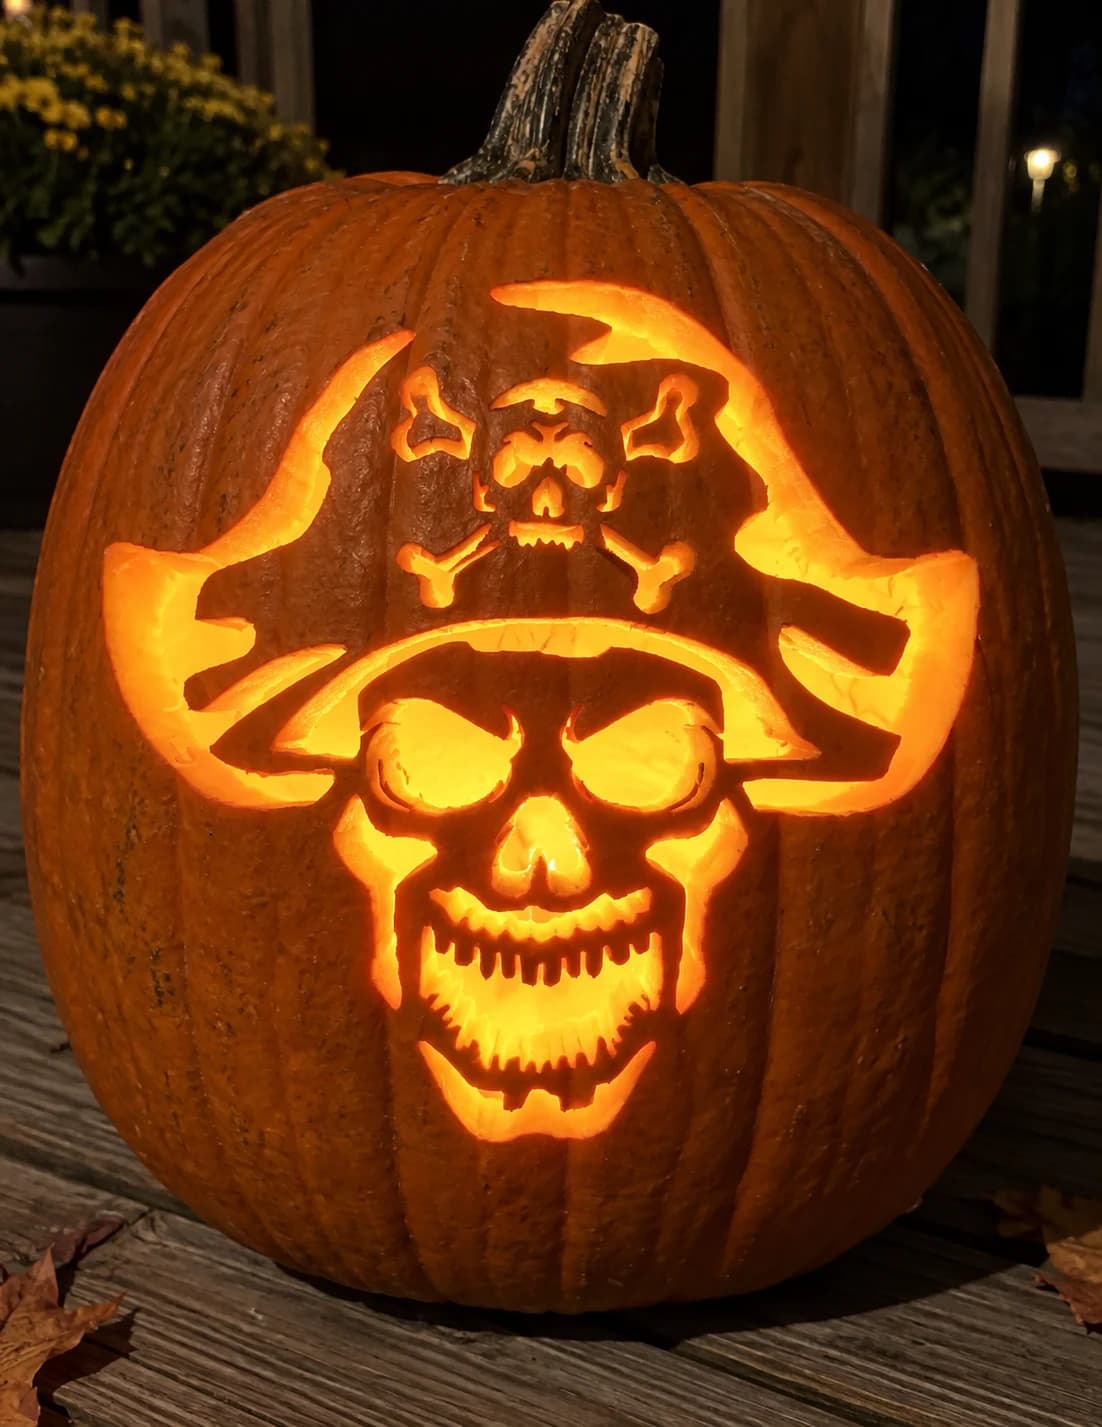
A grinning pirate skull wearing a broad tricorn hat dominates this expert-level pumpkin stencil, with a second miniature skull-and-crossbones badge emblazoned on the hat brim. Dense cutwork in the teeth row, eye sockets, and hat badge creates many small isolated pieces held together by narrow bridges of pumpkin flesh. Begin with the tiny crossbone details on the hat badge while your hands are freshest, then move to the eye sockets and finally the toothed lower jaw.
Pirate Skull with Parrot Pumpkin Stencil
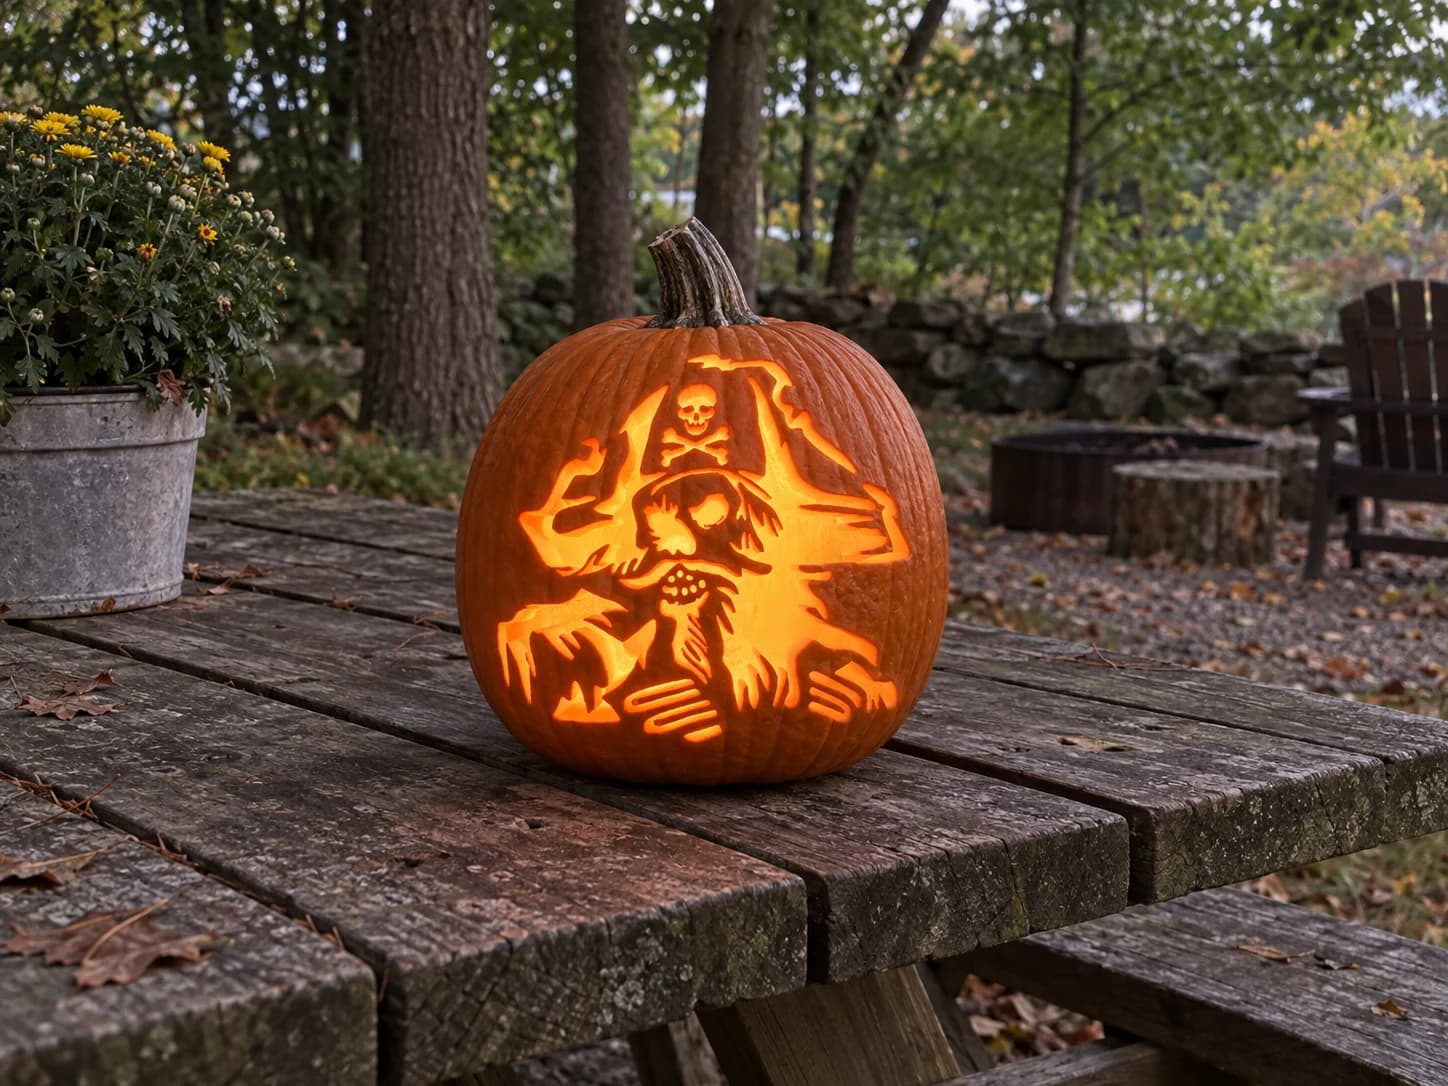
A weathered pirate skull in a battered tricorn hat stares out from this expert pumpkin stencil, a parrot perched on the skull's head and tattered coat lapels framing its hollow cheeks. The skull-and-crossbones badge on the hat, individual finger bones along the bottom, and ragged coat edges create dozens of intricate cut sections. Carve the small hat badge first, then the interior face hollows, before moving outward to the flowing coat edges where the thinnest bridges live.